Table of Contents
Advertisement
Quick Links
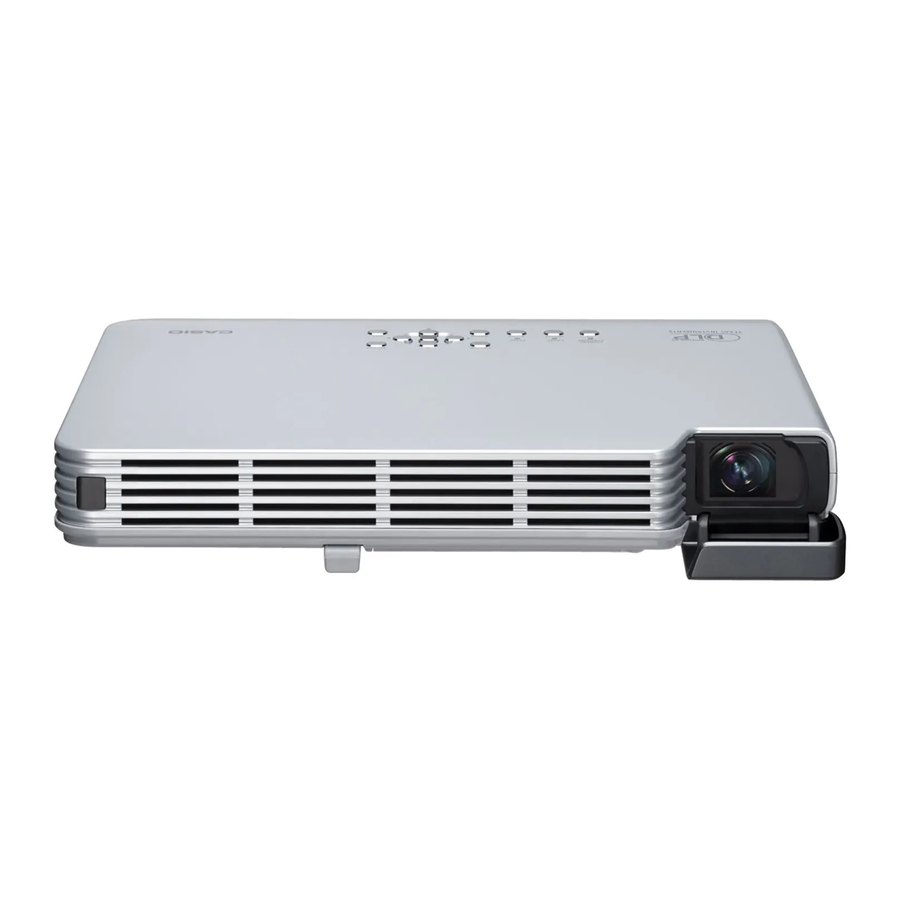
DATA PROJECTOR XJ-S35
Data Projector
USB Function Guide
Be sure to read the precautions in the separate User's Guide (Basic Operation). For
details about setting up the Data Projector and about lamp replacement, see the
User's Guide (Basic Operation).
Be sure to keep all user documentation handy for future reference.
• Microsoft, Windows, Windows XP, the Windows logo, and PowerPoint are registered
trademarks or trademarks of Microsoft Corporation in the United States and other
countries.
• Other company and product names may be registered product names or trademarks of
their respective owners.
• The contents of this manual are subject to change without notice.
• Copying of this manual, either in part or its entirety, is forbidden. You are allowed to
use this manual for your own personal use. Any other use is forbidden without the
permission of CASIO COMPUTER CO., LTD.
• CASIO COMPUTER CO., LTD. shall not be held liable for any lost profits or claims
from third parties arising out of the use of this product or this manual.
• CASIO COMPUTER CO., LTD. shall not be held liable for any loss or lost profits due
to loss of data due to malfunction or maintenance of this product, or any other reason.
• The sample screens shown in this manual are for illustrative purposes only, and may
differ somewhat from the screens actually produced by the product.
1
E
Advertisement
Table of Contents
Troubleshooting

Related Manuals for Casio XJ-S35


Summary of Contents for Casio XJ-S35
- Page 1 • CASIO COMPUTER CO., LTD. shall not be held liable for any loss or lost profits due to loss of data due to malfunction or maintenance of this product, or any other reason.
-
Page 2: Table Of Contents
Connecting a USB Device to the Data Projector ... 9 Turning On the Data Projector after Connecting a USB Device ... 9 Connecting to a USB Device while the Data Projector is On ... 10 Changing the Input Source while a USB Device is Connected... 10 Installing Data Projector Software... - Page 3 Playing a Presentation with Viewer ...30 To connect a USB memory device to the Data Projector... 30 File Menu Operations... 31 Using the Presentation Menu... 36 Operations during Image File Content Projection ... 38 Operations during a Slideshow ... 39 Slideshow Start Error ...
- Page 4 Specifying the Quality of Images Sent from a Computer ... 79 Manual Connection Setting Reference ... 80 Returning Data Projector Wireless Settings to Their Initial Defaults ... 84 Viewing Wireless Connection Help ... 85 Viewing Wireless Connection Version Information ... 85 Wireless LAN Connection Troubleshooting...86...
-
Page 5: About This Manual
About this manual... This manual explains how to perform various operations that are enabled when you connect an external device to the USB port of the XJ-S35 (Data Projector). Terms and Conventions In this manual, there are many procedures that require parallel operations on the Data Projector and your computer. -
Page 6: About The Data Projector's Usb Functions
About the Data Projector’s USB Functions The USB port that is built into the Data Projector lets you connect an external USB device and use it as an input source for image projection. USB Memory Device You can connect a commercially available USB memory device to the USB port and project images and movies stored on the device. - Page 7 Data Projector. You can have up to four computers connected to the Data Projector over a wireless LAN at the same time. Use the remote controller that comes with the Data Projector to select which of the four computer screens you want to project.
- Page 8 Document Camera (CASIO YC-400) You can connect a CASIO YC-400 Document Camera to the Data Projector’s USB port and project the images of documents placed on the document stage of the YC-400. XJ-S35 YC-400 For more information, see “Performing a Presentation Using the YC-400 Document Camera”...
-
Page 9: Connecting A Usb Device To The Data Projector
Data Projector will select it automatically and project the signal contents. If you turn the Data Projector on while a USB device is connected to its USB port, it will perform one of the following operations (depending on its current plug-and-play setting). -
Page 10: Connecting To A Usb Device While The Data Projector Is On
Connecting to a USB Device while the Data Projector is If you connect a USB device to the Data Projector’s USB port while it is turned on, it will perform one of the following operations (depending on its current plug-and-play setting). -
Page 11: Installing Data Projector Software
When you want to do this: Convert files created with PowerPoint to image (JPEG) files and store them on a USB memory device Send computer screen contents to the Data Projector over a wireless connection and project them Minimum System Requirements The following describes minimum computer system requirements to run the bundled software. -
Page 12: To Install Software
To install software Place the bundled CD-ROM into your computer’s CD-ROM drive. This displays the dialog box shown below. Select the check box of the software you want to install. Click the [Install] button. This will start installation. Keep clicking the [Next] button on the dialog boxes that appear. If your computer is running Windows XP and the dialog box shown below appears, click the [Continue Anyway] button. - Page 13 The dialog box shown below will appear after installation is complete. Click the [Finish] button.
-
Page 14: Projecting Presentation Images From A Usb Memory Device
This section explains how to perform the following operations. Using the bundled EZ-Converter software to save a presentation file to a USB memory device Connecting a USB memory device to the Data Projector and using Viewer to project image or movie data contained on the device Important! In order to perform the procedures in this section, you will first need to install the EZ- Converter software from the bundled CD-ROM onto your computer. -
Page 15: Supported Playback Data Types
• Playback of image files of approximately 6 Mbytes is supported. • Progressive JPEG image files are not supported. MP4 format (mp4) movie files and AVI format (avi) movie files recorded with a CASIO digital camera For details about movie files supported for playback by the Data Projector and playback specifications, visit the CASIO website at: http://world.casio.com/projector/support/en. -
Page 16: Main Ez-Converter Functions
Starting Up and Exiting EZ-Converter To start up EZ-Converter On your computer’s Windows Start menu, select [All Programs] - [CASIO] - [EZ-Converter]. This will cause the EZ-Converter window shown below to appear. The above window indicates that there is no presentation data currently open. This is what we call an “empty”... -
Page 17: Creating New Presentation Data
Creating New Presentation Data There are two ways that you can use EZ-Converter to create new presentation data: by converting a PowerPoint file (see below) or by inserting image files into the presentation data manually (page 19). Creating Presentation Data by Converting a PowerPoint File This procedure creates presentation data that includes all of the pages of the PowerPoint file. - Page 18 Select the PowerPoint file you want to convert and then click [Open]. This starts conversion of the PowerPoint file, which is indicated by the appearance of a dialog box that shows the progress of the conversion. After conversion is complete, the EZ-Converter widow will reappear with thumbnails of the converted images.
-
Page 19: Creating Presentation Data By Inserting Image Files Manually
Note Instead of steps 3 and 4 of the above procedure, you could also drop a single PowerPoint file into the EZ-Converter window. Converting a PowerPoint file to presentation data will generate the following folder, image files and presentation file. Example: When converting a 50-page PowerPoint file named “MeetingDocuments”... -
Page 20: Configuring The Option Setting
Drag the selected files into the EZ-Converter window. This will insert the image files into the presentation data and display their thumbnails in the EZ-Converter window. Add, delete, move, and otherwise edit the images as required. For details, see “Editing Presentation Data” (page 21). Configure presentation playback settings. -
Page 21: Editing Presentation Data
Configure the setting on the dialog box as described below. When you want to do this when converting a PowerPoint file to presentation data: Save image files as high-quality JPEG files Save image files as higher compression JPEG files After selecting the setting you want, click the [OK] button. This will apply the setting and close the dialog box. - Page 22 Note Instead of steps 2 and 3 of the above procedure, you could click select [Add Image to Presentation File] on the [Edit] menu. Then on the dialog box that appears, select one image file that you want to add to the presentation data. This will insert the image file into the presentation data immediately following the image you selected in step 1, above.
-
Page 23: Configuring Presentation Data Playback Settings
Configuring Presentation Data Playback Settings You can configure the following playback settings for playback of EZ-Converter presentation data with the Data Projector’s Viewer. • Manual or auto image change • Display time of each image file during auto image change •... - Page 24 Configure the following settings on the dialog box. When you want to do this: Change images manually during a presentation Have images change automatically during a presentation Specify the display interval during auto image change This setting is available only while [Auto] is selected for [Display Interval].
- Page 25 Image Transition Effects When “On” is selected for the “Image Transition Effect” setting on the “Presentation File Setup” dialog box, you can select a visual effect to be applied any time you transition from one image file to another. The following shows examples of each of the available effects.
-
Page 26: Saving Presentation Data
Saving Presentation Data Use the procedures in this section to save presentation data to a USB memory device or to your computer’s hard disk. To save presentation data to a new file Perform the procedure under “Creating New Presentation Data” (page 17). If you want to save the presentation data to a USB memory device, connect the device to your computer’s USB port. - Page 27 Note Performing this procedure will generate the presentation files shown below. Example:When you input the folder name “Market Data 2006” for a 50-image presentation Market Data 2006 (Folder) Market Data 2006.plf Market Data 2006 001.jpg Market Data 2006 002.jpg Market Data 2006 003.jpg Market Data 2006 050.jpg To overwrite existing presentation data with newly edited data Perform the procedure under “Editing Presentation Data”...
-
Page 28: Opening Presentation Data
Opening Presentation Data Use the procedure below to open existing presentation data in order to edit it or to save it under a different name. Note To open presentation data, specify a presentation file (plf). To open a presentation file If the presentation data you want to open is stored on a USB memory device, connect the device to your computer’s USB port. -
Page 29: Ez-Converter Menu And Button Reference
EZ-Converter Menu and Button Reference This section provides detailed information about the EZ-Converter menu commands and about the buttons that appear on the EZ-Converter window. To do this: Convert a PowerPoint file to presentation data and display it in the EZ-Converter window Clear presentation data currently in the EZ-Converter window Open an existing presentation (plf) file and display its contents in the EZ-Converter window... -
Page 30: Playing A Presentation With Viewer
Playing a Presentation with Viewer Viewer is an application built into the Data Projector that lets you display image files and play back movie files that are stored on a USB memory device that is connected to the Data Projector. Viewer starts up automatically whenever you connect a supported USB memory device (see “Supported USB Memory Devices”... -
Page 31: File Menu Operations
Note that even if a file appears in the file menu, it does not mean that the file can be displayed or played back by the Data Projector. The file menu displays USB memory device contents in the following sequence: folders, movie files, image files. - Page 32 To switch between the thumbnail view and the tree view Press the [FUNC] key. This displays the Viewer function menu shown below. Use the [ ] key to move the highlighting to “Screen Format” and then press the [ENTER] key. This toggles between the thumbnail view and the tree view To scroll file menu pages To scroll to the next menu page press the [ ] key.
- Page 33 To select a file or a folder Thumbnail View Use the cursor keys to move the highlighting to the file or folder you want to select. Highlighting Tree View Use the [ ] and [ ] cursor keys to move the highlighting to the file or folder you want to select.
- Page 34 ] key. This will display a full-size version of the image that fills the projection area. Now the Data Projector will advance to the next image automatically at a regular interval (default: 5 seconds). If “Manual” is selected for the “Image Switching” setting, the image will not change automatically.
- Page 35 Note A slideshow displays the image files (jpg or bmp) that are included in the same folder as the image file you select in step 1 of the above procedure. All other files are ignored. For details about operations you can perform during a slideshow, see “Operations during a Slideshow”...
-
Page 36: Using The Presentation Menu
The folder that contains the presentation file created using the EZ-Converter software ( 15) that comes bundled with the Data Projector is called a “presentation folder”. Presentation folders appear along with other folders on the Viewer file menu, and they are indistinguishable from other folders. - Page 37 To perform a slideshow by running a presentation file Use the [ ] and [ ] keys to move the highlighting to the presentation file you want to run. Press the [ENTER] key or the [ This will start the currently selected presentation file. The image file sequence, display time for each image, and image transition effect will all be in accordance with the settings stored in the presentation file.
-
Page 38: Operations During Image File Content Projection
Operations during Image File Content Projection To scroll between image files Use the [ ] and [ ] keys. To do this: Display the content of the next image file Display the content of the previous image file Note Scrolling to a file that is too large to fit within the projection area will cause the message “Cannot display an image file.”... -
Page 39: Operations During A Slideshow
Operations during a Slideshow To pause a slideshow while auto image change is turned on Press the [ ] key. To unpause a slideshow while auto image change is turned on Press the [ ] key. To scroll between image files during a slideshow Use the cursor keys. -
Page 40: Slideshow Start Error
Pressing the [ENTER] key while a file whose playback is not supported by the Data Projector is selected will cause the error message “This movie file cannot be played back.” to appear. For more information, see “Supported Playback Data Types” ( 37), or “To start a slideshow... - Page 41 Operations during Movie File Playback You can perform the operations described below during movie file playback. To do this: Pause movie playback Fast reverse Fast forward Stop movie playback Jump to the beginning of the currently playing movie file and pause there Jump to the end of the currently playing movie file and pause there...
-
Page 42: Configuring Viewer Setup Menu Settings
Configuring Viewer Setup Menu Settings You can use the Viewer Setup Menu to configure viewer display settings and to perform a presentation using playback settings that are different from those that were stored with presentation data using EZ-Converter. Note When you perform a slideshow by running a presentation file created with EZ- Converter, the slideshow settings on the Viewer setup menu (Image Switching, Slideshow Display Interval, Slideshow Transition Effect, and Slideshow Repeat) are changed automatically to the playback settings (... - Page 43 What you should do next depends on whether or not [ENTER] is displayed at the far right of the setting you are configuring (the one that is highlighted). If [ENTER] is displayed: a. Press the [ENTER] key. b. On the submenu that appears, use [ ] and [ ] to move the highlighting to the setting you want to select.
- Page 44 To restore all the settings to their initial defaults, press the [ENTER] key. To exit the operation without doing anything, press [ESC] instead of [ENTER]. To exit the Viewer setup menu, press the [ESC] key. Viewer Setup Menu Contents This section provides detailed explanations of all of the items included on the Viewer setup menu.
- Page 45 Setting Name Description Slideshow Repeat Specifies whether or not slideshows and movie file playback should repeat when the end it reached. Slideshows and movie playback are repeated. Off: Slideshows and movie playback are not repeated. Movie Display Specifies the display size during movie playback. Zoom: Enlarges to the size of the projection area.
-
Page 46: Viewer Error Messages
Viewer Error Messages Message Cause There is a problem There is some problem with the slideshow with the presentation file setup file. Cannot created with EZ-Converter. start the slideshow. Folder does not There is no displayable contain any image folder, image file, or files. -
Page 47: Viewer Troubleshooting
Viewer Troubleshooting Some folders and/or files are not displayed in the file menu • All the folders and/or files contained in a folder will not be displayed if there are more than 999 folders and/or files inside the folder. If this happens, reduce the number of folders and/or files in the folder. -
Page 48: Performing A Presentation Using A Wireless Lan (Projecting Computer Screen Contents Over A Wireless Lan)
LAN. Supported Wireless LAN Devices CASIO YW-2S wireless adapters are required in order to establish a wireless LAN connection between a computer and the Data Projector. The YW-2S package includes two YW-2 USB type wireless adapters, one for the Data Projector and one for the computer. -
Page 49: Preparing The Computer For Wireless Lan Connection With The Data Projector
On your computer, install “Wireless Connection” from the CD-ROM that comes bundled with the Data Projector. For more information, see “Installing Data Projector Software” ( Connect the YW-2 wireless adapter to your computer’s USB port. If you are using another wireless LAN adapter (including a computer’s built-... -
Page 50: About The Data Projector's Wireless Lan
Data Projector operations (such as displaying connection information, switching computers when there are multiple computers connected over a wireless LAN, etc.) after a connection is established. Wireless starts up automatically whenever you connect a CASIO YW-2 wireless adapter to the Data Projector’s USB port. -
Page 51: Establishing A Wireless Lan Connection Between The Data Projector And A Computer
For information about configuring settings, see “To create a new computer connection profile” (page 75). Supplementary information is also available on the CASIO website (http://world.casio.com/projector/support/en/). Connection Using a Notebook Computers Built-in Wireless LAN Use Manual Connection for this type of connection. -
Page 52: Wireless Lan Connection Basics
For more details about the plug-and- play setting, see “Setup Menu Contents” in the User’s Guide. The operations described here assume that the CASIO YW-2 wireless LAN adapter is connected to the computer. In the case of a computer equipped with another manufacturer’s wireless LAN adapter or a built-in wireless LAN adapter, configure... -
Page 53: Establishing A Wireless Lan Connection With A Single Computer Using A Simple Connection
Turn on the Data Projector. Wait until the Data Projector’s POWER/STANDBY indicator is lit green. Connect the CASIO YW-2 wireless adapter to the Data Projector’s USB port. You could also turn on the Data Projector with the wireless adapter already connected to the USB port. - Page 54 This will cause the dialog box shown below to appear. When the computer finds the Data Projector, communication will start between them. This will establish a wireless LAN connection between the computer and Data Projector automatically and cause the Wireless Connection window shown below to appear on the computer screen.
-
Page 55: Establishing A Wireless Lan Connection With Multiple Computers Using A Manual Connection
The above procedure will not establish a wireless LAN connection if the connection profile of the Data Projector is different from the profile used the first time a connection was established between the computer and Data Projector (Simple Connection 1 in this example). - Page 56 Wireless Connection should start up automatically when you connect the YW-2 wireless adapter to the computer’s USB port. If it does not, go to the Windows [Start] menu and select [All Programs] - [CASIO] - [Wireless Connection]. On the Wireless Connection window of the first computer, select “Switch Connection Profile”...
- Page 57 Configure the settings on the dialog box. In this example, we will use the following settings. Dialog Box Item Profile Name SSID Access Mode Security Setup WEP Key Format WEP Key/WPA/WPA2 Pass Phrase DHCP IP Address Subnet Mask Default Gateway Channel For details about each of the settings on the dialog box, see “Manual Connection Setting page...
- Page 58 To use the Manual Connection profile to establish a wireless LAN connection between the first computer and the Data Projector Note Perform the following steps while the connection profile dialog box is on the display at the end of the procedure under “...
- Page 59 Clicking the [OK] button in response to the “Overwrite it?” message will cause the settings of the first computer to be sent to the Data Projector. At this time, the Manual Connection 1 settings of the Data Projector will be overwritten with the “Test” settings of the connection profile of the computer (see step 3 above).
- Page 60 When the computer finds the Data Projector, the display will change to a dialog box like the one shown below for selecting the connected device. Move the highlighting to the XJ-S35 Data Projector to which you want to connect and then click the [OK] button.
- Page 61 On the Wireless Connection window, select “Options” on the “Tools” menu. This will display a dialog box for configuring the option setting. In the “User Name” box, enter the user name (the name you want to appear in the projection area when projecting the screen contents of this computer) for the computer whose settings you are configuring.
- Page 62 This will display a user menu like the one shown below. You can use the user menu when multiple computers are connected to the Data Projector to select which computer’s screen image will fill the entire projection area. The location of each computer’s image on the user menu screen will be in accordance with the projection area position button you selected for the computer.
- Page 63 When the computer finds the Data Projector, the display will change to a dialog box like the one shown below for selecting the connected device. Move the highlighting to the XJ-S35 Data Projector to which you want to connect and then click the [OK] button.
- Page 64 This will cause the contents of the highlighted computer screen to fill the entire projection area. For details about Wireless Connection window operations and Data Projector remote controller operations you can perform after establishing a connection, see “Using Wireless LAN for Projection” (page 91).
-
Page 65: Advanced Wireless Lan Connection Settings
LAN for Projection” (page 91). Web Setup In order to modify the settings of a Data Projector manual setup profile and to configure advanced settings of other Data Projector settings, you need first to display a special web browser page named “Web Setup” on you computer screen. To display Web Setup, use a web browser running on a computer that is connected to the Data Projector over a wireless LAN. - Page 66 On the initial Web Setup page, click the [Change Password] button. This will display the change password page. In the “Current Password” box, enter the current password (“casio” if you have not yet changed the initial default password) and then enter the new password into the “New Password”...
-
Page 67: Enabling And Disabling Web Setup
This section explains how you can disable the Web Setup page so it is not displayed when you perform Data Projector operations. You can disable the Web Setup page when you want to restrict access to Web Setup while there are multiple computers connected to the Data Projector. -
Page 68: Switching The Data Projector Connection Profile
Switching the Data Projector Connection Profile The Data Projector uses one of its six connection profiles to connect to a computer over a wireless LAN. You can use the following procedure to switch the connection profile as required. To view the Data Projector’s current connection profile information While Wireless is shown in the projection area, press the [FUNC] key on the Data Projector’s remote controller. - Page 69 Press the [ ] key to move the highlighting to “Yes” and then press the [ENTER] key. This will switch to the Data Projector connection profile you highlighted in step 2 and then display the “Standing by for connection...” message.
- Page 70 Switch the settings on the computer and then re-connect. Click the [OK] button. This will switch the Data Projector to the connection profile you selected in step 2 and terminate the current wireless LAN connection between Data Projector and computer.
-
Page 71: Assigning A Name To A Data Projector
Assigning a Name to a Data Projector You can use Web Setup to assign a unique name to each Data Projector, which comes in handy when you are using multiple projectors. The projector name you assign is displayed in the following locations. -
Page 72: Configuring A Connection Keyword
You can specify whether or not input of the connection keyword is required (connection keyword on/off) to establish a wireless LAN connection with the Data Projector from a computer, and you can register and modify the connection keyword as required. - Page 73 On the Wireless Connection window, click the This will display a dialog box for inputting a connection keyword. Enter the connection keyword that is preset for the Data Projector and then click the [OK] button. If the input connection keyword is correct, a wireless LAN connection will be established between the Data Projector and computer and the computer screen contents will be sent to the Data Projector.
-
Page 74: Modifying Data Projector Manual Connection Settings
Modifying Data Projector Manual Connection Settings The following are example cases in which you may want to modify Data Projector manual connection settings. • When you want to configure Data Projector settings to be compatible with information configured on the wireless LAN access point you are using •... -
Page 75: Creating A Computer Connection Profile
This section explains the procedure for using Wireless Connection to create a new profile or to modify the existing profile of a computer that has a CASIO YW-2 wireless adapter connected. Important! For the required computer wireless LAN connection settings when you are using another manufacturer’s wireless LAN adapter or the computer’s built-in LAN adapter, see the... - Page 76 Perform the procedure under “To switch the Data Projector connection profile” (page 69) to switch the Data Projector connection profile to “Manual Connection 3”. This will cause the “Standing by for connection...” screen to appear in the projection area. Confirm that the screen shows “Manual Connection 3” for the connection profile.
- Page 77 This closes the connection profile switching dialog box and displays the dialog box shown below. When the computer finds the Data Projector, the display will change to a dialog box like the one shown below for selecting the connected device.
-
Page 78: Deleting A Computer Connection Profile
Display the Wireless Connection window by double-clicking the computer desktop, or select the following from the windows Start menu: [All Programs] - [CASIO] - [Wireless Connection]. This step is not necessary if the Wireless Connection window is already displayed. On the Wireless Connection window, select “Switch Connection Profile” on the “Connection”... -
Page 79: Assign A User Name To A Computer For Projection
User names make it possible to identify each computer when multiple computers are connected to the Data Projector at the same time. The user name assigned to a computer will appear in the projection area when the computer’s screen contents are projected. Use Wireless Connection to assign a user name to each computer. -
Page 80: Manual Connection Setting Reference
Data Projector manual connection settings. • For information about creating a computer manual connection setting profile for wireless LAN connection with the Data Projector, refer to “To create a new computer connection profile” (page 75). For information about modifying a manual connection setting profile, refer to “To modify an existing computer connection profile”... - Page 81 Input up to 32 single-byte alphanumeric characters. Access Mode Specifies either wireless LAN connection through an access point or direct connection between the Data Projector and computer without going through an access point. Access Point: Specifies wireless LAN connection through an access point.
- Page 82 IP Address Configuration of this setting is required when “Off” is selected for “DHCP”. Enter the IP address that is assigned to the Data Projector/computer. The IP address consists of four values in the range of 0 to 255, separated by...
- Page 83 1, 2, 3, 4, 5, 6, 7, 8, 9, 10, 11: Specify a channel that should be used for wireless LAN communication. The same channel must be set on the Data Projector and the computer that will be communicating with each other over the wireless LAN...
-
Page 84: Returning Data Projector Wireless Settings To Their Initial Defaults
Returning Data Projector Wireless Settings to Their Initial Defaults You can return all Data Projector Wireless function settings to their initial defaults by executing “Initialize Wireless Setup”. The following are the Wireless initial default settings configured by this operation. Dialog Box Item... -
Page 85: Viewing Wireless Connection Help
Press the [ENTER] key. This displays the dialog box shown below. Press the [ ] key to move the highlighting to “Yes” and then press the [ENTER] key. This initializes all Wireless settings. Viewing Wireless Connection Help To view Wireless Connection help, select “Help” on the Wireless Connection window “Help” menu. -
Page 86: Wireless Lan Connection Troubleshooting
Also check the following. • Are the Data Projector and computer too far apart or are they separated by a wall or other barrier? Try moving the Data Projector and computer so they are closer to each other. - Page 87 You cannot establish a Manual Connection between the Data Projector and a single computer or multiple computers. Except for the IP address setting, all of the settings configured for the Data Projector and the computer(s) must match in order to establish a Manual Connection. Use the following procedures to display and check the Data Projector and computer settings.
- Page 88 The wireless network connection used by the YW-2 wireless adapter is the one with the adapter name “CASIO 802.11b/g Wireless LAN USB Adapter (3887A)”. Disable all wireless network connections that have any other name. If you see a “Local Area Connection” on the window, right-click its icon and...
- Page 89 Data Projector and computer, check the following points. • The Web Setup of the Data Projector may be disabled. Use the procedure under “To enable and disable Web Setup” (page 67) to check the current setting. If it is “Disable”, change it to “Enable”.
-
Page 90: Wireless Connection Menus And Button Reference
Data Projector Terminate the wireless LAN connection between a computer and the Data Projector and quit Wireless Connection Select the mouse cursor shape for the projection screen or turn mouse cursor display off... -
Page 91: Using Wireless Lan For Projection
Simple Connection is established. This means you do not have to click the button to project the image. • This will send the contents of the computer screen to the Data Projector, which will project it. The color of the Refer to this section of this manual: “Operations while a Single Computer is Connected to the... - Page 92 Note While the computer screen contents are being projected, the mouse cursor will be displayed in accordance with the Mouse Cursor Emulation settings configure with Wireless Connection. For details, see “To display a mouse cursor in the projection area” (page 92). To pause computer screen contents as they are being projected On the computer screen, click the cause the...
- Page 93 On the computer screen, click the “Disconnect” on the “Connection” menu. This will terminate the wireless LAN connection between the computer and Data Projector and display “Standing by for connection...” in the projection area. To restore the wireless LAN connection between a computer and Data...
-
Page 94: Operations While Multiple Computers Are Connected To The Data Projector Over A Wireless Lan
To check which computer’s screen contents currently are being projected. On the Data Projector’s remote controller, press the [ ] key. This will display the user name of the computer whose screen contents are currently being projected. - Page 95 Under initial default settings, the user name is displayed in the upper left corner of the projection area whenever you switch projection from the contents of one computer screen to another, or when a single computer is connected to the Data Projector over a wireless LAN.
-
Page 96: Performing A Presentation Using The Yc-400 Document Camera
Performing a Presentation Using the YC-400 This section explains how to connect the CASIO YC-400 Multi PJ Camera System (document camera) to the Data Projector in order to project the images of documents placed on the document stage of the document camera. The Data Projector’s built-in application named YC Camera is used to project document images. - Page 97 This will turn on the document camera, which will cause its lens to extend. The Data Projector will recognize the document camera and start up the YC Camera application automatically. When the YC Camera application starts up, the Data Projector will project an image of the document stage along with a dialog box for adjusting the document camera position.
- Page 98 This will switch to the recorded image of the next document automatically. Note Step 5 above is what happens while the Data Projector’s YC Camera application is configured with its initial default settings. The recorded image will not switch automatically if you have changed the “Operation Mode” setting of the YC Camera application to “Manual Capture”.
-
Page 99: Yc Camera Application Operations
The procedures in this section assume that you have already connected the YC-400 Document Camera to the Data Projector as explained under “Connecting the Document Camera to the Data Projector” (page 96), and that the Data Projector’s YC Camera application is running. - Page 100 To adjust the document camera’s zoom setting Press the [FUNC] key to display the YC Camera application function menu. Use the [ ] key to move the highlighting to “Camera Zoom/Focus” and then press the [ENTER] key. This causes the YC Camera Zoom/Focus dialog box to appear in the projection area. The “Optical Zoom”...
- Page 101 To adjust the camera position Remove all documents and objects from the document stage. Press the [FUNC] key to display the YC Camera application function menu. Use the [ ] key to move the highlighting to “Adjust Camera Position” and then press the [ENTER] key.
- Page 102 To rotate the currently projected image Note This operation will affect only the image that is currently being projected. The projection image produced the next time you release the shutter will be projected in accordance with the settings on the YC Camera Application Setup Menu (page 104). Press the [FUNC] key to display the YC Camera application function menu.
- Page 103 To perform manual skew correction on the currently projected image Note Skew correction automatically straightens the image of a document that is misaligned on the document stage of the document camera. Under its initial defaults, the YC Camera application is configured to perform skew correction automatically. You can also turn off auto skew correction.
-
Page 104: Configuring Yc Camera Application Setup Menu Settings
Configuring YC Camera Application Setup Menu Settings You can use the YC Camera setup menu to configure various YC Camera application operation settings. To configure YC Camera application setup menu settings Press the [MENU] key to display the setup menu. Press the [ ] key to move the highlighting to “USB”... - Page 105 To restore all settings on the YC Camera application setup menu to their initial factory defaults Press the [MENU] key to display the setup menu. Press the [ ] key to move the highlighting to “USB” and then press the [ENTER] key.
- Page 106 YC Camera Application Setup Menu Contents This section provides detailed explanations of all of the items included on the YC Camera application setup menu. The initial default setting for each item is indicated by an asterisk (*). Setting Name Description Operation Mode Specifies whether recording of documents placed on the document stage of the document camera should be performed automatically or manually.
- Page 107 Setting Name Description Skew Correction Specifies whether or not skew correction should be performed automatically on the projected image. On*: Turns on automatic skew correction. Off: Turns off automatic skew correction. Project Document Specifies whether or not the camera’s monitor image should be projected Monitor Image when a document is removed from the document stage.
- Page 108 MA0610-B...
Need help?
Do you have a question about the XJ-S35 and is the answer not in the manual?
Questions and answers