Chapters
Table of Contents

Related Manuals for Campbell Hausfeld IN727700AV


Summary of Contents for Campbell Hausfeld IN727700AV
- Page 1 Framing Nailer Operating Instructions and Parts Manual CHN70800 Française: Page 21 esPañol: Página 41 IN727700AV 8/10 © 2010 Campbell Hausfeld/Scott Fetzer LIKE A PRO MAKES IT EASY TO DO IT chpower.com...
-
Page 2: Table Of Contents
Warranty ......20 Visit: www.chpower.com Call : Customer Service at 1-800-543-6400 Campbell Hausfeld Attn: Customer Service 100 Production Drive Harrison, OH 45030 U.S.A. -
Page 3: Description
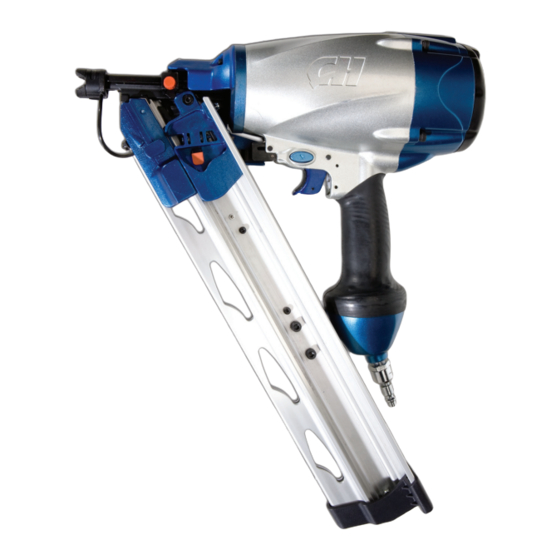
Operating Instructions and Parts Manual Framing Nailer Description This nailer is designed for framing, trusses, sub-floors, sheathing, exterior decks, and pallet/create assembly. Features include: convenient rear loading magazine which holds up to 100 nails, tethered no-mar decking tip, quick clear nose, an adjustable depth of drive mechanism, oil free, electronic low nail indicator, nail placement laser pointer, in-line magazine, bubble level, anti-dry fire, conversion trigger with safety lockout, rubber comfort grip, swivel plug, and adjustable exhaust. -
Page 4: Safety Guidelines
Do not make any modifications to the tool without first obtaining written approval from Campbell Hausfeld. Do not use the nailer if any shields or guards are removed or altered. Do not use the nailer as a hammer. Personal injury or tool damage may occur. -
Page 5: Personal Safety
Operating Instructions and Parts Manual Important Safety Information (Continued) PersoNal saFety a. Stay alert. Watch what you are doing and use common sense when operating the tool. Do not use the tool while tired or under the influence of drugs, alcohol, or medication. - Page 6 Do not return product to store for depleted batteries; please call Campbell Hausfeld at 1-800-543-6400 for assistance. q. Do not modify or alter the nailer or any nailer parts. Do not use the nailer if any shields or guards are removed or altered.
-
Page 7: Service
Operating Instructions and Parts Manual Important Safety Information (Continued) servICe a. Tool service must be performed only by qualified repair personnel. b. When servicing a tool, use only identical replacement parts. Use only authorized parts. c. Use only the lubricants supplied with the tool or specified by the manufacturer. -
Page 8: Glossary
Operating Instructions and Parts Manual Glossary Become familiar with these terms before operating the unit. ACTUATE (TOOL) — To cause movement to the tool’s component(s) intended to drive the fastener. ACTUATION SYSTEM — The use of a trigger, work contact element (WCE) and/ or other operating control, separately or in combination or sequence, to actuate the tool. -
Page 9: Getting To Know Your Framing Nailer Like A Pro
Operating Instructions and Parts Manual Getting To Know Your Framing Nailer Like A Pro Bubble Conversion Switch Level Adjustable Exhaust Deflecter Trigger Rubber Comfort Grip Swivel Plug Low Nail Adjustable Depth Control Knob Indicator Light Laser No-mar Tip Storage Pusher Latch Button Nail Pusher Figure 6 - Components of the Framing Nailer Work... -
Page 10: Set-Up
Operating Instructions and Parts Manual Set-Up luBrICatIoN This nailer requires NO lubrication for normal operation. However, lubrication will NOT harm the tool. The work surface can become damaged by excessive lubrication. MINIMuM CoMPoNeNts reQuIred For Hook-uP AIR COMPRESSOR: The air compressor must be able to maintain a minimum of 70 psi when the nailer is being used. -
Page 11: Loading / Unloading The Nailer
Operating Instructions and Parts Manual Set-Up (Continued) loadINg / uNloadINg tHe NaIler Always disconnect the tool from the air supply before loading / unloading fasteners. Choose which type of fastener you want to use for you project. Additional fasteners can be found at major home centers. -
Page 12: Of The Exhaust
Operating Instructions and Parts Manual Set-Up (Continued) adjustINg tHe dIreCtIoN oF tHe exHaust The CHN70800 is equipped with an adjustable direction exhaust deflector. This is intended to allow the user to change the direction of the exhaust. Simply twist the deflector to any direction desired. -
Page 13: Bump Mode
Lockout Mode. In this mode, no combination of WCE and trigger activations will allow the tool to cycle or fire. If tool does operate while in Safety Lockout Mode, contact Campbell Hausfeld for technical support, and do not use the nailer until repaired. Work CoNtaCt eleMeNt (WCe) Check the operation of the Work Contact Element (WCE) trip mechanism before each use. -
Page 14: Operation
Operating Instructions and Parts Manual Operation NaIl PlaCeMeNt laser PoINter The tool is equipped with a laser mounted near the nose. Turn the electronics switch to the ON position. When the Work Contact Element (WCE) touches the workpiece and slightly moves, the laser will shine on the spot where the nail will be driven. This can be seen through the wide slots in the WCE and / or no-mar tip. -
Page 15: Storage
Hausfeld replacement parts and accessories, or parts and accessories which perform equivalently. rePlaCeMeNt Parts Use only genuine Campbell Hausfeld service parts. Tool performance, safety and durability could be reduced if improper parts are used. When ordering replacement parts, specify by part number. -
Page 16: Technical Service
Operating Instructions and Parts Manual Maintenance (Continued) teCHNICal servICe For information regarding the operation or repair of this product, please call 1-800-543-6400. FasteNer INterCHaNge INForMatIoN This tool drives most brands of paper-collated, framing nails with these specifications: 31° to 34° D-clipped head Length: 2 inch to 3-1/2 inch long Shank diameter: 0.113 inch to 0.131 inch www.chpower.com... -
Page 17: Troubleshooting Guide
Operating Instructions and Parts Manual Troubleshooting Guide Stop using nailer immediately if any of the following problems occur. Serious personal injury could result. Any repairs or replacements must be done by a Qualified Service Person or Authorized Service Center. SYMPTOM CAUSe Air leaking at trigger valve O-rings in trigger valve housing are... - Page 18 - Part description and number as shown in parts list Figure 27 – repair Parts Illustration for air Powered Framing Nailer, model CHN70800av www.chpower.com Address any correspondence to: Campbell Hausfeld Attn: Customer Service 100 Production Drive Harrison, OH 45030 U.S.A.
-
Page 19: Replacement Parts List For Framing Nailer
Operating Instructions and Parts Manual Replacement Parts List for Framing Nailer ref. description Socket head cap screw - M6 x 20 Bushing Exhaust cover Seal Washer Bubble level Socket head cap screw - M6 x 30 Washer - M6 Cylinder head cap Gasket Spring O-ring... -
Page 20: Warranty
8. RESPONSIBILITIES OF PURCHASER UNDER THIS WARRANTY: A. Provide dated proof of purchase and maintenance records. B. Deliver or ship the Campbell Hausfeld product or component to the nearest Campbell Hausfeld Authorized Service Center. Freight costs, if any, must be borne by the purchaser. - Page 21 Cloueuse d’Encadrement Instructions d’Utilisation et Manual de Pièces CHN70800 english: Page 1 esPañol: Página 41 IN727700AV 8/10 © 2010 Campbell Hausfeld/Scott Fetzer LIKE A PRO MAKES IT EASY TO DO IT chpower.com...
- Page 22 Pour l’information sur les pièces, produits et services Appeler: Service à la clientèle au 1-800-543-6400 Adresser TouTe correspondAnce à : Campbell Hausfeld Charger/décharger la cloueuse. . F-31 Charger la cloueuse ..F-31 Décharger la cloueuse .
-
Page 23: Description
Instructions d’Utilisation et Manual de Pièces Cloueuse d’encadrement Description Cette cloueuse est conçue pour l’encadrement, les poutres triangulées, les sous- planchers, les terrasses extérieures et palette/assemblage. Les caractéristiques incluent: pratique chargeur à chargement arrière pour un maximum de 100 clous, embout de recouvrement anti-marques amarré, buse à... -
Page 24: Directives De Sécurité
MORT ou de GRAVES BLESSURES. b. Se familiariser avec ce produit, ses commandes et son utilisation. Suivez toutes les instructions. Contacter votre représentant Campbell Hausfeld si vous avez des questions. c. Seules les personnes familières avec ces règles d’utilisation sans danger devraient utiliser cette unité. -
Page 25: Sécurité Personnelle
Instructions d’Utilisation et Manual de Pièces Importantes Instructions De Sécurité (Suite) sÉCurItÉ PersoNNelle a. Rester vigilant. Il faut regarder ce que vous faites et utiliser son sens commun en faisant fonctionner un outil. Ne pas faire fonctionner l’appareil si vous êtes fatigué ou sous l’influence de drogues, d’alcool ou de médicaments. - Page 26 Instructions d’Utilisation et Manual de Pièces Importantes Instructions De Sécurité (Suite) e. Toujours travailler dans un endroit bien ventilé. Porter un masque anti-poussières homologué OSHA. Toujours débrancher l’outil de la source de courant lorsqu’il est sans supervision, pour effectuer son entretien ou des réparations, pour débloquer, charger, décharger ou déplacer l’outil vers un nouvel endroit.
-
Page 27: Service
Instructions d’Utilisation et Manual de Pièces Importantes Instructions De Sécurité (Suite) servICe a. Tout le travail d’entretien et de réparation doit être effectué seulement par un personnel de réparation qualifié. b. En réparant ou faisant l’entretien d’un outil, utiliser seulement des pièces de rechange identiques. Utiliser seulement des pièces autorisées. -
Page 28: Glossaire
Instructions d’Utilisation et Manual de Pièces Glossaire Familiarisez-vous avec ces termes avant d’utiliser l’appareil. ACTIVER (OUTIL) — Provoquer le déplacement du(des) composant(s) de l’outil pour enfoncer l’attache. SYSTÈME D’ACTIVATION — L’utilisation d’une gâchette, pointe de contact et/ou autre contrôle d’utilisation, séparément ou en combinaison ou séquence, pour activer l’outil. -
Page 29: Apprendre À Connaître Votre Cloueuse D'encadrement Comme Un Professionnel
Instructions d’Utilisation et Manual de Pièces Apprendre à connaître sa cloueuse d’encadrement comme un professionnel Interrupteur de Niveau à conversion bulles Déflecteur d’échappement ajustable Gâchette Prise confortable de caoutchouc Bouchon pivotant Bouton de contrôle de profondeur ajustable Voyant de faible quantité... -
Page 30: Installation
Instructions d’Utilisation et Manual de Pièces Installation luBrIFICatIoN Cette cloueuse n’exige pas de lubrification pour une opération normale. Par contre, une lubrification n’endommagera pas l’outil. La surface de travail pourrait être endommagée par une lubrification excessive. CoMPosaNts MINIMaux reQuIs Pour le raCCord COMPRESSEUR D’AIR : Le compresseur doit pouvoir maintenir au moins 483 kPa (70 lb/po²) lorsqu’on utilise la cloueuse. -
Page 31: Charger/Décharger La Cloueuse
Instructions d’Utilisation et Manual de Pièces Installation (suite) CHarger/dÉCHarger la Cloueuse Toujours débrancher l’outil de l’alimentation d’air avant de charger ou de décharger les attaches. Choisir le type d’attache à utiliser pour le projet. Il y a des attaches supplémentaires dans les centres de rénovations principaux. Charger l’outil 1. -
Page 32: Ajuster La Direction De L'échappement
Instructions d’Utilisation et Manual de Pièces Installation (suite) ajuster la dIreCtIoN de l’ÉCHaPPeMeNt Le CHN70800 est doté d’un déflecteur d’échappement à direction ajustable. Ceci est pour permettre à l’utiliser de changer la direction de l’échappement. Tourner tout simplement le déflecteur dans la direction voulue. INstaller l’eMBout aNtI-MarQues 1. -
Page 33: Mode De Contact
Mode de Verrouillage de sécurité. Aucune combinaison d’activations de PC et de gâchette ne permettra à l’outil de cycler ou de se déclencher. Si l’outil fonctionne en Mode de verrouillage de sécurité, contacter Campbell Hausfeld pour le support technique et ne pas utiliser la cloueuse avant la réparation. -
Page 34: Fonctionnement
Instructions d’Utilisation et Manual de Pièces Fonctionnement Baguette laser de PlaCeMeNt de Clou L’outil est doté d’un laser monté près de la buse. Mettre l’interrupteur électronique à la position ON. Lorsque la pointe de contact (PC) touche la pièce de travail et se déplace un peu, le laser brillera sur le point où... -
Page 35: Rangement
8. Débrancher l’alimentation d’air et recharger (Voir la section Charger l’outil). rÉParatIoN de la Cloueuse Seul un personnel qualité doit réparer l’outil et il doit utiliser des pièces de rechange et des accessoires authentiques de Campbell Hausfeld, ou des pièces et accessoires d’une performance équivalente. PIèCes de reCHaNge Utiliser seulement des pièces de rechange de Campbell Hausfeld. -
Page 36: Service Technique
Instructions d’Utilisation et Manual de Pièces entretien (suite) servICe teCHNIQue Pour obtenir de l’information sur le fonctionnement ou la réparation de ce produit, appeler le 1-800-543-6400. INForMatIoN sur les attaCHes INterCHaNgeaBles Cet outil enfonce la plupart des marques de clous d’encadrement, d’assemblage de papier avec ces spécifications : Tête taillée en D 31°... -
Page 37: Guide De Dépannage
Instructions d’Utilisation et Manual de Pièces Guide de dépannage Cessez l’utilisation de la cloueuse immédiatement en cas des problèmes suivants, car il résultat risque de blessures graves. Toutes réparations doivent être effectuées par un Technicien Qualifié ou par un Centre De Service Autorisé. SYMPTôMe CAUSe(S) POSSIbLe(S) Fuite d’air à... - Page 38 - Description de la pièce et son numéro Figure 25 - Illustration des pièces de réparation pour la Cloueuse d’encadrement, modèle CHN70800av F-38 Adresser toute correspondance à : Campbell Hausfeld Attn: Customer Service 100 Production Drive Harrison, OH 45030 U.S.A.
-
Page 39: Liste De Pièces De Rechange Pour La Cloueuse D'encadrement
Instructions d’Utilisation et Manual de Pièces Liste de pièces de rechange pour la cloueuse d’encadrement No. de réf. description Vis d’assemblage à tête creuse - M6 x 20 Douille Couvercle d’échappement Joint d’étanchéité Rondelle Niveau à bulles Vis d’assemblage à tête creuse - M6 x 30 Rondelle - M6 Chapeau de culasse... -
Page 40: Garantie
8. RESPONSABILITÉS DE L’ACHETEUR AUX TERMES DE CETTE GARANTIE: A. Fournir une preuve d’achat datée et un état d’entretien. B. Livraison ou expédition du produit ou de la pièce Campbell Hausfeld au Centre De Service Autorisé Campbell Hausfeld. Taux de frais, si applicables, sont la responsabilité de l’acheteur. - Page 41 Clavadora para Estructuras Manual de Instrucciones y Lista de Piezas CHN70800 english: Page 1 Française: Page 21 IN727700AV 8/10 © 2010 Campbell Hausfeld/Scott Fetzer LIKE A PRO MAKES IT EASY TO DO IT chpower.com...
- Page 42 ....S-51 Por información sobre piezas, productos y servicios dirijA TodA lA correspondenciA A: Campbell Hausfeld Para cargar la clavadora ..S-51 Para descargar la clavadora .
-
Page 43: Descripción
Manual de Instrucciones y Lista de Piezas Clavadora para estructuras Descripción Esta clavadora está diseñada para el armado de estructuras, armaduras de cubierta, contrapisos, plataformas exteriores, y pálets/cajones. Las características incluyen: práctico cargador de carga trasera con una capacidad de hasta 100 clavos, punta antirrayones flotante para plataformas, boquilla de desobstrucción rápida, profundidad ajustable del mecanismo de accionamiento, no necesita aceite, indicador electrónico de nivel bajo de clavos, puntero láser para la ubicación de clavos, cargador... -
Page 44: Medidas De Seguridad
No haga ninguna modificación a la herramienta sin obtener primero la aprobación por escrito de Campbell Hausfeld. No use la clavadora si le faltan alguna de las tapas protectoras o si éstas han sido modificadas. No use la clavadora como un martillo. -
Page 45: Seguridad Personal
Manual de Instrucciones y Lista de Piezas Importantes Instrucciones De Seguridad (Continuación) segurIdad PersoNal a. Manténgase alerta. Mire lo que está haciendo y use el sentido común cuando haga funcionar la herramienta. No use la herramienta si está cansado o bajo la influencia de drogas, alcohol o medicamentos. - Page 46 No devuelva el producto a la tienda por pilas descargadas, llame a Campbell Hausfeld al 1-800-543-6400 para obtener asistencia. q. No modifique ni altere la clavadora ni ninguna de sus piezas.
-
Page 47: Suministro De Aire
Manual de Instrucciones y Lista de Piezas Importantes Instructions De Sécurité (Suite) r. Evite usar la clavadora cuando el cargador esté vacío. La clavadora podría desgastarse de forma acelerada. No modifique ni desactive el Elemento de contacto de trabajo (WCE, por sus siglas en inglés). -
Page 48: Glosario
Manual de Instrucciones y Lista de Piezas Glosario Familiarícese con estos términos antes de poner la unidad en funcionamiento. ACTIVAR (HERRAMIENTA) — Producir el movimiento del (de los) componente(s) de la herramienta diseñado(s) para impulsar el sujetador. SISTEMA DE ACTIVACIÓN -— El uso de un gatillo, elemento de contacto de trabajo (WCE) y/o otro control de funcionamiento, de modo independiente, en combinación o en secuencia, para activar la herramienta. -
Page 49: Conozca Su Clavadora Para Estructuras Como Un Profesional
Manual de Instrucciones y Lista de Piezas Conozca su clavadora para estructuras como un profesional Nivel de Interruptor de burbuja conversión Desviador ajustable del orificio de salida Botón de empuje del seguro Cómodo mango de goma Conector giratorio Perilla de control de profundidad ajustable Luz indicadora de bajo nivel de clavos... -
Page 50: Configuración
Manual de Instrucciones y Lista de Piezas Configuración luBrICaCIóN Esta clavadora no requiere lubricación para su funcionamiento normal. Sin embargo, la lubricación no dañará la herramienta. La superficie de trabajo puede dañarse por exceso de lubricación. CoMPoNeNtes MÍNIMos NeCesarIos Para la CoNexIóN COMPRESOR DE AIRE: El compresor de aire debe ser capaz de mantener un mínimo de 4,1 bar (70 psi) cuando se usa la clavadora. -
Page 51: Para Cargar Y Descargar La Clavadora
Manual de Instrucciones y Lista de Piezas Configuración (Continuación) Para Cargar y desCargar la Clavadora Siempre desconecte la herramienta del suministro de aire antes de cargar o descargar los sujetadores. Elija qué tipo de sujetador desea usar para su proyecto. Puede encontrar sujetadores adicionales en grandes tiendas para el hogar. -
Page 52: Ajuste De La Dirección Del Orificio
Manual de Instrucciones y Lista de Piezas Installation (suite) ajuste de la dIreCCIóN del orIFICIo de salIda La CHN70800 está equipada con un deflector del orificio de salida de dirección ajustable. Esto está diseñado para que el usuario pueda cambiar la dirección del orificio de salida. -
Page 53: Modo De Contacto
La herramienta NO DEBE funcionar en ninguno de los pasos. Si la herramienta funciona en el modo de bloqueo de seguridad, póngase en contacto con Campbell Hausfeld para obtener soporte técnico. INterruPtor de oN/oFF (eNCeNdIdo/aPagado) Para FuNCIoNes eleCtróNICas... -
Page 54: Funcionamiento
Manual de Instrucciones y Lista de Piezas Funcionamiento PuNtero lÁser Para la uBICaCIóN de Clavos La herramienta está equipada con un láser montado cerca de la boquilla. Coloque el interruptor de las funciones electrónicas en la posición de encendido. Cuando el elemento de contacto de trabajo (WCE) toque la pieza de trabajo y se mueva levemente, el láser brillará... -
Page 55: Almacenamiento
Clavadora La herramienta debe ser reparada únicamente por personal calificado, y se deben usar piezas de repuesto y accesorios originales Campbell Hausfeld, o piezas y accesorios que funcionen de manera equivalente. PIezas de rePuesto Use únicamente piezas de repuesto Campbell Hausfeld originales. -
Page 56: Servicio Técnico
Manual de Instrucciones y Lista de Piezas Mantenimiento (continuación) servICIo tÉCNICo Para obtener información con relación al funcionamiento o reparación de este producto, sírvase llamar al 1-800-543-6400. INForMaCIóN de INterCaMBIo de sujetadores Esta herramienta sirve para la mayoría de las marcas de clavos para estructuras unidos por papel con las siguientes especificaciones: Cabeza recortada en D de 31°... -
Page 57: Guía De Resolución De Problemas
Manual de Instrucciones y Lista de Piezas Guía de resolución de problemas Deje de usar la clavadora inmediatamente si alguno de los siguientes problemas ocurre. Podría resultado en heridas graves. Cualquier reparación o reemplazo de piezas los debe hacer un técnico calificado personal de un centro autorizado de servicio. - Page 58 Figura 27 – Ilustración de las piezas de repuesto para la Clavadora para estructuras, modelo CHN70800av s-58 Dirija toda la correspondencia a: Campbell Hausfeld Attn: Customer Service 100 Production Drive Harrison, OH 45030 U.S.A. CHN70800...
-
Page 59: Lista De Piezas De Repuesto Para La Clavadora Para Estructuras
Manual de Instrucciones y Lista de Piezas Lista de piezas de repuesto para la clavadora para estructuras No. de ref. descripción Tornillo de sombrerete de cabeza de casquillo - M6 x 20 Casquillo Tapa del escape Sello Arandela Nivel de burbuja Tornillo de sombrerete de cabeza de casquillo - M6 x 30 Arandela - M6... -
Page 60: Garantía
A. Suministrar prueba fechada de compra y la historia de mantenimiento del producto. B. Entregar o enviar el producto o componente Campbell Hausfeld al Centro de Servicio autorizado Campbell Hausfeld más cercano. Los gastos de flete, de haberlos, deben ser pagados por el comprador.
Need help?
Do you have a question about the IN727700AV and is the answer not in the manual?
Questions and answers