
Related Manuals for MR MSENSE DGA 9


Summary of Contents for MR MSENSE DGA 9
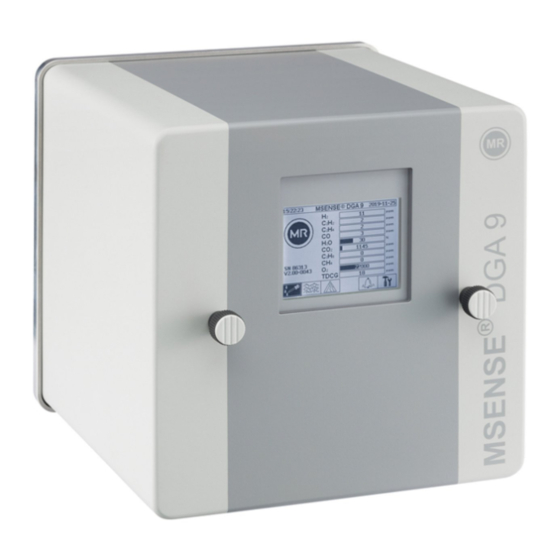
- Page 1 Online – Oil analysis DGA 9 ® MSENSE Installation and Operating Instructions 7045899/02 EN – 11.2020 7045899/02 EN – 11.2020 ® MSENSE DGA 9 Page 1...
- Page 2 Your contact for all inquiries about the MSENSE® DGA 9: MR Service & Complaint Maschinenfabrik Reinhausen GmbH Falkensteinstraße 8 93059 Regensburg Germany service@reinhausen.com complaint@reinhausen.com If required, you will receive at this address more information about the product and issues this technical document.
-
Page 3: Table Of Contents
List of contents Introduction ..........................6 Contact ..........................6 Revision Rights ........................6 Completeness........................6 Legal provisions ........................7 Safety Guidelines ......................... 7 Safety ............................8 Intended Use ........................8 Basic safety instructions ....................... 8 Qualification of the staff ...................... 10 Personal protective equipment ................... - Page 4 Process flow ........................69 6.2.1 Zero measurement ...................... 70 6.2.2 Vacuum generation ..................... 71 6.2.3 Leak testing ......................... 72 6.2.4 Filling level L1 ......................73 6.2.5 Degasing ........................74 6.2.6 Filling level L2 ......................75 6.2.7 Gas measurement ....................... 76 6.2.8 Ventilation ........................
- Page 5 6.10.3.2 Alarm settings .................... 99 ® 6.10.4 MSENSE DGA Settings ................102 6.10.4.1 DGA measurement cycle interval ............103 6.10.4.2 Test digital outputs .................. 104 6.10.4.3 Device options ..................105 6.10.4.4 Date, time, clock settings ................. 107 6.10.4.5 Communication / Interfaces ..............109 Modbus Function, register and address mapping ..............
-
Page 6: Introduction
The target group of this technical document is exclusively specially trained and authorized specialist personnel. Contact Your contact for all inquiries about the MSENSE® DGA 9: MR Service & Complaint Maschinenfabrik Reinhausen GmbH Falkensteinstraße 8 93059 Regensburg Germany service@reinhausen.com... -
Page 7: Legal Provisions
Legal provisions Trademark Microsoft, Microsoft Windows are either registered trademarks or trademarks of Microsoft Corporation in the United States and / or other countries. All other trademarks, registered trademarks, service marks and trade names are the property of their respective owners. Disclaimer After the editorial deadline of this documentation, the product may have changed. -
Page 8: Safety
Safety This technical file contains detailed descriptions to safely and properly install, connect, commission, and monitor the product. • Read this technical document carefully to familiarize yourself with the product. • This technical document is part of the product. • Read and pay special attention to the safety instructions in this chapter. - Page 9 Personal protective equipment Loosely worn or unsuitable clothing increases the risk of being caught or wound on rotating parts and the danger of getting caught on protruding parts. This poses a danger to life and limb. • All necessary equipment as well as the personal protective equipment required for the respec- tive activity such.
-
Page 10: Qualification Of The Staff
This ensures the professional execution of all work. If work is not carried out by the Maschinenfabrik Reinhausen technical service, it must be ensured that the personnel are trained and authorized by Maschinenfabrik Reinhausen. MR Service & Complaint Maschinenfabrik Reinhausen GmbH Falkensteinstraße 8... -
Page 11: Personal Protective Equipment
Personal protective equipment At work, personal protective equipment is required to minimize health hazards. • Always wear the necessary protective equipment during work. • Never wear damaged protective equipment. • Follow instructions in the work area for personal protective equipment. Basically to be worn protective equipment Protective clothing Close-fitting work wear with low tear resistance, with tight sleeves and no protruding... - Page 12 • All protocol interfaces (Modbus, DNP3 and IEC 61850) have read-only access to the MSENSE® DGA 9. A change of parameters or data is not possible. • Access to the parameterisation via the MSET parameterisation software can be protected by passwords.
-
Page 13: General Information
General information The MSESNE DGA 9 device is a permanently installed multiple “gas-in-oil” analysis system. It enables the individual measurement of oil moisture (H O) and the key gases dissolved in the oil: hydrogen (H carbon monoxide (CO), carbon dioxide (CO ), methane (CH ), acetylene (C ), ethylene (C... -
Page 14: Mountinginstructions
Mountinginstructions Installation position ® The installation location is very important for the correct function of the MSENSE DGA 9. There are three possible installation locations in the case of a typical transformer: Pos. 1 Cooler return line: ® Install the MSENSE DGA 9 on a straight pipe section at the connection between the un- derside of the cooler and the transformer tank. -
Page 15: Safety Notes On Installation
Safety notes on installation The following safety notes must be strictly followed during installation. Otherwise no warranty claims can be made. Never remove the protective cap of the connecting thread before you are ready to install the device at the transformer valve. This cap protects the connection unit from damage by dust and other foreign matter. - Page 16 ® Never operate the MSENSE DGA 9 on a close transformer valve for longer periods. Please remove the device if this can not be prevented. Always heed the removal instructions. ® Never install the MSENSE DGA 9 on a knee pipe or pipe bend on the in- take side of the cooling system pump!! Turbulence in pipe bends can result in a vacuum that can cause problems on the device.
- Page 17 Safety gloves must be worn during mounting of the device. If the unit is to be installed over 1 m, the use of personal protective equipment to prevent falling and specially trained personnel are neces- sary. The high weight means two people are required for mounting the unit. Use lifting equipment.
-
Page 18: Preparing Installation
Preparing installation A visual inspection must be carried out on the device before installation. For this purpose, unscrew the two knurled screws and then remove the device protective cover. All the connector plugs, cables and hoses must be connected. 4.3.1 Mechanical connection DGA 9 has an external thread of the type G 1½"’... -
Page 19: Supply Voltage Connection
4.3.2 Supply voltage connection The MSENSE® DGA 9 is available in 4 different voltage versions (please ensure to specify when or- dering). Depending on which nominal voltage version is being used, the following alternating or direct current connection (in the form of a 3-pin mains connection cable) must be present near to the de- vice: Nominal voltage version MSENSE®... -
Page 20: Thread Adhesive
4.3.4.2 Thread adhesive ® ® We recommend the two Henkel products LOCTITE 7471 (activator) and LOCTITE 577 (seal and ® securing) in combination. The activator LOCTITE 7471 increases curing speed and is used before ® the actual thread adhesive LOCTITE 577 is applied to 3 or 4 turns of the external thread on the MSENSE®... -
Page 21: Installation
Installation Once installation preparations have been completed, the MSENSE® DGA 9 can be installed. Installa- tion is divided into 3 steps: • Mechanical installation [4.4.1] • Electrical connection [4.4.2] • Initial start-up (4.4.3) 4.4.1 Mechanical installation The sequence for mechanical installation depends on the connection on the transformer side. There are 2 basic types of mechanical installation: •... - Page 22 4.4.1.1.1 Direct mounting with thread sealing tape • Use a dry cloth / paper towel to clean the inside of the threaded flange. • Use a dry cloth / paper towel to clean the external thread of the connecting unit. Remove any residual thread sealing tape completely from the external thread.
- Page 23 • Wind 3 to 15 layers of thread sealing tape (depending on the thread's characteristics) tightly in the clockwise direction (seen from the back) around the connecting thread of the MSENSE® DGA 9. The first thread groove should remain free. •...
- Page 24 • Screw the MSENSE® DGA 9 2 or 3 times clockwise by hand into the threaded flange. • Now use an M55 open-ended spanner or a 1 ½" adjustable spanner to screw the MSENSE® DGA 9 by a further 5 or 6 turns clockwise into the threaded flange and stop when the vent screw is in the 9 o'clock position.
- Page 25 • ® Now align the MSENSE DGA 9 by turning it clockwise until the vent screw is at the 12 o'clock position at the top. Make sure the device is fitted firmly in this final position. Remark: The device may only be aligned by turning clockwise. As soon as the device is turned anti-clockwise for alignment, mounting must be carried out again! Note!!! When thread sealing tape is used, screwing the device beyond the 12...
- Page 26 Note!!! The following steps must be carried out in accordance with company procedures. Work carefully and prevent air getting into the transformer. Use a bucket to collect any leaking oil. • Unscrew the vent screw by 3 or 4 turns anti-clockwise using the long size 4 hexagon key (vent- ing is active).
- Page 27 • Close the vent screw as soon as there are no more air bubbles escaping from the sample hose. • Now open the gate valve/ball valve completely. 7045899/02 EN – 11.2020 ® MSENSE DGA 9 Page 27...
- Page 28 • Secure the end of the sample hose using a hose clip • Use a dry cloth / paper towel to remove oil residues thoroughly from the device. Note!!! Do not use solvents for cleaning! 7045899/02 EN – 11.2020 ® MSENSE DGA 9 Page 28...
- Page 29 • Check every 30 minutes whether the thread connection is leak-proof. 7045899/02 EN – 11.2020 ® MSENSE DGA 9 Page 29...
- Page 30 4.4.1.1.2 Direct mounting with thread adhesive • Use a dry cloth / paper towel to clean the inside of the threaded flange. Use a dry cloth / paper towel to clean the external thread of the connecting unit. Remove any residual thread sealing tape completely from the external thread.
- Page 31 • ® Apply LOCTITE 7471 (activator) by spraying or brushing it onto both sealing faces. During ® spraying, the openings (transformer gate valve and MSENSE DGA 9) must be covered/sealed by a clean cloth / paper towel. • Allow the activator to flash off completely in a well ventilated room until the surface is completely dry.
- Page 32 • Place the MSENSE® DGA 9 horizontally onto the threaded flange. Make sure the device does not twist. • Screw the MSENSE® DGA 9 2 or 3 times clockwise by hand into the threaded flange. 7045899/02 EN – 11.2020 ® MSENSE DGA 9 Page 32...
- Page 33 • Now use an M55 open-ended spanner or a 1½" adjustable spanner to screw the MSENSE® DGA 9 by a further 5 or 6 turns clockwise into the threaded flange and stop when the vent screw is in the 9 o'clock position. Remark: If the unit can be screwed in without a great deal of effort being necessary, too little thread sealing adhesive has been used.
- Page 34 • We recommend that you wait for 30 minutes before you continue with the further installation steps. The thread adhesive only cures under pressure i.e. in the thread grooves of the pipe connection. For this reason, any excessive thread adhesive should be removed using a clean cloth.
- Page 35 • Close the vent screw as soon as there are no more air bubbles escaping from the sample hose. 7045899/02 EN – 11.2020 ® MSENSE DGA 9 Page 35...
- Page 36 • Now open the gate valve/ball valve completely. • Secure the end of the sample hose using a hose clip 7045899/02 EN – 11.2020 ® MSENSE DGA 9 Page 36...
- Page 37 • Use a dry cloth / paper towel to remove oil residues thoroughly from the device. Note!!! Do not use solvents for cleaning! • Check every 30 minutes whether the thread connection is leak-proof. 7045899/02 EN – 11.2020 ® MSENSE DGA 9 Page 37...
-
Page 38: Indirect Mounting
4.4.1.2 Indirect mounting In the case of indirect mounting, the MSENSE® DGA 9 is fixed in place by screwing the union nut on the threaded joint. A flat gasket is used as a thread seal here. Note!!! Do not remove the protective cap (by turning it slowly) until ®... - Page 39 Note!!! Make sure that the gasket has been inserted between MSENSE® DGA 9 and the screw connection. • Turn the union nut by hand onto the external thread of the connection unit until it stops. 7045899/02 EN – 11.2020 ® MSENSE DGA 9 Page 39...
- Page 40 • Remove the two knurled screws and the device protective cover. • Now align the device by turning it clockwise until the vent screw is at the 12 o'clock position at the top. • Use a M55 open-ended spanner or 1½" adjustable spanner to tighten the union nut until the connection is a firm fit.
- Page 41 • Close the vent screw as soon as there are no more air bubbles escaping from the sample hose. • Now open the gate valve/ball valve completely. Secure the end of the sample hose using a hose clip 7045899/02 EN – 11.2020 ®...
- Page 42 • Use a dry cloth / paper towel to remove oil residues thoroughly from the device. Note!!! Do not use solvents for cleaning! 7045899/02 EN – 11.2020 ® MSENSE DGA 9 Page 42...
- Page 43 • Check every 30 minutes whether the thread connection is leak-proof. 7045899/02 EN – 11.2020 ® MSENSE DGA 9 Page 43...
-
Page 44: Electrical Connection
4.4.2 Electrical connection Note! There must be a 10A overcurrent protective device available in the installation Note! A disconnecting device must be available for the device, easy to reach for the user and identifiable as a disconnecting device for this device. Use reinforced pipes as protection for all cables and connect these to the respective connections in the device. - Page 45 Recommendation for the mains connection cable: Cable type: PUR-PUR CEE JB 3x1.50 (or similar) Cable diameter : 8.1 mm Cable cross-section : 1.5 mm (of the 3 individual wires) Minimum cross-section: 0.75 mm² (maximum cable length at 120V: 25m, at 230V: 50m ...
- Page 46 Do not route external wiring over the heaters. Danger through heat. When connecting external cables, please note the following: The red-rimmed area can reach tem- peratures of up to 80 ° C in the event of a fault. Do not lay cables over this area! 7045899/02 EN –...
-
Page 47: Initial Start-Up
4.4.3 Initial start-up As soon as the device is connected to a power source, a short beep will sound and the LCD screen will show the main menu after a brief moment. To begin with, the time and date have to be set and then the device must be activated / initialized by the operator. - Page 48 Activate / initialise device under extraction status To enter the sub-menu “Extraction status”, please select the following sub-menu symbols. Main menu Extraction status The MSENSE® DGA 9 does not automatically start the measure- ment cycle after installation and the application of the supply volt- age (exception: after a power fail- ure while the device is running).
-
Page 49: Turn Off The Device
4.4.4 Turn off the device Note!!! taken out of operation using the “de- The device must always be activation” key, before it becomes de-energised and can then be disas- sembled!!!! Deactivate device under extraction status Main menu Extraction status The device’s deactivation has to be done explicitly by the user and can be done at any time. -
Page 50: Automatic Activation Following The Interruption Of The Supply Voltage
Note: In order to deactivate the MSENSE® DGA 9, the term “unmount” is typically used. 4.4.5 Automatic activation following the interruption of the supply voltage If a device has already been activated, the automatic activation will be started after the supply voltage is interrupted. -
Page 51: Hardware Components
Hardware components Internal front view with controls After removing the housing's protective hood, the inner front section and its operating elements become visible. This comprises the following components: LCD-Display with 320 x 240 pixels Threaded bolt for the attachment of the device protective cap Alphanumeric keypad for entering numbers and text Arrow keys for navigation in menus and data entry Enter key to activate and confirm functions and data entry... -
Page 52: View Of Rear
View of rear Connecting unit with external thread G 1½” DIN ISO 228-1 or 1½” NPT ANSI B 1.20.1 7045899/02 EN – 11.2020 ® MSENSE DGA 9 Page 52... - Page 53 ® Mains connection with SKINTOP threaded joint M16 Nominal voltages: 120 V -20% +15% AC 50/60Hz 230 V -20% +15% AC 50/60Hz 120 V -20% +15% DC 230 V -20% +15% DC Other nominal voltages upon request Power consumption: max. 600 VA Fuse for 120V: T6, 3 A Fuse for 230V:...
-
Page 54: Connections For The Measuring And Controller Card
Connections for the measuring and controller card 7045899/02 EN – 11.2020 ® MSENSE DGA 9 Page 54... - Page 55 Connector plug X12: Valve control V4 ... V9 [Valve Control V4-V9] Connection for ventilation, bypass, measurement cell switching, vacuum and inlet / outlet valve. V9 Inlet / outlet valve X12:12 V9 Inlet / outlet valve X12:11 ...
- Page 56 Connector plug X11: Filling level / Flow [Oil-Level Oil-Flow] Connection for filling levels and flow (not connected) X11:10 F1 Flow meter X11:9 F1 Flow meter X11:8 Impulse F1 Flow meter X11:7 L0 ...
- Page 57 Connection of the heating resistors with a supply voltage of 120 V ┌ (not connected) X16:6 └ (not connected) X16:5 ┌ (not connected) X16:4 └ (not connected) X16:3 ┌ (not connected) X16:2 ...
-
Page 58: Configuration Of Relay Output 1 With Coding Bridge 1 (J1)
Connection terminals X401: Relay outputs 1 ... 4 [4 x Relay-out X401] Connection for relay outputs 1 ... 4 (220 VDC/VAC / 2 A / 60 W) Relays Output 4 Relays Output 3 Relays Output 2 Relays Output 1 Relay contacts ... - Page 59 Connection terminals X402: Relay outputs 5 ... 8 [4 x Relay-out X402] Connection for relay outputs 5 ... 8 (220 VDC/VAC / 2 A / 60 W) Relay contact DOR8 Relay output 8 X402:8 DOR8 Relay output 8 X402:7 ...
- Page 60 AO1 Analogue output 1 X301:2 AO1 Analogue output 1 X301:1 Connection terminals X302: Relay outputs 5 ... 8 [Analogue output 5-8] Connection for analogue outputs 5 ... 8 (0 / 4…. 20 mA DC) Analogue Output 8 Analogue Output 7 Analogue...
- Page 61 [12] Connector plug X13: Valve control V1 ... V3 [Valve Control V1-V3] Connection for degassing, measurement cell separation and vacuum MZ1 - valve 7045899/02 EN – 11.2020 ® MSENSE DGA 9 Page 61...
- Page 62 V3 Vacuum value for measurement cell 1 X13:6 V3 Vacuum value for measurement cell 1 X13:5 V2 Measurement cell isolation valve X13:4 V2 Measurement cell isolation valve X13:3 V1 Degassing valve X13:2 ...
- Page 63 [15] Connector plug X3: Moisture in oil / oil temperature Oil] Connection for the moisture in oil sensor and oil temperature sensor T2 Oil temperature sensor extraction chamber X3:7 T2 Oil temperature sensor extraction chamber X3:6 ...
- Page 64 N X17:6 Heating measurement cell 2 N X17:5 Heating measurement cell 2 N X17:4 Heating measurement cell 1 N X17:3 Heating measurement cell 1 N X17:2 Heating extraction chamber N ...
-
Page 65: Extraction Menu
Extraction menu 5.4.1 Hardware components Filling level sensor L0 (L0 zero acknowledgement) Filling level sensor L1 (L1 extraction chamber) Filling level sensor L2 (L2 extraction chamber) Valve V9 (safety) Flow measurement (fill / drain flow) Valve V1 (filling / draining, circulation) Valve V3 (vacuum MZ1) Valve V7 (vacuum MZ2) Compressor K1... - Page 66 [10] Valve V4 (ventilation MZ1) [11] Valve V8 (ventilation MZ2) [12] Valve V2 (measurement cell separation, oil from gas) [13] Valve V6 (switching between MZ1 and MZ2) [14] Oil pump P1 [15] Valve V5 (bypass filling) [16] Oil separator [17] Oil-moisture extraction chamber [18] Oil temperature extraction chamber...
- Page 67 7045899/02 EN – 11.2020 ® MSENSE DGA 9 Page 67...
-
Page 68: Device Firmware
The defined alarms also affect the storage capacity. Each alarm status change requires 12 bytes of space. Note!!! To avoid data loss, the measured values should be read out regularly us- ing the Windows-based MR MSET DGA software. 6.1.1 Main screen 3 seconds The relative moisture of the oil is displayed on the main screen in alternating fashion between the absolute and relative oil moisture. -
Page 69: Process Flow
Process flow This chapter contains a description of the individual process steps and the information regarding safety and the associated functions. In the event of a fault, the process is interrupted and the system is set to a defined state (pump and compressor standstill, all valves closed). Colour Aggregate State... -
Page 70: Zero Measurement
6.2.1 Zero measurement In this process step, the zero measurement is executed. Legend Condition of components Filling level L0 “not reached” Filling level L1 “not reached” Filling level L2 “not reached” Valve V9 “closed” Flow F1 “not available” Valve V1 “degassing” Valve V3/ V7 “closed”... -
Page 71: Vacuum Generation
6.2.2 Vacuum generation In this process step, a vacuum is generated in the measurement cell. Legend Condition of components Filling level L0 “not reached” Filling level L1 “not reached” Filling level L2 “not reached” Valve V9 “closed” Flow F1 “not available” Valve V1 “degassing”... -
Page 72: Leak Testing
6.2.3 Leak testing This process step checks the pressure stability of the whole system. Legend Condition of components Filling level L0 “not reached” Filling level L1 “not reached” Filling level L2 “not reached” Valve V9 “closed” Flow F1 “not available” Valve V1 “filling - draining”... -
Page 73: Filling Level L1
6.2.4 Filling level L1 In this process step, the extraction chamber is filled with oil up filling level L1. Legend Condition of components Filling level L0 “reached” Filling level L1 “reached” Filling level L2 “not reached” Valve V9 “open” Flow F1 “present - filling” Valve V1 “filling - draining”... -
Page 74: Degasing
6.2.5 Degasing In this process step, the gases dissolved in oil are released by way of circulation into the air in the extraction chamber (headspace principle). This results in a balance being achieved in the proportionate quantities of gas between oil and air. Legend Condition of components Filling level L0 “reached”... -
Page 75: Filling Level L2
6.2.6 Filling level L2 In this process step, the extraction chamber is filled with oil up to filling level L2 and the gaseous air is forced from the extraction chamber into the measurement cell. Legend Condition of components Filling level L0 “reached” Filling level L1 “reached”... -
Page 76: Gas Measurement
6.2.7 Gas measurement In this process step, the gas contents of the air in the measurement cell are measured. Legend Condition of components Filling level L0 “reached” Filling level L1 “reached” Filling level L2 “reached” Valve V9 “closed” Flow F1 “not available” Valve V1 “degassing”... -
Page 77: Ventilation
6.2.8 Ventilation This process step is used to ventilate the measurement cell with fresh air. Legend Condition of components Filling level L0 “reached” Filling level L1 “reached” Filling level L2 “reached” Valve V9 “closed” Flow F1 “not available” Valve V1 “degassing” Valve V3/ V7 “open”... -
Page 78: Draining
6.2.9 Draining This process step drains the extraction chamber. The oil is pumped back into the transformer. Legend Condition of components Filling level L0 “reached” Filling level L1 “reached” Filling level L2 “reached” Valve V9 “open” Flow F1 “present - draining” Valve V1 “filling - draining”... -
Page 79: Waiting (Only When Switching From Measurement Cell # 2 To Measurement Cell # 1)
6.2.11 Waiting (only when switching from measurement cell # 2 to measurement cell # 1) This process step sets the system for waiting / standby until the start of the next measurement cycle. Valve V6 is switched after waiting. Legend Condition of components Filling level L0 “not reached”... -
Page 80: Operation By Means Of Device Keyboard
Operation by means of device keyboard The MSENSE® DGA 9 can be used while in operation via the built-in alphanumeric keypad, the arrow keys and the enter key. To do so, the protective hood must be removed. Loosen the knurled screws on the front of the device and carefully remove the protective cover. -
Page 81: Contrast Settings
- Choice of input format Capital letters Lowercase letters Numbers ABC1 abc1 DEF2 def2 GHI3 ghi3 JKL4 jkl4 MNO5 mno5 PQR6 pqr6 STU7 stu7 XYZ9 xyz9 ˽0@{}()<>[] ˽0@{}()<>[] .+-*/_#,:; .+-*/_#,:; Remark: After a capital letter is entered, the firmware will automatically switch the format to lowercase. 6.3.4 Contrast settings The contrast of the LCD display can be adjusted using the up / down arrow keys while the main menu... -
Page 82: Main Menu
Main menu After the MSENSE® DGA 9 has been connected to the supply voltage, a short beep will sound and, after a short period of time, the main menu will appear on the LCD display. The current measurement values of the corresponding gas concentrations and the oil moisture are then displayed. If unconfirmed alarms are present, the display switches periodically every 5 seconds between the main menu and alarm status. -
Page 83: Extraction Status
Extraction status The extraction status menu displays the measuring and sampling components of the MSENSE® DGA 9 in the form of a hydraulic function diagram. These are displayed actively (shaded grey) and change their status according to the current process step (6.2): Legend Name Short designation... - Page 84 Legend Name Short designation (Valve function) [11] Flow measurement oil Flow F1 [12] Moisture in oil Moisture in oil [13] Oil temperature Temperature T2 [14] Filling level sensor zero acknowledgement Filling level L0 [15] Temperature heating extraction chamber [16] Filling level sensor low extraction chamber Filling level L1 [17] Filling level sensor high extraction cham-...
- Page 85 Overview of possible states: ® MSENSE DGA 9 inactive (un- Initialisation cycle Zero measurement mounted) Vacuum generation Leak testing Filling level L1 Degasing Filling level L2 Gas measurement Ventilation Draining Waiting The following functions are available in the extraction status menu: Fault acknowledgement (6.5.1) Deactivate device (6.5.2) Activate device (6.5.3)
-
Page 86: Acknowledge Fault
6.5.1 Acknowledge fault After a fault has occurred and this has once again been corrected, it can be acknowledged with the The fault is visualised with an additional information line (below the extraction chamber) and warning symbols (header and to the right of the compressor). Remark: The large warning symbol is also visualised in the main menu. -
Page 87: Gas-In-Oil Measurements
Gas-in-oil measurements In the menu “Gas-in-oil measurements”, an overview of the measured gases is displayed as a bar chart. The measurements C , CO, CO O, O and TDCG (Total dissolved com- bustible Gas) each show the current gas content in the oil. The following values are available with this MSENSE®... -
Page 88: Graph View
6.6.1 Graph view After selecting the measurement variable to be displayed, its graphic time history is displayed. The following functions are available in the time line display: Scroll to the right on the time line (future) Scroll to the left on the time line (past) Expand presentation. - Page 89 6.6.2 Table view The tabular display shows the measured values together with the record number, date and time. The presentation is chronological and the last measurement is always inserted at the top. The following functions are available in the table view: Scroll one line up Scroll one page up Scroll one page down...
-
Page 90: Duval Triangle
Duval triangle • Capture interval: Time span of the data displayed in the Duval triangle • Min Concentration (ppm): Blanking threshold for data to be displayed. Possible setting: ➢ none: No threshold ➢ low: 1-1-1 ➢ high: 10-10-10 • Duval region: Duval region defined for IEC 60599, can not be changed. •... - Page 91 o There is a date entry: There was an alarm in the past for this measurement variable, which was confirmed at the time shown. o There is no date entry: There was no alarm for this measurement variable in the past. •...
-
Page 92: Alarm Acknowledegement
6.8.1 Alarm acknowledegement Password entry is required to acknowledge the selected alarm (standard password 123456). After entering the corresponding password using the alphanumeric keyboard and confirming with the enter key, the alarm is acknowledged. Remark: Every alarm must be acknowledged individually in the firmware. 6.8.2 Alarm settings of the selected alarm In the sub-menu “Alarm settings”... -
Page 93: Device Settings
Device settings The user language can be selected on the MSENSE® DGA 9. The following languages are available: English, German, French, Russian, Turkish, Spanish and Polish. Select the language selection field using the arrow key. By repeatedly pressing the Enter key you can select the desired language. -
Page 94: Transformer-Related Settings
Alarm settings (6.10.3) ® MSENSE DGA settings (6.10.4) Exit settings menu 6.10.1 Transformer-related settings Transformer-specific information can only be entered and managed using the MSET DGA programme. However, this information is not absolutely necessary in order to operate the device. The following sub-menus can be selected in the “Transformer-related settings”... -
Page 95: Settings - Analogue Outputs
To enter results from laboratory analyses, the date of the analysis should first be entered in the “Sample date” field. The daily average gas concentrations of the MSENSE® DGA 9 are then deter- mined and displayed in the “MSENSE® DGA 9 value” fields. After the results of the laboratory analy- sis have been entered in the “Laboratory value”... - Page 96 Analogue output 6 - X302:3(+) & 4(-) Analogue output 7 - X302:5(+) & 6(-) Analogue output 8 - X302:7(+) & 8(-) Analogue output 9 - X303:1(+) & 2(-) Analogue output 10 - X303:3(+) & 4(-) In the Sensor column, a selection of the following options can be made: •...
-
Page 97: Alarm Limits And Alarm Sources
6.10.3 Alarm limits and alarm sources With this MSENSE® DGA 9 you have the possibility to configure 16 different alarms. The alarms can be applied to internal or external measurements and can be issued in different ways. One of these is the issuance to the digital outputs. -
Page 98: Create New Alarm
6.10.3.1 Create new alarm To create a new alarm, use the arrow keys to select the desired free alarm number: As soon as the key is pressed, the key appears in its place and the desired measurement variable can be selected by pressing it several times. The following measurement variables are available by pressing the key several times: •... -
Page 99: Alarm Settings
6.10.3.2 Alarm settings After creating a new alarm and by selecting it with the key, the following functions are available: Delete alarm Highlight upwards Highlight downwards Switches between the existing selections in the lines: Mode, action 1/2 and output 1/2 (if an output was selected during the action) Activates the entry from the alphanumeric keypad for the lines: Threshold value 1/2 and delay 1/2 Save and exit menu... - Page 100 6.10.3.2.2 Alarm settings – Threshold The alarm settings can be edited using the key, the arrow keys and the alphanumeric keypad. The unit is defined by the measurement variable: • ppm – O Gas concentration H - CO - CO - CH •...
- Page 101 Remark: The standard measurement interval of the “gas-in-oil” measurement lasts 60 min. 6.10.3.2.4 Alarm settings – Action When in the line action, the following selection can be made by pressing the key: • Entry : A status change is saved in the alarm history, this must be acknowledged. •...
-
Page 102: Msense ® Dga Settings
® 6.10.4 MSENSE DGA Settings The following sub-menus can be selected in the MSENSE® DGA 9 settings: DGA measurement cycle interval (6.10.4.1) Digital outputs (6.10.4.2) Device options (6.10.4.3) Date, time, clock settings (6.10.4.4) Communication / Interfaces (6.10.4.5) Exit settings menu 7045899/02 EN –... -
Page 103: Dga Measurement Cycle Interval
6.10.4.1 DGA measurement cycle interval The DGA measurement cycle interval defines the time range between the start of the measurement and the start of the following measurement cycle. As per the factory settings, the MSENSE® DGA 9 starts the measurement cycles in a standard interval of 60 minutes. The measurement cycle starts synchronously with the time either at xx: 00, xx: 20 or xx: 40. -
Page 104: Test Digital Outputs
6.10.4.2 Test digital outputs In order to test the outputs and their peripherals, the alarm outputs in this menu can be set manually. Use the arrow keys to select the desired output and then the input key to switch the output on and off. The ten relay outputs are labelled with KL401 #, KL402 # and KL403 # (see chapter 5.3) [5] - X401: 1 ... -
Page 105: Device Options
Remarks: When the device is disassembled, the system monitoring is switched in the same way as in the event of a fault. The function of relay output 1 (KL401 # 1) can be inverted. This is set with a coding bridge on the measuring and controller card. - Page 106 • Device settings • Customer data settings • Acknowledgement of alarms Changing the main screen display – Main menu The content of the main menu display changes in a defined cycle. The following selection can be made by pressing the Enter key in the “Change interval” field: •...
-
Page 107: Date, Time, Clock Settings
6.10.4.4 Date, time, clock settings The MSENSE® DGA 9 has a sub-menu in which the system time, system date, time offset and daylight saving time mode can be set. The following input formats are to be considered for the system time and date: System time: [Hours]:[minutes]:[seconds] (enter the colon using the “dot”... - Page 108 DST mode For the DST mode the following selections are possible using the “Home” key: • MET (Middle European Time): The summer and winter time is automatically changed. • None: The function is switched off Remark: The time change for summer refers to the time zone MET (Last Sunday in March –...
-
Page 109: Communication / Interfaces
6.10.4.5 Communication / Interfaces In the Communication menu, the interfaces are configured and the current status information of the corresponding interfaces (RS232, RS485, modem and Ethernet) is displayed. The following sub-menus can be selected in the “Communication / Interfaces” menu: Network settings (6.10.4.5.1) Alarm SMS settings (not available) Modem settings (6.10.4.5.2) - Page 110 6.10.4.5.1.2 DHCP Client The network administrator must allow automatic TCP / IP address assignment for MSENSE® DGA 9 in the network. Normal view: When selecting IEC 61850 modem: 6.10.4.5.1.3 DHCP Server For testing purposes, a DHCP server can be activated on the device. However, this setting should only be used during start-up, in order to connect to a Windows based laptop.
- Page 111 6.10.4.5.1.4 TCP port number The TCP port number should also be determined by the network administrator. The free area for TCP port number is: 49152 ... 65535. The standard factory setting is 49152. Theoretically, the device allows the following settings: 1 ... 65535. However, several TCP port numbers are reserved for other applications, e.g.
- Page 112 MSENSE® DGA 9 has an Ethernet inter- face. • Modem socket: On-board modem (BU4 and ST6). The plug ST6 on the measuring and control card is for MR service purposes only! 6.10.4.5.2.1 DNP3 Modem When selecting DNP3-GW (internal), the following appears on the LCD display: No additional settings can be made here.
- Page 113 6.10.4.5.2.2 IEC 61850 modem When selecting IEC61850-GW (int.), the following appears on the LCD display: IED name This input field is used to name the MSENSE® DGA 9 device in the IEC 61850 name space. As with other input fields, the input is made via the device's alphanumeric keyboard. Without any input, the name is set automatically as follows: “IED-MSENSE DGA”...
- Page 114 Network settings with IEC 61850-GW (int.) The general network settings are extended by the input field (IP address IEC 61850). In the event of a static address being entered, the IEC 61850 network address can be entered there. When DHCP Client is selected, the address assignment is generated automatically.
- Page 115 7045899/02 EN – 11.2020 ® MSENSE DGA 9 Page 115...
- Page 116 DGA 9 MSET DGA Please ensure that the baud rate and the COM interface in MR MSET DGA are set correctly and that, when necessary, ART RS485 is selected in the “Settings – Bus communication” menu (in the standard settings, ART is not selected). An RS485 adapter may require additional settings in the MR MSET DGA “Connection”...
- Page 117 (e.g. via RTS signal) or by ART (Automatic Receive Transmit Control). The adapter should confirm the data sent (echo). The two check boxes in the MR MSET DGA dialogue box must match the adapter properties: •...
- Page 118 ® MSENSE DGA 9 MSET DGA Bus communication settings in the MSENSE® DGA 9 device: • Set mode to “Bus node” • One-to-one address (1 ... 254) for each device in the RS485 bus. Remark: There can currently be up to 32 devices in the same RS485 bus. •...
- Page 119 • Ignore echo check boxes & select RTS transmit control according to the adapter specification • General settings: Enter the correct address (own Bus address) RS485 Bus Bridge The RS485 bus bridge is an extension that allows communication with an RS485 network in which several MSENSE®...
- Page 120 Bus communication settings in the MSENSE® DGA 9 device: • Set mode to “Bus bridge” • One-to-one address (1 ... 254) for each device in the RS485 bus. Remark: There can currently be up to 32 devices in the same RS485 bus. •...
- Page 121 6.10.4.5.3.3 MODBUS The connection of several MSENSE® DGA 9s to a control system can be realised with MODBUS. A connection to the MSET DGA is not possible via MODBUS. MODBUS configuration Using the Enter key, the following selection can be made in the field mode: ®...
- Page 122 Test options for the MSENSE DGA 9 In the lower left corner of the LCD display there is an image of the MODBUS statistics: <==> 0 ; Counter of all MODBUS messages -> 0 ; Counter of all received MODBUS messages <- 0 ;...
-
Page 123: Modbus Function, Register And Address Mapping
Modbus Function, register and address mapping The following MODBUS functions, register and address areas are used: ® Modbus Modbus Register MSENSE DGA 9 function address Address code Dec. / Hex (5 digit dec.) 0x02 Alarm status Read 1000 / 3E8 11001 Alarm #1 discrete... - Page 124 ® Modbus Modbus Register MSENSE DGA 9 function address Address code Dec. / Hex (5 digit dec.) 0x04 Query ageing rate Read 4000 / FA0 34001 Operating time reduction [s] Input Register 4001 / FA1 34002 4002 / FA2 34003 Operating time [s] 4003 / FA3 34004...
- Page 125 Remark: The value read is always 0x0000. If the MODBUS status is switched off, this value cannot be read. Modicon® PLC address schematic Sensor number allocation MSENSE DGA 9 The following sensor numbers are currently applicable: Gas sensor H Gas sensor C...
-
Page 126: Modbus Tcp
MODBUS TCP MODBUS TCP is always available. TCP port number is 502. MODBUS Serial Communication Adapter Example The following programme and hardware were used to test the MODBUS communication with MSENSE® DGA 9. The programme is available for download, free of charge. The hardware adapter is not the only application that works with MSENSE®... -
Page 127: Modbus / Rtu On Rs485 Bus (With Modpoll)
• MSENSE® DGA 9 can be operated without a response delay (due to full duplex on RS232). Modpoll result screenshot: • Modpoll requires the start register address 1017 to query the additional sensors 1 ... 8 (Address = 1016 ... 1023, Register = 1017 ... 1024) 7.9.2 MODBUS / RTU on RS485 bus (with Modpoll) This test MSENSE®... - Page 128 MSENSE® DGA 9 (Device # 91, # 92 only) Settings: • MSENSE® DGA 9 Response delay setting. Each MSENSE® DGA 9 in the bus has its own address (# 90 .. # 93, # 0 is reserved for the bus master). •...
-
Page 129: Rs 485 Wiring
RS 485 Wiring This chapter focuses on the wiring of the RS485 connection. RS485 ® The RS485 interface, which is integrated in the MSENSE DGA 9 is designed as a 3-conductor inter- face. The 3 conductors are fitted to the terminal clamps KL302 (RS485 Phone) at pin 1, 2 and 3, which ®... -
Page 130: Troubleshooting
• Should a fault occur again in the device, read out the service data once again. • Send the read out service data (ZIP file) to the MR service e-mail specified on page 2 and await a response. 9.1.2 Brief instructions by way of remote diagnosis Execute the following points in succession: •... -
Page 131: Gas Extraction Principle
9.1.3 Gas extraction principle The “gas-in-oil” analysis system MSENSE® DGA 9 is based on the so-called “headspace” principle, which extracts the erroneous gases from the transformer oil. The complete extraction and measuring device consists of the following components: Connection unit, valves, pneumatic hoses, oil pump, vac- uum compressor, flow measurement, filling level sensors, pressure monitor, oil separator, extraction unit (extraction chamber with humidity and temperature sensor and heater), measurement cell with heating and front panel complete (measuring and control card with alphanumeric keyboard and dis-... -
Page 132: Fault - Signalling
Fault – Signalling 9.1.5 A fault state is indicated by a flashing, large warning symbol in the main menu and extraction status menu or by a small, flashing warning symbol in the status list (top left). Faults – Analysis and acknowledgement options 9.1.6 A fault must be reset by the user. -
Page 133: Brief Instruction On Reading Out Service Data
9.1.6.2 Brief instruction on reading out service data This quick guide should help you to read out the service data using the MSET DGA Service Tool. Please consult the detailed description, should you require more detailed information. • Extract the MSET DGA Service Tool in the desired directory (zip file) •... -
Page 134: Fault - Extraction Status Menu
9.1.6.4 Fault - Extraction status menu The extraction status menu also indicates the fault. There may be a problem within the oil itself (debris or dirt) or in the air hose system (leak) that is not identifiable as oil contamination in the unit or the device’s protective hood. -
Page 135: Fault - Acknowledgement By Hand
If a fault should re-occur, the service data must be re-read out from the device by means of the MSENSE® DGA 9 Service Tool . The read-out service data must be sent to the MR Service De- partment (see page 2) for analysis. Please now wait for the MR Service Department report before taking any further action. -
Page 136: Sequence Diagnostics - Data Read
• Optional: RS232 communication interface (internal RS232 or USB to RS232 adapter) Sequence diagnostics – Data read 9.1.7.3 To read out service data using the MSET DGA Service Tool, proceed as follows. 9.1.7.3.1 Connection and start The device from the MSENSE® DGA family must be connected to the network interface via a network cable or via a serial cable to the PC’s free COM interface. - Page 137 • Start the device detection process • The device detection is executed • The device has been detected Figure: Device detection sequence • Following the successful device detection process, the text field Device? displays the following content (here using the example of MSENSE DGA 5): •...
- Page 138 9.1.7.3.4 Firmware and parameter update Please note: In the event of a device fault a firmware update may not be carried out. Window update request In such a case, please close this dialogue box by pressing the “No” key to skip the update process. If there is no fault with the device, an update can be started by clicking on the “Yes”...
- Page 139 At the end, the read-out data (.dat) is compressed and stored in a zip file (.zip) with the same name. The uncompressed file (.dat) is then deleted. For the purposes of the fault analysis, please send the compressed file to the MR Service Department. 7045899/02 EN – 11.2020 ®...
-
Page 140: Technical Specifications
Technical specifications General Optional nominal voltages of 120 VAC 50/60 Hz 230 VAC 50/60 Hz the operating voltage: 120 VDC 230 VDC Other nominal voltages upon request! CAT II Power consumption: max. 600 VA Housing: Aluminium Dimensions: W 263 x H 274 x D 331.5 mm Weight: approx. - Page 141 • Capacitive thin-film humidity sensor for H O measurement • Temperature sensors for oil and gas temperature measurement Analogue and digital outputs (standard) Max. switching capacity Digital outputs (free assignment) Type Relays 220 VDC/VAC / 2 A / 60 W potential-free Standard Alternative Analogue DC outputs...
-
Page 142: Dimensions Msense Dga 9
® Dimensions MSENSE DGA 9 7045899/02 EN – 11.2020 ® MSENSE DGA 9 Page 142... -
Page 143: Dimensions Gate Valve / Ball Valve Connection
Dimensions gate valve / ball valve connection Pipe thread G 1½” DIN ISO 228-1 11.1.1 Pipe thread 1½” NPT ANSI B 1.20.1 11.1.2 7045899/02 EN – 11.2020 ® MSENSE DGA 9 Page 143...
Need help?
Do you have a question about the MSENSE DGA 9 and is the answer not in the manual?
Questions and answers