
Related Manuals for NXP Semiconductors SLN-LOCAL2-IOT


Summary of Contents for NXP Semiconductors SLN-LOCAL2-IOT
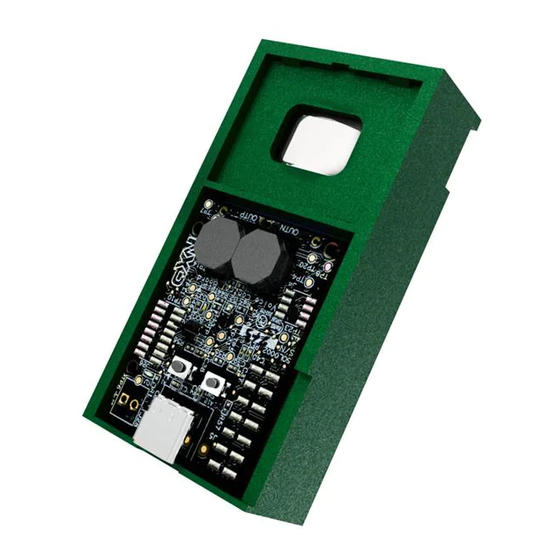
- Page 1 NXP Semiconductors Document identifier: SLN-LOCAL2-IOT-DG User's Guide Rev. 0, 19 April 2021 SLN-LOCAL2-IOT Developer’s Guide...
-
Page 2: Table Of Contents
7.1.1.1 Scenario #1: Single-language two-stage voice control..............41 7.1.1.2 Scenario #2: Multiple-language two-stage voice control..............42 7.1.1.3 Scenario #3: Single-language N-stage voice control..............44 7.1.1.4 User interface..........................45 7.1.2 Language-specific voice control engine..................46 7.1.2.1 Specification..........................46 SLN-LOCAL2-IOT Developer’s Guide, Rev. 0, 19 April 2021 User's Guide 2 / 87... - Page 3 11.1.2 Download the package......................70 11.1.3 Requirements..........................70 11.1.4 Platform configuration......................70 11.1.5 Boot programming modes and security features..............71 11.2 NXP application image signing tool..................71 11.2.1 Generating signing entity......................71 SLN-LOCAL2-IOT Developer’s Guide, Rev. 0, 19 April 2021 User's Guide 3 / 87...
- Page 4 11.4 Secure boot programming with High Assurance Boot (HAB)..........77 11.4.1 HAB setup..........................77 11.4.2 Creating the images........................ 79 11.4.3 Programming the images......................80 Chapter 12 References..................83 Chapter 13 Acronyms..................84 Chapter 14 Revision history.................86 SLN-LOCAL2-IOT Developer’s Guide, Rev. 0, 19 April 2021 User's Guide 4 / 87...
- Page 5 Figure 3. High-level software architecture........................... 13 Figure 4. Audio application pipeline............................. 15 Figure 5. Shell prompt interface..............................16 Figure 6. User LED on the SLN-LOCAL2-IOT kit........................17 Figure 7. Creating MCUXpresso IDE workspace.........................19 Figure 8. MCUXpresso SDK build for SLN-LOCAL2-IOT......................20 Figure 9.
- Page 6 Figure 72. Editing post-build steps...............................59 Figure 73. Post-build commands to generate BIN file......................... 60 Figure 74. MSD update mode LED..............................61 Figure 75. SLN-LOCAL2-IOT kit mounted as USB MSD......................61 Figure 76. Transfer format................................61 Figure 77. Request and response flow............................62 Figure 78.
- Page 7 Figure 91. Image binaries before executing HAB........................80 Figure 92. Usage of secure_app.py and its output with --signed-only option................81 Figure 93. Usage of prog_sec_app.py and its output with --signed-only option................82 SLN-LOCAL2-IOT Developer’s Guide, Rev. 0, 19 April 2021 User's Guide 7 / 87...
- Page 8 Table 11. u16PostProcessedGain description..........................52 Table 12. SLN_DSP_SetGainFactor function description......................52 Table 13. Summary of boot mode and security features......................71 Table 14. Acronyms..................................84 Table 15. Revision history................................86 SLN-LOCAL2-IOT Developer’s Guide, Rev. 0, 19 April 2021 User's Guide 8 / 87...
-
Page 9: Chapter 1 System Requirements And Prerequisites
Table 2. Software tools and versions Software tool Version Description Segger JLink_v6.98 or later Tool to program the flash. MCUXpresso IDE Version 11.3.0 Eclipse base IDE for development environment SLN-LOCAL2-IOT Developer’s Guide, Rev. 0, 19 April 2021 User's Guide 9 / 87... -
Page 10: Chapter 2 Usage Conditions
EUROPEAN DECLARATION OF CONFORMITY (Simplified DoC per Article 10.9 of the Radio Equipment Directive 2014/53/EU) This apparatus, namely SLN-LOCAL2-IOT, conforms to the Radio Equipment Directive 2014/53/EU. The full EU Declaration of Conformity for this apparatus can be found at this location: https://www.nxp.com/... -
Page 11: Chapter 3 Introduction
3.1 Hardware overview The SLN-LOCAL2-IOT kit is designed to provide a reference for a real product design. The board is designed using a small form factor and has many of the design considerations that hardware engineers evaluate. NXP also designed the hardware with some of the key hallmarks of a traditional development kit. -
Page 12: Software Overview
This shows everything that is included in the SDK for the SLN- LOCAL2-IOT package, though not all of the features are implemented in demo applications. SLN-LOCAL2-IOT Developer’s Guide, Rev. 0, 19 April 2021 User's Guide... -
Page 13: Device Memory Map
0x6000_2000 0x6003_FFFF Bootloader 0x6004_0000 0x601F_FFFF Not Used 0x6020_0000 0x602F_FFFF Not used Application Bank A 0x6030_0000 0x60CF_FFFF Application Bank B 0x60D0_0000 0x616F_FFFF Table continues on the next page... SLN-LOCAL2-IOT Developer’s Guide, Rev. 0, 19 April 2021 User's Guide 13 / 87... -
Page 14: Flash Memory Filesystem
HyperFlash filesystem is 256 KB. Each file must be saved in one sector. The contents are listed in Table 5. It shows all the files and their purposes in the SLN-LOCAL2-IOT kit. These files are programmed by default when receiving the kit. Table 5. Full list of files in HyperFlash filesystem... -
Page 15: Audio Application Architecture
— Two-stage (wake word and command) ASR • IoT/elevator/audio/washing machine voice control demo — Selectable combinations of English, Chinese, German, and French — Two-stage ASR • Oven voice control demo SLN-LOCAL2-IOT Developer’s Guide, Rev. 0, 19 April 2021 User's Guide 15 / 87... -
Page 16: User Interfaces
The connection is made via the USB CDC. Figure 5. Shell prompt interface The LED indicates various conditions of the SLN-LOCAL2-IOT kit. The LED is located on the kit, as shown in Figure 6. If the kit boots without any problems, the LED lits with green color while booting and then it turns off. -
Page 17: Figure 6. User Led On The Sln-Local2-Iot Kit
NXP Semiconductors Introduction Figure 6. User LED on the SLN-LOCAL2-IOT kit Table 6. Summary of LED color and behavior Function LED State (D2) Color Description The device has powered on and is Boot up Solid Green 2 seconds going through initialization... -
Page 18: Security Architecture
3.8 Security architecture The SLN-LOCAL2-IOT kit is built and designed in a way that enables the best security practices, while maintaining the development kit feel. The main security mechanisms implemented are the image verification stages that are required for every image programmed into the device. -
Page 19: Chapter 4 Getting Started With Mcuxpresso Tool Suite
NXP board platforms. This section describes where to locate, generate, and download the SDK before installing it. Navigate to the MCUXpresso SDK Builder which should open the SLN-LOCAL2-IOT kit which allows you to build the SDK. SLN-LOCAL2-IOT Developer’s Guide, Rev. 0, 19 April 2021 User's Guide... -
Page 20: Import Sln-Local2-Iot Sdk
SDK” button. 4.2.2 Import SLN-LOCAL2-IOT SDK Before building the SLN-LOCAL2-IOT SDK example projects, the target SDK must be imported into the MCUXpresso IDE by dragging and dropping the target SDK archive into the “Installed SDKs” window in the MCUXpresso IDE. -
Page 21: Importing Sln-Local2-Iot Projects
Figure 10. SLN-LOCAL2-IOT SDK installation in MCUXpresso IDE 4.2.3 Importing SLN-LOCAL2-IOT projects The SLN-LOCAL2-IOT SDK allows you to import existing application examples as a development starting point. Some applications are intended to handle most of the voice aspects of the functionality, allowing developers to focus on the product innovation. -
Page 22: Figure 12. Mcuxpresso Sdk Selection
The import wizard then displays all the applications that are available to import. Ensure that the SDK Debug Console is not moved from its default position. Figure 13 shows the import of all the projects to be used in this section. SLN-LOCAL2-IOT Developer’s Guide, Rev. 0, 19 April 2021 User's Guide 22 / 87... -
Page 23: Figure 13. Mcuxpresso Project Import Selection
Figure 14 shows the Project Explorer window after the projects from the SLN-LOCAL2-IOT SDK are imported. Figure 14. MCUXpresso Project Explorer SLN-LOCAL2-IOT Developer’s Guide, Rev. 0, 19 April 2021 User's Guide... -
Page 24: Chapter 5 Building And Programming With Mcuxpresso
Figure 15. Boot security flowchart By default, the SLN-LOCAL2-IOT kit has the image verification enabled and the HAB disabled in the bootstrap and bootloader. The bootstrap project is the first application that boots. The architecture is described below. Bootstrap is a minimal FreeRTOS application that is responsible for image verification. -
Page 25: Turning Off Image Verification
5.3 Turning off image verification The SLN-LOCAL2-IOT kit has the image verification turned on by default. This has the security feature of only booting images that are signed with the Certificate Authority that is associated with the application certificate and the Certificate Authority certificate programed in the flash. -
Page 26: Turning Off Bootloader Image Verification
• Properties > C/C++ Build > Settings > Preprocessor Inside the Preprocessor section, change the MACRO “DISABLE_IMAGE_VERIFICATION” to “1” and click “OK”, as shown in Figure SLN-LOCAL2-IOT Developer’s Guide, Rev. 0, 19 April 2021 User's Guide 26 / 87... -
Page 27: Programming The Firmware And Artifacts
The following section assumes that the image verification is disabled and all supporting artifacts are available to the developer and that the J-Link debug probe and MCUXpresso IDE are used. SLN-LOCAL2-IOT Developer’s Guide, Rev. 0, 19 April 2021 User's Guide... -
Page 28: Bootstrap, Bootloader, And Local Voice Control Application Images
Figure 22. Debug window for applications Select the J-Link probe that is connected to the board and click "OK", as shown in Figure SLN-LOCAL2-IOT Developer’s Guide, Rev. 0, 19 April 2021 User's Guide 28 / 87... -
Page 29: Audio Playback Files
5.4.2 Audio playback files The steps required to program the audio files to play from the SLN-LOCAL2-IOT kit are described here. It is assumed that the audio files are available to the developers using the pre-built RAW form of files inside the “Image_Binaries/local_audio_files” folder in... -
Page 30: Figure 25. Opening Flash Gui Tool For Programming Audio Playback Binaries
Figure 25. Opening Flash GUI Tool for programming audio playback binaries The Probes discovered window (shown in Figure 26) appears if the project has never been used to program the SLN-LOCAL2-IOT kit before. Figure 26. Probes discovered window for programming audio playback binaries After clicking “OK”, the Flash GUI Tool shown in... -
Page 31: Figure 27. Opening Gui Flash Tool For Audio Playback Binaries
Within the “Base Address” textbox, enter the address where the audio file is located and click the "Run" button. In Figure 29, for demonstration purposes, we program the “OK” audio playback in English at the 0x6178_0000 address. SLN-LOCAL2-IOT Developer’s Guide, Rev. 0, 19 April 2021 User's Guide 31 / 87... -
Page 32: Figure 29. Updating The "Ok" Audio Playback In English Binary Address
Figure 30. Programming the audio playback binaries Figure 31. Audio “OK” in English binary programming completed Table 5 for the list of all audio file addresses saved in the HyperFlash memory. SLN-LOCAL2-IOT Developer’s Guide, Rev. 0, 19 April 2021 User's Guide 32 / 87... -
Page 33: Image Verification Certificate And Keys
“Default Binaries” folder in the release package or that they are generated and converted to files. Ensure that the SLN-LOCAL2-IOT kit is USB-powered with the JTAG connected to the back of the kit. In the MCUXpresso IDE, ensure you have selected a project to launch the debug configuration in and select the GUI Flash Tool icon, as shown in Figure Figure 32. -
Page 34: Figure 34. Opening Flash Gui Tool For Application/Ca Certificates
“0x61CC0000” for the certificate authority public certificate (ca_crt.bin) and click the "Run" button. In Figure 36, for demonstration purposes, the same app_crt.bin certificate is used for both banks. For security reasons, using different certificates for each bank is recommended. SLN-LOCAL2-IOT Developer’s Guide, Rev. 0, 19 April 2021 User's Guide 34 / 87... -
Page 35: Flash Image Configuration Area (Fica)
Regardless of whether the verification is turned on or off, the FICA must be programmed into the area, because it holds the boot information about which image should be booted. SLN-LOCAL2-IOT Developer’s Guide, Rev. 0, 19 April 2021 User's Guide... -
Page 36: Figure 39. Opening Flash Gui Tool For Fica
Building and programming with MCUXpresso Ensure that the SLN-LOCAL2-IOT kit is USB-powered with the JTAG connected to the back of the board. In the MCUXpresso IDE, ensure that you have selected a project to launch the debug configuration in and click the GUI Flash Tool icon, as shown in Figure Figure 39. -
Page 37: Figure 41. Gui Flash Tool
Select the “fica_table.bin” file to download. Figure 42. Selecting the FICA table binary Within the “Base Address” textbox, enter “0x61FC0000” and hit the "Run.." button, as shown in Figure SLN-LOCAL2-IOT Developer’s Guide, Rev. 0, 19 April 2021 User's Guide 37 / 87... -
Page 38: Figure 43. Updating The Fica Table Address
Figure 44. After the flashing process completes, the “Operation Completed” window appears (Figure 45). Figure 44. Programming the FICA table binary Figure 45. FICA table programming complete SLN-LOCAL2-IOT Developer’s Guide, Rev. 0, 19 April 2021 User's Guide 38 / 87... -
Page 39: Chapter 6 Hardware Platform
NXP Semiconductors Chapter 6 Hardware platform The hardware platform of the SLN-LOCAL2-IOT development kit is described on the web page: www.nxp.com/mcu-local2. • SLN-LOCAL2-IOT Schematics • SLN-LOCAL2-IOT BOM • SLN-LOCAL2-IOT Design Files SLN-LOCAL2-IOT Developer’s Guide, Rev. 0, 19 April 2021 User's Guide... -
Page 40: Chapter 7 Far-Field Local Voice Control Framework
When making modifications, ensure to re-test the application against standard acoustic test guidelines. The SLN-LOCAL2-IOT kit is based on the acoustic architecture of the SLN-ALEXA-IOT kit. It was tested based on the Amazon Voice Service self-test guidelines, which are available at https://developer.amazon.com. -
Page 41: Asr Application Scenarios
Developers can implement various application scenarios that are described in the following subsections. The SLN-LOCAL2-IOT with i.MX RT106S supports up to four languages of the ASR in runtime. With i.MX RT105S, it reduces to two languages because of the reduced RAM size. -
Page 42: Scenario #2: Multiple-Language Two-Stage Voice Control
The SLN-LOCAL2-IOT kit loads the wake word engines (that is English and Mandarin) into their RAM memory pools and starts listening to the user’s voice. If the user utters the English wake word “Hey, NXP”, the SLN-LOCAL2-IOT kit detects the wake word, loads the command engine for English into the RAM memory pool and starts listening to voice commands. -
Page 43: Table 7. Wake Words And Commands For Multi-Language Demos
Schließe die Tür Lautstärke verringern Augmenter Température Premier Etage Allumer Lavage Délicat French Salut, (FR) Diminuer Température Deuxième Etage Eteindre Lavage Normal Table continues on the next page... SLN-LOCAL2-IOT Developer’s Guide, Rev. 0, 19 April 2021 User's Guide 43 / 87... -
Page 44: Scenario #3: Single-Language N-Stage Voice Control
If the SLN-LOCAL2-IOT kit is triggered by a wake word, it turns the LED blue playing the audio in the detected languages: • Can I help you? (English) •... -
Page 45: User Interface
Figure 53 Figure 54 for the “changeto” and “multilingual” commands, respectively. Figure 52. Demo selection by shell commands Figure 53. Demo selection command Figure 54. Language selection command SLN-LOCAL2-IOT Developer’s Guide, Rev. 0, 19 April 2021 User's Guide 45 / 87... -
Page 46: Language-Specific Voice Control Engine
M : The number of wake words or commands. : Optimized for the SIMD instructions. The values of 68 and 45 represent typical voice control applications. 7.1.2.2 Architecture Figure 55. ASR software architecture SLN-LOCAL2-IOT Developer’s Guide, Rev. 0, 19 April 2021 User's Guide 46 / 87... -
Page 47: Language Model
Far-field local voice control framework Figure 55 shows the software architecture of NXP’s ASR for SLN-LOCAL2-IOT. The ASR control structure points to a command inference engine instance, the linked lists of language models, and the wake word engines. There are memory pools assigned for the command as well as the wake word inference engine instances in the SRAM. -
Page 48: Inference Engine
Table 10. Inference engine types Inference engine type asr_inference_t code Encoding Unknown UNDEFINED_INFERENCE 0x0000 Wake Word ASR_WW 0x0001 Commands for Smart Home (IoT) ASR_CMD_IOT 0x0002 Table continues on the next page... SLN-LOCAL2-IOT Developer’s Guide, Rev. 0, 19 April 2021 User's Guide 48 / 87... -
Page 49: Asr Configuration
7.1.3 ASR configuration 7.1.3.1 Languages The SLN-LOCAL2-IOT with i.MX RT106S can support up to four languages in runtime. If customized hardware or proof-of- concepts are created, ensure the maximum number of languages to be enabled. Figure 59. Configuration for the maximum number of languages snippet •... -
Page 50: Asr Session Control
7.1.4.1 Follow-up mode The SLN-LOCAL2-IOT ASR session supports the follow-up mode where you can continue saying voice commands after the wake word is triggered once. For example, with the elevator voice control application, multiple passengers who go to different floors can say a voice command one by one after the first passenger triggers the device with a wake word. -
Page 51: Timeout
7.1.4.3 Push-to-Talk (PTT) mode In some applications, you may want to bypass the wake word detection stage. The SLN-LOCAL2-IOT kit offers the PTT feature. If it is enabled, you can directly say voice commands after pressing the SW1 button on the device. -
Page 52: Changing The Post Gain
Modifies the PCM gain before the DC Offset is applied. This increases the gain factor but it can Description also cause clipping. Table continues on the next page... SLN-LOCAL2-IOT Developer’s Guide, Rev. 0, 19 April 2021 User's Guide 52 / 87... -
Page 53: Figure 67. Pdm_To_Pcm_Task.c Set Gain Factor
Locate the code snippet shown in Figure 67 and change the numerical value according to your needs, related to the table. Figure 67. pdm_to_pcm_task.c set gain factor SLN-LOCAL2-IOT Developer’s Guide, Rev. 0, 19 April 2021 User's Guide 53 / 87... -
Page 54: Chapter 8 Security Architecture
68. The certificate from the CA is stored in the SLN-LOCAL2-IOT’s filesystem and used to verify the signatures of the signing entity certificates. In addition, the locally stored certificates from the signing entities are used to verify the signature of firmware images coming in the Over-the-Air (OTA) or Over-the-Wire (OTW) bootloader interfaces. -
Page 55: Image Certificate Authority (Ca) And Application Certificates
NXP Semiconductors Security architecture 8.3 Image Certificate Authority (CA) and application certificates The SLN-LOCAL2-IOT kit comes pre-programmed with signed images, as explained in FICA and image verification. The bootloader and demo applications are signed using NXP's test CA and they can be used to ensure that all images that are to be booted are authentic. -
Page 56: Chapter 9 Bootloader
NXP Semiconductors Chapter 9 Bootloader The SLN-LOCAL2-IOT SDK enables three forms of firmware update capability: 1. USB Mass Storage Device (MSD) interface 2. Over-The-Air (OTA) via Wifi 3. Over-The-Wire (OTW) via UART The boot flow is described in detail in Understanding the boot flow. -
Page 57: Figure 70. Editing Memory Configuration
Before building the application, make sure that the MCUXpresso project generates a BIN file as an outcome of the build process. Right-click the project name and open Properties, as shown in Figure SLN-LOCAL2-IOT Developer’s Guide, Rev. 0, 19 April 2021 User's Guide 57 / 87... -
Page 58: Figure 71. Project Properties
Expand C/C++ Build in the menu and click Settings. Select the Build steps tab, where the Post-build steps can be edited. Click Edit and it shows the commands for the post-build steps. Figure 72 shows how to open the "Post-build steps" window. SLN-LOCAL2-IOT Developer’s Guide, Rev. 0, 19 April 2021 User's Guide 58 / 87... -
Page 59: Figure 72. Editing Post-Build Steps
The “#” command character disables all the following commands. To generate a BIN file in the post-build process, remove the “#” character on the second line and click OK. The resulting commands after removing “#” are shown in Figure SLN-LOCAL2-IOT Developer’s Guide, Rev. 0, 19 April 2021 User's Guide 59 / 87... -
Page 60: Usb Mass Storage Device (Msd) Update
To put the device into the MSD mode, hold down switch 2 (SW2) and power cycle the board until the pink LED (D2) is lit. The pink LED turns on and off in 3-second intervals. SLN-LOCAL2-IOT Developer’s Guide, Rev. 0, 19 April 2021 User's Guide... -
Page 61: Over-The-Air (Ota) And Over-The-Wire (Otw) Updates
NXP Semiconductors Bootloader Figure 74. MSD update mode LED Navigate to the PC’s file explorer and ensure that the SLN-LOCAL2-IOT kit is mounted as a USB MSD. A mounted kit is displayed in the file explorer, as shown in Figure Figure 75. -
Page 62: Json Messages
"fwupdate_common_message": { "messageType":0, "job_id": <Job ID string>, "app_bank_type": <Flash Bank: ‘1’ for A ‘2’ for B>, "signature": <RSA Signature of image to be loaded>, "image_size": <Image Length>, SLN-LOCAL2-IOT Developer’s Guide, Rev. 0, 19 April 2021 User's Guide 62 / 87... -
Page 63: Block Request
"fwupdate_message": { "messageType":1, "fwupdate_server_message": { "messageType":1 9.4.1.4 Activate image request "messageType":1, "fwupdate_message": { "messageType":1, "fwupdate_server_message": { "messageType":3 9.4.1.5 Start self-test request "messageType":1, "fwupdate_message": { "messageType":1, "fwupdate_server_message": { "messageType":2 SLN-LOCAL2-IOT Developer’s Guide, Rev. 0, 19 April 2021 User's Guide 63 / 87... -
Page 64: Clean Request
This section describes the steps necessary to perform an OTA update. To perform an OTA update using the test script, the SLN-LOCAL2-IOT kit must be connected to a Wi-Fi network and the proper bit in the FICA table must be set to indicate to the bootloader that an OTA update is being expected. -
Page 65: Running The Test Script
1. Device: local (equivalently applied to local2) 2. Method: OTA/OTW 3. Bank: A/B (see Application BIN file generation) 4. Appfile: binary for the sln_local2_local_demo project (see Building and programming with MCUXpresso) SLN-LOCAL2-IOT Developer’s Guide, Rev. 0, 19 April 2021 User's Guide 65 / 87... - Page 66 {"messageType": 1, "fwupdate_message": {"messageType": 1, "fwupdate_server_message": {"messageType": 2}}} Upon completion, the SLN-LOCAL2-IOT kit restarts itself automatically and switches over to the new application bank, running the new application that was just flashed. The OTA update sets the FICA bit and triggers the board by running the fwupdate_client.py script, whereas the OTW update must set the FICA bit using the updateotw shell command.
- Page 67 NXP Semiconductors Bootloader SLN-LOCAL2-IOT Developer’s Guide, Rev. 0, 19 April 2021 User's Guide 67 / 87...
-
Page 68: Chapter 10 Filesystem
Chapter 10 Filesystem The SLN-LOCAL2-IOT implements a custom filesystem to manage files with HyperFlash on the kit. The reasons why a custom filesystem is chosen are as follows: 1. The device executes code from the flash (XiP), which means that it must read the flash from RAM functions. - Page 69 NXP Semiconductors Filesystem Before generating the binary files, simply create a 16-bit, 48-kHz audio file. The current configuration of the amplifier only supports 48-kHz playback. SLN-LOCAL2-IOT Developer’s Guide, Rev. 0, 19 April 2021 User's Guide 69 / 87...
-
Page 70: Chapter 11 Automated Manufacturing Tools
• Names of the binaries to be flashed (from the Image_Binaries folder): — BOOTSTRAP_NAME — BOOTLOADER_NAME — MAIN_APP_NAME — Names of audio playback binaries • Flash configurations: — FLASH_TYPE — FLASH_START_ADDR SLN-LOCAL2-IOT Developer’s Guide, Rev. 0, 19 April 2021 User's Guide 70 / 87... -
Page 71: Boot Programming Modes And Security Features
In the secure boot programming, the HAB is enabled. There are various security feature options with (or without) signing certificates. Table 13 summarizes the security features for the open and secure boot modes. By default, the SLN-LOCAL2-IOT kit is enabled with image verification in the open boot mode. Table 13. Summary of boot mode and security features... -
Page 72: Figure 80. Signing Artifact Generation Usage
PEM files, use the same password for all of them for this exercise. Figure 81 shows an excerpt from the terminal output of the generation script. SLN-LOCAL2-IOT Developer’s Guide, Rev. 0, 19 April 2021 User's Guide 72 / 87... -
Page 73: Figure 81. Signing Artifact Generation Excerpt
Figure 81. Signing artifact generation excerpt When generate_signing_artifacts.py succeeds, the ca folder is generated. This folder contains the certificates and private keys with the user-defined <ca_name>. • ./ca/certs/ — <ca_name>.app.a.crt.pem — <ca_name>.app.b.crt.pem SLN-LOCAL2-IOT Developer’s Guide, Rev. 0, 19 April 2021 User's Guide 73 / 87... -
Page 74: Installing The Ca And Application Certificates
The output of this script are two binary files – ca_crt.bin and app_crt.bin. Move these files to the Image_Binaries folder of the Ivaldi package, as shown in Figure 83. They will be programmed into the SLN-LOCAL2-IOT kit by a boot programming tool. Figure 83. Moving ca_crt.bin and app_crt.bin to Image_Binaries folder 11.3 Open Boot Programming tool The Open Boot Programming tool is responsible for connecting to the device and programming it with the correct images and certificates. -
Page 75: Figure 84. Files And Folder For Open Boot Programming Tool
End user will need to update the device signing entity used below (by default prod.app.a used). • The SLN-LOCAL2-IOT kit must be put into the serial download mode. Make sure that jumper J27, which is located on the top of the kit, is in position “0”. -
Page 76: Figure 85. Output Of Ivaldi Open Boot Programming
NXP Semiconductors Automated manufacturing tools Figure 85. Output of Ivaldi Open Boot Programming SLN-LOCAL2-IOT Developer’s Guide, Rev. 0, 19 April 2021 User's Guide 76 / 87... -
Page 77: Secure Boot Programming With High Assurance Boot (Hab)
RT processor. The implementation steps to enable the HAB of the i.MX RT processor for the SLN-LOCAL2-IOT kit is assured by the Python scripts. With the Ivaldi package, the bootstrap is signed to work with the HAB. -
Page 78: Figure 86. Running Setup_Hab.py
To enable the HAB with the generated secure boot image file (enable_hab.sb), set the i.MX RT106S to the serial download mode by moving jumper J27, which is located on the top of the SLN-LOCAL2-IOT kit, into the “0” position. Then, execute the “Script/ sln_local2_iot_secure_boot/manf/enable_hab.py”... -
Page 79: Creating The Images
SREC file format, use the MCUXpresso Binary Utilities to convert the AXF file to the s-record file in the bootstrap project. Right-click the AXF file and navigate to Binary Utilities > Create S-Record. Figure 89. Converting to s-record file SLN-LOCAL2-IOT Developer’s Guide, Rev. 0, 19 April 2021 User's Guide 79 / 87... -
Page 80: Programming The Images
Figure 91. Image binaries before executing HAB 11.4.3 Programming the images Create a secure image and program the created image into the SLN-LOCAL2-IOT kit. Execute the Scripts/sln_local2_iot_secure_boot/oem/secure_app.py script with the --signed-only option. It generates the boot_sign_image.sb file with the images created in... -
Page 81: Figure 92. Usage Of Secure_App.py And Its Output With --Signed-Only Option
Figure 92. Usage of secure_app.py and its output with --signed-only option Program the created boot_sign_image.sb file into the SLN-LOCAL2-IOT kit in the HAB enabled by executing the prog_sec_app.py script with the --signed-only option. The script performs the following actions and its output is shown in Figure •... -
Page 82: Figure 93. Usage Of Prog_Sec_App.py And Its Output With --Signed-Only Option
NXP Semiconductors Automated manufacturing tools Figure 93. Usage of prog_sec_app.py and its output with --signed-only option SLN-LOCAL2-IOT Developer’s Guide, Rev. 0, 19 April 2021 User's Guide 82 / 87... -
Page 83: Chapter 12 References
NXP Semiconductors Chapter 12 References The following references supplement this document: MCU Local Voice Control SLN-LOCAL2-IOT-UG Solution User’s Guide (document SLN-LOCAL-IOT-UG) • • Hardware files (gerbers, schematics, BOM) SLN-LOCAL2-IOT Developer’s Guide, Rev. 0, 19 April 2021 User's Guide 83 / 87... -
Page 84: Chapter 13 Acronyms
Over The Air Over The Wire One Time Programmable Pulse-code modulation Pulse-density modulation Public Key Infrastructure Read Only Memory RTOS Real-Time Operating System Table continues on the next page... SLN-LOCAL2-IOT Developer’s Guide, Rev. 0, 19 April 2021 User's Guide 84 / 87... - Page 85 NXP Semiconductors Acronyms Table 14. Acronyms (continued) Acronym Meaning (Definition) Software Development Kit UART Universal Asynchronous Receiver-Transmitter SLN-LOCAL2-IOT Developer’s Guide, Rev. 0, 19 April 2021 User's Guide 85 / 87...
-
Page 86: Chapter 14 Revision History
NXP Semiconductors Chapter 14 Revision history Table 15. Revision history Revision Date Substantive changes 19 April 2021 Initial release SLN-LOCAL2-IOT Developer’s Guide, Rev. 0, 19 April 2021 User's Guide 86 / 87... - Page 87 Right to make changes - NXP Semiconductors reserves the right to make changes to information published in this document, including without limitation specifications and product descriptions, at any time and without notice. This document supersedes and replaces all information supplied prior to the publication hereof.
Need help?
Do you have a question about the SLN-LOCAL2-IOT and is the answer not in the manual?
Questions and answers