
Subscribe to Our Youtube Channel
Related Manuals for Argos 157/7295


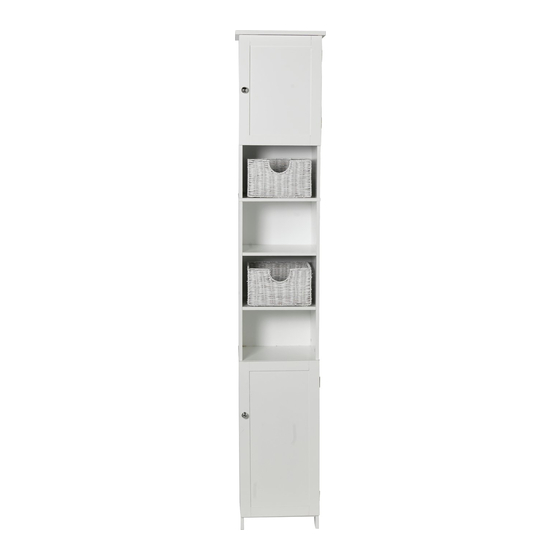
Summary of Contents for Argos 157/7295
- Page 2 Safety and Care Advice Important – Please read these instructions fully before starting assembly • Check you have all the • Do not stand or put weight on • We do not components and tools listed on the product, this could cause recommend the pages 3 and 4.
- Page 5 Assembly Instructions Step 1 Insert 2 x 35mm male camlock into the holes at the bottom of side panels 1 and 3 as shown. Tighten with a screwdriver. Insert 4 x female camlock into the holes on the underside of base panel 14 .
- Page 6 Assembly Instructions Step 3 Secure shelf 5 in place using 4 x screw shown. Step 4 Insert 4 x 35mm male camlock into the holes in the middle of side panels 6 and 7 as shown. Tighten with a screwdriver. Insert 4 x female camlock into the holes on the underside of shelf 2 .
- Page 7 Assembly Instructions Step 6 Insert middle back panel 8 into the slots at the back of the assembly as shown. Step 7 Secure shelf 5 in place using 4 x screw shown.
- Page 8 Assembly Instructions Step 8 Insert 2 x 35mm male camlock into the holes in the middle of top side panel 10 as shown. Tighten with a screwdriver. Insert 4 x female camlock into the holes on the underside of shelf 2 . Connect the camlocks and tighten with a screwdriver.
- Page 9 Assembly Instructions Step 10 Insert top back panel 12 into the slots at the back of the assembly as shown. Step 11 Insert 4 x 35mm male camlock into the holes on the underside of shelf 13 as shown. Tighten with a screwdriver.
- Page 10 Assembly Instructions Step 13 Insert 4 x 35mm male camlock into the holes in top of the assembly completed at Step 7 as shown. Insert 4 x female camlock into holes at the bottom of the assembly completed at Step 12. Place the second assembly on top of the first to connect the...
Need help?
Do you have a question about the 157/7295 and is the answer not in the manual?
Questions and answers