
Related Manuals for Southern Enterprises HZ030500TX


Summary of Contents for Southern Enterprises HZ030500TX
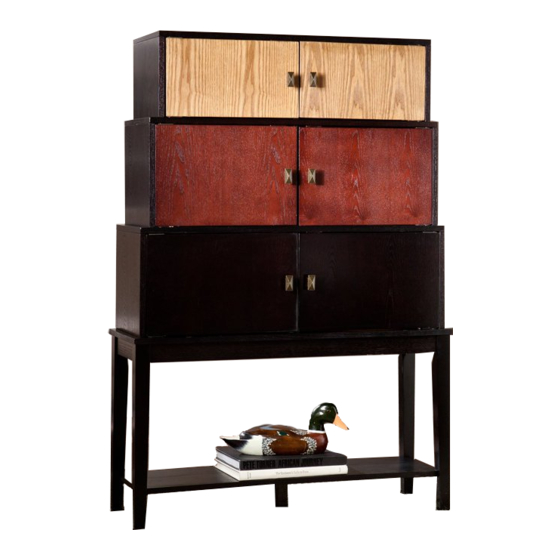
- Page 1 HZ030500TX Wyman Tiered Storage Cabinet For assistance with assembly, contact: Southern Enterprises, Inc. Customer Service: 1-800-633-5096 service@seidal.com Assembly Instructions www.seifurniturestore.com PO#: Page | 1...
- Page 2 Wyman Tiered Storage Cabinet Parts List Please check packaging for all parts and hardware before discarding. Unpack and lay parts on clean, padded surface like carpet or blanket. Check that you have all parts indicated. Call customer service if hardware is missing.
- Page 3 11L) Quantity 11R) Quantity Quantity of 1 of 1 of 1 Bottom Left Door Panel Bottom Right Door Panel Fourth Top Panel Quantity Quantity Quantity of 1 of 1 of 1 Bottom Panel Top Back Panel Middle Back Panel Quantity Quantity Quantity of 1...
- Page 4 Quantity Quantity Quantity of 6 of 12 of 8 Bolts Knob Screw Dia. 1/8” x 5/8”L Dia. 1/4”x 1-3/4”L Quantity Quantity Quantity of 8 of 16 of 16 Bolts Dia. 1/4”x 1/2”L Flat Washer Spring Washer Quantity Quantity Quantity of 1 of 6 of 6 Allen Wrench...
- Page 5 Quantity Quantity Quantity of 4 of 2 of 4 Bracket Plastic chain Anchor Quantity of 4 Screw Dia1/8”x1-3/8”L Care and Cleaning Instructions: Before using, wipe with a clean, dry cloth. For replacement parts or questions, please call Periodically apply furniture wax to renew the SEI Customer Service at 1-800-633-5096.
- Page 6 Wyman Tiered Storage Cabinet Assembly Instructions Attach three Legs (18) to the Fourth Top Panel (12) with Bolts (I), Spring Washers (M), and Flat Washers (L). Tighten Bolts (I) with Allen Wrench (N). Figure 1 Attach Bottom Panel (13) to pre-assembled unit from Figure 1 with Iron Brackets (Q), Bolts (J), Spring Washers (M), and...
- Page 7 Attach the Fourth Leg (18) to pre-assembled unit from Figure 2 with Brackets (Q), Bolts (J/I), Spring Washers (M), and Flat Washers (L). Tighten Bolts (J/I) with Allen Wrench (N). Figure 3 Attach Hinges (PL/PR) to Bottom Left Door Panel (11L) with Screws (E).
- Page 8 Attach Hinges (PL/PR) to Bottom Right Door Panel (11R) with Screws (E). Attach Iron Plate (R) to Bottom Right Door Panel (11R) with Screw (S). Attach Knob (G) to Bottom Right Door Panel (11R) with Bolt (F). Tighten Bolt (F) and Screws (E/S) with Phillips screwdriver (not included).
- Page 9 Attach Magnets (O) to Third Top Panel (6) with Screws (H). Tighten Screws (H) with Phillips screwdriver (not included). Figure 7 Insert Cam Locks (C) into corresponding holes on pre-assembled unit from Figure Screw Cam Bolts (A) into threaded holes on Third Top Panel (6).
- Page 10 Attach Hinges (PL/PR) to Middle Left Door Panel (10L) with Screws (E). Attach Iron Plate (R) to Middle Left Door Panel (10L) with Screw (S). Attach Knob (G) to Middle Left Door Panel (10L) with Bolt (F). Tighten Bolt and Screws (E/S) with Phillips screwdriver (not included).
- Page 11 Insert Cam Locks (C) into Third Side Panels (5) and Second Vertical Panel (7). Screw Cam Bolts (A) into threaded holes on pre-assembled unit from Figure Attach Third Side Panels (5) and Second Vertical Panel (7) to pre-assembled unit from Figure 8 by inserting Cam Bolts (C) and Wood Dowels (B) into corresponding holes until all...
- Page 12 Insert Cam Locks (C) into corresponding holes on pre-assembled unit from figure Screw Cam Bolts (A) into threaded holes on Second Top Panel (4). Attached Middle Doors (10L/10R) to pre-assembled unit from Figure 11 by inserting lower hinges into corresponding holes.
- Page 13 Attach Hinges (PL/PR) to Top Left Door Panel (9L) with Screws (E). Attach Iron Plate (R) to Top Left Door Panel (9L) with Screw (S). Attach Knob (G) to Top Left Door Panel (9L) with Bolt (F). Tighten Bolt (F) and Screws (E/S) with Phillips screwdriver (not included).
- Page 14 Attach Magnets (O) to Top Panel (1) with Screws (H). Tighten Screws (H) with Phillips screwdriver (not included) Figure 16 Insert Cam Locks (C) into Top Side Panels (2) and Top Vertical Panel (3). Screw Cam Bolts (A) into threaded holes on pre-assembled unit from Figure Attach Top Side Panels (2) and Top Vertical Panel (3) to...
- Page 15 Insert Cam Locks (C) into corresponding holes on pre-assembled unit from figure Screw Cam Bolts (A) into threaded holes on Top Panel (1). Attach Top Doors (9L/9R) to pre-assembled unit from figure 17 by inserting lower hinges into corresponding holes. Upper hinges will fit in holes on Top Panel (1).
- Page 16 Attach Back Panels (14/15/16) to pre-assembled unit from Figure 18 with Screws (T). Tighten Screws (T) with Phillips screwdriver (not included). Figure 19 Attach Brackets (V) to Back Panels (14/15/16) using Screws (U). Mark two desired locations on wall. Drill two 3/16" holes on wall. Insert Plastic Anchors (X) into the 2 holes on wall, tap with WALL...
- Page 17 WALL Move this item close to the wall. Tie Brackets (V) together with Plastic Chains (W). Anti-tipping hardware must be used for this product to avoid tipping and injury. Figure 21 Now your Wyman Tiered Storage Cabinet is ready for use! Page | 17...
-
Page 18: Parts Replacement Form
90 days of your receipt, we are under no obligation to provide parts or replacement merchandise. For product issues, please contact Southern Enterprises at 800-633-5096 (toll-free) / 972-869-0111 (Dallas), Mon-Fri 9am – 4pm CST, or email us at service@seidal.com. Please ask for customer service representative for issues involving damages or replacement parts.
Need help?
Do you have a question about the HZ030500TX and is the answer not in the manual?
Questions and answers