
Related Manuals for Southern Enterprises Larissa HZ640900TX


Summary of Contents for Southern Enterprises Larissa HZ640900TX
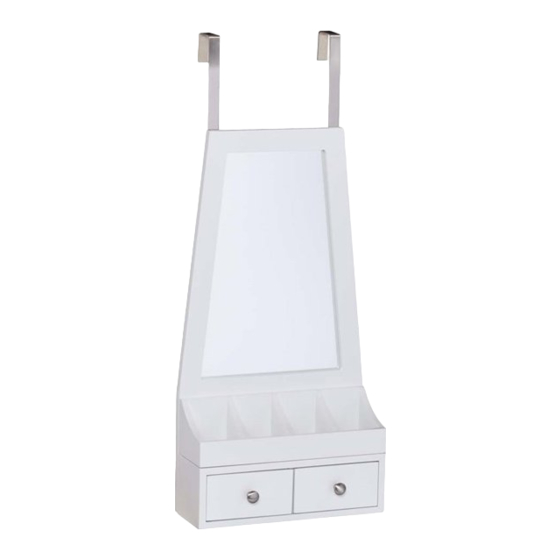
- Page 1 HZ640900TX Larissa Over The-Door Mirror / For assistance with assembly, contact: Organizer Southern Enterprises Inc. Customer Service 1-800-633-5096 Service@seidal.com Assembly Instructions www.seifurniturestore.com Page 1...
- Page 2 Larissa Over The-Door Mirror / Organizer Parts List Please check packaging for all parts and hardware before discarding. Unpack and lay parts on clean, padded surface like carpet or blanket. Check that you have all parts indicated. Call customer service if any hardware is missing.
- Page 3 Larissa Over The-Door Mirror / Organizer Assembly Instructions Attach Left Metal Hook (3) and Right Metal Hook (4) to Cabinet (1) using Bolts (A). Tighten Bolts (A) with Phillips screwdriver (not included). Figure 1 Hang the assembled unit over the door.
- Page 4 Attach Cubby (2) to Cabinet (1). Now your Larissa Over-The-Door Mirror / Organizer is ready to use on the door. Figure 3 If you feel that the Larissa Over-the-Door Mirror / Organizer’s height is not suitable for you, return to Step 1 and can adjust the position of the Left Metal Hook (3) and Right Metal Hook (4) to the desired height.
- Page 5 To mount this piece on the wall, follow the steps below. Take the assembled unit down from the door and take out Cubby (2) from Cabinet (1). Then unscrew Bolts (A) with Phillips screwdriver (not included). Figure 5 Mark 2 holes on the wall 9.75" apart.
- Page 6 Lift Cabinet (1) up and insert Screws (B) into keyhole hangers on back of Cabinet (1). Please use Level (D) on unit top to ensure product is level. Figure 7 Attach Cubby (2) to Cabinet (1). Ensure unit is firmly attached to wall.
- Page 7 90 days of your receipt, we are under no obligation to provide parts or replacement merchandise. Please contact Southern Enterprises at 800-633-5096 or in Dallas 972-869-0111/ 9am – 4pm Mon-Fri Central time if you have product issues or email us at service@seidal.com. Please ask for customer service representative for issues involving damages or replacement parts.
Need help?
Do you have a question about the Larissa HZ640900TX and is the answer not in the manual?
Questions and answers