Hay NEW ORDER Instruction Manual
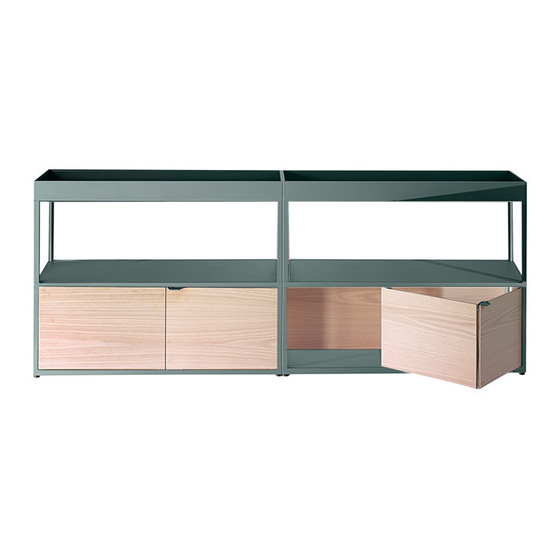
Shelving system
Hide thumbs
Also See for NEW ORDER:
- User manual ,
- Instruction manual (78 pages) ,
- Instruction manual (31 pages)
Advertisement
Quick Links
Advertisement

Subscribe to Our Youtube Channel
Related Manuals for Hay NEW ORDER


Summary of Contents for Hay NEW ORDER
- Page 1 – INSTRUCTION MANUAL – NEW ORDER SHELVING SYSTEM DESIGN BY STEFAN DIEZ...
- Page 3 – TABLE OF CONTENTS – SAFETY INSTRUCTIONS INSTRUCTIONS SHELVING SYSTEM 5-13 INSTRUCTIONS WALL SAFETY BRACKET 14-18 INSTRUCTIONS FLOOR SAFETY BRACKET 19-22 INSTRUCTIONS WALL BRACKET SHELF / TRAY 23-26 GUIDELINE WALL MOUNTING ACCESSORIES INSTRUCTIONS WHEELS 28-30 INSTRUCTIONS BENCHTOP 31-33 INSTRUCTIONS BOOK DIVIDER 34-35 CARE AND MAINTENANCE...
- Page 4 SAFETY INSTRUCTIONS FOR NEW ORDER – NEW ORDER SAFETY INSTRUCTIONS – MAX WEIGHT DRAWERS = 30 KG / PER LAYER SAFETY BRACKETS DO NOT CLIMB MAX BUILDING HEIGHT FREESTANDING FREESTANDING CONNECTED WITH FLOOR WITH WALL SAFETY BRACKETS SAFETY BRACKETS ALWAYS USE SAFETY BRACKETS...
- Page 5 – INSTRUCTION MANUAL – SHELVING SYSTEM...
- Page 6 – PARTS – 150 cm 100 cm 34 cm Top shelves 150 cm 100 cm 34 cm Middle shelves 150 cm 100 cm 34 cm Bottom shelves...
- Page 7 – PARTS – 200 cm 100 cm Top trays 200 cm 150 cm 100 cm Middle trays 200 cm 150 cm Bottom trays...
- Page 8 – PARTS – Single profile Double profile Corner profile Single profile Double profile Corner profile double height double height double height Allen key...
- Page 9 Before starting assembly, use a spirit level to ensure the bottom shelves are level. Adjust the feet if the bottom shelves need levelling by unscrewing the adjustable feet, either by hand or with the Allen key from the top.
- Page 10 Mount the profiles onto the bottom shelves ALIGNMENT Make sure that the fixed screws are aligned with the channel running along the shelf. AVOID GAPS Make sure that the profiles are pressed firmly against the shelf, leaving no gaps.
- Page 11 Add the middle shelves and the top shelves A. . Then tighten all fixed screws in both ends of the profiles with the Allen key J. to secure the construction. Then add the next layer of profiles. TIGHTEN ALL FIXED SCREWS Secure the construction by tightening all fixed screws in...
- Page 12 Add the top tray and the top shelves . Then tighten all fixed screws in both the top and bottom of the profiles. TIGHTEN ALL FIXED SCREWS Secure the construction by tightening all fixed screws in the second layer of profiles.
- Page 13 Make sure all fixed screws are tightened.
- Page 14 - ACCESSORIES - WALL SAFETY BRACKET...
- Page 15 – PARTS – Bracket holder Bracket Screw Torx key...
- Page 16 Always mount wall panels and wall brackets under the top shelf. Place the bracket holder in the channel running along the shelf and flip it down by following the steps 1, 2 and 3 below.
- Page 17 Screw the bracket into place using the screws and torx key . Do not tighten the screws completely. Mark the holes, and slide the bracket to the side and drill holes in the wall. Fasten the bracket with the screws.
- Page 18 Tighten the screws completely.
- Page 19 – INSTRUCTION MANUAL – FLOOR SAFETY BRACKET...
- Page 20 Make sure the shelf is level. Adjust the feet with the Allen key if needed. Slide the brackets in from the sides and mark their position. MARK THE POSITION Mark the position of the brackets on both sides.
- Page 21 Drill holes where marked. Position the brackets and screw them into place. Make sure the openings at the ends are facing the same direction. POSITION THE OPENINGS Make sure the openings in the two brackets are facing the same direction.
- Page 22 Slide the shelf into position.
- Page 23 – INSTRUCTION MANUAL – WALL BRACKET SHELF / TRAY...
- Page 24 Start by marking where the mounting holes for the brackets should be placed using the template below. Also use a spirit level to ensure the brackets are level. Use the appropriate screws and plugs according to the following screw guide for wall mounting. SHELF SIZES 100 cm 150 cm...
- Page 25 Remove the feet from the bottom shelf or tray. Mount the shelving system onto the brackets by pushing the shelving system up against the wall and letting it slide down, hooking onto the wall brackets both on the top and bottom.
- Page 26 To build the wall brackets vertically, mount the brackets in each section and column. PLEASE NOTE Use one set of wall brackets per shelf / tray layer.
- Page 27 - GUIDELINE - WALL MOUNTING WOODEN WALLS Use suitable wood screws. CONCRETE OR BRICK WALLS Use suitable screws and expansion plugs. DRYWALL OR CHIPBOARD Use suitable expanding bolts. PLEASE NOTE These are only intended as guidelines. The buyer is responsible for the wall’s bearing capacity and for ensuring the correct mounting method is used.
- Page 28 - ACCESSORIES - WHEELS...
- Page 29 Start unscrewing the feet of the bottom shelf or tray. Then mount the wheels with the braking wheels diagonally using the supplied wrench. PLEASE NOTE Retighten all wheels three to four weeks after assembly. 3-4 W...
- Page 30 Only mount wheels on shelves with two layers. PLEASE NOTE When two shelves are connected, wheels are mounted as shown.
- Page 31 – ACCESSORIES – BENCHTOP...
- Page 32 Peel off the paper, protecting the adhesive tape of the velcro and apply the cushion to the shelf. Make sure that it is aligned with all four corners.
- Page 33 PLEASE NOTE Apply sufficient pressure along the adhesive strips to fasten completely to the top shelf. PLEASE NOTE Only use the benchtop on the second layer.
- Page 34 – ACCESSORIES – BOOK DIVIDER...
- Page 35 Mount the book divider by tilting it 45 degrees and placing it in the channel running along the shelf. Then tilt the book divider downwards.
- Page 36 – CARE & MAINTENANCE – Our Care & Maintenance offers guidance for optimal maintenance of your HAY product. It includes advice and instructions on cleaning and caring for specific materials to prolong the life of your furniture. Please find our Care & Maintenance...
- Page 40 Havnen 1 8700 Horsens Denmark +45 4282 0282 / hay@hay.com ITEM NO. 850001 3/1 1/2021...
Need help?
Do you have a question about the NEW ORDER and is the answer not in the manual?
Questions and answers