Advertisement
Advertisement
Table of Contents

Related Manuals for Hay NEW ORDER Series


Summary of Contents for Hay NEW ORDER Series
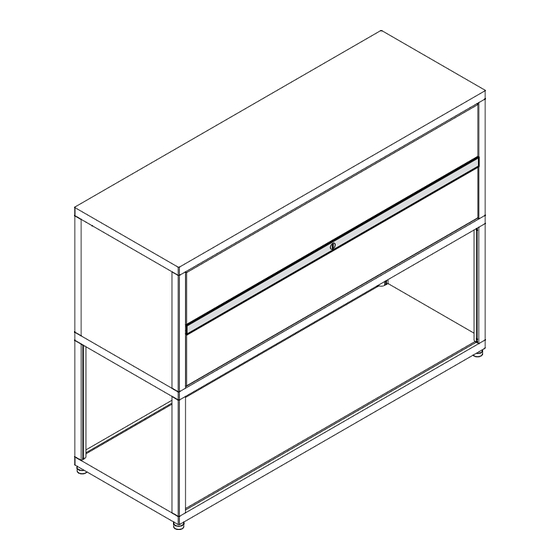
- Page 1 – INSTRUCTION MANUAL – NEW ORDER STEEL PARTS DESIGN BY STEFAN DIEZ...
-
Page 2: Table Of Contents
– TABLE OF CONTENTS – SAFETY INSTRUCTIONS INSTRUCTIONS STEEL PANELS 5-12 INSTRUCTIONS TEXTILE PANELS 13-20 INSTRUCTIONS ADJUSTABLE SHELVES 21-25 INSTRUCTIONS STEEL DOORS 26-35 INSTRUCTIONS DRAWERS 36-50 ACCESSORIES INSTRUCTIONS MIDDLE BAR / LOCK BAR 51-54 INSTRUCTIONS WALL SAFETY BRACKET 55-59 INSTRUCTIONS FLOOR SAFETY BRACKET 60-63 GUIDELINE WALL MOUNTING INSTRUCTIONS TRAY ADAPTER... -
Page 3: Safety Instructions
DO NOT CLIMB MAX BUILDING HEIGHT FREESTANDING FREESTANDING CONNECTED WITH FLOOR WITH WALL SAFETY BRACKETS SAFETY BRACKETS ALWAYS USE SAFETY BRACKETS IN THE FOLLOWING CASES Public places Trains, ships etc. Airports, lobbies, Environments medical centres etc. with children MORE INFO AT HAY.COM... - Page 4 – STEEL PANELS OVERVIEW – – STEEL PANELS OVERVIEW – Side panel 34 Back panel 100 Table panel 34 Table back panel 100 Side panel Back panel Table panel Table back panel double height 34 double height 100 double height 34 double height 100 Back panel 150 Table back panel 150...
- Page 5 – PARTS – Mount the back panel by inserting the bent edge into the channel running along the bottom of the top shelf. Hold the shelf at an angle when instering it and then slowly turn it, pushing the bottom edge of the panel into place. ...
- Page 6 Working inside the shelf, use the Allen key to push the small pins in the edges of the Insert the side panels from the long side of the shelf, and turn them into place. panel into the channel of both the bottom shelf and the corner profiles. 67-68...
- Page 7 – INSTRUCTIONS – Lock the panels in place by pushing the small pins into the channel of the corner profiles. TEXTILE PANELS...
- Page 8 – TEXTILE PANELS OVERVIEW – – PARTS – Textile side panel 34 Textile back panel 100 Textile panel clip Textile steel panel Textile side panel Textile back panel double height 34 double height 100 Textile back panel 150 ...
- Page 9 Insert the textile panel clips into the channel running along the bottom shelf. Make Mount the textile steel panel by inserting the bent edge into the channel running sure the round dot on the clip is facing outwards. along the bottom of the top shelf.
- Page 10 Push the round dot on the textile clip through the hole in the panel . Then slide Use the Allen key to push the small pins in the edges of the panel into the channel the clip to the side, locking it in place. of the corner profiles.
- Page 11 – INSTRUCTIONS – Remove the protective film of the adhesive strips on the back of the textile insert Make sure not to separate the velcro parts. Then mount the textile insert onto the steel ADJUSTABLE SHELVES panel by pushing it into place.
- Page 12 – PARTS – Mount both of the adjustable side panels according to the instructions on pages 13-14. Mount the panels according to the direction of the mounting label. 13 14 ADJ side panel / ADJ side panel for table ...
- Page 13 Insert the shelf pins (4 per/shelf) in the grooves inside the side panels at the desired Insert each adjustable shelf upright with the bottom facing outwards and angling it into one of the inside corners, as shown in the illustration below. height.
-
Page 14: Instructions Steel Doors
– INSTRUCTIONS – – STEEL DOORS OVERVIEW – STEEL DOORS Steel door 100 Steel door with lock 100 Steel door left 100 Steel door left with lock 100 Steel door Steel door double height 100 double height with lock 100 Steel door left Steel door left double height 100... - Page 15 – PARTS – Insert the connector clips in the channel running along the shelf. Both on the top and underneath. Connector clip Allen key Steel door Lock cylinder (doors with lock only) (doors with lock only)
- Page 16 Insert the fitting on the end of the steel door into the channel on the profile. Start with Rotate the end fitting on the steel door as shown in the illustration below. the door at an angle before rotating it into place.
- Page 17 Push the other end of the door into place by clicking the metal fitting To lock the door in place, use the Allen key to bend the small tap into the channels, into the connector clips and supporting it with your hand. both at the top and bottom.
- Page 18 If you experience problems with fully closing your double height door, Mounting lock cylinder (doors with lock only) adjust the fixed screw on the inside bottom of the door. Insert the matching key in the lock cylinder Make sure the cylinder is turned so that the end pin is facing downwards. ...
-
Page 19: Instructions Drawers
– INSTRUCTIONS – – DRAWERS OVERVIEW – DRAWERS Drawer 34 Drawer double height 34 Drawer 100 Drawer double height 100... - Page 20 – PARTS – Start by removing all of the yellow lock clips that are mounted on the top of each rail on the mounting panels . The clips can then be discarded, sorted as hard plastic. REMOVE ALL LOCK CLIPS Remove by pressing the tap inwards, then pull up.
- Page 21 Start with the right side mounting panel (sides are marked on the label). Once the panels are mounted, pull out the rails and mount the stabilisation connector Assemble the panel by sliding it into the groove in the side profiles as illustrated on each side.
- Page 22 Mount the stabilisation bar between the stabilisation connectors . Then mount Test the drawers by pushing on the front to open. Check that the drawers are are flush the drawer on top of the rails. Grab the stabilisation bar from below to guide the and placed symmetrically.
- Page 23 ADJUSTING DRAWER BACKWARDS/FORWARDS Turn the wheel to adjust the drawer forwards or backwards. (there is one on each side of the drawer) DRAWERS ADJUSTMENT...
- Page 24 REMOVING DRAWER ADJUSTING HEIGHT Push simultaneously on both sides to remove the drawer. Move the slider back or forth to adjust the height.
- Page 25 ADJUSTING DRAWER SIDEWAYS IN FRONT ADJUSTING DRAWER SIDEWAYS IN FRONT Turn the wheel to adjust the back of the drawer sideways. Turn the wheel to adjust the drawer sideways.
-
Page 26: Accessories
- ACCESSORIES - TILTING DRAWER Turn the levels to adjust the tilting of the front. MIDDLE BAR / LOCK BAR... - Page 27 – PARTS – Remove the drawers as instructed in the “DRAWERS ADJUSTMENT” section. Then insert the lock / middle bar straight into the guide grooves that are placed on each side of the mounting panels. Adjust until the bar is flush, before locking the bar ...
- Page 28 - ACCESSORIES - Mounting lock cylinder (lock bar only). WALL SAFETY BRACKET Insert the matching key in the lock cylinder j. . Make sure the cylinder is turned so that the end pin is facing upwards. Insert the cylinder in the cylinder housing on the bar , angle the lock cylinder slightly downwards to get the end pin in.
- Page 29 – PARTS – Always mount wall panels and wall brackets under the top shelf. Place the bracket holder in the channel running along the shelf and flip it down by following the steps 1, 2 and 3 below. ...
- Page 30 Screw the bracket into place using the screws and torx key . Do not tighten Tighten the screws completely. the screws completely. Mark the holes, and slide the bracket to the side and drill holes in the wall.
- Page 31 – INSTRUCTION MANUAL – Make sure the shelf is level. Adjust the feet with the Allen key if needed. FLOOR SAFETY BRACKET Slide the brackets in from the sides and mark their position. MARK THE POSITION Mark the position of the brackets on both sides.
- Page 32 Drill holes where marked. Position the brackets and screw them into place. Slide the shelf into position. Make sure the openings at the ends are facing the same direction. POSITION THE OPENINGS Make sure the openings in the two brackets are facing the same direction.
- Page 33 - GUIDELINE - - ACCESSORIES - WALL MOUNTING TRAY ADAPTER WOOD WALLS Use suitable wood screws. CONCRETE OR BRICK WALLS Use suitable screws and expansion plugs. DRYWALL OR CHIPBOARD Use suitable expanding bolts. NOTICE These are only intended as guidelines. The buyer is responsible for the wall’s bearing capacity and for ensuring the correct mounting method is used.
- Page 34 - ACCESSORIES - Use the tray adapter when mounting drawers in a system with trays. The adapter is easily mounted onto the groove inside the top or bottom of the tray. TRAY ADAPTER FOR BACK PANEL BOTTOM TRAY Place the tray adapter from the top as illustrated on the right.
-
Page 35: Care And Maintenance
The adapter is easily mounted onto the groove from inside, as Our Care & Maintenance offers guidance for optimal shown in the illustration below. maintenance of your HAY product. It includes advice and instructions on cleaning and caring for specific materials to prolong the life of your furniture. - Page 37 Havnen 3 8700 Horsens Denmark +45 3164 6000 / hay@hay.com 13/02/2024...
Need help?
Do you have a question about the NEW ORDER Series and is the answer not in the manual?
Questions and answers