Hay NEW ORDER Instruction Manual
Table
Hide thumbs
Also See for NEW ORDER:
- User manual ,
- Instruction manual (66 pages) ,
- Instruction manual (13 pages)
Table of Contents
Advertisement
Quick Links
Advertisement
Table of Contents

Related Manuals for Hay NEW ORDER


Summary of Contents for Hay NEW ORDER
- Page 1 I NST RUCTION M A N UA L N E W O R D E R TA B L E B y S t e f a n D i e z...
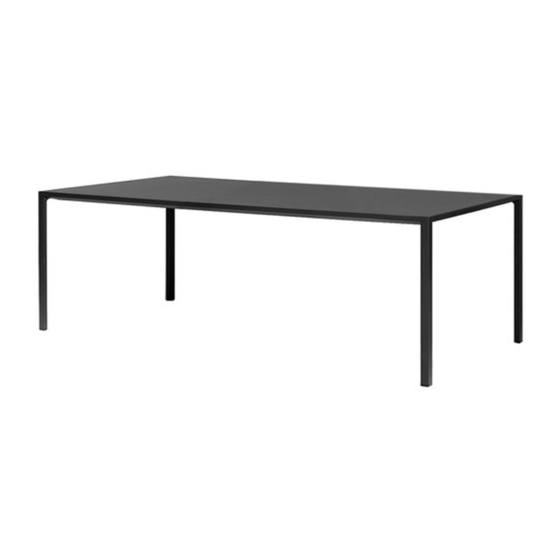
- Page 3 New Order Table works as a free standing table for the dining room, office or conference room but the functionality of the...
-
Page 4: Care And Maintenance
C A R E A N D M A I N T ENA NCE CAUTION With a little care you can prolong the life of your • Tighten up the screws after one to two months’ furniture. Follow the instructions for the materials of use and whenever required. - Page 5 C A R E A N D M A I N T ENA NCE POWDER COATED ALUMINIUM LINOLEUM • Wipe with a clean cloth wrung in water or in a • Wipe with a clean cloth wrung in water or in a solu- solution of water and a neutral detergent or soap tion of water and a neutral detergent.
- Page 7 CON T EN TS PAGE 8-17 Whitout support bar PAGE 18-31 With 1 support bar PAGE 32-45 With 2 support bars PAGE 46-60 With 3 support bars...
- Page 9 INSTRUCTION M A NUA L Without support bar...
- Page 10 PA RTS Frame profile long Short frame profile Leg x 4 Leg screw x 4 Frame screw x 48 Allen key Torx key...
- Page 11 PA RTS Tabletop x 1 Tabletop clips x 10 Tableclips screw x 10 Corner knot x 4...
- Page 12 MOUNTING CORNER KNOTS Insert the two corner knots in the short frame profile. Make sure the corner knots are pushed all the way in.
- Page 13 MOUNTING FRAME PROFILES Slide the frame profiles firmly onto the corner knots.
- Page 14 ALIGNING FRAME PROFILE In the other end of the table frame align and push the short frame profile into the long frame profile.
-
Page 15: Checking The Connection
MOUNTING THE FRAME PROFILE When mounting the frame profiles to the corner knot it is important that the two frame profiles align without gaps or unevenness. CHECKING THE CONNECTION Check the corners of the frame profiles. Avoid any unevenness or gaps. If this occurs, placing the tabletop in the frame will become unnecessarily challenging... - Page 16 SECURING THE FRAME PROFILES Use the supplied torx key to fixate each corner using 8 screws. x 32 FRAME SCREWS Locate the bag of screws named Frame Screws...
-
Page 17: Mounting The Legs
MOUNTING THE LEGS Make sure that the legs are pressed firmly against and onto the corner knots leaving no gaps. Any gaps can lead to difficulties when inserting the leg screws. - Page 18 MOUNTING THE LEGS Firmly press all 4 legs onto the corner knots. Insert the leg screws in the holes in the frame profile and secure the legs by screwing in the leg screws using the supplied allen key. LEG SCREWS Locate the bag of screws named Leg Screws INSERTING THE TABLETOP...
- Page 19 PUSHING THE MIDDLE Push the center of the tabletop gently upwards while guiding the free side of the tabletop into the frame. NUDGING Work your way around the tabletop’s edge pushing down to ensure that it rests well in the frame profile.
- Page 20 1 1. TABLETOP CLIP Place the 10 tabletop clips on the inside of the frame profile. PLEASE NOTE If a crossbar interfers with the placement of the tabletop clips, please place the item as close to the crossbar as possible. TABLETOP CLIP Place the clip on the inside of the frame profile.
- Page 21 TABLETOP CLIP Fix the clip to the tabletop using the tabletop screws.
- Page 23 INSTRUCTION M A NUA L With 1 support bar...
- Page 24 PA RTS Corner knot x 4 Connector x 2 Support bar connector x 2 Frame profile long x 2 Support bar x 1 Short frame profile x 2 Leg screw x 4 Frame screw x 48 Support bar screw x 8...
- Page 25 PA RTS Leg x 4 Tabletop clips x 10 Tabletop x 1 Tableclips screw x 10 Allen key Allen key Torx key...
- Page 26 MOUNTING CONNECTOR Insert one connector in the short frame profile. Repeat by inserting one connector in the other short frame profile. MOUNTING SUPPORT BAR CONNECTOR Locate the mark on the short frame profile.
- Page 27 ALIGNING SUPPORT BAR CONNECTOR Locate the center mark on the frame profile. Align the support bar connector so that the mark on it aligns with the mark on the frame profile. MOUNTING SUPPORT BAR CONNECTOR Using the supplied allen key screw in the two support bar screws mounting the support bar connector to the connector.
- Page 28 MOUNTING CORNER KNOTS Insert the two corner knots in the short frame profile. Make sure the corner knots are pushed all the way in.
- Page 29 MOUNTING SUPPORT BAR AND FRAME PROFILES Firmly push the support bar onto the support bar connector and slide the frame profiles firmly onto the corner knots.
- Page 30 ALIGNING SUPPORT BAR CONNECTOR SIDE In the other end of the table frame align and push the short frame profile into the long frame profile and support bar.
- Page 31 SECURING SUPPORT BAR Using the supplied allen key fixate the support bar to the support bar connector. SUPPORT BAR SCREWS Locate the bag of screws named Support Bar Screws...
-
Page 32: Checking The Connection
MOUNTING THE FRAME PROFILE When mounting the frame profiles to the corner knot it is important that the two frame profiles align without gaps or unevenness. CHECKING THE CONNECTION Check the corners of the frame profiles. Avoid any unevenness or gaps. If this occurs, placing the tabletop in the frame will become unnecessarily challenging. - Page 33 SECURING THE FRAME PROFILES Use the supplied torx key to fixate each corner using 8 screws. x 32 FRAME SCREWS Locate the bag of screws named Frame Screws...
-
Page 34: Mounting The Legs
1 1. MOUNTING THE LEGS Make sure that the legs are pressed firmly against and onto the corner knots leaving no gaps. Any gaps can lead to difficulties when inserting the leg screws. - Page 35 MOUNTING THE LEGS Firmly press all 4 legs onto the corner knots. Insert the leg screws in the holes in the frame profile and secure the legs by screwing in the leg screws using the supplied allen key. LEG SCREWS Locate the bag of screws named Leg Screws INSERTING THE TABLETOP...
- Page 36 PUSHING THE MIDDLE Push the center of the tabletop gently upwards while guiding the free side of the tabletop into the frame. NUDGING Work your way around the tabletop’s edge pushing down to ensure that it rests well in the frame profile.
- Page 37 TABLETOP CLIP Place the 10 tabletop clips on the inside of the frame profile. PLEASE NOTE If a crossbar interfers with the placement of the tabletop clips, please place the item as close to the crossbar as possible. TABLETOP CLIP Place the clip on the inside of the frame profile.
- Page 38 TABLETOP CLIP Fix the clip to the tabletop using the tabletop screws.
- Page 41 INSTRUCTION M A NUA L With 2 support bar...
- Page 42 PA RTS Corner knot x 4 Connector x 2 Support bar connector x 4 Frame profile long x 2 Support bar x 2 Short frame profile x 2 Leg screw x 4 Frame screw x 48 Support bar screw x 16...
- Page 43 PA RTS Leg x 4 Tabletop clips x 10 Tabletop x 1 Tableclips screw x 10 Allen key Allen key Torx key...
-
Page 44: Mounting Connectors
MOUNTING CONNECTORS Insert two connectors in the short frame profile. Repeat by inserting two connectors in the other short frame profile. MOUNTING SUPPORT BAR CONNECTORS Locate the marks on the short frame profile. - Page 45 ALIGNING SUPPORT BAR CONNECTOR Locate the outer mark on the short frame profile. Align the support bar connector so that the mark on it aligns with the mark on the frame profile. Repeat on the other short frame profile. MOUNTING SUPPORT BAR CONNECTORS Using the supplied allen key screw in the two support bar screws mounting the support bar connector to the connector.
- Page 46 MOUNTING CORNER KNOTS Insert the two corner knots in the short frame profile. Make sure the corner knots are pushed all the way in.
- Page 47 MOUNTING SUPPORT BARS AND FRAME PROFILES Firmly push the support bars onto the support bar connectors. Slide the frame profiles firmly onto the corner knots.
- Page 48 ALIGNING SUPPORT BAR CONNECTOR SIDE In the other end of the table frame align and push the short frame profile into the long frame profile and support bars.
- Page 49 SECURING SUPPORT BARS Using the supplied allen key fixate the support bar to the support bar connector. SUPPORT BAR SCREWS Locate the bag of screws named Support Bar Screws.
-
Page 50: Checking The Connection
MOUNTING THE FRAME PROFILE When mounting the frame profiles to the corner knot it is important that the two frame profiles align without gaps or unevenness. CHECKING THE CONNECTION Check the corners of the frame profiles. Avoid any unevenness or gaps. If this occurs, placing the tabletop in the frame will become unnecessarily challenging. - Page 51 SECURING THE FRAME PROFILES Use the supplied torx key to fixate each corner using 8 screws. x 32 FRAME SCREWS Locate the bag of screws named Frame Screws...
-
Page 52: Mounting The Legs
1 1. MOUNTING THE LEGS Make sure that the legs are pressed firmly against and onto the corner knots leaving no gaps. Any gaps can lead to difficulties when inserting the leg screws. - Page 53 MOUNTING THE LEGS Firmly press all 4 legs onto the corner knots. Insert the leg screws in the holes in the frame profile and secure the legs by screwing in the leg screws using the supplied allen key. LEG SCREWS Locate the bag of screws named Leg Screws INSERTING THE TABLETOP...
- Page 54 PUSHING THE MIDDLE Push the center of the tabletop gently upwards while guiding the free side of the tabletop into the frame. NUDGING Work your way around the tabletop’s edge pushing down to ensure that it rests well in the frame profile.
- Page 55 TABLETOP CLIP Place the 10 tabletop clips on the inside of the frame profile. PLEASE NOTE If a crossbar interfers with the placement of the tabletop clips, please place the item as close to the crossbar as possible. TABLETOP CLIP Place the clip on the inside of the frame profile.
- Page 56 TABLETOP CLIP Fix the clip to the tabletop using the tabletop screws.
- Page 59 INSTRUCTION M A NUA L With 3 support bar...
- Page 60 PA RTS Corner knot x 4 Connector x 6 Support bar connector x 2 Extra support bar x 2 Frame profile long x 2 Support bar x 1 Frame screw x 48 Support bar screw x 8 Extra support bar screw x 16...
- Page 61 PA RTS Leg x 4 Short frame profile x 2 Allen key Allen key Torx key Extra support bar Leg screw x 4 connector x 4...
- Page 62 PA RTS Tabletop x 1 Tabletop clips x 10 Tableclips screw x 10...
- Page 63 MOUNTING CONNECTORS Insert three connectors in the short frame profile. Repeat by inserting three connectors in the other short frame profile. MOUNTING SUPPORT BAR CONNECTORS Locate the marks on the short frame profile.
- Page 64 ALIGNING SUPPORT BAR CONNECTOR Locate the center mark on the frame profile. Align the support bar connector so that the mark on it aligns with the mark on the frame profile. ALIGNING EXTRA SUPPORT BAR CONNECTOR Locate the outer mark on the frame profile. Align the extra support bar connector so that the mark on it aligns with the mark on the frame profile.
- Page 65 MOUNTING SUPPORT BAR CONNECTOR Using the supplied allen key screw in the two support bar screws mounting the support bar connector to the connector. SUPPORT BAR SCREWS Locate the bag of screws named Support Bar Screws MOUNTING EXTRA SUPPORT BAR CONNECTORS Using the supplied allen key screw in the two extra support bar screws mounting the extra support bar connector to the connector.
- Page 66 MOUNTING CORNER KNOTS Insert the two corner knots in the short frame profile. Make sure the corner knots are pushed all the way in.
- Page 67 MOUNTING SUPPORT BAR, EXTRA SUPPORT BARS AND FRAME PROFILES Firmly push the support bar and the extra support bars onto the support bar connector and the extra support bar connectors. Slide the frame profiles firmly onto the corner knots.
- Page 68 ALIGNING SUPPORT BAR CONNECTOR SIDE In the other end of the table frame align and push the short frame profile into the long frame profile, support bar and extra support bar.
- Page 69 SECURING SUPPORT BAR Using the supplied allen key fixate the support bar to the support bar connector. SUPPORT BAR SCREWS Locate the bag of screws named Support Bar Screws 1 1. SECURING EXTRA SUPPORT BAR Using the supplied allen key fixate the extra support bars to the extra support bar connectors.
- Page 70 MOUNTING THE FRAME PROFILE When mounting the frame profiles to the corner knot it is important that the two frame profiles align without gaps or unevenness. CHECKING THE CONNECTION Check the corners of the frame profiles. Avoid any unevenness or gaps. If this occurs, placing the tabletop in the frame will become unnecessarily challenging.
- Page 71 SECURING THE FRAME PROFILES Use the supplied torx key to fixate each corner using 8 screws. x 32 FRAME SCREWS Locate the bag of screws named Frame Screws...
-
Page 72: Mounting The Legs
MOUNTING THE LEGS Make sure that the legs are pressed firmly against and onto the corner knots leaving no gaps. Any gaps can lead to difficulties when inserting the leg screws. - Page 73 MOUNTING THE LEGS Firmly press all 4 legs onto the corner knots. Insert the leg screws in the holes in the frame profile and secure the legs by screwing in the leg screws using the supplied allen key. LEG SCREWS Locate the bag of screws named Leg Screws INSERTING THE TABLETOP...
- Page 74 PUSHING THE MIDDLE Push the center of the tabletop gently upwards while guiding the free side of the tabletop into the frame. NUDGING Work your way around the tabletop’s edge pushing down to ensure that it rests well in the frame profile.
- Page 75 TABLETOP CLIP Place the 10 tabletop clips on the inside of the frame profile. PLEASE NOTE If a crossbar interfers with the placement of the tabletop clips, please place the item as close to the crossbar as possible. TABLETOP CLIP Place the clip on the inside of the frame profile.
- Page 76 TABLETOP CLIP Fix the clip to the tabletop using the tabletop screws.
- Page 78 Havnen 1 8700 Horsens Denmark +45 4282 0282 / hay@hay.dk ITEM NO. 706325 5 710441 20824 2 09082017...
Need help?
Do you have a question about the NEW ORDER and is the answer not in the manual?
Questions and answers