
Subscribe to Our Youtube Channel
Related Manuals for Magnetrol Kotron Sentinel II 804 Series


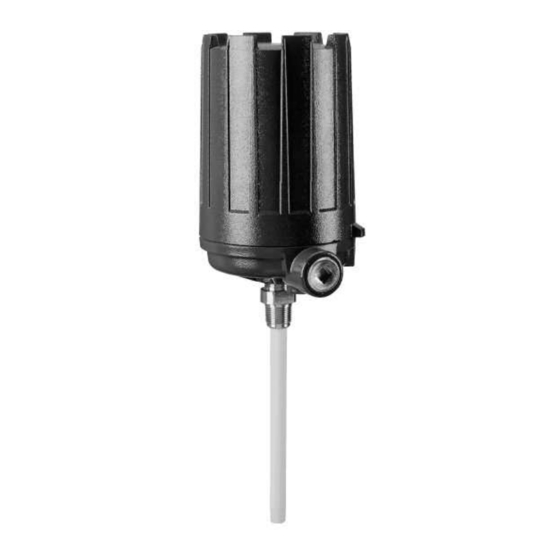
Summary of Contents for Magnetrol Kotron Sentinel II 804 Series
- Page 1 Kotron ® Sentinel II Model 804 RF Level Transmitter Installation and Operating Manual Capacitance Level Measurement...
- Page 2 Magnetrol/STI will repair or replace the control at no cost to materials. In this manual, a caution box indicates a the purchaser (or owner) other than transportation.
-
Page 3: Table Of Contents
Kotron Model 804 Sentinel II RF Level Transmitter Table of Contents 1.0 Description 2.5.4 QuickCal............12 1.1 Principle of Operation ..........1 2.5.5 General Programming Menus.......13 1.2 Unpacking ..............1 2.5.6 Measured Value Menu........14 1.3 Connecting Cable .............2 2.5.7 System Configuration Menu ......14 2.0 Installation 2.5.8 I/O Configuration Menu ......16 2.1 Installation Location ..........2... -
Page 4: Description
Description The Sentinel II is a unique, powerful level transmitter. The leading-edge microprocessor-based circuitry has non-volatile memory that requires no battery backup. To simplify troubleshooting, powerful diagnostics not only check all aspects of the system, but will actually indicate the faulty section of the system. MagneCal™ offers the user the greatest improvement in RF Capacitance—one small level change (2% of span) is needed to calibrate. -
Page 5: Connecting Cable
Remote mount connecting cable should be shielded, twisted pair, 22-gauge stranded conductors and may be ordered as Magnetrol part number 009-7146-001. Cable length in feet must be specified at time of order; 2500 feet (760 m) maximum; 800 feet (240 m) maximum for intrin- sically safe models. -
Page 6: Mounting
Tanks/Silos with Non-Conductive Materials of Construction With plastic, concrete, wood, or any other non-conductive walled vessel, the reference electrode (mentioned in the Principle of Operation section on page 1) needs clarifica- tion. Most commonly, this electrode will be in the form of a concentric ground tube (for example, a stilling well). -
Page 7: Integral Mount With Flexible Probe
3. Screw the amplifier housing onto the probe. Refer to Figure 2. 4. Screw housing onto the probe unit until hand tight. Housing may be wrench tightened to align conduit connection with conduit. 5. Remove housing cover. Probe wire (white) NOTE: Refer to Electrostatic Discharge Handling Procedure on page 9. -
Page 8: Remote Mount With Standard Rigid Probe
NOTE: Do not allow the probe to fall in the tank while performing steps 7 through 18. 7. Loosen both socket head clamp screws. 8. Pull clamp and Teflon retaining bushing off probe. ® 9. While holding the probe cable, loosen upper probe nut. 10. -
Page 9: Preamplifier
1. Remove amplifier from mounting bracket. 2. Install bracket in a location that is isolated from tempera- tures below -40° F (-40° C) and above +160° F (+70° C) and vibration which could cause mechanical damage. The unit may be mounted up to 2500 feet (760 m) from the probe assembly. -
Page 10: Remote Mount With Flexible Probe
2.2.5 Remote Mount with Flexible Probe 2.2.5.1 Main amplifier Remote amplifier assemblies are normally shipped from the factory assembled into an “L” mounting bracket. To install amplifier assembly, proceed as follows. Refer to Figure 5. 1. Remove amplifier from mounting bracket. 2. - Page 11 2. Attach weight, if used, to the probe end. 3. Insert probe end through tank mounting bushing and feed cable into the tank. Do not allow probe insulation to become damaged by scraping against the bushing. Caution: Probe cable must not be in contact with anything metallic in its final installation position.
-
Page 12: Electrostatic Discharge (Esd) Handling Procedure
Electrostatic Discharge (ESD) Handling Procedure Magnetrol/STIs electronic instruments are manufactured to the highest quality standards. These instruments utilize electronic components which may be damaged by static electricity present in most work environments. The follow- ing steps are recommended to reduce the risk of compo- nent failure due to electrostatic discharge: 1. -
Page 13: Wiring Operation
2.4.2 Wiring Operation 2.4.2.1 4–20 mA output wiring Connect the positive wire to the + terminal; connect the negative wire Relay 3 Relay 1 (TB5) (TB2) to the – terminal. Relay 4 Relay 2 (TB3) (TB4) 2.4.2.2 Active or passive selection The 4–20 mA output can be config- ured for active or passive operation. -
Page 14: Manual Self-Test
2.4.2.4 Manual self-test A manual self-test can be performed on the 804 electron- ics. A remote contact should be wired across terminals 1 and 2 with terminal 3 used for shield if needed. Performing a manual self-test will cause the 804 to go into alarm mode. -
Page 15: Quickcal
QuickCal menu. Before beginning, ensure that level in the tank is at the low level (4 mA). Begin at the mode: Current Menu Display Comments Location Magnetrol Intl None This is RUN mode. 0.0 level units WARNING QuickCal SETTINGS WILL BE LOST... -
Page 16: General Programming Menus
2.5.5 General Programming Menus Following is an outline of the general menu changes will affect only the models with 4–20 mA structure used in the Sentinel II. Even though all output. Use the UP and DOWN arrow keys to features are shown, certain features will only scroll through any portion of the menu;... -
Page 17: Measured Value Menu
Sentinel II (refer to page 15 for the overall menu layout). Current Menu Location Display Action Comments Magnetrol Int’l Normal operation This is the RUN MODE x.x level units Measured Values Run/Measured Values Access “Measured Values” menu >... - Page 18 Probe Calibrate > to select Probe Calibrate Run System Config Press DEL twice to return to the RUN mode. > to select Magnetrol Int’l Normal operation The RUN mode. x.x level units 50-604 Kotron Model 804 Sentinel II RF Level Transmitter...
-
Page 19: I/O Configuration Menu
Follow the step-by-step procedure for setting the discrete output. It is assumed that you are starting from the RUN mode. Current Menu Location Display Action Comments Magnetrol Int’l Normal operation This is the RUN mode. x.x level units I/O Config Use the arrow keys to scroll down until the... -
Page 20: Setting 4-20 Ma And Communications Output
Following is a step-by-step procedure for setting the 4–20 mA and communications output. It is assumed that you are beginning at the RUN mode. Current Menu Location Display Action Comments Magnetrol Int’l Normal operation This is the RUN mode. x.x level units I/O Config Press the down arrow until the display reads... -
Page 21: Advanced Configuration Menu
Follow this step-by-step procedure to use this menu. It is assumed that you are starting from the RUN mode. Current Menu Location Display Action Comments Magnetrol Int’l Normal operation This is the RUN mode. x.x level units Adv Config Use the arrow keys to scroll down until the... -
Page 22: Diagnostics Menu
Follow this step-by-step procedure to use this menu. It is assumed that you are starting from the RUN mode. Current Menu Location Display Action Comments Magnetrol Int’l Normal operation This is the RUN mode. x.x level units Diagnostics Press the arrow keys to scroll down until the... -
Page 23: Reference Information
Reference Information Troubleshooting Caution: In hazardous areas, do not remove housing until power is disconnected and atmosphere is determined to be safe.The Sentinel II contains a comprehensive diagnostics system that can assist in locating the cause of a specific fault. This system also allows the user to test the 4–20 mA and discrete (relay) outputs to ensure satisfactory opera- tion of the system. -
Page 24: View Version
3.1.4 View Version # The View Version # menu enables the user to verify the version number of the software of the unit. 3.1.5 Factory Presets The Factory Presets menu allows setting of special factory functions. This menu should only be used with guidance from factory personnel. -
Page 25: Agency Approvals
Agency Approvals AGENCY MODEL APPROVED APPROVAL CATEGORY APPROVAL CLASSES 804-XXXX-23X Explosion proof Class I, Div. 1; Groups B, C, & D 804-XXXX-33X Insulated probes only Class II, Div. 1; Groups E, F, & G Class III, NEMA 4X IP66 Integral units Class I, Div. -
Page 26: Agency Specifications - Intrinsically Safe Installation (Fm/Csa)
Class II, Div. 1, Groups E, F, and G; Dust ignition proof for: Class II, Div. 1, Groups E, F, and G; Class III, NEMA 4X IP65. Class III, NEMA 4X IP65 41-5XXX-XXX Series Remote Probe Controller/Transmitter Magnetrol Models Black 804-XXXX-53X 804-XXXX-63X Intrinsic safety Black ground... -
Page 27: Specifications
Specifications 3.3.1 Electrical Power supply 120 VAC, 50/60 Hz (+10%, -15%) 240 VAC, 50/60 Hz (+10%, -15%) 24 VDC, (±10%) Power consumption 15 VA nominal Supply voltage effect Less than 1 pF over full range Ambient temperature range -40° to +160° F (-40° to +71° C) Humidity 99% non-condensing (electronics) Accuracy... -
Page 28: Dimensional
Specifications 3.3.2 Dimensional inches (mm) Rotation clearance Rotation clearance plugged plugged .50 (13) Optional Typical mounting flange Optional mounting .50 (13) flange I.L. Typical .1250 (3) .1875 (5) .2500 (6) 2.95 (75) .375 (10) .50 (13) Figure 9 .625 (16) Integral Mount with Flexible Probe Figure 10 Integral Mount with Standard Rigid Probe... - Page 29 " NPT Standard process connection is (remote probe housing) ⁄ " NPT. Consult probe Single conduit brochure (Magnetrol 50-125/STI 95-133) for flange and NEMA 4X/7/9 other probe connections. 1" NPT Ž Probe/amplifier connecting cable to be shielded twisted Dual conduit pair 22-gauge stranded conductors;...
-
Page 30: Replacement Parts
Replacement Parts Item Description Part Number Cover 004-9174-007 Base 004-9188-004 O-Ring 012-2201-253 Daughterboard Integral Z30-2213-001 Integral I.S. Z30-2213-002 Remote Z30-2213-003 Remote I.S. Z30-2213-004 Logic board 4–20 Z30-2211-001 RS-485 Z30-2211-002 4–20/RS-485 Z30-2211-003 Power supply board 120 VAC 0 relays Z30-2212-003 2 relays Z30-2212-002 4 relays Z30-2212-001... -
Page 31: Model Numbers
Model Numbers 3.5.1 Transmitter Kotron Sentinel II RF Level Transmitter BASIC MODEL NUMBER: ELECTRONIC HOUSING: NEMA 4X7/9 aluminum die-cast, 1" NPT NEMA 4X7/9 aluminum die-cast, 1" NPT w/316 SS, CCO housing (remote only) INPUT POWER: 120 VAC 240 VAC 24 VDC ANALOG OUTPUT/COMMUNICATIONS: 4–20 mA 4–20 mA w/RS-485 (Modbus) - Page 32 No claims for misapplication, labor, direct or consequen- tial damage will be allowed. 5300 Belmont Road • Downers Grove, Illinois 60515-4499 • 630-969-4000 • Fax 630-969-9489 • www.magnetrol.com 145 Jardin Drive, Units 1 & 2 • Concord, Ontario Canada L4K 1X7 • 905-738-9600 • Fax 905-738-1306 Heikensstraat 6 •...
Need help?
Do you have a question about the Kotron Sentinel II 804 Series and is the answer not in the manual?
Questions and answers