
Related Manuals for GreenWorks Pro MO60L03


Summary of Contents for GreenWorks Pro MO60L03
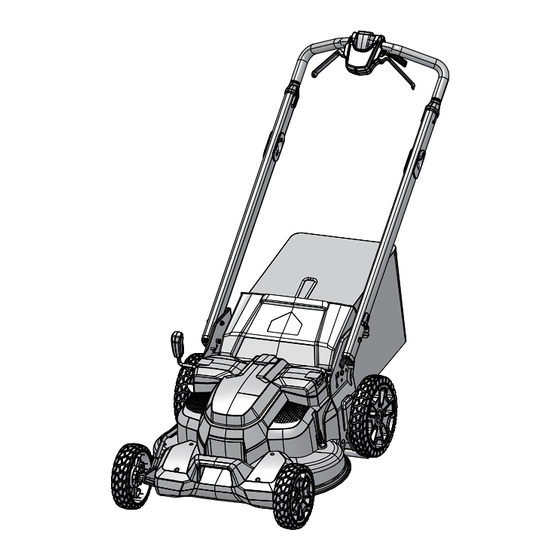
- Page 1 MO60L03 LAWN MOWER OPERATOR MANUAL CORTACÉSPED MANUAL DEL OPERADOR www.greenworkstools.com LMC406...
-
Page 3: Table Of Contents
English Set the cutting height........10 Description......... 4 Install the battery pack........10 Purpose.............. 4 Remove the battery pack......... 10 Overview............4 Operation......... 10 Read all instructions......4 Start the machine..........11 Children and Bystanders........4 Stop the machine..........11 General Operation..........4 Operate the self-propel drive system....11 Slope Operation.......... -
Page 4: Description
English DESCRIPTION READ ALL INSTRUCTIONS DANGER PURPOSE This machine was built to be operated according to the rules This machine is used for domestic lawn mowing. The cutting for safe operation included in this manual. As with any type blade must be approximately parallel to the ground. All four of power equipment, carelessness or error on the part of the wheels must touch the ground while you mow. - Page 5 English handle immediately and the blade will stop rotating • Release the bail switch to disengage the motor. within three seconds. • Remove the battery. • Thoroughly inspect the area where the equipment is to be • Inspect for damage. used and remove all stones, sticks, wires, bones, and •...
-
Page 6: Slope Operation
English • Do not dispose of the battery in a fire. The cells could • Keep all nuts, bolts, and screws tight in order to ensure catch fire or explode. Check with local codes and waste the equipment is in safe working condition. management for proper disposal instructions. -
Page 7: Symbols On The Product
English Item Temperature Symbol Name Explanation Battery storage temperature 1 year: 32°F (0°C) - 73°F Looking Be- Look down and behind first range (23°C) hind While to avoid tripping when pull- Backing ing back. 3 months: 32°F (0°C) - 113°F (45°C) To reduce the risk of injury, keep hands and feet away 1 month: 32°F (0°C) - 140°F... -
Page 8: Environmentally Safe Battery Disposal
English ENVIRONMENTALLY SAFE PROPOSITION 65 BATTERY DISPOSAL WARNING This product contains a chemical known to the state of California to cause cancer, birth defects or other reproductive harm. Some dust created by power sanding, sawing, grinding, drilling, and other construction activities contains chemicals known to cause cancer, birth defects or other reproductive harm. -
Page 9: Place The Mower Upright In Vertical Position
English PLACE THE MOWER UPRIGHT IN UNFOLD AND ADJUST THE VERTICAL POSITION HANDLES 1. Pull up on the handle holes (11) to release the handles. 2. Fold the handles up until the handle pins (12) lock into position. 1. Place the mower upright in vertical position. NOTE 2. -
Page 10: Install The Mulch Plug
English INSTALL THE MULCH PLUG INSTALL THE BATTERY PACK 1. Remove the grass catcher. 2. Open the rear discharge door (6) and hold it. WARNING 3. Hold the mulch plug (10) by its handle and fit it in the discharge chute. •... -
Page 11: Start The Machine
English START THE MACHINE OPERATE THE SELF-PROPEL DRIVE SYSTEM 1. Start the machine. 2. While you hold the start handles (2), grab either of the drive levers (3) and pull towards the handle bar. 3. Hold the start handles and the drive levers at the same 1. -
Page 12: Operation Tips
English • Tighten correctly all the fasteners and caps. WARNING • Clean the machine with a dry cloth. Do not use water. Please keep a low self-propelled speed when you mow on a slope. REPLACE THE BLADE • Do not go up and down on a slope, mow across the face of the slope. -
Page 13: Vertical Storage
English • Make sure that the machine does not have loose or Problem Possible cause Solution damaged parts. If it is necessary, do these steps/ The machine does The battery ca- Charge the battery instructions: not start. pacity is low. pack. -
Page 14: Technical Data
English * If you cannot find the solution to these problems, go to the HELPLINE: service center. Warranty service is available by calling our toll-free helpline, at 1-855-345-3934. TECHNICAL DATA TRANSPORTATION CHARGES: Voltage 60 V Transportation charges for the movement of any power Battery model LB602 / LB604 and other BAC series equipment unit or attachment are the responsibility of the... -
Page 15: Exploded View
English EXPLODED VIEW Part No. Description R0200862-00 Blade A assembly kit R0200861-00 Blade B assembly kit R0200873-00 Power control board RB341472376 Safety key R0200864-00 Mulch plug kit R0200662-00 Front wheel assembly R0200744-00 Rear wheel assembly R0200865-00 Grass catcher assembly R0200866-00 Upper control assembly R0200867-00 Height adjustment spring... - Page 16 Español Ajuste de la altura de corte......23 Descripción........17 Instalación de la batería........24 Finalidad ............17 Retirada de la batería........24 Perspectiva general.......... 17 Funcionamiento ......24 Lea todas las instrucciones .... 17 Puesta en marcha de la máquina......24 Niños y transeúntes .........17 Detención de la máquina.........
-
Page 17: 1 Descripción
Español DESCRIPCIÓN LEA TODAS LAS INSTRUCCIONES FINALIDAD PELIGRO Esta máquina se utiliza para el corte de césped doméstico. La Esta máquina se ha construido para utilizarse de acuerdo cuchilla de corte debe estar aproximadamente paralela al con las normas para un funcionamiento seguro que se suelo. - Page 18 Español • No se estire, mantenga en todo momento una postura • Los objetos golpeados por la cuchilla del cortacésped adecuada y el equilibrio. Numerosas lesiones se producen pueden producir lesiones graves a las personas. El césped como resultado del paso del cortacésped sobre el pie siempre debe examinarse detenidamente y deben durante una caída debida a resbalones o tropiezos.
-
Page 19: Funcionamiento En Pendientes
Español FUNCIONAMIENTO EN cuchilla se detenga por completo, posteriormente retire la batería. La cuchilla de corte sigue girando durante unos PENDIENTES segundos después de apagar el motor. Nunca realice estas funciones hasta que esté seguro de que la cuchilla ha Las pendientes son un factor principal relacionado con los dejado de girar. -
Page 20: Símbolos En El Producto
Español • Mantenga las protecciones en su posición y en estado de permitirá manejar la herramienta mejor y de manera más funcionamiento. Las cuchillas del cortacésped están segura. afiladas y pueden cortar. Envuelva las cuchillas o lleve Símbolo Nombre Explicación guantes y tenga especial cuidado al realizar tareas de servicio. -
Page 21: Niveles De Riesgo
Español AVISO Símbolo Nombre Explicación Deseche todos los materiales tóxicos de una manera PELIGRO --- No corte el césped cuando especificada para evitar la contaminación del medio Mantenga ale- haya niños u otras personas ambiente. Antes de desechar una batería de ion de litio jados a los cerca. -
Page 22: Propuesta 65
Español PROPUESTA 65 COLOCACIÓN DEL CORTACÉSPED EN POSICIÓN AVISO VERTICAL Este producto contiene una sustancia química conocida en el estado de California como causante de cáncer, defectos de nacimiento u otros daños reproductivos. El polvo generado por el lijado eléctrico, el serrado, el esmerilado, la perforación y otras actividades de construcción contiene sustancias químicas que se sabe que son causantes de cáncer, defectos de nacimiento u otros daños reproductivos. -
Page 23: Despliegue Y Ajuste De Las Asas
Español DESPLIEGUE Y AJUSTE DE LAS INSTALACIÓN DEL TAPÓN DE ASAS MULCHING 1. Retire el recogehierba. 2. Abra la puerta de descarga trasera (6) y sujétela. 3. Sujete el tapón de mulching (10) por su asa y colóquelo en el conducto de descarga. 1. -
Page 24: Instalación De La Batería
Español FUNCIONAMIENTO INSTALACIÓN DE LA BATERÍA AVISO Lleve protección ocular durante el funcionamiento. PUESTA EN MARCHA DE LA MÁQUINA AVISO • Si la batería o el cargador ha sufrido daños, sustituya la batería o el cargador. • Detenga la máquina y espere hasta que el motor se pare antes de instalar o retirar la batería. -
Page 25: Detención De La Máquina
Español DETENCIÓN DE LA MÁQUINA VACIADO DEL RECOGEHIERBA 1. Suelte el asa de puesta en marcha para detener la 1. Detenga la máquina. máquina. 2. Retire la llave de seguridad. AVISO 3. Retire la batería. 4. Abra la puerta de descarga trasera y sujétela. Espere hasta que la cuchilla se detenga por completo antes de volver a poner en marcha la máquina. -
Page 26: Mantenimiento General
Español 4. Apoye la máquina sobre un lateral. AVISO 5. Utilice un trozo de madera para impedir el movimiento de Mantenga el motor y la batería libres de hierba, hojas o un la cuchilla. exceso de grasa. 6. Retire las cuchillas con una llave o una llave de tubo: PRECAUCIÓN •... -
Page 27: Almacenamiento Vertical
Español ALMACENAMIENTO VERTICAL Problema Posible causa Solución La máquina corta El césped es Examine la super- la hierba irregular- agreste. ficie de segado. mente. La altura de la cu- Mueva las ruedas chilla no se ha a una posición más ajustado correcta- alta. -
Page 28: Datos Técnicos
Español instrucciones del manual del propietario suministrado con el Problema Posible causa Solución producto nuevo. La máquina se de- La altura de la cu- Aumente la altura tiene durante el se- chilla es demasia- de la cuchilla. ARTÍCULOS NO CUBIERTOS POR LA GARANTÍA: gado. -
Page 29: Vista Despiezada
Español VISTA DESPIEZADA Nº Nº pieza Cant. Descripción R0200862-00 Kit de conjunto de cuchilla A R0200861-00 Kit de conjunto de cuchilla B R0200873-00 Placa de control de alimentación RB341472376 Llave de seguridad R0200864-00 Kit de tapón de mulching R0200662-00 Conjunto de rueda delantera R0200744-00 Conjunto de rueda trasera R0200865-00...
Need help?
Do you have a question about the MO60L03 and is the answer not in the manual?
Questions and answers