
Related Manuals for GreenWorks Pro ULTRAMOWE 60


Summary of Contents for GreenWorks Pro ULTRAMOWE 60
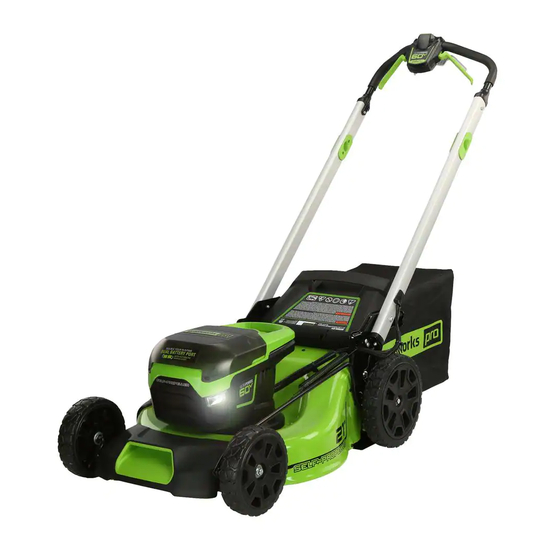
- Page 1 MO60L01 MO60L424 LAWN MOWER OPERATOR MANUAL MANUAL DEL OPERADOR CORTACÉSPED www.greenworkstools.com LMC420...
-
Page 3: Table Of Contents
English Set the cutting height........10 Description......... 4 Install the battery pack........10 Purpose.............. 4 Remove the battery pack......... 10 Overview............4 Operation......... 10 Packing list............4 Start the machine..........10 Read all instructions......4 Stop the machine..........11 Children and Bystanders........4 Operate the self-propel drive system.... -
Page 4: Description
English DESCRIPTION NOTE When using electric lawn mowers, basic safety precautions PURPOSE should always be followed to reduce the risk of fire, electric shock, and personal injury. These basic precautions include This machine is used for domestic lawn mowing. The cutting the following: blade must be approximately parallel to the ground. - Page 5 English • Never pull the mower back toward you while you are • Dress properly, do not wear loose clothing or jewelry that walking. If you must back the mower away from a wall or can be caught in moving parts. Use of safety gloves and obstruction, first look down and behind you to avoid proper footwear is recommended when working outdoors.
-
Page 6: Service/Maintenance
English • Do not open or mutilate the battery. Electrolytes • Maintain Lawn Mower With Care – Keep cutting edges contained within the battery are corrosive and may cause sharp and clean for best and safest performance. Follow damage to eyes or skin if released. It may be toxic if instructions for lubricating and changing accessories. -
Page 7: Risk Levels
English Symbol Name Explanation Symbol Name Explanation Volt Voltage DANGER --- Use extra caution on slopes. Steep Slope do not mow slopes greater Amperes Current Hazard than 15 degrees. Frequency (cycles per sec- Hertz ond) RISK LEVELS Watt Power The following signal words and meanings are intended to Minutes Time explain the levels of risk associated with this product. -
Page 8: Proposition 65
English UNPACK THE MACHINE WARNING If the battery pack cracks or breaks, with or without leaks, WARNING do not recharge it and do not use. Discard it and replace Make sure that you correctly assemble the machine before with a new battery pack. DO NOT TRY TO REPAIR IT! To use. -
Page 9: Unfold The Lower Handle
English 5. Put the bolts (13) through the holes and tighten with the 4. Hold the the grass catcher (6) by its handle (16) and nuts (14), using a Philips head screwdriver (not included). engage the hooks (17) on the door rod (18). 5. -
Page 10: Set The Cutting Height
English 2. Line up the recesses of the side discharge chute (11) NOTE below the pivot (20). The machine has an automatic switch function that lets the 3. Close the side discharge door (19). other battery work when the first cannot operate. SET THE CUTTING HEIGHT 1. -
Page 11: Stop The Machine
English • Press and hold the start button (1), then pull up on the 4 Green The battery is above 80% capacity drive lever (3). Lights 3 Green The battery is between 80% and 60% ca- Lights pacity • Pull up on the drive lever (3), then press the start button (1). -
Page 12: Operation Tips
English • Tighten correctly all the fasteners and caps. WARNING • Clean the machine with a dry cloth. Do not use water. Please keep a low self-propelled speed when you mow on a slope. REPLACE THE BLADE • Do not go up and down on a slope, mow across the face of the slope. -
Page 13: Store The Machine
English TROUBLESHOOTING STORE THE MACHINE • Clean the machine before storage. Problem Possible cause Solution • Make sure the motor is not hot when you store the The handle is not The bolts are not Adjust the height machine. in position. engaged correctly. -
Page 14: Technical Data
English units which have been used for personal use that have not Problem Possible cause Solution been hired or rented for industrial/commercial use, and that The machine stops The blade height is Increase the blade have been maintained in accordance with the instructions in during mowing. -
Page 15: Exploded View
English EXPLODED VIEW Part No. Qty. Description R0200742-00 Blade assembly kit R0201875-00 High lift blade RB311081179A Side discharge cover kit R0200226-00 Side discharge chute RB341281179A 8" front wheel assembly R0200744-00 10" rear wheel assembly RB341472376 Safety key R0200743-00 Upper control assembly... - Page 16 English Part No. Qty. Description R0201921-00 Grass catcher assembly R0201874-00 Power control board R0200068-00 Mulch plug kit R0200860-00 Motor R0201880-00 Bolt/nut...
- Page 17 Español Ajuste de la altura de corte......25 Descripción........18 Instalación de la batería........25 Finalidad ............18 Retirada de la batería........25 Perspectiva general.......... 18 Funcionamiento ......25 Lista de embalaje..........18 Puesta en marcha de la máquina......25 Lea todas las instrucciones .... 18 Detención de la máquina.........
-
Page 18: Descripción
Español DESCRIPCIÓN LEA TODAS LAS INSTRUCCIONES FINALIDAD PELIGRO Esta máquina se utiliza para el corte de césped doméstico. La Esta máquina se ha construido para utilizarse de acuerdo cuchilla de corte debe estar aproximadamente paralela al con las normas para un funcionamiento seguro que se suelo. - Page 19 Español • No se estire, mantenga en todo momento una postura • Los objetos golpeados por la cuchilla del cortacésped adecuada y el equilibrio. Numerosas lesiones se producen pueden producir lesiones graves a las personas. El césped como resultado del paso del cortacésped sobre el pie siempre debe examinarse detenidamente y deben durante una caída debida a resbalones o tropiezos.
-
Page 20: Servicio/Mantenimiento
Español SERVICIO/MANTENIMIENTO cuchilla se detenga por completo, posteriormente retire la batería. La cuchilla de corte sigue girando durante unos • Compruebe la cuchilla y los pernos de montaje del motor segundos después de apagar el motor. Nunca realice estas (de la máquina) a intervalos frecuentes para verificar que funciones hasta que esté... -
Page 21: Funcionamiento En Pendientes
Español • Nunca utilice el cortacésped sin las protecciones, placas u Símbolo Nombre Explicación otros dispositivos de protección de seguridad adecuados Voltios Tensión en su posición. Amperios Corriente El intervalo de temperatura ambiente recomendado: Frecuencia (ciclos por se- Elemento Temperatura Hertzios gundo) Intervalo de temperatura de... -
Page 22: Niveles De Riesgo
Español AVISO Símbolo Nombre Explicación Deseche todos los materiales tóxicos de una manera PELIGRO --- No corte el césped cuando especificada para evitar la contaminación del medio Mantenga ale- haya niños u otras personas ambiente. Antes de desechar una batería de ion de litio jados a los cerca. -
Page 23: Propuesta 65
Español PROPUESTA 65 COLOCACIÓN DEL CORTACÉSPED EN POSICIÓN AVISO VERTICAL Este producto contiene una sustancia química conocida en el estado de California como causante de cáncer, defectos de nacimiento u otros daños reproductivos. El polvo generado por el lijado eléctrico, el serrado, el esmerilado, la perforación y otras actividades de construcción contiene sustancias químicas que se sabe que son causantes de cáncer, defectos de nacimiento u otros daños reproductivos. -
Page 24: Desplegado Del Asa Inferior
Español DESPLEGADO DEL ASA INSTALACIÓN DEL TAPÓN DE INFERIOR MULCHING 1. Retire el recogehierba. 2. Abra la puerta de descarga trasera (7) y sujétela. 3. Sujete el tapón de mulching (10) por su asa y colóquelo 1. Tire hacia arriba sobre los orificios del asa (12) para en el conducto de descarga. -
Page 25: Ajuste De La Altura De Corte
Español AJUSTE DE LA ALTURA DE 1. Abra la puerta de la batería (9). CORTE 2. Alinee las nervaduras de la batería (22) con las ranuras del compartimento de la batería. La máquina puede ajustarse a distintas alturas de corte. 3. -
Page 26: Detención De La Máquina
Español • Tire del botón de control de velocidad en la dirección Pilotos Capacidad del símbolo de la tortuga para disminuir la velocidad. 4 pilotos La batería está por encima del 80% de ca- 6. Suelte las palancas de accionamiento para cerrar el verdes pacidad sistema de autopropulsión. -
Page 27: Funcionamiento En Pendientes
Español FUNCIONAMIENTO EN PRECAUCIÓN PENDIENTES No permita que líquidos de frenos, gasolina y otros derivados del petróleo toquen las piezas de plástico. Las AVISO sustancias químicas pueden dañar el plástico y hacer que quede inservible. No siegue en pendientes con una inclinación superior a 15°. Si no está... -
Page 28: Almacenamiento De La Máquina
Español ALMACENAMIENTO VERTICAL 5. Utilice un trozo de madera para impedir el movimiento de la cuchilla. 6. Retire el tornillo de montaje (25) y el espaciador (26) con una llave o una llave de tubo. 7. Retire la cuchilla. 8. Instale la cuchilla nueva. Asegúrese de que las flechas se acoplen en los orificios de la cuchilla. -
Page 29: Datos Técnicos
Español Problema Posible causa Solución Problema Posible causa Solución La máquina corta El césped es Examine la super- La máquina se de- La altura de la cu- Aumente la altura la hierba irregular- agreste. ficie de segado. tiene durante el se- chilla es demasia- de la cuchilla. - Page 30 Español reparará o sustituirá cualquiera y todas las piezas que resulten ser defectuosas, con un uso normal, sin coste alguno para el cliente. Esta garantía es válida únicamente para unidades que se hayan utilizado para uso personal que no han sido arrendadas o alquiladas para uso industrial/comercial y cuyo mantenimiento se ha realizado de acuerdo con las instrucciones del manual del propietario suministrado con el...
-
Page 31: Vista Despiezada
Español VISTA DESPIEZADA Nº Nº pieza Cant. Descripción R0200742-00 Kit de conjunto de cuchilla R0201875-00 Cuchilla de alta elevación RB311081179A Kit de cubierta de descarga lateral R0200226-00 Conducto de descarga lateral RB341281179A Conjunto de rueda delantera de 8" R0200744-00 Conjunto de rueda trasera de 10" RB341472376 Llave de seguridad R0200743-00... - Page 32 Español Nº Nº pieza Cant. Descripción R0201921-00 Conjunto de recogehierba R0201874-00 Placa de control de alimentación R0200068-00 Kit de tapón de mulching R0200860-00 Motor R0201880-00 Tornillo/ tuerca...
Need help?
Do you have a question about the ULTRAMOWE 60 and is the answer not in the manual?
Questions and answers
Can the lights be turned off while operating the mower? If not, can they be disconnected?
Yes, the LED headlights on the GreenWorks Pro ULTRAMOWE 60 mower can be turned off by releasing the start handles and self-propel levers.
This answer is automatically generated