Groen HyPerSteam HY-3E Operator's And Service Manual
Atmospheric convection steamer
Hide thumbs
Also See for HyPerSteam HY-3E:
- Operator's manual (36 pages) ,
- Operator's and service manual (12 pages) ,
- Manual (2 pages)
Table of Contents
Advertisement
https://appliancetechmanuals.com
IMPORTANT INFORMATION - KEEP FOR OPERATOR - IMPORTANT INFORMATION
IMPORTANT INFORMATION - KEEP FOR OPERATOR - IMPORTANT INFORMATION
OPERATOR AND SERVICE MANUAL
Part Number 128174
MODELS:
HY-3E(CE), HY-5E(CE)
HyPerSteam™
Atmospheric Convection Steamer - CE
Self-Contained
Electric Heated
Capacity:
KEEP THIS MANUAL WITH STEAMER DOCUMENTS. OPERATORS AND
TECHNICIANS SHOULD READ, UNDERSTAND AND FOLLOW INSTRUCTIONS
AND WARNINGS CONTAINED IN THIS MANUAL.
3 or 5 Steamer Pans
(12" x 20" x 2½")
(305 mm x 508 mm x 64 mm)
HY-3E(CE)
OM/SM-HY-3E(CE)
OM/SM-HY-5E(CE)
Information contained in this document is
known to be current and accurate at the time
of printing/creation. Unified Brands recom-
mends referencing our product line websites,
unifiedbrands.net, for the most updated
product information and specifications.
INTERNATIONAL
HY-5E(CE)
Advertisement
Table of Contents

Related Manuals for Groen HyPerSteam HY-3E


Summary of Contents for Groen HyPerSteam HY-3E
- Page 1 https://appliancetechmanuals.com IMPORTANT INFORMATION - KEEP FOR OPERATOR - IMPORTANT INFORMATION IMPORTANT INFORMATION - KEEP FOR OPERATOR - IMPORTANT INFORMATION OPERATOR AND SERVICE MANUAL OM/SM-HY-3E(CE) OM/SM-HY-5E(CE) Part Number 128174 INTERNATIONAL MODELS: HY-3E(CE), HY-5E(CE) HyPerSteam™ Atmospheric Convection Steamer - CE Self-Contained Electric Heated Capacity: 3 or 5 Steamer Pans (12"...
- Page 2 https://appliancetechmanuals.com OM/SM-HY-3E & HY-5E(CE) IMPORTANT — READ FIRST — IMPORTANT THESE APPLIANCES MUST BE INSTALLED BY A COMPETENT PERSON IN CONFORMITY WITH THE INSTALLATION AND SERVICING INSTRUCTIONS AND NATIONAL REGULATIONS IN FORCE AT THE TIME. PARTICULAR ATTENTION MUST BE PAID TO THE FOLLOWING: I.
- Page 3 DO NOT USE ANY DE-GREASER THAT CONTAINS POTASSIUM HYDROXIDE OR SODIUM HYDROXIDE OR THAT IS ALKALINE. WARNING: USE OF ANY REPLACEMENT PARTS OTHER THAN THOSE SUPPLIED BY GROEN OR THEIR AUTHORIZED DISTRIBUTOR VOIDS ALL WARRANTIES AND CAN RESULT IN BODILY INJURY TO THE OPERATOR AND DAMAGE THE EQUIPMENT. SERVICE BY OTHER THAN FACTORY-AUTHORIZED PERSONNEL WILL VOID ALL WARRANTIES.
-
Page 4: Table Of Contents
https://appliancetechmanuals.com OM/SM-HY-3E & HY-5E(CE) Table of Contents OPERATOR WARNINGS ........... . . 2 REFERENCES . -
Page 5: Equipment Description
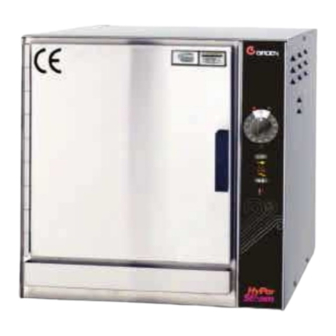
OM/SM-HY-3E & HY-5E(CE) Equipment Description Your Groen HY-3E and HY-5E HyPerSteam Convection Steamers are designed to give years of service. It has a stainless steel cavity (cooking chamber) which is served by an independent atmospheric steam generator which is electrically- heated. -
Page 6: Water Conditioning/Requirements
https://appliancetechmanuals.com OM/SM-HY-3E & HY-5E(CE) Water Conditioning It is essential to supply the steam generator with 2. If your water contains scale-forming minerals, as water that will not form scale. Even though the most water does, use a well-maintained water steam generator is engineered to minimize scale softener. -
Page 7: Installation And Start-Up Instructions
https://appliancetechmanuals.com OM/SM-HY-3E & HY-5E(CE) Installation and Start-Up WARNING THE UNIT MUST BE INSTALLED BY PERSONNEL WHO ARE QUALIFIED TO WORK WITH ELECTRICITY AND PLUMBING. IMPROPER INSTALLATION CAN CAUSE INJURY TO PERSONNEL AND/OR DAMAGE TO THE EQUIPMENT. THE UNIT MUST BE INSTALLED IN ACCORDANCE WITH APPLICABLE CODES CAUTION DO NOT INSTALL THE UNIT WITH THE RIGHT OR LEFT SIDE VENTS BLOCKED OR WITHIN 12 INCHES OF A HEAT SOURCE (SUCH AS A BRAISING PAN, DEEP FRYER, CHAR BROILER OR KETTLE). - Page 8 https://appliancetechmanuals.com OM/SM-HY-3E & HY-5E(CE) Connect appropriate wiring as described in the wiring diagram located on the inside of the unit’s right side panel. Incoming power connections are shown below. The equipotential terminal is located on the left HY-3E Electrical Connections rear of the units.
- Page 9 https://appliancetechmanuals.com OM/SM-HY-3E & HY-5E(CE) 3. Drain Connection Level the steamer front to back, or even pitch it slightly to the rear by adjusting the bullet feet on the stand or cabinet base. A two inch (50mm) ID hose should be attached to the drain pipe and elbow supplied.
- Page 10 https://appliancetechmanuals.com OM/SM-HY-3E & HY-5E(CE) Operation WARNING ANY POTENTIAL USER OF THE EQUIPMENT SHOULD BE TRAINED IN SAFE AND CORRECT OPERATING PROCEDURES. A. Controls When a cook time is set, the unit steams until the timer reaches OFF. The steaming stops, a red light comes on and a beeper sounds.
- Page 11 https://appliancetechmanuals.com OM/SM-HY-3E & HY-5E(CE) 5. Ope 6. To shut down the unit, press the ON switch/pad n the door. Remove the pans from the to OFF. The steam generator will automatically steamer, using hot pads or oven mitts to protect drain.
-
Page 12: Cleaning
WATER CLEANING 3. Steam generator de-liming agent, such as SOLUTIONS OUT OF CONTROLS AND Groen Delimer Descaler, Lime-Away® or ELECTRICAL COMPONENTS. NEVER an equivalent. A liquid de-liming agent will be easier to use than crystals or powders. See the HOSE OR STEAM CLEAN ANY PART OF warning about chlorides, below THE UNIT. - Page 13 Wipe out the cavity completely. If necessary, use a damp nylon pad. Reinstall the fan baffle partition. Pour two cups of Groen de-liming solution or Lime-Away into the de-liming port. k. If the steamer will no longer be used, leave it off.
- Page 14 Troubleshooting This Groen Steamer is designed to operate smoothly and efficiently if properly maintained. However, the following is a list of checks to make in the event of a problem. Wiring diagrams are furnished inside the service panel.
-
Page 15: Parts List
OM/SM-HY-3E & HY-5E(CE) Parts List - Model HY-3E To order parts, contact your authorized Groen Service Agency. Supply the model designation, part description, part number, quantity, and when applicable, voltage and phase. Description Part No. Description Part No. Right Side Panel... - Page 16 OM/SM-HY-3E & HY-5E(CE) Parts List-Model HY-3E (Continued) To order parts, contact your authorized Groen Service Agency. Supply the model designation, part description, part number, quantity, and when applicable, voltage and phase. Description Part No. Description Part No. Heater Element, 240 /400V...
- Page 17 OM/SM-HY-3E & HY-5E(CE) Parts List - HY-3E To order parts, contact your authorized Groen Service Agency. Supply the model designation, part description, part number, quantity, and when applicable, voltage and phase. Description Part No. Description Part No. Timer 100983...
- Page 18 https://appliancetechmanuals.com OM/SM-HY-3E & HY-5E(CE) Parts List - Model HY-5E Description Part No. Description Part No. Left Pan Rack 125901 Mylar Overlay Plate (Symbols) 128215 Door Assembly, Complet 125922 Water Valve, Two Way 071235 Door Gasket 094147 Water Valve Brackets 094189 Door Handle 070123 Water Inlet Adapter Assembly...
- Page 19 https://appliancetechmanuals.com OM/SM-HY-3E & HY-5E(CE) Parts List - Model HY-5E...
- Page 20 OM/SM-HY-3E & HY-5E(CE) Parts List - Model HY-5E To order parts, contact your authorized Groen Service Agency. Supply the model designation, part description, part number, quantity, and when applicable, voltage and phase. Description Part Description Part Description Part Platform Assembly...
-
Page 21: Schematics Hy-3E
https://appliancetechmanuals.com OM/SM-HY-3E & HY-5E(CE) Electrical Schematics- HY-3E... -
Page 22: Schematics Hy-5E
https://appliancetechmanuals.com OM/SM-HY-3E & HY-5E(CE) Electrical Schematics - HY-5E... -
Page 23: Service Procedures
https://appliancetechmanuals.com OM/SM-HY-3E & HY-5E(CE) Service Procedures [FOR PROFESSIONAL TECHNICAL SERVICE PERSONNEL ONLY] the steamer so that the replacement of the three General Information: screws will be easy and not damaging. The following procedures are based upon having access to the steamer on all four sides. If the Top Panel - Removal steamer is installed between other appliances and P/N 096777... - Page 24 https://appliancetechmanuals.com OM/SM-HY-3E & HY-5E(CE) contact with the floor for proper steamer support. 7. Align the flat of the knob hole with the flat on the timer shaft. Press the knob firmly onto 4. If damaged, these posts may be replaced by the timer shaft.
- Page 25 https://appliancetechmanuals.com OM/SM-HY-3E & HY-5E(CE) 2. Remove the large steam hose by loosening G. Cavity Hose Assembly the hose clamp with a 5/16 inch nutdriver Steam Hose (HY-3E) P/N 123867 and then removing the hose from the steam Steam Hose (HY-5E) P/N 126008 port collar.
- Page 26 https://appliancetechmanuals.com OM/SM-HY-3E & HY-5E(CE) 5. Slide the two hose clamps onto the hose and position the hose adjacent to the steam port and steam generator. 6. Slide the hose onto the hose collar on the steam port and at the other end, onto the steam generator collar.
- Page 27 https://appliancetechmanuals.com OM/SM-HY-3E & HY-5E(CE) 4. Remove the motor mounting plate to which the motor is attached. 10. Using this technique, the rubber side of the oil slinger washer should be in contact with the plate holder and there should be a space To Install a New Motor: of approximately 1/16 inch between the phenolic face of the washer and the motor.
- Page 28 https://appliancetechmanuals.com OM/SM-HY-3E & HY-5E(CE) Control Transformer 2. Note the position and identity of the terminals and then remove them from the control transformer. 3. With a 5/16 inch nutdriver, remove the four 10-32 screws holding the control transformer to the service tray. Note: Do not lose lock washers at the ground wire.
- Page 29 https://appliancetechmanuals.com OM/SM-HY-3E & HY-5E(CE) 7. Remove the gasket attached to the steam 16. Reconnect the terminal wires to the heater. generator and discard. Remove heater and Install thermostat switch to bracket with thermostat assembly. sheet metal screws. 8. The thermostat bulb is fastened to one of the 17.
- Page 30 https://appliancetechmanuals.com OM/SM-HY-3E & HY-5E(CE) thermostat bulb. Tighten using a 7mm 8. Replace the wire(s) to the probes by nutdriver. snapping the fork terminals around the terminal post. Using a 5/16 inch nutdriver, 8. Tighten the compression nut on the heater tighten the terminal nut.
- Page 31 https://appliancetechmanuals.com OM/SM-HY-3E & HY-5E(CE) 10. Plug the electrical leads of the valve into the wiring harness. Connect steamer to branch circuit, and turn on power. To Test: WARNING Operate steamer and allow steam generator to fill. DISCONNECT THE POWER SUPPLY BEFORE Check for leaks and observe if drain valve fully BEGINNING ANY SERVICE PROCEDURE.
- Page 32 https://appliancetechmanuals.com OM/SM-HY-3E & HY-5E(CE) 11. Remove steam generator from rear of 3. Inspect door gasket for signs of cuts or other steamer by lifting steam generator up and defects which may impair its function. out. Replace if necessary. See Section U. To Install: To Install: 12.
- Page 33 https://appliancetechmanuals.com OM/SM-HY-3E & HY-5E(CE) 3. If the door has been reversed and the switch spring in U-channel open with a screwdriver must be removed and replaced, refer to the or similar tool, and install U-channel. top panel removal in Section B and then remove the switch as above.
- Page 34 https://appliancetechmanuals.com OM/SM-HY-3E & HY-5E(CE) Apply a high temperature (922 degrees C) b) Support weight of the door and remove anti-seize and lubricating compound to the the two door-to-hinge bolts. Refer to door cam and Locktite 242 to the door Section R for more instructions. handle screw threads.
- Page 35 https://appliancetechmanuals.com OM/SM-HY-3E & HY-5E(CE) 9. Hold door spring open with a screwdriver or 4. To install new door locking pin, coat locking similar tool, hold door handle in the DOWN pin threads with a few drops of Locktite 222. position and install the U-channel, top end first - then lower channel into position.
-
Page 36: Service Log
https://appliancetechmanuals.com OM/SM-HY-3E & HY-5E(CE) Service Log Model No. Purchased From Serial No. Location Date Purchased Date Installed Purchase Order No. For Service Call Date Maintenance Performed Performed by... - Page 37 Groen Foodservice Equipment ("Groen Equipment") has been skillfully manufactured, carefully inspected and packaged to meet rigid standards of excellence. Groen warrants its Equipment to be free from defects in material and workmanship for twelve months from date of installation or eighteen months from date of shipment with the following conditions and subject to the following limitations.
- Page 38 https://appliancetechmanuals.com 1055 Mendell Davis Drive OM/SM-HY-3E & HY-5E (CE) Jackson, MS 39272 (Revised 6/99) Telephone 601 372-3903 Part Number 128174 Fax 601 373-9587...
Need help?
Do you have a question about the HyPerSteam HY-3E and is the answer not in the manual?
Questions and answers