Advertisement
Quick Links
Advertisement

Related Manuals for Wali 1343LKS


Summary of Contents for Wali 1343LKS
- Page 1 1343LKS support@walielectric.com...
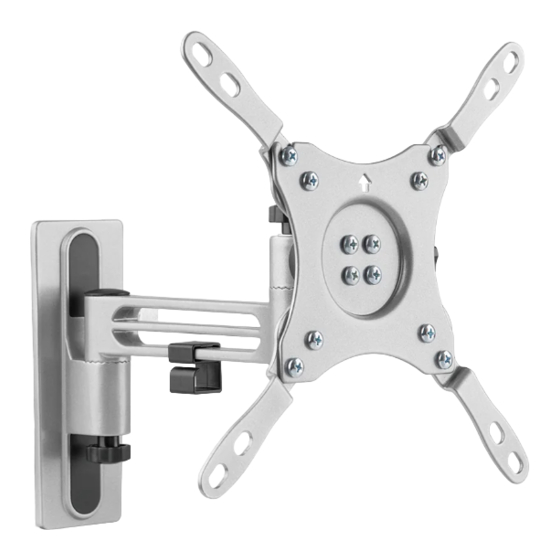
- Page 3 Supplied Parts List VESA Plate Decor Cover Adapter A(x1) B(x1) C(x2) D(x2) Adapter Bolt Bubble Level Allen Key E(x2) F(x8) G(x8) H(x1) I(x1) M4x14 Bolt M5x14 Bolt M6x14 Bolt M8x20 Bolt D5 Washer M-A(x4) M-B(x4) M-C(x4) M-D(x4) M-E(x4) D8 Washer Spacer Bolt Concrete Anchor...
- Page 4 Step 1 Twist the knob as the image shown to release the knob and washer. Step 2 Option A Wood Stud If installing this product on wood stud, mark the position with Bubble Level & pencil on the wall. Drill 3/16"(4.5mm) diameter x 2.2"(55mm) length holes at the marked position, attach the mount to wood stud and tighten using Bolt with screwdriver.
-
Page 5: Concrete Wall
Step 2 Option B Concrete Wall If installing this product on concrete wall, mark the position with Bubble Level & pencil on the concrete wall. Drill 3/8"(10mm) diameter x 2.4"(60mm) length holes at the marked position, attach the mount to concrete wall and tighten using Bolt &... - Page 6 Step 4 Step 4.1 Step 4.2 Select TV Screws Select Spacers ( if needed ) Only one screw size fits your TV Step 4.3a Select M4x14 Bolt or M5x14 Bolt according to your TV/Monitor specification, connect VESA Plate together with D5 Washer into the mounting holes on the back of TV/Monitor, tighten with screwdriver.(Screwdriver not included)
- Page 7 Step 4 Step 4.3b Select M4x14 Bolt or M5x14 Bolt according to your TV/Monitor specification, connect VESA Plate together with D5 Washer and Spacer into the mounting holes on the back of TV/Monitor, tighten with screwdriver.(Screwdriver not included) Step 4.3c Select the VESA size according to TV/Monitors specification as shown in image, connect the Adapter &...
- Page 8 Step 4 Step 4.3c Three options are available for multiple TV/Monitor specifications. 1) Connect M4x14 Bolt or M5x14 Bolt together with D5 Washer ,Spacer and tighten with screwdriver; 2) Connect M6x14 Bolt together with D8 Washer ,Spacer and tighten with screwdriver; 3) Connect M8x20 Bolt together with D8 Washer , 2 pcs Spacer...
- Page 9 Step 6 Place the assembled TV/Monitors onto the Arm , twist the knob as shown in image (#1) to tighten the VESA Plate . Twist the bottom knob as shown in image (#2) to tighten the whole arm.
- Page 10 Step 7 To ensure the integral stability of the mount, fully tighten knobs using Allen Key each time after adjusting preferred angle and extension. (Do NOT tighten knobs only by hand alone). Guide the cable through the clip holder on the arm as shown in image (#2).
- Page 11 Step 8 Angle Adjustments.
- Page 12 We support the technology that brings your home to life. We offer high quality products, professional customer service, and extensive technical support. If you have any questions,please contact us. support@walielectric.com 1-844-SATTLER (18447288537)
Need help?
Do you have a question about the 1343LKS and is the answer not in the manual?
Questions and answers