
Related Manuals for Wali GSWM002


Summary of Contents for Wali GSWM002
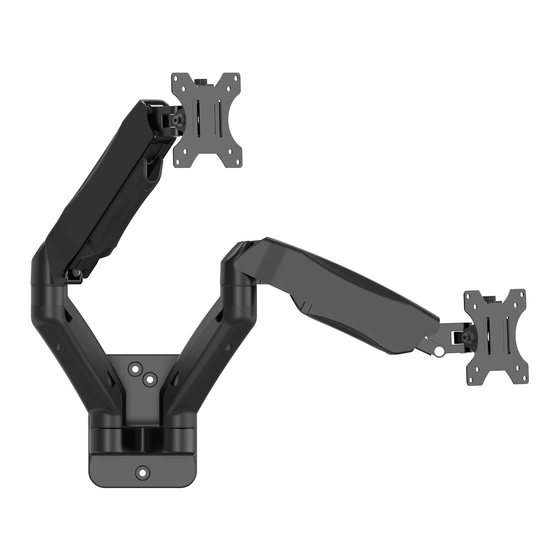
- Page 1 Dual Monitor Wall Mount 27” GSWM002 75x75/100x100 (2~6.5kg)x2 (4.4~14.3lbs)x2 RATED support@walielectric.com...
- Page 2 Supplied Parts List VESA Plate Cover Allen Key 5mm M4x12 Bolt A (x1) B (x2) C (x3) D (x1) M-A (x8) M5x12 Bolt D5 Washer ST6.3x55 Screw Φ10x45 Anchor Washer M-B (x8) M-C (x8) W-A (x3) W-B (x3) W-C (x3)
- Page 3 Step 1 Option A Wood Stud 1. If installing this product on wood stud, mark the position with Bubble Level & pencil on the wall. Stud Finder 2. Drill 3/16"(4.5mm) diameter x 2.2”(55mm) length holes at the marked position. 3. Attach the mount to wood stud and tighten using Screw &...
-
Page 4: Concrete Wall
Option B Concrete Wall 1. If installing this product on concrete wall, mark the position with Bubble Level & pencil on the concrete wall. 2. Drill 3/8"(10mm) diameter x 2.2”(55mm) length holes at the marked position. Insert the Anchor into the mounting holes. Attach the mount to concrete wall and tighten using Screw &... - Page 5 Step 2 Fix Cover onto the front of mount part. Step 3 Step 3.1 Select TV Screws Step 3.2 Attach the VESA Plate to your TV/Monitor, and thread M4x12 Bolt or M5x12 Bolt into the mounting holes with D5 Washer , tighten with Allen Key 5mm...
- Page 6 Step 4 Detach the Top Screw by threading it counterclockwise. Step 5 Put the assembled TV/Monitor onto the Arm and ensure the stability, tighten the VESA Plate using Top Screw. Step 6 Press the Arm on horizontal level as image shown, adjust gas spring tension to your personal preference using Allen Key .
- Page 7 Step 7 Step 8 Screw out the bolts with Allen Key 5mm and take off the Guide the cables through and put the cable cases back. cable cases. Step 9 Manually swivel, tilt, and rotate the monitor for the best viewing angle. ±90°...
- Page 8 We support the technology that brings your home to life. We offer high quality products, professional customer service, and extensive technical support. If you have any questions,please contact us. 1-844-SATTLER (18447288537) support@walielectric.com www.walielectric.com...
Need help?
Do you have a question about the GSWM002 and is the answer not in the manual?
Questions and answers