Table of Contents
Advertisement
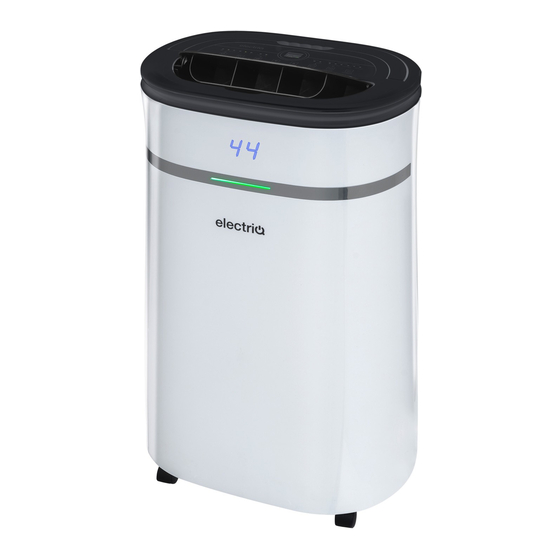
PREMIUM LOW ENERGY DEHUMIFIDIER
CD12LE
CD20LE
Please read this user manual before using this innovative dehumidifier and keep it safe for future
Visit our page www.electriQ.co.uk for our entire range of Intelligent Electricals
USER MANUAL
WITH AIR PURIFICATION
CD12LEB
CD20LEB
Thank you for choosing electriQ.
12 Litres per day
20 Litres per day
reference
Advertisement
Table of Contents

Related Manuals for ElectrIQ CD12LE


Summary of Contents for ElectrIQ CD12LE
- Page 1 12 Litres per day CD20LE CD20LEB 20 Litres per day Thank you for choosing electriQ. Please read this user manual before using this innovative dehumidifier and keep it safe for future reference Visit our page www.electriQ.co.uk for our entire range of Intelligent Electricals...
-
Page 2: Table Of Contents
CONTENTS SAFETY INSTRUCTIONS VISUAL SAFETY GUIDE INFORMATION ON INDOOR POLLUTANTS APPLIANCE DIAGRAM FEATURES INSTALLATION FITTING THE OPTIONAL FILTERS CONTROL PANEL OTHER FEATURES AND INDICATORS QUICK REFERENCE GUIDE POSITIONING THE DEHUMIDIFIER WATER DRAINAGE CARE AND MAINTENANCE TROUBLESHOOTING TECHNICAL DATA SUPPORT... -
Page 3: Safety Instructions
SAFETY INSTRUCTIONS Carefully read the instructions before Never operate this appliance if the • • operating the unit. power cord or plug is damaged. This appliance is for indoor use only Ensure the power cord is not stretched • • and is only intended for use in a or exposed to sharp objects/edges. - Page 4 • spaces where there high Potential) of 3. The CD12LE and CD12LEB contains concentration of gases, solvent or other • about 50g of R290 refrigerant gas. volatile organic compounds; in very The CD20LE and CD20LEB contains dusty environments; in any domestic, •...
-
Page 5: Visual Safety Guide
VISUAL SAFETY GUIDE WHERE OR WHEN NOT TO USE YOUR DEHUMIDIFIER INFORMATION ON INDOOR POLLUTANTS VOC (Volatile Organic Compound): VOCs come from motor vehicle exhausts, gasoline vapour, pollutants such as formaldehyde, ammonia and many other common and chemical solvents such as paints and glues, or can be a by-product of mould growth. -
Page 6: Appliance Diagram
APPLIANCE DIAGRAM OPTIONAL FILTERS HEPA FILTER CARBON FILTER Filters are available Replacement filters from the retailer under are available from the code: retailer under code: HEPA-CDLEX ACFIL-CDLEX Note: Diagrams are for illustrative purposes only. The design of the parts may vary from what is shown. -
Page 7: Features
FEATURES Your dehumidifier belongs to the electriQ dehumidifier range featuring power saving logic. Easy to use controls Cost effective way to combat mould, condensation and damp Optional HEPA and Carbon filters for air purification UV light and Ioniser to remove mould and pathogens from the air. -
Page 8: Control Panel
CONTROL PANEL POWER Button Turn the appliance on/off POWER MODE Button Select the function of the unit between: SMART and FAN modes. The LED’s next to the button will show which mode is selected. SMART MODE: The unit will default to SMART mode the first time it is switched on and remains in this mode until another program is chosen. - Page 9 TIMER Button Press the TIMER button to program the timer. When the timer is activated the "TIMER" light will be illuminated. Before programming the timer, ensure the SLEEP timer function has not been activated (the light must be off). The following timer programs are available.
-
Page 10: Other Features And Indicators
HUMIDITY LEVEL & TIMER 2 DIGIT DISPLAY The led indicator performs the following functions: 1. When the unit is plugged in, it will indicate the humidity level of the room. 2. When the UP and DOWN buttons are pressed, it will indicate the desired humidity currently set. -
Page 11: Quick Reference Guide
QUICK REFERENCE GUIDE Power Button: Press to turn the dehumidifier on and off. Timer: Press the timer button, then use the buttons to adjust the duration of the timer (1-24 hrs, start/ stop timer). If set while the unit is running: The number will represent the number of hours the unit will operate before turning off. -
Page 12: Positioning The Dehumidifier
The handle should not be used if there is any signs of damage to its fixings. When positioning your electriQ dehumidifier, ensure that it is placed clear of any obstacle that may limit the air movement. Place the dehumidifier on a flat dry surface. -
Page 13: Water Drainage
WATER DRAINAGE When the water tank is full, the unit will stop automatically. When this happens the TANK FULL light will illuminate on the control panel. NOTE: Only empty the water tank when it is full or before moving or storing the unit. There are two ways to dispense collected water. -
Page 14: Care And Maintenance
CARE AND MAINTENANCE Always shut off the unit and unplug from the mains before cleaning or performing any maintenance. When it is not in use for long periods it is advisable to remove the plug from the power socket. Do not use chemical solvents (such as benzene, alcohol or gasoline) as they may cause irreversible damage to the unit. -
Page 15: Troubleshooting
Tank is full or is not in the right position-- Empty the tank light notification and replace in the right position. Any other malfunctions will need to be reported to electriQ service centre. Do not attempt unauthorised repairs as these may invalidate the warranty. -
Page 16: Technical Data
When the unit is in dehumidifying mode it absorbs humid air from room and freezes it to reduce the humidity. During the cold cycle there should be cold air coming out of the unit. During the hot cycle hot dry air should be coming out of the outlet grill. TECHNICAL DATA CD12LE-V3 CD12LEB-V2 CD20LE-V4 CD20LEB-V2 Model Voltage 220-240V~50Hz... -
Page 17: Support
UK SUPPORT www.electriQ.co.uk/support Please, for your own convenience, make these simple checks before calling the service line. Has the unit been standing upright for at least 2 hours? Is the unit plugged into the mains? Is the fuse OK? Switch the unit off and wait three minutes to see if the issue is resolved.
Need help?
Do you have a question about the CD12LE and is the answer not in the manual?
Questions and answers