Table of Contents
Advertisement
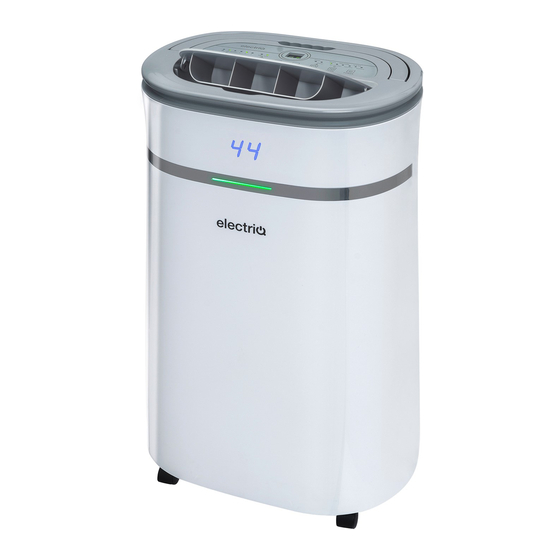
PREMIUM LOW ENERGY DEHUMIFIDIER
Please read this user manual before using this innovative dehumidifier and keep it safe for future
Visit our page www.electriQ.co.uk for our entire range of Intelligent Electricals
USER MANUAL
WITH AIR PURIFICATION
AND SMART APP CONTROL
CD12PRO-LE
CD20PRO-LE
CD25PRO-LE
Thank you for choosing electriQ.
12 Litres per day
20 Litres per day
25 Litres per day
reference
Advertisement
Table of Contents
Troubleshooting

Related Manuals for ElectrIQ CD12PRO-LE


Summary of Contents for ElectrIQ CD12PRO-LE
- Page 1 20 Litres per day CD25PRO-LE 25 Litres per day Thank you for choosing electriQ. Please read this user manual before using this innovative dehumidifier and keep it safe for future reference Visit our page www.electriQ.co.uk for our entire range of Intelligent Electricals...
-
Page 2: Table Of Contents
CONTENTS SAFETY INSTRUCTIONS VISUAL SAFETY GUIDE INFORMATION ON INDOOR POLLUTANTS APPLIANCE DIAGRAM FEATURES INSTALLATION FITTING THE OPTIONAL FILTERS CONTROL PANEL OTHER FEATURES AND INDICATORS QUICK REFERENCE GUIDE POSITIONING THE DEHUMIDIFIER WATER DRAINAGE SETTING UP THE WIFI APP CONNECTING USING QUICK CONNECTION CONNECTING USING AP MODE CONTROLLING YOUR DEVICE THROUGH THE APP SMART SCENES... -
Page 3: Safety Instructions
SAFETY INSTRUCTIONS Carefully read the instructions before Never operate this appliance if the • • operating the unit. power cord or plug is damaged. This appliance is for indoor use only Ensure the power cord is not stretched • • and is only intended for use in a or exposed to sharp objects/edges. - Page 4 • vapours or liquids in the vicinity of this Potential) of 3. dehumidifier or any other appliance. The CD12PRO-LE contains about 50g • of R290 refrigerant gas. This dehumidifier must not be used in •...
-
Page 5: Visual Safety Guide
VISUAL SAFETY GUIDE WHERE OR WHEN NOT TO USE YOUR DEHUMIDIFIER INFORMATION ON INDOOR POLLUTANTS VOC (Volatile Organic Compound): VOCs come from motor vehicle exhausts, gasoline vapour, pollutants such as formaldehyde, ammonia and many other common and chemical solvents such as paints and glues, or can be a by-product of mould growth. -
Page 6: Appliance Diagram
APPLIANCE DIAGRAM OPTIONAL FILTERS HEPA FILTER CARBON FILTER Filters are available Replacement filters from the retailer under are available from the code: retailer under code: HEPA-CDLEX ACFIL-CDLEX Note: Diagrams are for illustrative purposes only. The design of the parts may vary from what is shown. -
Page 7: Features
FEATURES Your dehumidifier belongs to the electriQ dehumidifier range featuring power saving logic. Easy to use controls Cost effective way to combat mould, condensation and damp Optional HEPA and Carbon filters for air purification UV light and Ioniser to remove mould and pathogens from the air. -
Page 8: Control Panel
CONTROL PANEL POWER Button Turn the appliance on/off POWER MODE Button Select the function of the unit between: SMART and FAN modes. The LED’s next to the button will show which mode is selected. SMART MODE: The unit will default to SMART mode the first time it is switched on and remains in this mode until another program is chosen. - Page 9 TIMER Button Press the TIMER button to program the timer. When the timer is activated the "TIMER" light will be illuminated. Before programming the timer, ensure the SLEEP timer function has not been activated (the light must be off). The following timer programs are available.
-
Page 10: Other Features And Indicators
HUMIDITY LEVEL & TIMER 2 DIGIT DISPLAY The led indicator performs the following functions: 1. When the unit is plugged in, it will indicate the humidity level of the room. 2. When the UP and DOWN buttons are pressed, it will indicate the desired humidity currently set. -
Page 11: Quick Reference Guide
QUICK REFERENCE GUIDE Power Button: Press to turn the dehumidifier on and off. Timer: Press the timer button, then use the buttons to adjust the duration of the timer (1-24 hrs, start/ stop timer). If set while the unit is running: The number will represent the number of hours the unit will operate before turning off. -
Page 12: Positioning The Dehumidifier
The handle should not be used if there is any signs of damage to its fixings. When positioning your electriQ dehumidifier, ensure that it is placed clear of any obstacle that may limit the air movement. Place the dehumidifier on a flat dry surface. -
Page 13: Water Drainage
WATER DRAINAGE When the water tank is full, the unit will stop automatically. When this happens the TANK FULL light will illuminate on the control panel. NOTE: Only empty the water tank when it is full or before moving or storing the unit. There are two ways to dispense collected water. -
Page 14: Setting Up The Wifi App
SETTING UP THE WIFI APP This is designed as a general guide to the setup. There may be differences in the interface and features available due to product development and features of the model. BEFORE YOU START • Ensure your router provides a standard 2.4ghz connection. •... - Page 15 REGISTER THE APP 1. Press on the register button Read the Privacy policy and 3. Enter your email address or at the bottom of the screen. press the Agree Button. phone number and press continue to register. 4. A verification code will be 5.
- Page 16 SETTING UP YOUR HOME WITHIN THE APP TUYA is designed so it can work with a large number of compatible smart devices within your home. It can also be set up to work with multiple devices within different houses. As such, during the setup process the app requires that different areas are created and named to allow easy management of all your devices.
-
Page 17: Connecting Using Quick Connection
CONNECTING USING QUICK CONNECTION Before initiating the connection, make sure the unit is in standby mode, with the WiFi light flashing twice per second. If not, follow the instructions for changing the connection mode. Ensure your phone is connected to the WiFi network. (We advise turning mobile data off during setup) 1. -
Page 18: Connecting Using Ap Mode
CONNECTING USING AP MODE (ALTERNATIVE METHOD) Before initiating the connection, make sure the unit is in standby mode, with the WiFi light flashing once per second. If not, follow the instructions for changing the connection type. Ensure your phone is connected to the WiFi network. (We advise turning mobile data off during setup) 1. -
Page 19: Controlling Your Device Through The App
CONTROLLING YOUR DEVICE THROUGH THE APP THE HOME SCREEN Add a device Choose the device to control User Profile Smart Scenes / Automation... - Page 20 DEVICE SCREEN The device screen is the main control screen for the dehumidifier, providing access to the controls to amend the functions of the dehumidifier Profile: Use to change the name of the dehumidifier Back: Return to the Home and amend user settings. Screen On / Off Button: Use to turn the dehumidifier On...
-
Page 21: Smart Scenes
SMART SCENES Smart Scenes is a powerful tool providing the option to customise the operation of the dehumidifier based both on conditions within the room and outside influences. This gives the user the option of specifying much more intelligent actions. These are split into two categories Scene and Automation. SCENE Scene allows for a one-touch button to be added to the Home screen. -
Page 22: Automation
AUTOMATION Automation allows an automatic action to be set up for the device. This can be triggered by the Time, indoor temperature, humidity of the room, weather conditions, and a range of other influences. 1. Press on the Smart Scene 2. -
Page 23: Connection Troubleshooting
DEVICE DETAILS SCREEN The device details screen gives you the option to edit the details for the device, and use some of its additional features. The device details screen can be accessed from the device screen by pressing on the symbol in the top right hand corner. -
Page 24: Care And Maintenance
CARE AND MAINTENANCE Always shut off the unit and unplug from the mains before cleaning or performing any maintenance. When it is not in use for long periods it is advisable to remove the plug from the power socket. Do not use chemical solvents (such as benzene, alcohol or gasoline) as they may cause irreversible damage to the unit. -
Page 25: Troubleshooting
Tank is full or is not in the right position-- Empty the tank light notification and replace in the right position. Any other malfunctions will need to be reported to electriQ service centre. Do not attempt unauthorised repairs as these may invalidate the warranty. -
Page 26: Technical Data
During the cold cycle there should be cold air coming out of the unit. During the hot cycle hot dry air should be coming out of the outlet grill. TECHNICAL DATA Model CD12PRO-LE-V3 CD20PRO-LE-V3 CD25PRO-LE-V3 Voltage 220-240V~50Hz Dehumidifying capacity... -
Page 27: Support
Please contact the local council for details of your local household waste recycling centres. DECLARATION OF CONFORMITY Hereby, electriQ declares that this Portable air conditioner is in compliance with Directive 2014/53/ EU. The full text of the EU declaration of conformity is available at the following internet address: https://www.electriQ.co.uk/content/declaration-of-conformity...
Need help?
Do you have a question about the CD12PRO-LE and is the answer not in the manual?
Questions and answers