Table of Contents
Advertisement
Available languages
Available languages
Quick Links
Advertisement
Table of Contents

Subscribe to Our Youtube Channel
Related Manuals for Coccolle Faro


Summary of Contents for Coccolle Faro
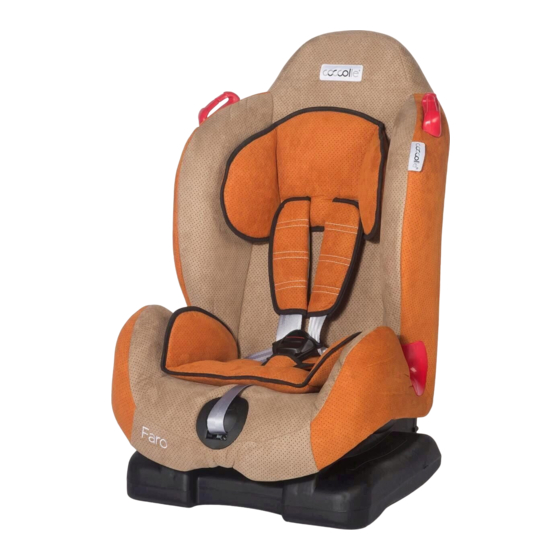
- Page 1 Faro scaun auto grupa 9-25 kg car seat group 9-25 kg autosules 9-25 kg seggiolino grupo 9-25 kg Manual de instructiuni / User’s manual / Hasznalati utmutato / Manuale di istruzioni GroupII: 15-25kg...
- Page 2 ATENTIONARI ATENTIONARI · Inainte de a instala scaunul auto in autovehicul asigurati-va ca nu exista obiecte grele, ascutite si ca · Acest scaun auto este conceput pentru grupele I toate celelalte obiectele sunt securizate (9-18kg) si II (15-25 kg); recomandam utilizarea corespunzator.
-
Page 3: Instructiuni De Instalare
ATENTIONARI INSTRUCTIUNI DE INSTALARE · Faceti pauze in timpul calatoriilor lungi. Astfel Instalarea scaunul de masina cu centura de copilul dumneavoastra poate sa se relaxeze. siguranta in 3 puncte · Nu aduceti modificari sau adaugiri scaunului auto Scaunul auto poate fi folosit doar cu centura de si urmati intodeauna instructiunile importatorului la siguranta in 3 puncte a autovehiculului (a se vedea instalarea si utilizarea scaunul auto. - Page 4 INSTRUCTIUNI DE INSTALARE INSTRUCTIUNI DE INSTALARE Metoda de instalare pentru Grupul I (9-18 kg) a) Reglati scaunul auto in pozitia de dormit 3 sau 4. (a se vedea fig. F3) b) Scoateti axul de blocare prin tragerea partii sale mobile de blocare din scaunul auto (a se vedea fig. F4-A).
- Page 5 INSTRUCTIUNI DE INSTALARE INSTRUCTIUNI DE INSTALARE Asezarea copilului in scaunul de masina a) Slabiti centurile de umar prin apasarea butonului de eliberare si trageti centurile de umar inspre dumneavoastra. Important: Nu trageti de protectile centurii atunci cand efectuati aceasta actiune. (fig. F8-9) Nota! Dupa ce ati finalizat instalarea, verificati daca scaunul este fixat incercand sa-l miscati, acesta nu ar trebui sa se miste mai mult de un centimetru in...
- Page 6 INSTRUCTIUNI DE INSTALARE INGRIJIRE SI MENTENANTA b) Slabiti curelele de umar prin apasarea butonului de reglare si tragand curelele de umar spre dumneavoastra cat mai mult posibil (fig. F9). Important: Nu trageti de protectile centurii atunci cand efectuati aceasta actiune. (fig. F9) c) Asezati carcasa scaunului in pozitie pentru dormit.
- Page 7 INGRIJIRE SI MENTENANTA ATENTIONARI FINALE Pasul 4. Scoateti intreaga husa a scaunului auto daca este posibil, si spalati-o la masina de spalat, folosind un program pentru rufe delicate. Pasul 5. Daca nu puteti scoate husa, curatati local petele, asigurandu-va ca este permisa folosirea sapunului pe materialul scaunului de masina prin verificarea instructiunilor de pe produs.
- Page 8 ATENTIONARI FINALE ATENTIONARI FINALE Evitati spargerea cataramei : daca catarama se - Reparatile sunt efectuate de catre un tert. sprijina pe cadrul scaunului de masina, in caz de - Defectele se datoreaza neglijentei proprietarului. coliziune se poate rupe sau se poate deschide - Deteriorarea se datoreaza utilizatorului.
- Page 9 Dear parents: ●Check the seat's harness system is correctly adjusted for your child. Thank you for purchasing “Coccolle Faro” Child ●Clothing can affect how snugly the harness fits, so Safety Car Seat. check it every journey. ●The belt is worn as tight as possible, the shoulder Please make sure this car seat is suitable belts are at the proper height.
-
Page 10: Changing The Cover
CHANGING THE COVER IMPORTANT ● Make sure this car seat is suitable for Removing and Replacing the cover and belt GroupI(9-18kg) and GroupII(15-25kg); or for age pads group from 9months to 4 years old. a)Loosen the belt pads. (See adjusting the ●... -
Page 11: Maintenance And Cleaning
IMPORTANT MAINTENANCE & CLEANING General: ● The child car seat must be used with the fabric cover. Please use the original cover as the cover a)The car seat can be cleaned using lukewarm contributes to the safety of the seat. water and soap. -
Page 12: Installation
INSTALLATION RESTRAINT FEATURES e)Pull the shoulder belts through the shell and cover out of the belt pads, ensuring that the buckle remains fixed to prevent the belts from twisting.(F17) f)If you wish to alter the belts from or to the lowest positions, adjust the car seat to the sleeping position. - Page 13 RESTRAINT FEATURES INSTALLATION Adjusting the height of the shoulder belts a)The correct belt height of the shoulder belts is attained when the belt disappears into the shell slightly above the shoulder of the child. Ensure that the shoulder belts fit comfortably over the child’s shoulder.(F15) b)Loosen the shoulder belts by pressing the release button of the adjuster and pulling the shoulder belts...
-
Page 14: Installation Tips
INSTALLATION INSTALLATION TIPS Installing the car seat with a 3-point safety belt b) Press the red button to open the buckle.(F10) The car seat can only be used with an automatic c) Place the belts over the sides of the shell.(F11) 3-point safety belt.(see pic F1)Below d) Position your child into the seat and make sure The car seat can be secured in a forward-facing... - Page 15 INSTALLATION INSTALLATION Installing method for Group I (9-18kg) a) Adjust the car seat to sleeping position 3 or Installing method for GroupⅡ(15-25kg) 4.(see pic F3) This installation method is for child within Group b) Remove the installation shaft by pulling the Ⅱ(15-25kg).
- Page 16 BEMUTATKOZÁS ELLENŐRZÉSI LISTA Gyermeke biztonságának érdekében, kérjük szánjon időt az alábbiak ellenőrzésére: ●Ellenőrizze, hogy az 5 pontos biztonsági öv megfelelően illeszkedik a gyermeken ●A gyermek ruházata befolyásolhatja a biztonsági Kedves Szülők: öv illeszkedését, ezért kérjük ellenőrizze minden indulás előtt Köszönjük, hogy cégünk biztonsági autósülését ●Az övnek a lehető...
- Page 17 HUZAT LEVÉTELE FONTOS A huzat levétele és felhelyezése a) Lazítsa meg a biztonsági övet a teljes ● Ez a biztonsági autósülés I csoport (9-18 kg) és II hosszúságig. csoport (15-25kg) besorolásnak felel meg, vagy 9 hónapos kortól kb. 4 éves korig. b) Lazítsa ki a huzatot.
-
Page 18: Karbantartás&Tisztítás
FONTOS KARBANTARTÁS&TISZTÍTÁS Általános: ● Az autósülés csak hozzá tartozó, eredeti huzattal a)az autósülés kizárólag langyos vízzel és használható! Soha ne használja az autósülést huzat semleges mosószerrel tisztítható. Soha ne nélkül. ● Az autósülést kötelező mindig rögzíteni a használjon erős vegyszert vagy fehérítőt. b)A autósülés huzata elsősorban kézzel, illetve gépjáműben. - Page 19 RÖGZÍTÉS JELLEMZŐK e) Lazítsa meg a biztonsági öveket (F17), majd állítsa a gyermekülést alvó pozícióba.(F19) f) Állítsa át az also tengelyzárt és tolja előre az ülés háttámláját g) Vezesse át az auto biztonsági övét az ülés alapja és a háttámla között középen és csatolja be az autó csatjába.
- Page 20 JELLEMZŐK RÖGZÍTÉS Vállöv magasságának állítása a) A tökéletes öv hosszúság a vállpántknál , ha az öv bújtató pontosan a gyerek vállvonalát kicsit meghaladva helyezkedik el, innen kell kihúzni az övet. Mindig úgy állítsa be a vállpántokat, hogy kicsit feljebbről jöjjön, mint ameddig a gyermek válla ér.(F15) b) A vállpántok több magassági fokozatban állíthatók, mindig a gyermek magasságának...
- Page 21 RÖGZÍTÉS RÖGZÍTÉS Az autósülés rögzítése a gépjármű 3 pontos övével b) Soha ne húzza az övpárnákat! Az autósülés kizárólag 3 pontos biztonsági övvel c) Nyissa szét az övcsatot! F11) ellátott autóban rögzíthető.(F1) Az autósülés d) Helyezze a gyermeket az autósülésbe, ügyelve arra, hogy semmilyen tárgy vagy játék nincs menetiránynak megegyező...
- Page 22 RÖGZÍTÉS RÖGZÍTÉS Behelyezés a II. súlycsoport számára (15-25kg) Mielőtt behelyezné az autóba távolítsa el az ülésben található belső biztonsági övet, ennek a Behelyezés az I. súlycsoport számára (9-18kg) súlycsoportnak már nem lesz rá szüksége. a) állítsa a gyermekülést alvó pozícióba. (beleértve a vállpántokon található...
- Page 23 AVVERTENZE AVVERTENZE Prima di installare il seggiolino in auto assicurarsi che tutti i bagagli e oggetti che possono causare lesioni in caso di incidente siano solidamente Questo seggiolino auto è stata progettata per il ancorati all'interno dell'autoveicolo r. gruppo I (9-18kg) e II (15-25 kg); si consiglia il suo utilizzo per i bambini di età...
-
Page 24: Istruzioni Per L'installazione
AVVERTENZE ISTRUZIONI PER L'INSTALLAZIONE La installazione del seggiolino si fa con la Non lasciate mai il vostro bambino a giocare con cintura di sicurezza a 3 punti la fibbia della cintura. Il seggiolino può essere usato solo con cintura del Fare delle pause durante i lunghi viaggi, in modo veicolo in 3 punti (vedi figura F1). - Page 25 ISTRUZIONI PER L'INSTALLAZIONE ISTRUZIONI PER L'INSTALLAZIONE Il metodo di installazione per il gruppo I (9-18 kg) a) Regolare il seggiolino nella posizione per dormire 3 o 4. (vedi fig. F3) b) Rimuovere il blocco del mandrino del seggiolino, tirando il dispositivo di blocco dalla sua parte mobile (vedi fig.
- Page 26 ISTRUZIONI PER L'INSTALLAZIONE ISTRUZIONI PER L'INSTALLAZIONE Posizionamento del bambino nel seggiolino a) Allentare le cinture per la spalla premendo il dispositivo di regolazione e tirare le cinghie di spalle verso di voi. Importante: Non tirare gli spallacci di sicurezza quando si esegue questa azione. (fig. F8-9) Nota! Dopo aver finito l'installazione, controllare che la sede è...
-
Page 27: Cura E Manutenzione
ISTRUZIONI PER L'INSTALLAZIONE CURA E MANUTENZIONE b) Allentare le cinture premendo il dispositivo di regolazione e tirando le cinture verso di voi quanto possibile (fig. F9). Importante: Non tirare de gli spallacci quando si esegue questa operazione. (fig. F9) c) Posizionare il seggiolino in posizione di riposo. d) Rimuovere le cinture dalla fibbia Yoke. - Page 28 SOTITUZIONE DEL RIVESTIMENTO TESSILE AVVISO FINALE Fase 4. Rimuovere il rivestimento tessile dell'intero i) Collegare le cinture alla fibbia Yoke. seggiolino auto, se possibile, e lavarlo in lavatrice j) Fissare il rivestimento tutto intorno al seggiolino. con un programma per tessuti delicati. Fase 5.
Need help?
Do you have a question about the Faro and is the answer not in the manual?
Questions and answers