Advertisement
Quick Links
Advertisement

Related Manuals for Savic Tasmania


Summary of Contents for Savic Tasmania
- Page 1 Tasmania assembly instructions...
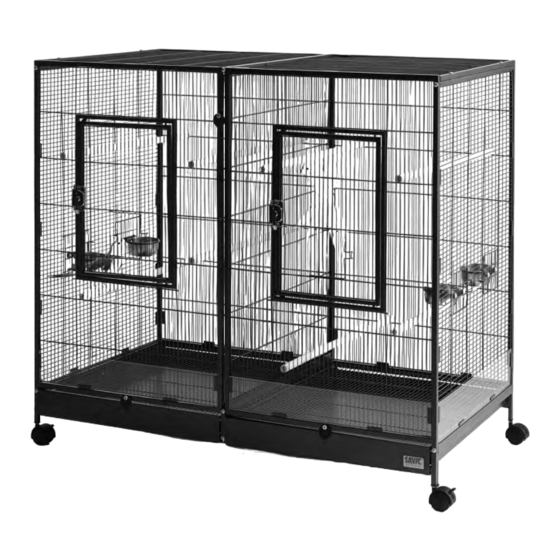
- Page 2 Savic would like to thank you for Wij, firma Savic, danken u voor Savic vous remercie de votre your purchase and confidence in uw aankoop en uw vertrouwen achat et de votre confiance en our Tasmania 120 cage. in onze kooi Tasmania 120.
- Page 3 Savic благодарит вас за Ihnen für Ihren Einkauf und elegido la Tasmania 120. покупку и уверенность в нашей Ihr Vertrauen in unserem Käfig двойной клетке Tasmania 120 . Tasmania 120. Para su seguridad le Ради вашей собственной Für Ihre persönliche Sicherheit, aconsejamos de llevar y montar безопасности, учитывая...
- Page 4 Parts list - Inhoud onderdelen - Liste des pièces livrées Gelieferte Teile - Lista de piezas - Обозначения деталей A left back panel A linkerachterpaneel A panneau arrière gauche B right back panel B rechterachterpaneel B panneau arrière droit C side panel ( x 2 ) C zijpaneel (x 2) C panneau latéral (x 2) D left front panel...
- Page 5 left roof panel linkerdakpaneel panneau de toit gauche J right roof panel J rechterdakpaneel J panneau de toit droit K separation grid K scheidingsrooster K grille de séparation L bottom grid (‘ x 2 ) L bodemrooster (x 2) L grille de fond (x 2) M wooden perches ( x 8) M houten zitstokken (x 8) M perchoirs en bois (x 8)
- Page 6 Q hexagon key Q inbussleutel Q clé hexagonale R wrench R moersleutel R clé Allen S screws ( x 18 ) S schroeven (x 18) S vis (x 18) T bolts + wing nut fasteners( x 8) T bouten + vleugelmoeren (x 8) T boulons + écrous à...
- Page 7 Assemble one of the side panels (C) to the right front panel (E). Tighten the screws (S) at the top and bottom using the hexagon key (Q). Monteer één van de zijpanelen (C) tegen het rechter voorpaneel (E). Draai de schroeven (S) bovenaan en onderaan aan met de inbussleutel (Q) Montez un des panneaux latéraux (C) sur le panneau avant droit (E).
- Page 8 Slide the left front panel (D) into the right front panel (E). Schuif het linkervoorpaneel (D) in het rechter voorpaneel (E). Glissez le panneau avant gauche (D) dans le panneau avant droit (E). Schieben Sie die linke Vorderwand (D) in die rechte Vorderwand (E). Encaje el panel delantero izquierdo (D) en el panel delantero derecho (E).
- Page 9 Assemble the slider (H) between the left and right front panel and back panel. Monteer de geleider (H) tussen de linker en rechter voor- en achterpanelen. Montez la glissière (H) entre les panneaux avant gauche et droit et le panneau arrière. Befestigen Sie den Schieber (H) zwischen der linken und der rechten Vorderwand und der Rückwand.
- Page 10 Assemble the second side panel (C) to the left front and back panel. Monteer het tweede zijpaneel (C) tussen de linker voor- en achterpanelen. Montez le deuxième panneau latéral (C) sur les panneaux avant et arrière gauches. Montieren Sie die zweite seitliche Wand (C) an Vorder- und Rückwand.
- Page 11 Assemble now the right roof panel (J). Monteer nu het rechter dakpaneel (J). Assemblez maintenant le panneau de toit droit (J). Montieren Sie nun die rechte Dachplatte (J). Coloque el panel del techo derecho (J). Установите правую панель крыши (J). Fix now the cup holders (N) on the inside of the small doors of the side panels.
- Page 12 Place now all the stainless steel bowls (O) into the cup holders and install the castors (P). Plaats alle roestvrijstalen kommen (O) in de bekerhouders en installeer de wieltjes (P). Placez maintenant toutes les écuelles en inox (O) dans les porte- écuelles et installez les roulettes (P).
- Page 13 Place the plastic panels (U, V, W) on all sides of the cage. Plaats de plastic panelen (U, V, W) aan alle kanten van de kooi. Montez les panneaux en plastique (U, V, W) sur toutes les faces de la cage. Bringen Sie die Kunststoffwände (U, V, W) an allen Seiten des Käfigs an.
- Page 14 You can convert the standard version of Tasmania cage into a small animal cage. The wooden kit is separately available (art.nr.: A951137). U kunt de standaardversie van de Tasmania-kooi ook omvormen tot een kooi voor knaagdieren. De houten kit is apart verkrijgbaar (art.nr.: A951137).
- Page 16 Ringlaan 10 • B-8501 Heule • Belgium Tel. +32 56 35 33 45 • Fax +32 56 35 77 30 info@savic.be...