Table of Contents
Advertisement
Quick Links
Zeno 3
Empire
collapsible small animal home
Assembly instructions for the Zeno 3 Empire
Richtlijnen voor de montage van de Zeno 3 Empire
Instructions pour le montage de la Zeno 3 Empire
Aufbau-Anleitung des Zeno 3 Empire
Instrucciones de montaje de la Zeno 3 Empire
инструкция по сборке Zeno 3 Empire
80 x 50 x 50 cm
www.savic.be
Ringlaan 10 • B-8501 Heule • Belgium
Tel. +32 56 35 33 45 • Fax +32 56 35 77 30
info@savic.be
Doc.nr.: 931868
4077-ZENO EMPIRE HANDLEIDING.indd 1
13/07/2015 11:14:33
Advertisement
Table of Contents

Related Manuals for Savic Zeno 3 Empire


Summary of Contents for Savic Zeno 3 Empire
- Page 1 Empire collapsible small animal home Assembly instructions for the Zeno 3 Empire Richtlijnen voor de montage van de Zeno 3 Empire Instructions pour le montage de la Zeno 3 Empire Aufbau-Anleitung des Zeno 3 Empire Instrucciones de montaje de la Zeno 3 Empire инструкция...
- Page 2 Savic would like to thank you for your purchase and confidence in our ZENO 3 EMPIRE cage. We can assure you that you have acquired a high quality small animal cage. Due to the size of the cage, we recommend that a minimum of two people carry and assemble this cage.
- Page 3 ATTENTION To avoid leakage, always fill bottle 100%. Rince spout with hot water before first use. 4077-ZENO EMPIRE HANDLEIDING.indd 3 13/07/2015 11:14:38...
- Page 4 Attach on all 4 profiles (f ) the 4 corner pieces (h). Slide the 2 side panels (o) in the vertical profiles (k). Make sure that the closures are facing outwards and the panels are well placed in the corner pieces (h). Slide the back panel with hooks (q) in the vertical profiles (k).
- Page 5 Turn the cage 180 ° and slide the front panel with hooks (n) in the profiles. Make sure that the closure of the door is facing outwards. Insert 4 x g in every plat- form (b). Place the first platform in the corner of the side and back panel between wire 15 &...
- Page 6 Slide the top back panel (p) into the profiles. Make sure the vertical wires are on the outside and the panels are assembled as shown. Attach the last platform as shown between wire 31 & 32, starting from the top. 4077-ZENO EMPIRE HANDLEIDING.indd 6 13/07/2015 11:15:01...
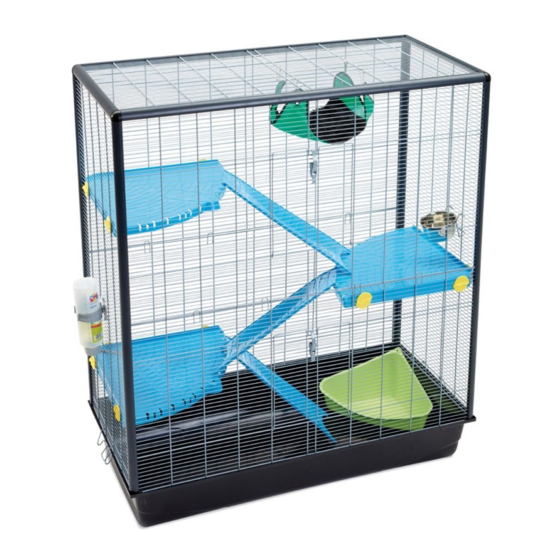
- Page 7 Insert the top front panel (m) into the profiles. Again, make sure the clo- sure of the door is on the outside. Place the roof panel (l) on top. Attach the hammock (j) on the roof panel, place the corner toilet (i) in the bottom tray and connect the platforms with the ladder (c).
- Page 8 Finally, install the drinking bottle (e) and the feeding bowl (d) and your cage is now ready for use. 4077-ZENO EMPIRE HANDLEIDING.indd 8 13/07/2015 11:15:12...
Need help?
Do you have a question about the Zeno 3 Empire and is the answer not in the manual?
Questions and answers