Advertisement
perma STAR CONTROL - Quick Start Guide
1. Predefi ne installation / Select lubricant, discharge period + connecting parts
Examples: Bearing lubrication
Support fl ange
Reducer
Direct mounting
2. Prepare lube-point
Clean lube-point
For direct mounting:
Prefi ll lube-point and any connecting parts
(use the same grease that is contained in the lubrication system)
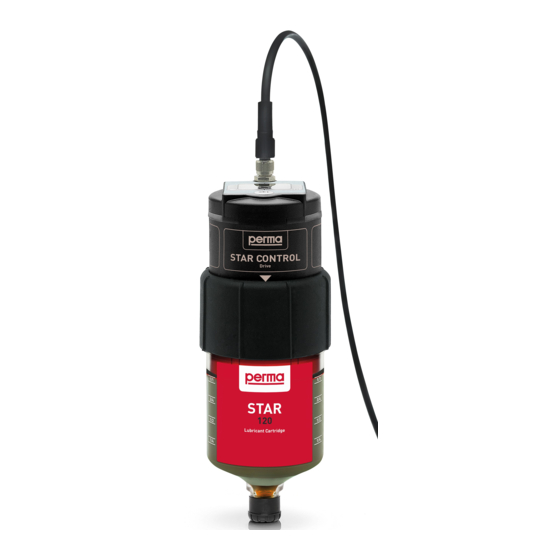
3. Activation / Installation of lubrication system
Tighten threaded ring hand tight until
Assemble drive
the white triangle is completely visible
and LC
www.permausa.com
Mounting bracket
STAR Standard Duty
1-point G1/4 female
(109663)
Hose connector 1/4" NPT male
for hose iØ 3/8" - push-on
(902160)
Remote mounting for lube-points with vibration,
limited mounting space, high temperature
Remove grease fi tting
For remote mounting:
Prefi ll lube-point and any grease lines / connections
(use the same grease that is contained in the lubrication system)
7
1...
2
01/2021
07/2021
Note activation /
exchange date
on label
Support fl ange STAR
G1/4 male x G1/4 female
(109420)
Reducer G1/4 male x
1/4" NPT female
(901000)
Hose connector 1/4" NPT male for
hose iØ 3/8" - push-on
(901007)
Heavy Duty hose up to
260 °F / 127 °C iØ 3/8" black
(901006)
Reducer
Confi guration can be
found on the back page
Remove plug
Select a suitable lubricant
for perma STAR LC unit
Select discharge period
→ e. g. with perma SELECT APP
(refer to our product catalog for details)
Possible mounting positions:
Add reducer, support fl ange
and tubes (if required)
Pressure check: Lube-point / all connecting parts
Remove cap and screw
the lubrication system into
Connect the cable to the
drive by screwing it on
the lubrication point
360°
(Oil fi lled LC
+/- 45°)
Add sealant
Advertisement
Table of Contents

Related Manuals for Perma STAR CONTROL


Summary of Contents for Perma STAR CONTROL
- Page 1 STAR CONTROL - Quick Start Guide 1. Predefi ne installation / Select lubricant, discharge period + connecting parts Examples: Bearing lubrication Select a suitable lubricant for perma STAR LC unit Support fl ange STAR G1/4 male x G1/4 female...
- Page 2 SET button SET button 5. Electrical connection Electrical connection Signal output Connection in parallel 9-30 V OUTPUT + V DC Err Err/LC Wiring diagram for 4 perma STAR CONTROL https://www.permausa.com/en/downloads/quick-start-guides/ 6. Quick Reference Description Feature TIME ◄ ◄ ◄ TIME TIME...
Need help?
Do you have a question about the STAR CONTROL and is the answer not in the manual?
Questions and answers