Advertisement
Quick Links
Advertisement

Related Manuals for Sanyo Denki SANUPS E11B


Summary of Contents for Sanyo Denki SANUPS E11B
- Page 1 M0012367 Uninterruptible Power Supply 100V, 200V Setting Menu Manual...
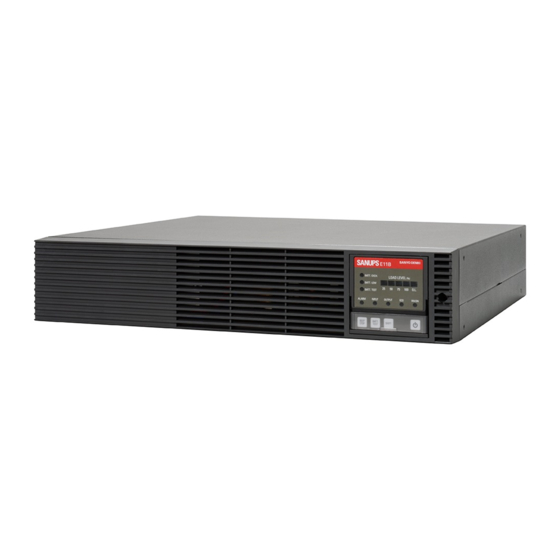
- Page 2 Introduction Thank you for purchasing our Uninterruptible Power Supply System E11B (hereinafter UPS). This manual describes the functions of the Setting Menus and how to use them. Please read this manual before using the Setting Menus. Be sure to store this manual in an accessib le location after you have finished reading. For details on UPS installation, operation, and maintenance, see the E11B instruction manual.
- Page 3 The UPS is provided with the setting menus described in “1.2 Setting Menus List”. The factory default settings are the values marked with an asterisk (*) in the "Default Setting" column of the Setting Menus List. Set the values according to your environment and load device specifications.
- Page 4 ●,■: Indicates that the LED is blinking. ○,□: Indicates that the LED is off. The table below shows a list of UPS setting menus. For setting menus marked with "", after you change the setting value, the value will not take effect until after you restart the UPS. Item Setting Value Default...
- Page 5 Item Setting Value Default Current No. Page Setting Menu Menu LED Setting Value Description Setting Setting 1 min. ■ □ □ □ 2 min. □ ■ □ □ 3 min. ■ ■ □ □ 5 min. □ □ ■ □ 22 2.18 Battery test time ○●○○●...
- Page 6 You can change settings in all setting menus as explained below. See the respective items for details about the settings in each menu. Step Operation Remarks This operation can be performed no matter the state of all LEDs Confirm that [INPUT (Green)] is lit, then press and hold other than [INPUT (Green)] (blinking, lit, or not lit).
-
Page 7: Operation
Set the UPS operation mode. Step Operation Remarks This operation can be performed no matter the state of all LEDs other Confirm that [INPUT (Green)] is lit, then press and hold than [INPUT (Green)] (blinking, lit, or not lit). for three to four seconds. - Page 8 Set the output voltage. Set the output voltage according to your environment. Step Operation Remarks This operation can be performed no matter the state of all LEDs other Confirm that [INPUT (Green)] is lit, then press and hold than [INPUT (Green)] (blinking, lit, or not lit). for three to four seconds.
- Page 9 Set the range of the output frequency when the operation mode is set to “Auto”. Step Operation Remarks This operation can be performed no matter the state of all LEDs other Confirm that [INPUT (Green)] is lit, then press and hold than [INPUT (Green)] (blinking, lit, or not lit).
- Page 10 Set the interface when using a PC I/F, CARD I/F, or REMOTE terminal on the back of the UPS. For details, refer to “5. Using the UPS (Application)” in the UPS instruction manual. Step Operation Remarks This operation can be performed no matter the state of all LEDs other Confirm that [INPUT (Green)] is lit, then press and hold than [INPUT (Green)] (blinking, lit, or not lit).
- Page 11 Set the baud rate for when a workstation, PC, LAN interface card, or the like is connected. Step Operation Remarks This operation can be performed no matter the state of all LEDs other Confirm that [INPUT (Green)] is lit, then press and hold than [INPUT (Green)] (blinking, lit, or not lit).
- Page 12 When using the PC I/F connector on the back of the UPS, set whether the RS-232C or USB connector will be used. Step Operation Remarks This operation can be performed no matter the state of all LEDs other Confirm that [INPUT (Green)] is lit, then press and hold than [INPUT (Green)] (blinking, lit, or not lit).
- Page 13 Set the UPS operation to be performed when utility power recovers after the UPS stops due to end of battery discharge during a power outage. This setting cannot be set using the UPS when you are using the SANUPS SOFTWARE STANDALONE or SANUPS SOFTWARE (optional) power management software.
- Page 14 Set when the buzzer should beep. Step Operation Remarks This operation can be performed no matter the state of all LEDs other Confirm that [INPUT (Green)] is lit, then press and hold than [INPUT (Green)] (blinking, lit, or not lit). for three to four seconds.
- Page 15 Set the shutdown operation for the button on the control panel to stop the UPS. This setting only changes the “OFF operation” and does not affect the “ON operation”. Step Operation Remarks This operation can be performed no matter the state of all LEDs other Confirm that [INPUT (Green)] is lit, then press and hold than [INPUT (Green)] (blinking, lit, or not lit).
- Page 16 Set conditions for returning to inverter power supply after switching to bypass power because of overload. Step Operation Remarks This operation can be performed no matter the state of all LEDs other Confirm that [INPUT (Green)] is lit, then press and hold than [INPUT (Green)] (blinking, lit, or not lit).
- Page 17 Set the UPS operation when the UPS is stopped by button operation. Step Operation Remarks This operation can be performed no matter the state of all LEDs other Confirm that [INPUT (Green)] is lit, then press and hold than [INPUT (Green)] (blinking, lit, or not lit). for three to four seconds.
- Page 18 Set whether the UPS will switch to bypass power when an input error (low input voltage or input frequency error) has occurred and the UPS is overload, there is a UPS fault, or battery discharge has completed. Step Operation Remarks ...
- Page 19 Set whether or not to output a “Device error” transmission signal from the CARD I/F connector when a minor malfunction (UPS surrounding temperature warning) occurs. Step Operation Remarks This operation can be performed no matter the state of all LEDs other than Confirm that [INPUT (Green)] is lit, then press and hold [INPUT (Green)] (blinking, lit, or not lit).
- Page 20 “ ” “ ” Output a simulated “Device error” transmission signal from the CARD I/F connector for equipment testing or the like. After testing is completed, be sure to return the setting to its original value. Step Operation Remarks This operation can be performed no matter the state of all LEDs other Confirm that [INPUT (Green)] is lit, then press and hold than [INPUT (Green)] (blinking, lit, or not lit).
- Page 21 “ ” “ ” Output a simulated “Low battery voltage” transmission signal from the CARD I/F connector for equipment testing or the like. After the testing is completed, be sure to return the setting to its original value. Step Operation Remarks ...
- Page 22 Set whether to start up the UPS under battery power when the utility power status is bad. Step Operation Remarks This operation can be performed no matter the state of all LEDs other Confirm that [INPUT (Green)] is lit, then press and hold than [INPUT (Green)] (blinking, lit, or not lit).
- Page 23 Set the timing for issuing a low battery voltage warning. This setting cannot be set using the UPS when you are using the SANUPS SOFTWARE STANDALONE or SANUPS SOFTWARE (optional) power management software. Configure the settings using the power management software. For details, see the user guide of the power management software.
- Page 24 Set the duration of the battery test implemented periodically or manually. Step Operation Remarks This operation can be performed no matter the state of all LEDs other Confirm that [INPUT (Green)] is lit, then press and hold than [INPUT (Green)] (blinking, lit, or not lit). for three to four seconds.
- Page 25 Set the backup time when using an external battery. Step Operation Remarks This operation can be performed no matter the state of all LEDs other Confirm that [INPUT (Green)] is lit, then press and hold than [INPUT (Green)] (blinking, lit, or not lit). for three to four seconds.
- Page 26 Set when replacing batteries or when the changing battery types when adding an external battery. Step Operation Remarks This operation can be performed no matter the state of all LEDs other Confirm that [INPUT (Green)] is lit, then press and hold than [INPUT (Green)] (blinking, lit, or not lit).
- Page 27 Set the interval (number of days) by which you want to run the battery test automatically. The battery test is implemented automatically when the set number of days elapses. This setting cannot be set using the UPS when you are using the SANUPS SOFTWARE STANDALONE or SANUPS SOFTWARE (optional) power management software.
- Page 28 Set the time until the UPS confirms that the utility power supply has recovered after the UPS stops due to end of battery discharge during a power outage. Step Operation Remarks This operation can be performed no matter the state of all LEDs other Confirm that [INPUT (Green)] is lit, then press and hold than [INPUT (Green)] (blinking, lit, or not lit).
- Page 29 Set the remote switch connected to the remote terminal on the UPS. See “5.6 Turning the UPS ON/OFF with the Remote Switch” for details. Step Operation Remarks This operation can be performed no matter the state of all LEDs other Confirm that [INPUT (Green)] is lit, then press and hold than [INPUT (Green)] (blinking, lit, or not lit).
- Page 30 Reset the battery information when replacing batteries, changing the backup time, or changing the battery type. If you mistakenly reset the battery information, remaining battery life warnings will not display correctly. Step Operation Remarks This operation can be performed no matter the state of all LEDs other Confirm that [INPUT (Green)] is lit, then press and hold than [INPUT (Green)] (blinking, lit, or not lit).
- Page 31 Resets the settings back to their factory default values. Performing this operation resets the settings in all menus. You cannot reset values on a per menu basis. Step Operation Remarks This operation can be performed no matter the state of all LEDs other Confirm that [INPUT (Green)] is lit, then press and hold than [INPUT (Green)] (blinking, lit, or not lit).
Need help?
Do you have a question about the SANUPS E11B and is the answer not in the manual?
Questions and answers