
Related Manuals for Sanyo Denki SANUPS E11A Series


Summary of Contents for Sanyo Denki SANUPS E11A Series
- Page 1 M0009096B Uninterruptible Power Supply User Settings Guide...
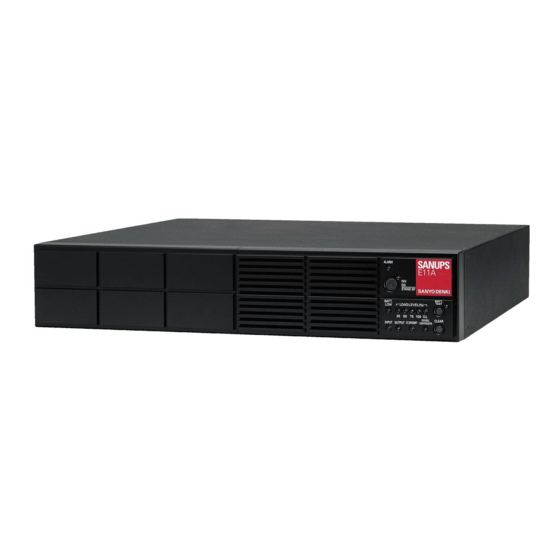
- Page 2 Introduction Thank you for choosing the SANUPS E11A. SAVE THESE INSTRUCTIONS This manual describes the functions and setting operations of the user setting menus. To operate correctly, read this manual when setting or changing the user setting menus of the UPS. Please be sure E11A Instruction Manual to also read the for details about UPS installation, operation, and...
-
Page 3: Setup Menu List
§ § § § The UPS has a user settings menu, described in §2 “Setup Menu List”. The factory default setting of the UPS is indicated by the “ * ” mark in the “Default Setting” column. Configure each menu according to your environment, your applications, and the specifications of the connected load devices. -
Page 4: Operation
§ § The available menus in the next page table (No.17-28) vary depending on the UPS model. ●: indicates that LED is blinking. See Appendix “UPS Model name” to check your UPS Model. ○: indicates that LED is off. Ref. Setting Default Current... -
Page 5: Setting Pc Interface
001, 002 Model: No.17- No.28 Menus are not available. These Menu LED blinking patterns are not displayed. Model: No.17- No.27 Menus are not available. Only No.28 Menu is available. Although Menu LED blinking patterns of No.17 - No.27 are displayed, do not change the settings of these Menus. 011, 012 Model: No.17- No.28 Menus are available. - Page 6 § § Set the UPS operation mode. § § Select “Auto”, “ Double Conversion” or “Economy”. ① Check that the UPS is in the following condition. *1. Operation is possible regardless of whether MAIN SW on the back panel set to “ON”. *1 is ON or OFF.
- Page 7 Set the output voltage. Select the output § § voltage according to your using environment. ① Check that the UPS is in the following condition. *1. Operation is possible regardless of whether MAIN SW on the back panel set to “ON” *1 is ON or OFF.
- Page 8 Set the output frequency variation range (%) in § § economy mode and auto mode operation. ① Check that the UPS is in the following condition. *1. Operation is possible regardless of whether MAIN SW on the back panel set to “ON”. *1 is ON or OFF.
- Page 9 Set the output frequency when starting up § the UPS by the procedures of “UPS Battery § Power Startup” in §11.1 “UPS Startup” in E11A Instruction Manual ① Check that the UPS is in the following condition. *1. Operation is possible regardless of whether MAIN SW on the back panel set to “ON”.
- Page 10 Set the interface mode when using external § § interface connector. ① Check that the UPS is in the following condition. *1. Operation is possible regardless of whether MAIN SW on the back panel set to “ON”. *1 is ON or OFF. The “Green ON/STAND BY”...
- Page 11 Set the serial baud rate when a workstation, PC, § § or optional LAN Interface card is connected. ① Check that the UPS is in the following condition. *1. Operation is possible regardless of whether MAIN SW on the back panel set to “ON”. *1 is ON or OFF.
- Page 12 Specify the UPS operation when power recovers after the UPS stops due to § § final discharge of the batteries during a power outage. When using the supplied power management software or optional power management software, you cannot set this menu on the control panel of the UPS. Set this menu using the power management software. Refer to the User Guide of the power management software.
- Page 13 Select the conditions under which the UPS emits § § the buzzer sound. ① Check that the UPS is in the following condition. *1. Operation is possible regardless of whether MAIN SW on the back panel set to “ON”. *1 is ON or OFF.
- Page 14 Set the shutdown operation for switch to stop the UPS. This operation is § § only valid for the shutdown operation. The startup operation cannot be changed. ① Check that the UPS is in the following condition. *1. Operation is possible regardless of whether MAIN SW on the back panel set to “ON”...
- Page 15 Set the conditions for automatic switch back to the UPS power supply (auto return) after § § switching to the bypass power supply because of overload. ① Check that the UPS is in the following condition. *1. Operation is possible regardless of whether MAIN SW on the back panel set to “ON”.
- Page 16 Specify the UPS power supply conditions when the UPS is stopped by the procedure in § § E11A §11.2 “UPS Shutdown (Daily)” in the Instruction Manual ① Check that the UPS is in the following condition. MAIN SW on the back panel set to “ON” *1 *1.
-
Page 17: Setting Buzzer Sound
Set the timing of emitting the low § § battery voltage warning. When using the supplied power management software or optional power management software, you cannot set this menu on the control panel of the UPS. Set this menu using the power management software. Refer to User Guide of the power management software. - Page 18 Set the UPS backup time when a battery box is § § connected. ① Check that the UPS is in the following condition. MAIN SW on the back panel set to “ON” *1 *1. Operation is possible regardless of whether The “Green INV.ON/STAND BY”...
- Page 19 Set the battery type. Set this when you replace § § the battery or connect an external battery. ① Check that the UPS is in the following condition. *1. Operation is possible regardless of whether MAIN SW on the back panel set to “ON” *1 is ON or OFF.
- Page 20 Set the interval (number of days) for the automatic § battery test. The test is carried out automatically § when the specified number of days has elapsed. When using the supplied power management software or optional power management software, you cannot set this menu on the control panel of the UPS.
- Page 21 The battery information should be reset when the battery is replaced. If resetting is performed § § accidentally, the alarm of the remaining battery service life is not emitted correctly. ① Check that the UPS is in the following condition. *1.
- Page 22 Set §3.17, §3.18, and §3.19 if you want to perform linked operation. E11A Instruction Manual See §18.2 “Linked Operation Cable” in the for details about linked operation. Specify whether to enable or § § disable the ON/OFF delay times that are set with §3.18 and §3.19. This menu is available for 011 and 012 model.
- Page 23 Set the ON delay time for linked operation. The delay is enabled only when “Delay” is specified in §3.17 “Enabling and Disabling § § Linked Operation Delay”. This menu is available for 011 and 012 model. ① Check that the UPS is in the following condition. *1.
- Page 24 Set the OFF delay time for linked operation. The delay is enabled only § § when §3.17 is set to “Delay”. This menu is available for 011 and 012 model. ① Check that the UPS is in the following condition. *1.
- Page 25 Set §3.20 to §3.27 when you want to perform output line control using an outlet box. E11A Instruction Manual For details about output line control, see §18.3 “Outlet Box” in the Select whether or not to perform § § output line control. This menu is available for 011 and 012 model.
- Page 26 § § If you want to perform output line control, set the outlet box OUTPUT1 ON delay time. The specified ON delay time is enabled only when §3.20 is set to “Enabled”. This menu is available for 011 and 012 model. When using the optional power management software, you cannot set this menu on the control panel of the UPS.
- Page 27 § § If you want to perform output line control, set the outlet box OUTPUT2 ON delay time. The specified ON delay time is enabled only when §3.20 is set to “Enabled”. This menu is available for 011 and 012 model. When using the optional power management software, you cannot set this menu on the control panel of the UPS.
- Page 28 § § If you want to perform output line control, set the outlet box OUTPUT1 OFF delay time. The specified OFF delay time is enabled only when §3.20 is set to “Enabled”. This menu is available for 011 and 012 model. When using the supplied power management software, you cannot set this menu on the control panel of the UPS.
- Page 29 § § If you want to perform output line control, set the outlet box OUTPUT2 OFF delay time. The specified OFF delay time is enabled only when §3.20 is set to “Enabled”. This menu is available for 011 and 012 model. When using the optional power management software, you cannot set this menu on the control panel of the UPS.
- Page 30 § § Set the length of time that output from OUTPUT1 continues after a power outage. After passage of the specified time, OUTPUT1 is turned OFF. This setting is enabled only when §3.20 is set to “Enabled” and §3.5 is set to “Standalone”. This menu is available for 011 and 012 model.
- Page 31 § § Set the length of time that output from OUTPUT2 continues after a power outage. After passage of the specified time, OUTPUT2 is turned OFF. This setting is enabled only when §3.20 is set to “Enabled” and §3.5 is set to “Standalone”. This menu is available for 011 and 012 model.
- Page 32 § § Set the operation of the outlet box OUTPUT0 after OUTPUT1 and OUTPUT2 are stopped by the power management software, or stopped by the standard UPS service of the operating system, or stopped after passage of the specified “Outlet Box OUTPUT1 Power Outage Output Time” and “Outlet Box OUTPUT2 Power Outage Output Time”. This setting is enabled only when “Enabled”...
- Page 33 Select whether or not to output a Ring signal § § when the UPS starts. This menu is available for 011, 021 and 012 model. *What is a Ring signal? This is a signal that automatically starts a connected computer when the UPS starts. This is enabled when the computer supports a Wake Up on Ring function and when the computer is connected to the UPS with the supplied Network cable.
-
Page 34: Setting Battery Backup Time
Resets the setting value to the factory § § defaults. When you perform this operation, all settings return to the factory defaults. Menu items cannot be reset individually. ① Check that the UPS is in the following condition. *1. Operation is possible regardless of whether MAIN SW on the back panel set to “ON”... - Page 35 E11A351*001USJ MASS DATE ***.** SANYO DENKI CO.,LTD. UPS model name in the “User Settings Guide”. In this "User Settings Guide", the name of UPS may be referred to as “001 model” and “021 model” etc. or “ as shown in the table below depending on the item explained.
Need help?
Do you have a question about the SANUPS E11A Series and is the answer not in the manual?
Questions and answers