
Related Manuals for TEFAL X-plorer 95 Series


Summary of Contents for TEFAL X-plorer 95 Series
- Page 1 EN User’s guide EE Kasutusjuhend RU Руководство пользователя LV Lietotāja rokasgrāmata PL Podręcznik użytkownika LT Naudotojo vadovas TEST X-plorer Serie 95...
- Page 3 LV Pirms pirmās izmantošanas reizes uzmanīgi izlasiet brošūru “Drošības un ekspluatācijas noteikumi”. LT Prieš pirmą kartą naudodami, įdėmiai perskaitykite brošiūrą „Saugumo ir naudojimo instrukcijos“ EN For more information RU Для получения дополнительной информации PL Więcej informacji można znaleźć na stronie EE Lisateave LV Plašāka informācija LT Daugiau informacijos www.tefal.com...
- Page 6 stool obstructions on staircases. cable ex. shoes books bowl liquid EN Your robot may encounter some difficulties on carpets: with fringes, too thick, with long piles, too light (ex: bathroom carpet). RU На коврах робот-пылесос может столкнуться с определенными трудностями: бахрома, большая толщина, длинный ворс, малый вес (например, коврики для ванной). PL Odkurzacz automatyczny może nie działać...
- Page 7 EN : PL : LV : 1. Power / Start Pause 1. Zasilanie / Start Pauza 1. Ieslēgšana/sākšana pauze 2. LDS (Laser Distance 2. Laserowy czujnik odległości 2. Lāzera attāluma sensors Sensor) 3. Ponowne ładowanie / 3. Uzlāde/punktveida tīrīšana 3. Recharge / Spot cleaning Czyszczenie miejscowe 4.
- Page 8 EN : PL : LV : 1. Dust box and water tank 1. Pojemnik na kurz i zbiornik na wodę 1. Putekļu tvertne un ūdens tvertne 2. Water outlet adapter 2. Adapter wylotu wody 2. Ūdens izplūdes adapteris 3. Filter 3.
- Page 9 EN : EE : 1. Anti-drop sensor 1. Kukkumiskaitse andur 2. Side brush 2. Külghari 3. Wheel 3. Ratas 4. Water outlet 4. Vee väljalaskeava 5. Charging electrode 5. Laadimiselektrood 6. Caster 6. Rullik 7. Rolling brush 7. Rullhari 8. Rolling brush cover 8.
- Page 10 EN : LV : 1. Lock 1. Fiksators 2. Water outlet 2. Ūdens izplūde 3. Removal button 3. Noņemšanas poga 4. Slot 4. Rieva 5. Washable mop 5. Mazgājams mops RU : LT : 1. Фиксатор 1. Užraktas 2. Отверстие для выпуска 2.
- Page 11 Remove the bottom cover and connect the docking station with the adapter, and pay attention to arranging adapter connection wires to avoid being wound during sweep. Put the bottom cover back. Снимите нижнюю крышку и подключите зарядную док-станцию к адаптеру. Обратите...
- Page 12 1. 1. 0.5m 0.5m 1.5m To place the docking station, make sure there is an empty area of 0.5m on the side and 1.5m in front of the docking station. Do not install the docking station near stairs. The cable must be tight. Always place the docking station on hard floor. Do not place the docking station on carpet.
- Page 13 1. 1. Connect the adapter to a wall socket. The docking station lights when the robot is not plugged in. Remove the protective strip on the bumper to ensure proper operation of the device. Подключите адаптер к розетке. Индикатор док-станции загорается, когда робот- пылесос...
- Page 14 1. 1. Please fully charge the robot before using it for the first time. To do so, place the robot on the docking station and align it to the charging terminal. When the robot is correctly plugged, the docking station light will switch off. When the white indicators on the robot are normally set on, the robot is fully charged (4-5 hours).
- Page 15 In order to extend the battery lifespan, always keep the robot charging on the docking station while not using it. When not using the vacuum cleaner for a long time, please fully charge the battery, switch off the robot and store the robot in a cool dry place. Чтобы...
- Page 16 The robot has drop sensors to detect stairs and gaps. The robot will change direction when detecting them. In order to correctly detect the floor level difference, make sure there are no objects (bags, shoes …) on the floor next to gaps, stairs or on the stairs’ steps. The robot near stairs without objects ...
- Page 17 Robotil on treppide ja avade tuvastamiseks kukkumisandurid. Kui robot need tuvastab, siis ta muudab suunda. Põrandapinna tasemeerinevuste õigeks tuvastamiseks tagage, et avade, treppide või trepiastmete läheduses ei ole maas esemeid (kotte, kingi jne). Robot ilma esemeteta trepi peal Robot kingade, kottide või muude esemetega trepi peal (robot ei suuda treppi õigesti tuvastada ja kukub).
- Page 18 1. 1. Press the button during 3 seconds to turn on power (when the robot is not being charged). The white indicator will be normally set on. Reversely, press the button during 3 seconds to turn off power. Нажмите и удерживайте кнопку в...
- Page 19 When the robot is turned on, press the button to start automatic cleaning (or use X-plorer Series 75/95 app, see section 2). Press again to suspend cleaning. Press to stop current cleaning and return to the docking station. The robot automatically goes back to the docking station under one of the following conditions: •...
- Page 20 1. 1. Odkurzacz automatycznie powraca do stacji dokującej w przypadku zaistnienia jednego z poniższych warunków: • Odkurzacz zakończył sprzątanie • Akumulator nie jest dostatecznie naładowany; po naładowaniu akumulatora do 80% odkurzacz powróci do przerwanej czynności, by dokończyć sprzątanie Kui robot on sisse lülitatud, vajutage automaatse koristuse käivitamiseks nuppu (või kasutage X-plorer Series 75/95 rakendust, vt 2.
- Page 21 1. 1. 1.5 m 1.5 m Press the button during 3 seconds to start spot cleaning mode. The robot will focus on a 1,5m x 1,5m specific area. After the whole area has been swept, the robot will automatically return to the charging dock. Нажмите...
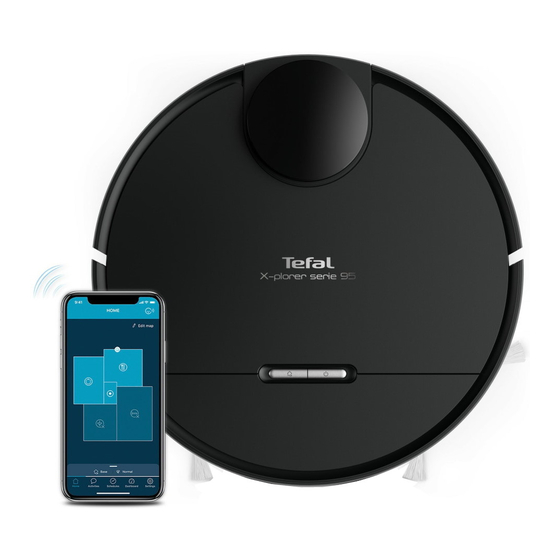
- Page 22 Google play) on your smartphone. Just follow the instructions in the application to enjoy the robot! Чтобы воспользоваться всеми функциональными возможностями робота-пылесоса, загрузите на свой смартфон бесплатное приложение «Tefal X-plorer Series 75/95» (чтобы найти его в AppStore или Google Play, используйте QR-код, указанный выше). Чтобы легко управлять роботом-пылесосом, следуйте инструкциям в приложении.
- Page 23 When the white indicator is flashing slowly, the device is waiting for connection. When the white indicator is flashing rapidly, the device is connecting WIFI. When the white indicator is normally set on, the device is connected ! Если белый индикатор медленно мигает, устройство ожидает подключения. Если белый...
- Page 26 month Wipe robot sensors with a dry, soft cloth including: • Wall sensor on the right side of the robot • Four anti-drop sensors on the bottom of the robot • Infrared anti-collision sensor in front of the robot on the bumper Please also wipe charging electrodes and the window of the charging dock regularly Протрите...
- Page 27 month To clean the dust box and water tank, open the robot cover, press the release button and remove the dust box and water tank. Press the open button of the dust box and empty the dust box. Tap the dust box to knock off excess dirt.
- Page 28 month Naciśnij przycisk zwolnienia pojemnika na kurz, aby odłączyć pojemnik na kurz od zbiornika na wodę. Tolmukasti ja veepaagi puhastamiseks avage roboti kate, vajutage vabastusnuppu ning võtke tolmukast ja veepaak välja. Vajutage tolmukasti avamisnuppu ja tühjendage tolmukast. Koputage tolmukasti, et sinna jäänud tolm välja raputada.
- Page 29 month Flush the water tank, dust box and filter module thoroughly with water. Let the water tank, dust box and filter module naturally dry for the next use. Put the pre-filter, foam filter and pleated filter back, and put the filter module back into the dust box.
- Page 30 month Loputage veepaaki, tolmukasti ja filtrihoidikut põhjalikult veega. Laske veepaagil, tolmukastil ja filtrimoodulil enne järgmist kasutamist õhu käes kuivada. Asetage eelfilter, vahtfilter ja kurdfilter tagasi ning pange filtrihoidik uuesti tolmukasti. Ühendage veepaak ja tolmukast omavahel ning pange need masinasse tagasi. Rūpīgi ar ūdeni izskalojiet ūdens tvertni, putekļu tvertni un filtra moduli.
- Page 31 month To clean the central brush, turn the robot OFF and turn the robot upside down. Press down the locker to take out the protective cover. And take out the central brush upwards. Clean the central brush with the cleaning tool. Для...
- Page 32 month To replace the central brush after having cleaned it, put one end of the central brush into the corresponding hole first. Then press the brush cover and fix it with the locker Чтобы установить центральную щетку на место после очистки, сначала вставьте один ее конец в...
- Page 33 month To clean side brush, remove it by unscrewing it and use a cleaning brush to clean the side brush and the entanglements in the slot of the side brush. Clean side brushes once a month. Чтобы очистить боковую щетку, разблокируйте ее, а затем открутите и очистите ее...
- Page 34 month Replace side brushes every 6 months. Throw away the old brushes and replace them with new ones. Screw the new brushes on the robot. Заменяйте боковые щетки каждые 6 месяцев. Выбросьте старые щетки и замените их новыми. Закрутите новые щетки на роботе-пылесосе. Szczotki boczne należy wymieniać...
- Page 35 month To clean the wheels, clean the front, left and right wheels once a month. The wheel shaft may be entangled by hair, cloth strips, etc. so please clean it in time ! Чтобы поддерживать чистоту, очищайте колеса (переднее, левое и правое) один раз...
- Page 36 month Component Cleaning the component Replacing the component Dust collector After each use Not applicable Filter Once a week Twice per year Brush Once a week If required Charging base Once a week Not applicable Fall sensors Once a week Not applicable Wheels Once a month...
- Page 37 month Część Czyszczenie części Wymiana części Pojemnik na kurz Po każdym użyciu Nie dotyczy Filtr Raz w tygodniu Dwa razy w roku Szczotka Raz w tygodniu W razie potrzeby Baza ładująca Raz w tygodniu Nie dotyczy Czujniki upadku Raz w tygodniu Nie dotyczy Koła Raz w miesiącu...
- Page 38 month Detaļa Detaļas tīrīšana Detaļas nomaiņa Putekļu savācējs Pēc katras lietošanas Neattiecas Filtrs Reizi nedēļā Divas reizes gadā Birste Reizi nedēļā Ja nepieciešams Uzlādes pamatne Reizi nedēļā Neattiecas Nokrišanas novēršanas Reizi nedēļā Neattiecas sensori Riteņi Reizi mēnesī Neattiecas Sānu birstes Reizi mēnesī...
- Page 39 year year Every 6 months replace the pleated filter and the foam with new ones to maintain optimal performances. Для оптимальной работы прибора заменяйте гофрированный и поролоновый фильтры каждые 6 месяцев. Co 6 miesięcy należy wymienić filtr silnika i filtr piankowy na nowe, aby zadbać o optymalną...
- Page 40 Do not throw the robot in the bin. Always wear gloves and protection. Remove the 5 screws. Remove the bottom cover. Take off the battery. Unplug the battery connector. Не выбрасывайте робот-пылесос вместе с бытовыми отходами. Всегда надевайте перчатки и средства защиты. Отверните 5 винтов. Снимите нижнюю крышку. Извлеките...
- Page 41 40°C - 104°F 0°C - 32°F...
- Page 42 FAULT SOLUTION • Make sure the robot is connected to power supply. Cannot start the robot • Make sure the battery is fully charged. • Check whether the robot is stuck or blocked by obstacles. • Check whether the battery is too low. •...
- Page 43 According to model: * When the robot fails, the red indicator on the robot will blink. Please check on the App the stated error code. Error code Solution Error 1: Collision bumper is stuck, please The collision bumper is stuck. Please tap repeatedly to remove foreign matters. check.
- Page 44 Error W1: Battery abnormal. Please consult Please open the battery compartment, check whether the battery is the instructions or APP. properly connected, and try to restart the robot. The battery temperature is too high or too low. Please wait for the battery temperature to be normal (0 °С~40 °С/32 °F~104 °F) before use.
- Page 45 НЕИСПРАВНОСТЬ РЕШЕНИЕ Не удается запустить робот- • Убедитесь, что робот-пылесос подключен к источнику питания. • Убедитесь, что аккумулятор полностью заряжен. пылесос • Убедитесь, что робот-пылесос не зажат между предметами, и его путь не заблокирован препятствиями. • Проверьте, достаточно ли заряда аккумулятора. Робот-пылесос...
- Page 46 В зависимости от модели: * Если с роботом возникает какая-то проблема, на нем начинает мигать красный индикатор. Поищите в приложении указанный код ошибки. Код ошибки Решение Ошибка 1. Бампер заклинило, проверьте его. Заклинило бампер. Слегка постучите по нему несколько раз, чтобы удалить посторонние...
- Page 47 Ошибка W1. Некорректная работа Откройте аккумуляторный отсек, проверьте правильность подключения аккумулятора. См. инструкции или аккумулятора и попробуйте перезапустить робот-пылесос. Температура ПРИЛОЖЕНИЕ. аккумулятора слишком высокая или слишком низкая. Перед использованием подождите, пока температура аккумулятора не достигнет нормального уровня (0 °С~40 °С). Если ошибка не устранена, обратитесь в наш...
- Page 48 PROBLEM ROZWIĄZANIE Nie można uruchomić odkurzacza • Upewnij się, że odkurzacz jest podłączony do zasilania. automatycznego • Upewnij się, że akumulator jest w pełni naładowany. • Sprawdź, czy odkurzacz nie utknął lub nie został zablokowany przez przeszkody. • Sprawdź, czy poziom naładowania akumulatora nie jest zbyt niski. •...
- Page 49 Odpowiednio do modelu: * Gdy odkurzacz się zepsuje, czerwona kontrolka odkurzacza zacznie migać. Sprawdź w aplikacji podany kod błędu. Kod błędu Rozwiązanie Błąd 1: Zderzak antykolizyjny zablokował się, Zderzak antykolizyjny zablokował się. Postukaj kilka razy, by usunąć blokujące sprawdź to. elementy.
- Page 50 Błąd W1: Nieprawidłowe działanie Otwórz komorę akumulatora, sprawdź, czy akumulator jest prawidłowo akumulatora. Zapoznaj się z instrukcją lub podłączony i spróbuj ponownie uruchomić odkurzacz automatyczny. aplikacją. Temperatura akumulatora jest zbyt wysoka lub zbyt niska. Poczekaj, aż temperatura akumulatora znajdzie się w prawidłowym przedziale (0°С~40°С/32°F~104°F), zanim ponownie skorzystasz z urządzenia.
- Page 51 TÕRGE LAHENDUS • Veenduge, et robot on toiteallikaga ühendatud. Robot ei käivitu • Veenduge, et aku on täis laetud. • Kontrollige, kas robot on kinni jäänud või selle liikumisteel on takistusi. • Kontrollige, kas aku on tühi. • Kui probleem püsib, lülitage robot välja, oodake 3 sekundit ja käivitage uuesti. Robot lõpetab järsku töötamise •...
- Page 52 Vastavalt mudelile * Roboti tõrke korral hakkab selle punane indikaator vilkuma. Vaadake rakendusest vastavat veakoodi. Veakood Lahendus Viga 1: põrkelaba on kinni jäänud, vaja Põrkelaba on kinni jäänud. Koputage seda korduvalt, et eemaldada võõrkehad. kontrollida. Kui võõrkehasid ei ole, pange see oma kohale tagasi ja käivitage robot. Viga 2: ratas on kinni jäänud.
- Page 53 Viga W1: aku viga. Lugege teavet Avage akusektsioon ja kontrollige, kas aku on õigesti ühendatud, seejärel kasutusjuhendist või rakendusest. proovige robotit taaskäivitada. Aku temperatuur võib olla liiga kõrge või madal. Oodake enne kasutamist, kuni aku temperatuur jõuab normtasemeni (0 °С~40 °С/32 °F~104 °F). Vea püsimise korral võtke ühendust meie teenindusosakonnaga.
- Page 54 KĻŪDA RISINĀJUMS • Pārliecinieties, ka robots ir pievienots strāvas apgādei. Robotu nevar ieslēgt • Pārliecinieties, ka akumulators ir pilnībā uzlādēts. • Pārbaudiet, vai robots nav iestrēdzis vai iesprūdis aiz priekšmetiem. • Pārbaudiet, vai akumulatora uzlādes līmenis nav pārāk zems. • Ja problēmu neizdodas novērst, izslēdziet robotu, nogaidiet 3 sekundes un Robots pēkšņi pārstāj darboties restartējiet.
- Page 55 Atbilstoši modelim: * Ja robotam notiek darbības traucējums, uz robota mirgo sarkans indikators. Lietotnē apskatiet attēloto kļūdas kodu. Kļūdas kods Risinājums Kļūda 1: sadursmes buferis ir iestrēdzis, Sadursmes buferis ir iestrēdzis. Atkārtoti uzsitiet, lai novāktu svešķermeņus. pārbaudiet. Ja svešķermeņu nav, pārvietojiet to citā vietā un iedarbiniet. Kļūda 2: ritenis ir iestrēdzis.
- Page 56 Kļūda W1: akumulatora darbības Atveriet akumulatora nodalījumu, pārbaudiet, vai akumulators ir traucējums. Skatiet instrukcijas vai lietotni. pareizi pievienots, mēģiniet restartēt robotu. Akumulatora temperatūra ir pārāk augsta vai pārāk zema. Pirms lietošanas nogaidiet, līdz akumulatora temperatūra ir normāla (0–40 ˚C/32–104 ˚F). Ja kļūdu neizdodas novērst, sazinieties ar mūsu klientu apkalpošanas nodaļu.
- Page 57 GEDIMAS SPRENDIMAS • Patikrinkite, ar robotas yra įjungtas į elektros tinklą. Nepavyksta paleisti roboto. • Patikrinkite, ar akumuliatorius visiškai įkrautas. • Patikrinkite, ar robotas neįstrigo arba ar jam neužstoja kelio kliūtys. • Patikrinkite, ar nėra per daug išeikvotas akumuliatorius. • Jei problemos nepavyksta pašalinti, išjunkite robotą, palaukite 3 sekundes ir Robotas staiga nustoja veikęs: įjunkite iš...
- Page 58 Priklausomai nuo modelio: * Kai roboto veikimas sutrinka, ima mirksėti raudonas roboto indikatorius. Patikrinkite programėlėje nurodytą klaidos kodą. Klaidos kodas Sprendimas Klaida 1: Susidūrimo buferis yra įstrigęs, Susidūrimo buferis yra įstrigęs. Kelis kartus švelniai bilstelėkite, kad nukristų patikrinkite. pašalinės medžiagos. Jei pašalinės medžiagos nėra, perkelkite jį ir paleiskite iš naujo. Klaida 2: Įstrigo ratas.
- Page 59 Klaida W1: Akumuliatorius netinkamai Atidarykite akumuliatoriaus skyrių, patikrinkite, ar akumuliatorius tinkamai veikia. Perskaitykite instrukcijas arba sujungtas ir pamėginkite iš naujo paleisti robotą. Akumuliatoriaus temperatūra patikrinkite programėlę. per aukšta arba per žema. Palaukite, kol akumuliatoriaus temperatūra vėl bus normali (0 °С~40 °С / 32 °F~104 °F), tada naudokite. Jei klaidos nepavyksta pašalinti, susisiekite su mūsų...
- Page 60 The languages NL, PT, RO, BG, CS, SK, UK, SR, HR, EL, BA and HU are included in the safety instructions. Инструкции по безопасности доступны на языках NL, PT, RO, BG, CS, SK, UK, SR, HR, EL, BA и HU. Języki NL, PT, RO, BG, CS, SK, UK, SR, HR, EL, BA oraz HU włączono do instrukcji bezpieczeństwa.
- Page 61 TEST Straight line test For measuring dust collection performance in accordance with IEC 62885-7, testers can activate the straight line test by using the remote control feature in the app menu. Проверка по прямой линии Для оценки эффективности сбора пыли в соответствии со стандартом IEC 62885-7 может быть...
- Page 62 2220004350/02...
Need help?
Do you have a question about the X-plorer 95 Series and is the answer not in the manual?
Questions and answers