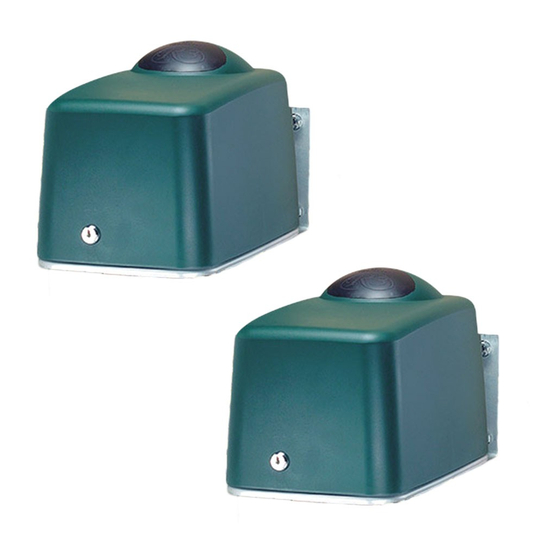
Centurion R3 Quick Setup Manual
Rotary swing gate operator
Hide thumbs
Also See for R3:
- Installation manual (56 pages) ,
- User manual (24 pages) ,
- Quick setup manual (19 pages)
Subscribe to Our Youtube Channel
Summary of Contents for Centurion R3
- Page 1 All manuals and user guides at all-guides.com R3R5 quick setup guide ROTARY SWING GATE OPERATOR...
-
Page 2: Required Tools And Equipment
All manuals and user guides at all-guides.com & E EQUIRED OOLS QUIPMENT Check that you have all the tools required. (IM page 12) ONSIDERATIONS Check for the safety and suitability of the site by looking at: (IM page All safety and local authority requirements. ... -
Page 3: Pedestal Mount
All manuals and user guides at all-guides.com TANDARD EDESTAL OUNT Pedestal Mount Installation Gate Bracket GATE LEAF IN CLOSED POSITION B E S U R E T O U S E A L O N G C O N N E C T I N G A R M F O R T H I S INSTALLATION TYPE. -
Page 4: Wall Mount
All manuals and user guides at all-guides.com ERPENDICULAR OUNT Wall Mount Installation Gate Bracket GATE LEAF IN CLOSED POSITION BE SURE TO USE A SHORT CONNECTING ARM FOR THIS INSTALLATION TYPE. Ensure that the gate does not exceed the relevant specifications (IM page 9) ... -
Page 5: Pedestal Mount Installation
All manuals and user guides at all-guides.com OUNT THE ATE BRACKET AND ETERMINE EDESTAL EIGHT Locate a suitable place for mounting the gate bracket according to dimension “C” in the tables of Figures 2 or 3. Determine pedestal or wall mount bracket height relative to gate bracket as in figure 4 and 5. -
Page 6: Wall Mount Installation
All manuals and user guides at all-guides.com OUNT NSTALLATION Wall Bracket Gate Bracket C (See Fig. 3) Figure 5 Wall/Gate Position & S OUTE ABLES ECURE OTOR Route cables as determined in the cabling plan in Figure 9. Make sure at least 400mm of cable protrudes above the pedestal or wall mount bracket. - Page 7 All manuals and user guides at all-guides.com ASTEN EARBOX IN OSITION Fasten the motor onto the pedestal adaptor plate or the wall bracket using the M8 bolts and washers supplied. (IM page 23) RIVE RM TO ENGTH Using the relevant tables below, read off the required drive arm length.
- Page 8 All manuals and user guides at all-guides.com IT THE RIVE Put the gearbox into manual mode. (IM page 24). Fit the drive arm to the operator as shown. SSEMBLE LAMP TO RIVE Clamp Clamp Drive Arm Drive Arm Wedge Wedge M12 Washer...
- Page 9 All manuals and user guides at all-guides.com ET THE ONNECTING ENGTH Loosen the connecting arm slightly and move it to its fully retracted position. Open the gate ½ way. Assemble the connecting arm to the gate bracket. ...
-
Page 10: Electrical Set - Up
All manuals and user guides at all-guides.com LECTRICAL 1. Always check that the circuit breaker in the electrical panel is in the WARNING OFF position, and that all high voltage circuits (more than 42.4V) are completely isolated from the mains supply before doing any work. 2. - Page 11 All manuals and user guides at all-guides.com CABLE REQUIREMENTS 220V AC mains cable (3 core LNE Radio receiver cable (3 core 0,5mm 0,5mm )*†, via mains isolator switch multistranded). Pedestrian key switch (if required) (2 core 0,5mm multistranded). Low voltage 16V AC battery charger supply (2 core 1,5mm )†.
-
Page 12: Get Into Programming Mode
All manuals and user guides at all-guides.com ROGRAMMING Remove all power. (IM page 28) Fit the SET link. Reapply power ELECT EITHER ASTER OR LAVE ETUP Press and hold the TEST button, release after 1 flash of L1. Then again, press and hold the TEST button, and release after 1 or ... -
Page 13: Status Light
All manuals and user guides at all-guides.com At this moment release the TEST button to select feature number 2. (L2 will turn off, and L1 will keep on flashing 2 times and pausing to indicate that feature number 2 is selected). NOTE: The STATUS of the Feature is not changed yet, the feature has only been selected to be changed! If an incorrect Feature is selected, then remove and re-... - Page 14 All manuals and user guides at all-guides.com CP75 C ONTROLLER UNCTIONS FEATURE STATUS or COUNT STATUS FEATURE COUNT DESCRIPTION DESCRIPTION VALUE NUMBER VALUE Gate Limit Settings See detailed instructions on page 29 Auto-close OFF (Default) 15 seconds (Default) Auto-close Time 1 Flash = 1 second STANDARD (Default) CONDOMINIUM...
- Page 15 All manuals and user guides at all-guides.com CP75 B ASIC ONTROLLER ONNECTIONS STATUS LIGHT FUSE (LED) 3A F/B SLAVE FUSE 16A S/B MASTER -BATT+ SLAVE LIGHT SS1 SS2 SS3 COM COM SOL 12V LIVE NEUTRAL AUXILIARY SUPPLY 220V AC MAINS IN SLAVE CP75A SENSOR...
-
Page 16: Installation Handover
All manuals and user guides at all-guides.com RIGGER ONNECTIONS For a detailed description of terminal functions, refer to DESCRIPTION OF TERMINAL FUNCTIONS on page 45 of the Installation Manual. SOLENOID LOCK RADIO RECEIVER 12V or 24V IRB Tx IRB RECEIVER LOOP LOOP DETECTOR Figure 12 CP75 Controller Trigger Connections...


Need help?
Do you have a question about the R3 and is the answer not in the manual?
Questions and answers