
Related Manuals for Canon L380S


Summary of Contents for Canon L380S
- Page 1 Please read this guide before operating this equipment. After you finish reading this guide, store it in a safe place for future reference.
-
Page 2: About The Manuals For The Machine
Considerable effort has been made to make sure that the manuals for the machine are free of inaccuracies and omissions. However, as we are constantly improving our products if you need an exact specification, please contact Canon. Guides with this symbol are PDF manuals included on the CD-ROM accompanying CD-ROM. - Page 3 H12425 (FAX-L380S) H12425 (FAX-L390) Copyright Copyright © 2005 by Canon Inc. All rights reserved. No part of this publication may be reproduced, transmitted, transcribed, stored in a retrieval system, or translated into any language or computer language in any form or by any means, electronic, mechanical, magnetic, optical, chemical, manual, or otherwise, without the prior written permission of Canon Inc.
- Page 4 3 seconds* per page which results in reduced telephone line charges. * Approx. 3 seconds per page fax data transmission time based on Canon FAX Standard Chart No.1, (Standard Mode) at 33.6Kbps modem speed. The Public Switched Telephone Network (PSTN) currently supports 28.8Kbps modem speeds or...
-
Page 5: Laser Safety Information
Safety Information Laser Safety Information Laser radiation could be hazardous to the human body. For this reason, laser radiation emitted inside this product is hermetically sealed within the protective housing and external cover. No radiation can leak from the product in the normal operation of the product by the user. -
Page 6: Table Of Contents
Chapter 1 Introducing FAX-L380S/L390 Welcome ............... . 1-1 The Main Features of the Machine . - Page 7 Chapter 3 Registering Information in the Machine Guidelines for Entering Information ..........3-1 Entering Numbers, Letters, and Symbols .
- Page 8 Canceling Sending ............. . . 6-10 Canceling Memory Sending .
- Page 9 Restricting Use of the Machine ........... . . 10-4 Enabling Restriction of Your Machine .
- Page 10 Chapter 14 Troubleshooting Clearing Jams ..............14-1 Removing Jammed Paper from Inside the Machine .
- Page 11 Appendix C Country-Specific Features United Kingdom ..............C-1 Connecting External Device.
-
Page 12: Introducing Fax-L380S/L390
Welcome Thank you for purchasing the new Canon FAX-L380S/L390 models. We are sure that your machine will meet your printing and copying needs easily and conveniently, as well as your fax and phone requirements. -
Page 13: The Main Features Of The Machine
Plain Paper Fax Features ■ UHQ™ Image Processing System The machine uses Canon’s Ultra High Quality Image Processing System to provide enhanced definition in faxed photos. ■ Error Correction Mode (ECM) The machine’s Error Correction Mode (ECM) reduces transmission errors while communicating with another ECM-capable machine. -
Page 14: Printer Features
Printer Features ■ Excellent print quality The machine offers 1,200 dpi enhanced graphics. ■ Simple maintenance The Cartridge T Starter and the regular Cartridge T for the machine contain both the toner and drum, making installation and replacement simple. ■ Economy toner-saving printing The machine includes an economy printing mode which allows you to reduce toner consumption by approx. -
Page 15: Using The Machine With The Printer Driver
Using the Machine With the Printer Driver The printer driver that is included with your machine allows you to use the machine’s printing function directly from your PC. • Use the machine as the default printer for Windows applications For more information on using the printer driver with your machine, refer to the Software Guide also stored on the CD-ROM. -
Page 16: Using Your Documentation
Unless otherwise mentioned, illustrations used in this guide are those taken when no optional equipment is attached to FAX-L380S. When there is any difference between FAX-L380S and FAX-L390, it is clearly indicated in the text, e.g., “Only for the FAX-L380S model.”... -
Page 17: Safety Instructions
• Do not allow small objects (such as pins, paper clips, or staples) to fall into the machine. If something does fall into it, unplug the machine immediately and call your local authorized Canon dealer or the Canon help line. -
Page 18: Customer Support
Always lift the machine as shown below. Never lift it by its paper cassette or other supports. CAUTION Unplug the machine and contact your local authorized Canon dealer or the Canon help line in any of these situations: - If the power cord or plug is damaged or frayed. -
Page 19: Setting Up Your Machine
• Place the machine near the PC you will be connecting it to. Make sure you can reach it easily, as you will be using the machine as a printer, fax machine, copier, and telephone. • Do not plug the machine into the same circuit as an appliance such as an air conditioner, electric typewriter, television, or copier. -
Page 20: Unpacking Your Machine
POWER CORD TELEPHONE LINE CORD DOCUMENTATION DESTINATION LABELS CD-ROM ONE-TOUCH SHEET If any of the above items are damaged or missing, notify your local authorized Canon dealer immediately. *Only for the FAX-L380S model Unpacking Your Machine FAX-L390 MAIN UNIT DOCUMENT OUTPUT TRAY... -
Page 21: Removing Shipping Materials
In addition to the items shipped with your machine, if you wish to use the machine as a printer, you will need a USB cable, which you can purchase from your Canon dealer. For best results, use a cable that is no more than 5 meters long. -
Page 22: Replaceable Parts
The Cartridge T Starter comes with your machine but you should purchase the regular Cartridge T for replacement. Although Canon manufactures many types of toner cartridges, the Cartridge T is the only one designed to be used with your machine. The Cartridge T can be purchased at any Canon authorized dealer. Unpacking Your Machine... -
Page 23: Assembling The Machine
Assembling the Machine Use the following instructions to assemble the main unit and its components. To see how the machine will look fully assembled, see “Getting Acquainted With Your Machine,” on p. 2-11. Attaching Components NOTE Make sure the tabs are inserted into the slot completely. Document Output Tray Insert the tabs into the slots on the back of the machine. -
Page 24: Installing The Paper Cassette
Pull out the paper cassette. Attach the cassette extension to the cassette. Attach the extension cover on the back of the machine. Insert the paper cassette into the machine. *Installing the paper cassette is necessary to the FAX-L380S model only. Assembling the Machine... -
Page 25: Making Connections
• Be sure to connect any external device before using your machine. • Canon cannot guarantee that all answering machines will be compatible with your machine, due to varying specifications. • If you have connected an external device to your machine, be sure to set the correct receive mode. (See Chapter 7, “Receiving Faxes.”) -
Page 26: Connecting The Telephone Line
Connecting the Telephone Line Connect the telephone line to the jack on the left side of the machine: If you connect an answering machine to the machine, be sure to read your answering machine’s manual. NOTE You can also connect the extension phone to the jack marked handset. - Page 27 Connect the power cord as follows: Plug the supplied power cord into the power connector on the back of the machine. Plug the other end of the power cord into the outlet. NOTE The machine has no power switch, so its power is on as long as it is plugged in. Once connected, though, the machine still needs to warm up before you can use it.
-
Page 28: Setting The Display Language And Country
Setting the Display Language and Country* When you connect the power cord to an AC outlet for the first time, you need to select the language for the LCD display. For some countries, you also need to select the country where you are using the machine. -
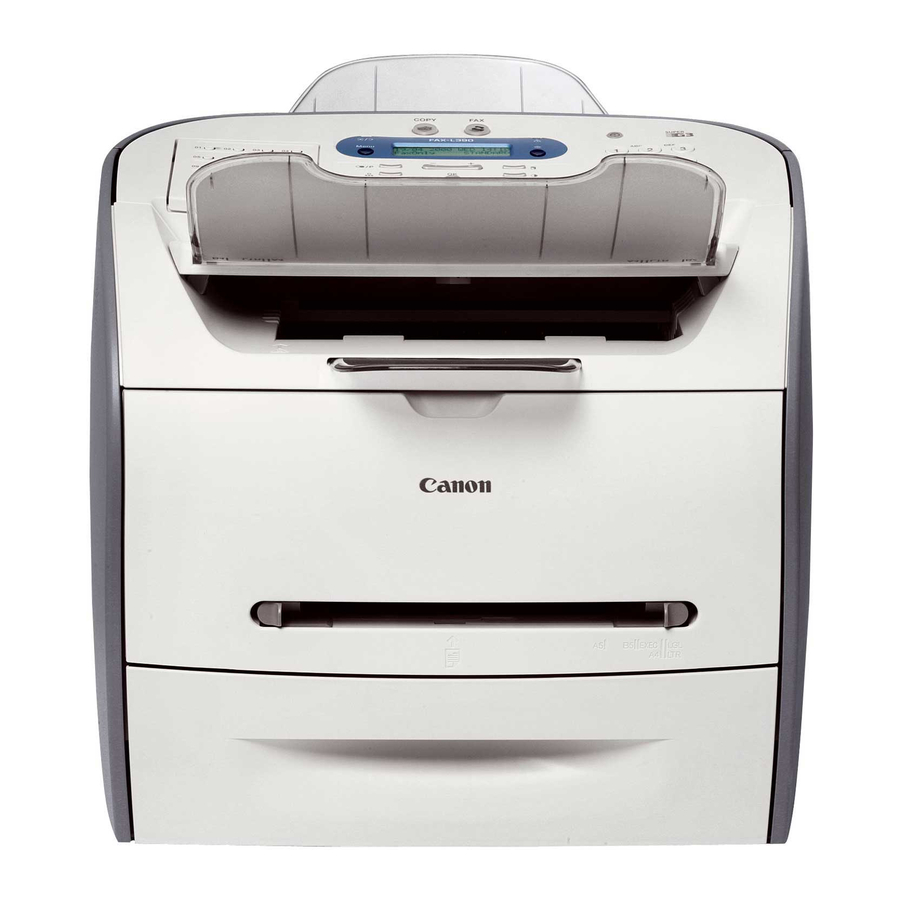
Page 29: Getting Acquainted With Your Machine
Document output tray Documents come out here. Slide guides Adjust to the width of documents. Operation panel Controls the machine. FAX-L380S Output tray Outputs printouts. Printer cover Open it when you install the cartridge, or remove jammed paper. Multi-purpose feeder Used when printing paper one by one manually. - Page 30 Document feeder tray Place documents. ADF (Automatic Document Feeder) Holds documents and feeds them automatically into the scanning machine. Document output tray Documents come out here. Slide guides Adjust to the width of documents. Operation panel Controls the machine. 2-12 Getting Acquainted With Your Machine FAX-L390 Output tray...
-
Page 31: Rear View
Rear View FAX-L380S FAX-L390 USB port Connect the USB (Universal Serial Bus) cable. Handset jack Connect the handset (optional). Extension phone jack Connect an extension phone. Telephone line jack Connect the telephone cable. Rear cover Open it when you output paper face up, or remove jammed paper. -
Page 32: The Operation Panel
The Operation Panel FAX-L380S FAX-L390 Menu button Use this button to customize the operation of the machine. In Use/Memory indicator Lights when the telephone line is used or a document has been received in memory. LCD display The LCD display shows messages and prompts while you use the machine. -
Page 33: Special Function Buttons (One-Touch Speed Dial Panel Open)
Stop/Reset button Use this button to cancel sending or receiving faxes and other operations, and bring back the standby display in the LCD. (-), (+) buttons Use this button to scroll through the selections. OK button Use this button to determine the contents you set or register. Start button Use this button to begin faxing, or copying. -
Page 34: Energy Saver Mode
Energy Saver Mode The machine provides an energy saver function. When no operations are performed for about 5 minutes, the machine automatically enters the energy saver mode. NOTE • The time until the machine enters the energy saver mode can be specified in a range of 3 minutes to 30 minutes. You can also turn off the energy saver function. -
Page 35: The Toner Cartridge
The Toner Cartridge Handling and Storing Cartridges • Do not open the drum protective shutter on the cartridge. If the drum surface is exposed to light and damaged, print quality may deteriorate. • Do not stand the cartridge on end, and do not turn it upside down. If toner becomes caked in the cartridge, it may prove impossible to free it even by shaking the cartridge. -
Page 36: Installing/Replacing The Toner Cartridge
A4-size page), while the Canon genuine Cartridge T you purchase can yield approx. 3,500 page of printouts (based on 5% coverage of a A4-size page). But the Canon genuine Cartridge T Starter is identical to the Canon genuine regular Cartridge T otherwise. - Page 37 Gently rock the cartridge several times to evenly distribute the toner inside. INSTRUCTIONS NOTE Always hold the cartridge as shown so that the side with the instructions is facing upward. Do not forcefully move or push the protective shutter of the drum in any way. Hold the cartridge on a flat stable surface with one hand, and break the tab and pull out the seal completely with the other hand.
- Page 38 Hold the cartridge and position the arrow mark on the cartridge towards the inside of the machine as shown below. Align the projections cartridge completely into the machine. Close the printer cover. 2-20 The Toner Cartridge on both sides of the cartridge to the guides in the machine and slide the...
-
Page 39: Loading Recording Paper
Loading Recording Paper When the message <SUPPLY REC. PAPER> appears in the LCD display, you need to add paper to the paper cassette. Here are a few tips you should follow when you load paper into the paper cassette. • Be sure to load paper of the correct size, weight, and quantity recommended for your machine. -
Page 40: Loading Paper In The Cassette
For the FAX-L390 model, be sure to properly attach the stopper of the paper size rear guide for the correct paper size by inserting the tabs into the matching slots on the paper cassette. Adjust the width slide guides or paper width guides to match the paper size. 2-22 Loading Recording Paper FAX-L380S FAX-L390... -
Page 41: Testing The Machine
Load the paper into the cassette. Make sure the paper stack sits below the hooks for the FAX-L380S model. Even out the edges of the paper stack. Make sure the height of the paper stack does not exceed the load limit mark. -
Page 42: Registering Information In The Machine
Registering Information in the Machine This chapter describes how to enter information in your machine. Guidelines for Entering Information The following section explains how to enter user information into the machine. NOTE If you pause while entering information and do not make an entry for more than a specified period of time, the machine returns to standby mode and loses all information you had entered up to that point. - Page 43 Button Uppercase Uppercase – . # ! “ , ; : ^ Follow this procedure when you come to a step that requires you to enter a name or number. Press [ ] to switch to the uppercase letter mode (:A), lowercase letter mode (:a), or the number mode (:1).
-
Page 44: Personalizing Your Machine
Personalizing Your Machine Identifying Your Documents When sending documents, you can have your fax number, your name, and the current date and time printed out by the receiving fax. This information is called your TTI (Transmit Terminal Identification) and appears at the top of the faxed document in small type. By identifying the documents you send, the receiving party can recognize your fax messages at a glance. -
Page 45: Registering Your Fax Number And Name
Use the numeric buttons to enter the date (month/day/year) and time (in 24-hour format) ➞ press [OK]. D A T E / T I M E S E T T I N G 3 1 / 1 2 ' 0 5 1 5 : 1 0 Enter only the last 2 digits of the year. -
Page 46: Setting The Telephone Line Type
Setting the Telephone Line Type Use this procedure if you need to change the telephone line setting. If you are unsure which setting to use, contact your local telephone company. Follow this procedure to set the telephone line type: Press [Menu]. Press [ (-)] or [ (+)] to select <4.FAX SETTINGS>... - Page 47 Press [OK] twice. Press [ (-)] or [ (+)] to select the month in which the summer time starts ➞ press [OK] twice. M O N T H Press [ (-)] or [ (+)] to select the week in which the summer time starts ➞ press [OK] twice. You can select from the following: - <FIRST WEEK>...
-
Page 48: Chapter 4 Paper Handling
For high-quality printing, we recommend using paper and transparencies recommended by Canon. Some types of paper available at office supply stores may not be suitable for the machine. If you have any questions about paper and transparencies, contact your local authorized Canon dealer or the Canon help line. -
Page 49: Printing Areas
Please note that the term “printing area” represents both the recommended area for optimum print quality and the entire area where the machine can technically print from your computer. Printing area (light shade): Canon recommends that you print within this area. ■ Paper... -
Page 50: Loading Paper
FAX-L380S IMPORTANT • If the slide guides (FAX-L380S) are not adjusted correctly for the size of the paper, the quality of your printouts may be adversely affected. • For the FAX-L390 model, be sure to properly attach the stopper of the paper size rear guide for the correct paper size. - Page 51 Adjust the width slide guides or paper width guides to match the paper size. Fan the paper stack first, then tap the edges on a flat surface to even the stack. Load the paper stack in the cassette with the print side down. When you load paper with a logo on, position the paper with the print side down (logo side) and load it so that the top of the paper feeds first in the cassette.
-
Page 52: Loading Envelopes In The Cassette
Loading Envelopes in the Cassette NOTE • Loading Envelopes in the Cassette is only for the FAX-L380S model. • Load an envelope in the multi-purpose feeder when you use the FAX-L390 model. For details on loading an envelope in the multi-purpose feeder, see “Loading an Envelope in the Multi-Purpose Feeder,” on p. 4-9. - Page 53 Remove any curling from the envelopes by holding the edges diagonally and bending them gently. Run a pen or other rounded object along the back flaps to flatten them. The flaps should not bulge more than 5 mm. Tap the edges on a flat surface to even the envelopes. Pull out the cassette completely.
- Page 54 Load the envelopes with the print side down and the right edge (i.e., closer to the stamp) first. If the envelope to be loaded has a flap on the short edge, this edge must enter the machine first. Not loading it this way will result in a paper jam.
-
Page 55: Loading Paper In The Multi-Purpose Feeder
Loading Paper in the Multi-Purpose Feeder Use the multi-purpose feeder when you want to copy or print on the different paper which is in the cassette. Load paper one by one in the multi-purpose feeder. NOTE The paper in the multi-purpose feeder is fed prior to the paper in the cassette. Slide the slide guides to fit the size of the paper you want to load. -
Page 56: Loading An Envelope In The Multi-Purpose Feeder
Specify the paper size. ❑ Press [Menu] ➞ press [OK]. ❑ Press [ (-)] or [ (+)] to select <2.MP TRAY> ➞ press [OK] twice. ❑ Press [ (-)] or [ (+)] to select the appropriate paper size ➞ press [OK] twice. NOTE •... - Page 57 IMPORTANT If the slide guides are not adjusted correctly for the size of the envelope, the quality of your printouts may be adversely affected. Insert the envelope straightly in the multi-purpose feeder with the print side up and the right edge (i.e., closer to the stamp) first.
-
Page 58: Orientation Of The Document And The Paper Loading
Orientation of the Document and the Paper Loading When you load a document in the ADF, the orientation of the document and the orientation of the paper in the cassette or in the multi-purpose feeder are as shown below. PAPER CASSETTE MULTI-PURPOSE FEEDER... -
Page 59: Selecting The Paper Output Area
Selecting the Paper Output Area Face down paper output delivers paper with the printed side down on the output tray. Face up paper output delivers paper with the printed side up out of the face up paper output. Select the area depending on your purpose by opening or closing the rear cover. -
Page 60: Face Down Paper Output Area
Face Down Paper Output Area The paper is delivered with the printed side down on the output tray. Paper is stacked in printed order. Close the rear cover. IMPORTANT • Do not place the delivered paper back on the output tray. Doing so may result in paper jams. •... -
Page 61: Speed Dialing
Speed Dialing This chapter describes how to register and use the speed dialing features of the machine. Speed Dialing Methods In addition to regular dialing, the machine provides several ways to dial fax/telephone numbers automatically. ■ One-Touch Speed Dialing Dial a fax/telephone number by pressing the One-Touch Speed Dial button that the number is assigned to. ■... -
Page 62: One-Touch Speed Dialing
One-Touch Speed Dialing Storing Numbers for One-Touch Speed Dialing Your machine can store up to 31 fax numbers under One-Touch Speed Dial buttons. Follow this procedure to store One-Touch Speed Dialing numbers and names. Press [Menu]. Use [ (-)] or [ (+)] to select <5.ADD. REGISTRATION> ➞ press [OK] twice. Press [ (-)], [ (+)], or the One-Touch Speed Dial button to select a One-Touch Speed Dial button under which you want to register a fax/telephone number between 01 and 31 ➞... -
Page 63: Changing Or Deleting A Number/Name Stored Under A One-Touch Speed Dial Button
Changing or Deleting a Number/Name Stored Under a One-Touch Speed Dial Button Follow these steps if you want to change a number and/or name registered under a One-Touch Speed Dial button, or if you want to delete all information stored under a button. Follow steps 1 and 2 of “Storing Numbers for One-Touch Speed Dialing.”... -
Page 64: Using One-Touch Speed Dialing
Press the numeric buttons to enter the new name ➞ press [OK]. For details on how to enter or delete letters, see “Entering Numbers, Letters, and Symbols,” on p. 3-1. To change additional numbers and/or names, repeat steps 2 to 6. -or- If you have finished changing numbers and/or names, press [Stop/Reset] to return to standby mode. -
Page 65: Coded Speed Dialing
Coded Speed Dialing Storing Numbers for Coded Speed Dialing You can store up to 100 numbers (169 numbers for the FAX-L390 model) for Coded Speed Dialing. Follow this procedure to store Coded Speed Dialing numbers and names. Press [Menu]. Press [ (-)] or [ (+)] to select <5.ADD. REGISTRATION> ➞ press [OK]. Press [ (-)] or [ (+)] to select <2.CODED SPD DIAL>... -
Page 66: Changing Or Deleting A Number/Name Stored Under A Coded Speed Dialing Code
Changing or Deleting a Number/Name Stored under a Coded Speed Dialing Code Follow these steps if you want to change the number and/or name registered under a Coded Speed Dialing code, or if you want to delete all information stored under a code. Follow steps 1 to 3 of “Storing Numbers for Coded Speed Dialing.”... -
Page 67: Using Coded Speed Dialing
Press the numeric buttons to enter the new name ➞ press [OK]. F A X - L 3 8 0 S C a n o n I T A L I A F A X - L 3 9 0 C a n o n I T A L I A For details on how to enter or delete letters, see “Entering Numbers, Letters, and Symbols,”... - Page 68 Press [Start]. • If you do not press [Start] within 5 seconds of entering the Coded Speed Dialing code, the machine will begin sending automatically. If you do not want the machine to send automatically, you need to change the <TIME OUT>...
-
Page 69: Group Dialing
Group Dialing Group dialing allows you to store as many as 130 numbers (199 numbers for the FAX-L390 model) under One-Touch Speed Dial buttons or Coded Speed Dialing codes. Creating Groups for Group Dialing The numbers you register in a group must already be stored under One-Touch Speed Dial buttons or Coded Speed Dialing codes. -
Page 70: Changing Or Deleting A Number/Name Stored Under A Group Dialing
NOTE • Each One-Touch Speed Dial button or Coded Speed Dialing code can store either a name and number for speed dialing, or a group. Be careful not to override speed dialing numbers and names when creating groups. • If you wish to register a group under a One-Touch Speed Dial button or Coded Speed Dialing code already registered for speed dialing, or if you want to re-enter a group, you must delete the previous information first. - Page 71 Press [OK] twice. If you delete all the numbers registered under the group, press [Clear] to delete the name ➞ press [OK]. Press [Stop/Reset] to return to standby mode. ● To change the number and/or name: Press [ (-)] or [ (+)] to select the number you want to change ➞ press [OK] twice. Press [Clear] to delete the numbers registered under the group.
-
Page 72: Using Group Dialing
Using Group Dialing To send a document to a group of numbers, follow these instructions. Load the document in the ADF. For details on the types of documents you can fax, their requirements, and how to load documents, see “Document Requirements,” on p. 6-1, and “Loading Documents in the ADF,” on p. 6-3. Press [FAX]. -
Page 73: Directory Dialing
Directory Dialing Directory dialing allows you to look up the other party’s name you registered and retrieve the number for dialing. This feature is convenient when you know the other party’s name but can not recall the One-Touch Speed Dial button, the code for Coded Speed Dialing, or Group Dialing where the number is registered. -
Page 74: Sending Faxes
Sending Faxes This chapter describes how to use your machine to send faxes. Preparing to Send a Fax Document Requirements The documents you load into the machine must meet the following requirements. When loading a multi-page document: Size: Max.: 216 × 356 mm ×... -
Page 75: Scanning Area
■ Problem documents • To prevent paper jams in the Automatic Document Feeder (ADF), do not use any of the following paper in the machine: WRINKLED OR CREASED PAPER CARBON PAPER OR CARBON-BACKED PAPER • Remove all staples, paper clips, or any other fasteners before loading the document into the Automatic Document Feeder (ADF). -
Page 76: Loading Documents In The Adf
Loading Documents in the ADF Fan the edges that will feed into the machine first, then tap the edges of multiple page documents on a flat surface to even the stack. Adjust the document guides to the width of the document. Load the document in the ADF. -
Page 77: Adjusting The Resolution And Contrast
Adjusting the Resolution and Contrast Adjusting the Image Quality (Resolution) Canon’s Ultra High Quality (UHQ that is very close to that of the original document. The machine also lets you adjust the resolution it uses in sending faxes to best suit your particular document. -
Page 78: Adjusting The Exposure (Density)
Set the resolution as follows: Press [FAX]. If you are already in the Fax standby mode, you can skip this step. Press [Image Quality]. The LCD display shows the current resolution setting. Press [Image Quality] repeatedly until the resolution you want is displayed ➞ press [OK]. F A X R E S O L U T I O N F I N E Continue the operation you wish to complete. -
Page 79: Sending Methods
Press [Exposure] repeatedly until the scanning density you want is displayed ➞ press [OK]. D E N S I T Y C O N T R O L Continue the operation you wish to complete. If you do not proceed with any other operation, the LCD display returns to standby mode. NOTE •... -
Page 80: Dialing Methods
Dialing Methods There are several ways of dialing the number of the party you want to send to: ■ Regular Dialing Use the numeric buttons to dial the recipient’s fax number. ■ One-Touch Speed Dialing Press the One-Touch Speed Dial button (1 to 31) under which you have registered the number you want to send to. See Chapter 5, “Speed Dialing,”... -
Page 81: Sending Documents
Sending Documents This section describes the different ways to send faxes with the machine. Memory Sending You should normally use memory sending to send documents efficiently. If <MEMORY FULL> is displayed, the machine cannot scan the documents. In this case, wait for the machine to send any faxes stored in the memory, then scan the documents. -
Page 82: Manual Sending Via The Handset
If you hear a high-pitched signal instead of the other party’s voice, go to step 8. Ask the other party to set their fax machine to receive faxes. When you hear a high-pitched signal, press [Start] ➞ hang up the handset. -
Page 83: Canceling Sending
Canceling Sending Canceling Memory Sending While Documents Are Being Scanned Using the ADF Press [Stop/Reset]. Scanning is canceled. Remove the document from the ADF. For details on how to remove documents, see “Removing Jammed Paper from the ADF,” on p. 14-7. After All Documents Are Scanned While documents are being sent, press [Stop/Reset]. -
Page 84: Redialing
With memory sending, you can set the machine to automatically dial the fax number again if the receiving fax machine does not answer or if the line is busy. You can also control how many times the machine will redial the number and how long it will wait between dialing attempts. See “Setting Up Automatic Redialing*,”... - Page 85 Follow the procedure below to adjust the automatic redialing settings. Press [Menu]. Press [ (-)] or [ (+)] to select <4.FAX SETTINGS> ➞ press [OK]. Press [ (-)] or [ (+)] to select <3.TX SETTINGS> ➞ press [OK]. Press [ (-)] or [ (+)] to select <3.AUTO REDIAL> ➞ press [OK]. Press [ (-)] or [ (+)] to select <ON>...
-
Page 86: Sequential Broadcasting
Sequential Broadcasting Sending a Document to More Than One Destination The machine’s sequential broadcasting feature allows you to send a fax to a sequence of up to 141 fax numbers (210 fax numbers for the FAX-L390 model), using any combination of dialing methods as follows: •... -
Page 87: Sending A Document Using Group Dialing
Enter up to 141 destinations (210 destinations for the FAX-L390 model) using any of the following methods: ● One-Touch Speed Dialing: ❑ Press the desired One-Touch Speed Dial button(s). ● Coded Speed Dialing: ❑ Press [Coded Dial] ➞ enter the two-digit code (00-99)* using the numeric buttons. *Enter a three-digit code (000 to 168) for the FAX-L390 model. -
Page 88: Delayed Sending
Delayed Sending Your machine allows you to scan a document into its memory and send it automatically at a preset time. By using this feature, you can take advantage of lower long distance rates at night, for example. You can set up to 141 destinations (210 destinations for the FAX-L390 model) and up to 20 reservations for delayed sending. -
Page 89: Regular Dialing
Enter the destination(s) using any of the following 4 methods. ● One-Touch Speed Dialing: ❑ Press the desired One-Touch Speed Dial button(s). ● Coded Speed Dialing: ❑ Press [Coded Dial] ➞ enter the two-digit code (00-99)* using the numeric buttons. *Enter a three-digit code (000 to 168) for the FAX-L390 model. -
Page 90: Chapter 7 Receiving Faxes
Receiving Faxes This chapter describes how to use your machine to receive faxes. Different Ways to Receive a Fax The machine provides you with 4 different modes for receiving faxes. To decide which mode will best suit your requirements, consider how you want to use the machine: Receive Mode Main Use FaxOnly*... -
Page 91: Setting The Receive Mode
■ RING START TIME When a call comes in, the machine checks to see if it is a person wishing to speak to you or a fax machine trying to send a document. If your machine does not have enough time to detect the fax tone, it assumes the call is from a telephone. -
Page 92: What Happens When Faxtel Mode Is Selected
What Happens When FaxTel Mode is Selected Type of call Telephone Sending document Telephone charges The machine answers without ringing begin for caller. The machine listens for fax tone (For 8 sec.) RING START TIME (Factory default setting = 8 sec.) Fax tone is not detected The telephone starts ringing F/T RING TIME... -
Page 93: Receiving Faxes Manually: Manual Mode
Start your conversation. If the caller wants to send a document after talking to you, ask them to press the start button on their fax machine. When you hear a beep, press [Start] to begin receiving the document, then hang ●... -
Page 94: Receiving Faxes Automatically: Faxonly Mode
NOTE Canon does not recommend using an “answering service” (like those offered by local telephone companies that provide voice mail) on the telephone line you are connecting to the machine. If you do subscribe to an answering service, you may want to dedicate a separate line for fax communication only and connect that line to the machine. -
Page 95: Receiving Faxes In Memory When A Problem Occurs
Once you have corrected the problem, the machine automatically prints the documents stored in memory. * Based on Canon FAX Standard Chart No.1, standard mode Receiving Faxes in Memory When a Problem Occurs O P E N P R I N T E R C O V E R... -
Page 96: Receiving While Performing Other Tasks
Receiving While Performing Other Tasks Since the machine is a multitasking device, it can receive faxes and phone calls while you are entering your user information, making copies, or printing. If you receive a fax while you are making copies or printing, the machine stores the incoming fax in memory. -
Page 97: Setting Up And Using Polling
• If the other party is using a Canon fax machine which has the Polling ID function, ask them to set the Polling ID of their fax machine to 255 (1111 1111 binary number). For details on the Polling ID, see the other party’s fax machine manual. -
Page 98: Polling Other Fax Machines To Receive Documents
The machine polling feature allows you to request a document to be faxed to you from another fax machine. The sender only needs to make sure the document is on his fax machine and ready to be sent: when your machine polls that machine, the document is sent automatically. The machine can poll any fax machine that supports polling. -
Page 99: Setting Up Polling Sending
Setting Up Polling Sending This section shows you how to set up your fax to store and hold a document until it is polled by another fax to send it. Setting Up a Polling Box Before you can use polling sending, you must create a polling box with the <POLLING BOX> of the Menu. -
Page 100: Scanning A Document Into The Memory For Polling Sending
- <OFF>:The document in the polling box is not erased after it is sent. Select this setting if you expect that the document will be polled by more than one fax machine. E R A S E A F T E R T X Press [Stop/Reset] to return to standby mode. -
Page 101: Changing The Polling Box Settings
Changing the Polling Box Settings Follow this procedure to change the settings of a polling box. Press [Menu]. Press [ (-)] or [ (+)] to select <4.FAX SETTINGS> ➞ press [OK]. Press [ (-)] or [ (+)] to select <6.POLLING BOX> ➞ press [OK]. Press [ (-)] or [ (+)] to select <2.CHANGE DATA>... -
Page 102: Deleting A Polling Box
Deleting a Polling Box Follow this procedure to cancel a polling box. NOTE You cannot cancel a polling box when the polling box is holding a document for polling sending. Press [Menu]. Press [ (-)] or [ (+)] to select <4.FAX SETTINGS> ➞ press [OK]. Press [ (-)] or [ (+)] to select <6.POLLING BOX>... -
Page 103: Restricting The Use Of The Machine
Restricting the Use of the Machine This chapter describes how to protect the machine from unauthorized access. Some of these features also enable you to keep track of fax transactions and copy (printing) based on division numbers that you can assign to individuals or sections inside your company. -
Page 104: Setting The System Administrator's Id And Password
Setting the System Administrator’s ID and Password Follow this procedure to set the System Administrator’s ID and password. Press [Menu]. Press [ (-)] or [ (+)] until <8.SYSTEM SETTINGS> appears ➞ press [OK] three times. Enter a System Administrator’s ID of up to seven digits (from 1 to 9999999) using the numeric keys ➞ press [OK]. - Page 105 Enter the current System Administrator’s password using the numeric keys ➞ press [OK] three times. The password you entered is displayed with asteriscs. S Y S T E M S E T T I N G S P A S S W O R D The current password is displayed.
-
Page 106: Restricting Machine Operation (Department Id Management)
Restricting Machine Operation (Department ID Management) This section describes how to restrict the operations of the machine. By storing a Department ID and Password for each department, you can set the machine so that its functions can be used only after the correct password has been entered. - Page 107 If the prompt <PASSWORD> is displayed, enter the System Administrator’s password using the numeric keys ➞ press [OK]. S Y S T E M S E T T I N G S P A S S W O R D Press [ (-)] or [ (+)] until <2.DEPT.
- Page 108 If you want to set the transmission limits, press [ (-)] or [ (+)] until <3. TX LIMITS> appears ➞ press [OK]. Enter the maximum number of pages that can be sent by the registered department using the numeric keys ➞ press [OK]. T X L I M I T S NOTE •...
-
Page 109: Turning Restrictions Off Or On
Turning Restrictions OFF or ON Follow this procedure to turn ‘OFF’ or ‘ON’ the printing, copying and sending restrictions temporarily without changing the Department ID Management settings. Press [Menu]. Press [ (-)] or [ (+)] until <8.SYSTEM SETTINGS> appears ➞ press [OK]. If the prompt <PASSWORD>... -
Page 110: Operating The Machine With Restrictions On
Operating the Machine with Restrictions ON This section describes how to operate the machine with the operation restriction features set up and turned ‘ON’. If you see the message <ENTER DEPT. ID> when the machine is in standby mode, the restriction is turned ‘ON’. -
Page 111: Checking And Clearing The Counter Information
Checking and Clearing the Counter Information This section describes how to check and clear the counter information for each department. Press [Menu]. Press [ (-)] or [ (+)] until <8.SYSTEM SETTINGS> appears ➞ press [OK]. If the prompt <PASSWORD> is displayed, enter the System Administrator’s password using the numeric keys ➞... - Page 112 NOTE If you have not set the TX limit, nothing will be displayed as “Limit.” (See “Setting Operation Restrictions,” on p. 9-4.) ❑ Press [ (-)] or [ (+)] to scroll through the Department IDs. To reset the counter, press [Menu] twice ➞ press [ (-)] or [ (+)] until <2.COUNT RESET> appears ➞ press [OK].
-
Page 113: Special Features
Special Features This chapter describes the special features of the machine. Special Dialing This section explains special dialing features, such as dialing through a switchboard and dialing international numbers. Dialing Through a Switchboard A PBX (Private Branch Exchange) is an on-site telephone switchboard. If your machine is connected through a PBX or other telephone switching system, you have to dial the outside line access number first, and then dial the number of the party you are calling. -
Page 114: Dialing Long Distance
Press [ (-)] or [ (+)] to select <PBX> ➞ press [OK]. R - K E Y S E T T I N G Press [ (-)] or [ (+)] to select the access type of your switching system ➞ press [OK]. ■... -
Page 115: Using Tone Dialing On A Pulse Line
To enter a pause within a number, press [Redial/Pause]. • To enter a pause at the end of a number, press [Redial/Pause] ➞ press [OK]. • A pause entered within a number (p) is 4 seconds long. • If necessary, you can adjust the length of a pause within a number. See p. 16-8 (<PAUSE TIME> setting) for more details. -
Page 116: Restricting Use Of The Machine
Restricting Use of the Machine If you do not want unauthorized people to be able to make calls, set the <LOCK PHONE> feature to ‘ON’. Calls are restricted when you make calls using the handset or [Hook]. Enabling Restriction of Your Machine Follow this procedure to enable restriction of your machine. -
Page 117: Canceling Restriction Of Your Machine
Canceling Restriction of Your Machine Follow this procedure to cancel restriction of your machine. Follow steps 1 to 4 of “Enabling Restriction of Your Machine,” on p. 10-4. Press [ (-)] or [ (+)] to select <OFF> ➞ press [OK]. L O C K P H O N E NOTE The display contents differ depending on the country. -
Page 118: Using Memory Lock
Using Memory Lock Normally, a document prints as soon as you receive it. However, there may be occasions when you want the machine to store all documents in memory until you are ready to print them. Locking the machine to receive and store all documents in memory is called “Memory Lock.” You may want to turn Memory Lock ‘ON’... -
Page 119: Turning Memory Lock Off And Printing Documents
The MEMORY LOCK RX menu includes the following items: Setting 1.MEM LOCK PASSWORD 2.REPORT OUTPUT NO OUTPUT YES The factory default setting is in bold face. Press [Stop/Reset] to return to standby mode. Turning Memory Lock OFF and Printing Documents Follow this procedure to turn the Memory Lock ‘OFF’... -
Page 120: Chapter 11 Making Copies
Making Copies This chapter describes how to make copies with your machine. Making Copies One of the machine’s convenient features is its ability to make up to 99 high-quality copies of a document. To make copies, do the following: Load the document in the ADF. For details on how to place or load documents, see “Loading Documents in the ADF”... -
Page 121: Specifying The Paper Size And Type (Common For Cassette And Multi-Purpose Feeder)
Press [ (-)] or [ (+)] to select the appropriate paper size (A4, B5*, A5*, LTR, EXECUTIV* or ENVELOPE* for the paper cassette, A4, B5, A5, LTR, LGL, EXECUTIV, ENVELOPE or FREESIZE for the multi-purpose feeder) ➞ press [OK]. *Only for the FAX-L380S model. ● When <ENVELOPE> is selected: ❑... -
Page 122: Specifying The Paper Type
● When <FREE SIZE> is selected: ❑ Press [ (-)] or [ (+)] to select <VERTICAL SIZE> or <HORIZONTAL SIZE> ➞ press [OK]. ❑ Use the numeric buttons, or press [ (-)] or [ (+)] to specify vertical and horizontal sizes of the paper in millimeters (mm). -
Page 123: Setting Enlarging/Reducing
Setting Enlarging/Reducing You can enlarge or reduce the copy size using preset copy ratios or using custom copy ratios. Enlarging/Reducing Using Preset Copy Ratios Press [COPY]. If you are already in the Copy standby mode, you can skip this step. Press [Enlarge/Reduce]. -
Page 124: Enlarging/Reducing Using Custom Copy Ratios
Enlarging/Reducing Using Custom Copy Ratios Press [COPY]. If you are already in the Copy standby mode, you can skip this step. Press [Enlarge/Reduce] twice. Z O O M 5 0 - 2 0 0 % 1 0 0 % Use the numeric buttons to enter the copy ratio ➞ press [OK]. Z O O M 5 0 - 2 0 0 % 8 0 % •... -
Page 125: Improving Copied Image
Improving Copied Image Adjusting the Image Quality (Resolution) You can adjust image quality to the appropriate level best suited for a document with text or photos. 3 modes are available for adjusting the image quality. Press [COPY]. If you are already in the Copy standby mode, you can skip this step. Press [Image Quality] repeatedly until the image quality you want appears. -
Page 126: Adjusting Manually
Adjusting Manually Press [COPY]. If you are already in the Copy standby mode, you can skip this step. Press [Exposure] twice to select the manual mode. Press [ (-)] or [ (+)] to adjust the copy exposure ➞ press [OK]. For a lighter copy exposure, press [ (-)]. -
Page 127: Special Features
Special Features The machine can perform the Collate Copy and Reserve Copy. Collate Copy The collate copy allows you to sort copies in page order. It is convenient when you make multiple copies of multiple page documents. To use this feature, you need to set <AUTO SORT> to ‘ON’ in the <COPY SETTINGS>... -
Page 128: Reserve Copy
Reserve Copy This feature allows you to reserve the next job while the machine is printing out a current job. Load the document to be reserved in the ADF. For details on how to load documents, see “Loading Documents in the ADF,” on p. 6-3. Use the numeric buttons to enter the number of copies. -
Page 129: Confirming The Copy Job You Reserved
Confirming the Copy Job You Reserved Press [Stop/Reset] while the machine is printing out. S E L E C T J O B T O C A N C E L 0 0 4 4 R E S E RVAT I O N N O. : P R I N T I N G B L A N K : WA I T I N G : N O PA P E R , PA P E R J A M , E T C . -
Page 130: System Monitor
System Monitor Checking the Status of Copy, Fax, Print and Report Jobs Use [System Monitor] to confirm and delete the jobs. When using [System Monitor], the LCD displays the jobs in the following order in each mode. In Copy mode, - COPY STATUS - FAX MONITOR - PRINT STATUS... -
Page 131: Confirming Transmission Results And Sending Reservation
Confirming Transmission Results and Sending Reservation Follow the procedure below to confirm the sending or receiving results and sending reservation (automatic redialing and delayed sending). Press [System Monitor] repeatedly until <FAX MONITOR> is displayed. Press [ (-)] or [ (+)] to select <2.TX/RX RESULT> ➞ press [OK]. The sending result and reservation can be confirmed by checking the sending time, <TX/RX NO.>... -
Page 132: Confirming And Deleting A Copy Job
Confirming and Deleting a Copy Job Press [System Monitor] repeatedly until <COPY STATUS> is displayed. NOTE If there is no job, <NO COPY JOBS EXIST> is displayed. Press [ (-)] or [ (+)] to confirm the job number, and the quantity of copies. C O P Y S T A T U S 0 0 0 3 If you want to delete the copy job, press [OK]. -
Page 133: Confirming And Deleting A Report Job
If you decide to delete the print job, press [ (-)] for <YES>. NOTE • To cancel deleting the job, press [ (+)] for <NO>. Once the job is deleted, the job cannot be restored. • The LCD can display characters in ASCII cord. Using characters other than those in ASCII cord may have the LCD display garbled characters. -
Page 134: Reports And Lists
Reports and Lists This chapter describes how to print reports and lists. Activity Report The Activity Report is printed out automatically by the machine after every 20 transactions. This report lists the details of the documents you have sent or received so that you can keep track of the transaction operations your machine has performed. -
Page 135: Department Id Report
Department ID Report If you set up Department ID Management, and the activity report feature is turned ON, transactions are listed by department in the Department ID report shown below. (See Chapter 9, “Restricting the Use of the Machine.”) 3 1 / 1 2 2 0 0 5 DEPARTMENT ID ST. -
Page 136: Transmission (Tx) Reports
Transmission (TX) Reports The machine normally prints a report only when an error occurs during sending (ERROR TX REPORT). However, you can set the machine to print a report every time you send a document (TX REPORT). If you send a document using memory, you can also select whether the first page of the document is printed with the report. -
Page 137: Tx Report
TX Report 3 1 / 1 2 2 0 0 5 WHEN YOU SET THE FAX TO PRINT THE FIRST PAGE OF THE DOCUMENT DEPT ID is listed only while the department ID management is ON. Multi TX/RX Report If you used sequential broadcasting to send a document, the MULTI TX/RX REPORT is printed. 3 1 / 1 2 2 0 0 5 0 9 : 5 8 TX/RX NO... -
Page 138: Reception (Rx) Report
Reception (RX) Report Normally the machine does not print a reception report (RX REPORT) unless you set it to do so. You can set the machine to print the RX REPORT every time you receive a document or only if an error occurs during receiving. -
Page 139: Memory Clear Report
Memory Clear Report If you experience a power failure, all documents stored in memory can be saved for up to approx. 1 hour. If power is not restored to the fax within 1 hour, the documents in memory will be lost. If this time limit has elapsed before power is restored to the fax, as soon as power is restored a list of documents deleted from the memory as a result of the power failure is printed automatically. -
Page 140: Speed Dialing Lists
Speed Dialing Lists Your machine can print speed dialing lists. These lists allow you to review the numbers and names registered under One-Touch Speed Dial buttons and Coded Speed Dialing codes (including Group Dialing numbers). Follow this procedure to print the lists. Press [Menu]. -
Page 141: One-Touch Speed Dial List
One-Touch Speed Dial List 3 1 / 1 2 2 0 0 5 1 0 : 3 2 NOT SORTED 3 1 / 1 2 2 0 0 5 1 0 : 3 2 SORTED 13-8 Speed Dialing Lists FA X 1 2 3 x x x x WORLD ESTATE,INC. -
Page 142: Coded Speed Dial List
Coded Speed Dial List FAX-L380S 3 1 / 1 2 2 0 0 5 1 0 : 3 2 FA X NOT SORTED ❉ 555 1234 ❉ 1 914 438 3619 ❉ 1 516 911 4411 ❉ 1 617222322 ❉... -
Page 143: Group Dial List
Group Dial List FAX-L380S 31/12 2005 13:36 CANON GROUP FAX-L390 31/12 2005 13:36 CANON GROUP 13-10 Speed Dialing Lists 123xxxx WORLD ESTATE,INC. ❉ ❉ ❉ ❉ ❉ ❉ ❉ ❉ ❉ ❉ ❉ ❉ ❉ ❉ ❉ ❉ ❉ ❉ ❉ ❉ ❉ ❉ ❉ ❉ ❉ ❉ ❉ ❉ ❉... -
Page 144: User's Data List
User’s Data List You can print a list of the data registered in your machine. This list is useful when you want to review the user data information you may have entered (such as your name and number, the date and time) and all other settings currently selected. - Page 145 NOTE When you set the System Administrator’s ID and password, System Administrator’s ID, contents of the department ID management settings are printed on the USER’S DATA LIST. 31/12 2005 13:36 1.PAPER SETTINGS CASSETTE PAPER SIZE PAPER TYPE MP TRAY PAPER SIZE SCANNING C 7.SYSTEM SETTINGS SYS.
-
Page 146: Department Information List
Department Information List When you set the department ID management, you can check the print count and send count by printing the DEPT. INFO LIST. Press [Menu]. Press [ (-)] or [ (+)] to select <9. PRINT LISTS> ➞ press [OK]. Press [ (-)] or [ (+)] to select <3. -
Page 147: Document Memory List
❉ ❉ ❉ ❉ ❉ ❉ ❉ ❉ ❉ ❉ ❉ ❉ ❉ ❉ ❉ ❉ ❉ ❉ ❉ ❉ ❉ ❉ ❉ ❉ ❉ ❉ ❉ ❉ ❉ ❉ ❉ DESTINATION TEL/ID 01] Canon TOKYO 02] Canon ITALIA ❉ ❉ ❉... -
Page 148: Cancel Report Printing
Cancel Report Printing You can cancel report printing using the CANCEL REPORT item from the REPORT menu. Press [Menu]. Press [ (-)] or [ (+)] to select <9.PRINT LISTS> ➞ press [OK]. Press [ (-)] or [ (+)] to select <4.CANCEL REPORT> ➞ press [OK]. Press [ (-)] or [ (+)] to select <YES>... -
Page 149: Chapter 14 Troubleshooting
Troubleshooting This chapter describes the problems you might encounter when using the machine and their remedies. It also explains what to do if you cannot solve the problem by yourself. Clearing Jams This section describes how to remove jammed paper. Removing Jammed Paper from Inside the Machine When print media jams inside the machine, the LCD displays <REC. - Page 150 Open the printer cover. If there is any paper left in the cassette or on the output tray, remove it first. Remove the cartridge. IMPORTANT • Remove watches and any bracelets or rings when touching the inside of the machine. These items might be damaged if they come into contact with the parts inside the machine.
- Page 151 Open the rear cover and push down the green paper release levers on both sides of the face up paper output. Hold both sides of the jammed paper and carefully move it inward, then gently pull it out. Roll the leading end of the paper outwards so that the printed surface is on the inside of the roll, then gently pull the rolled up paper out of the machine.
- Page 152 If the leading edge of the paper is visible but has not entered the imaging area (marked with yellow label), pull the paper forwards and roll it inwards. If the leading edge of the paper has already entered the imaging area, gently pull out the paper at the face up paper output rollers until the edge of the paper appears.
- Page 153 Gently pull the jammed paper between the output rollers until the leading edge emerges from the machine. Carefully pull the jammed paper straight out through the rollers. If the jammed paper is badly folded, similar to the folds of an accordion, ease the jammed paper loose and then pull it out of the machine.
- Page 154 Insert the cartridge back into the machine, then close the printer cover. For details, see “Installing/Replacing the Toner Cartridge,” on p. 2-18. IMPORTANT After you replace the cartridge and close the printer cover, the machine should be ready for operating. If the machine returns to the ready state for operating, troubleshooting has been successful.
-
Page 155: Removing Jammed Paper From The Adf
Removing Jammed Paper from the ADF When the document jams in the ADF, the LCD displays <CHECK DOCUMENT>. Widen the slide guides until they stop, and remove the paper so as not to be caught by the slide guides. Open the ADF and gently remove the jammed paper from the ADF. NOTE After removing jammed paper, even edges of the document before loading it in the ADF again. -
Page 156: Lcd Messages
LCD Messages The following messages are displayed in the LCD when the machine performs a function or if it encounters an error. Message CHANGE PAPERSIZE CHECK DOCUMENT CHECK PRINTER DOCUMENT TOO LONG HANG UP PHONE INCORRECT PAPER SIZE INSTALL CARTRIDGE 14-8 LCD Messages Cause... - Page 157 Message MEM IN USE nn % MEMORY FULL NOT REGISTERED PRINTER DATA ERROR REC. PAPER JAM RECEIVED IN MEMORY REMOVE MP PAPER REPLACE CARTRIDGE SCANNING MAKING SPACE IN MEM PLEASE WAIT START AGAIN SUPPLY REC. PAPER CASSETTE Cause Shows the percentage of memory currently in use.
- Page 158 Message SYSTEM ERROR Exxx* TX/RX NO. nnnn** * xxx stands for a number. ** The identification number does not appear in the standby mode. It appears when scanning documents, operating [System Monitor], receiving faxes in Manual mode or memory, or after transmission is completed. 14-10 LCD Messages Cause...
-
Page 159: Error Codes
Wait for a while and try again. If you still cannot send the document, contact the other party and have them check if their fax machine is turned on. If the line is busy, wait more and try again. Reset the one-touch or coded speed dialing settings. -
Page 160: Paper Feeding Problems
Paper Feeding Problems Paper does not feed correctly. Does the cassette or multi-purpose feeder contain an appropriate quantity of sheets? Make sure the paper stack in the cassette or the paper in the multi-purpose feeder does not exceed the capacity of the cassette or multi-purpose feeder. (See “Loading Paper,” on p. 4-3.) Is paper loaded correctly? Make sure the paper stack in the cassette or the paper in the multi-purpose feeder is loaded properly, and that the slide guides are adjusted correctly. - Page 161 Is the proper transparency loaded in the multi-purpose feeder? Do not use any transparencies designed for color copiers. They will cause a paper jam. Please use transparencies recommended by Canon. *Only for the FAX-L380S Paper feeds curled. Is the proper paper loaded? Check if the proper paper is loaded in the cassette or multi-purpose feeder.
- Page 162 Load the recommended envelopes (COM10, MONARCH, DL, or ISO-C5) in the cassette* or multi-purpose feeder. (See “Loading Envelopes in the Cassette,” on p. 4-5, or “Loading an Envelope in the Multi-Purpose Feeder,” on p. 4-9.) *Only for the FAX-L380S model. 14-14 Paper Feeding Problems...
-
Page 163: Faxing Problems
Dial the number again, or check that you have the correct number. Does the other party’s fax machine have enough paper? Call the other party and ask them to make sure paper is loaded in their fax machine. Faxing Problems... - Page 164 Check the machine by making a copy. For more information, see Chapter 11, “Making Copies.” If the copy is clear, the problem may be in the receiving fax machine. If the copy is spotted or dirty, clean the scanning area in the machine. For more information, see Chapter 15, “Maintaining Your Machine.”...
-
Page 165: Receiving Problems
Cannot send using ECM (Error Correction Mode). Does the receiving fax machine support ECM? If the receiving fax machine does not support ECM, the document is sent in the normal mode without error checking. Errors occur frequently while sending. Are the telephone lines in proper condition? Or do you have a good connection? Lower the transmission speed. - Page 166 Are you answering the call on a telephone connected to the machine? Answer calls using the optional handset or a telephone connected to the unit. Is the sending fax machine able to send the CNG signal that tells the machine that the incoming signal is a fax? Some fax machines cannot send the CNG signal that tells the machine the incoming call is a fax.
- Page 167 Cannot receive a fax using ECM (Error Correction Mode). Does the sending fax machine support ECM? If the sending fax machine does not support ECM, the document is received in the normal mode without error checking. Errors occur frequently while receiving.
-
Page 168: Telephone Problems
Telephone Problems You cannot dial. Is the telephone line connected properly? Make sure all line connections are secure. (See “Connecting the Telephone Line,” on p. 2-8.) Is the machine set for the correct telephone line type (pulse/tone)? Make sure the machine is set for the correct telephone line type. (See “Setting the Telephone Line Type,”... -
Page 169: Copying Problems
Copying Problems The machine will not make a copy. Is the cartridge installed correctly? Make sure the cartridge is installed correctly. (See “Installing/Replacing the Toner Cartridge,” on p. 2-18.) Is the sealing tape removed from the cartridge? Remove the sealing tape from the cartridge. (See “Installing/Replacing the Toner Cartridge,” on p. -
Page 170: Print Quality Problems
Print Quality Problems The print quality is not what you expect; print is not clear, has missing dots or white streaks. Are the size, thickness and type of the paper you are using within the specifications of the machine? Check that the paper you are using is supported by the specifications of the machine. (See “Print Media Requirements,”... - Page 171 Is the machine installed in a stable location? Install the machine in a proper location. (See “Choosing a Location for Your Machine,” on p. 2-1.) Copies are too dark or too light. Is the exposure adjusted correctly? Adjust the exposure correctly using [Exposure]. (See “Adjusting the Exposure (Density),” on p. 11-6.) Is the machine in the toner saver mode? Set <TONER SAVER MODE>...
-
Page 172: Printing Problems
3 minutes to 5 minutes, then plug it in again. If the problem is fixed, the Alarm indicator will turn off, and the LCD will return to the standby mode. If the Alarm indicator remains flash, unplug the machine, and contact your local authorized Canon dealer or the Canon help line. -
Page 173: If You Cannot Solve The Problem
Canon dealer or the Canon help line. CAUTION If the machine makes strange noises, emits smoke or strange smells, unplug it immediately and contact your local authorized Canon dealer or the Canon help line. Do not attempt to disassemble or repair the machine yourself. NOTE Attempting to repair the machine yourself may void the limited warranty. -
Page 174: Maintaining Your Machine
Maintaining Your Machine Your machine requires no maintenance other than periodic cleaning, and replacing of the toner cartridge as needed. Cleaning the Machine Clean your machine regularly to keep it in good operating condition. NOTE Follow these precautions whenever you clean the machine: - When cleaning the machine’s exterior or the scanning glass, be sure to disconnect the power cord before cleaning the machine. -
Page 175: Cleaning The Machine's Exterior
Cleaning the Machine’s Exterior Disconnect the power cord. Wipe the machine’s exterior with a clean, soft, lint-free cloth moistened with water or diluted dishwashing detergent solution. CAUTION Never use thinner, benzene, alcohol, or any other organic solvent to clean the machine, as these can damage the machine’s surface. - Page 176 Disconnect the power cord. Open the operation panel by gently pulling it up. Use a soft, dry, clean cloth to clean the scanning glass and rollers (shaded areas). • If the document scanning glass and rollers are dirty, the documents you send or print will also be dirty. •...
- Page 177 When you finished, close the operation panel by pressing it down from the center. NOTE Be sure to close the operation panel until it locks into place. Otherwise the machine will not function properly. Plug the power cord back in. 15-4 Cleaning the Machine...
-
Page 178: Transporting The Machine
Transporting the machine Be sure to disconnect the power cord before transporting the machine. If the machine is likely to be subjected to vibration (e.g., when transporting over long distances), the following precautions should be taken. If you do not follow these precautions, the machine may be damaged or the quality of your printouts may be adversely affected. -
Page 179: The Menu System
The Menu System The Menu allows you to specify or register various settings. This chapter explains the procedure to access the menus and their contents. Accessing the Menu Press [Menu]. Press [ (-)] or [ (+)] to select the menu you want to change ➞ press [OK]. A D D I T I O N A L F U N C T I O N S 3 . -
Page 180: Menu Descriptions
16-2 Menu Descriptions Name Sets the paper size for the paper cassette. FAX-L380S: A4, B5, A5, LTR, EXECUTIV, ENVELOPE (You can select from COM10, MONARCH, DL, or ISO-C5.) FAX-L390: A4, LTR Sets the paper type to be used in the paper cassette. -
Page 181: Common Settings
2. COMMON SETTINGS Name 1.DEFAULT SETTINGS COPY 2.SW AFTER AUTO CLR DEFAULT MODE CURRENT MODE 3.VOLUME CONTROL 1.KEYPAD VOLUME 2.ALARM VOLUME 3.TX DONE TONE ERROR ONLY Descriptions Selects which mode is displayed in the LCD when the power cord is connected, or the AUTO CLEAR function activates. - Page 182 4.RX DONE TONE ERROR ONLY 5.PRINTING END TONE ERROR ONLY 6.SCANNING END TONE ERROR ONLY 7.LINE MONITOR VOL. 4.PRINT EXPOSURE 5.TONER SAVER MODE 6.DISPLAY LANGUAGE 16-4 Menu Descriptions Name Adjusts the volume of the done tone sounded when the machine has finished receiving faxes. 1 to 3 1 to 3 The volume is turned off.
-
Page 183: Copy Settings
3. COPY SETTINGS Name 1.STD. IMAGEQUALITY 2.STANDARD EXPOSURE AUTO* MANUAL 3.STD ZOOM RATIO 4.STANDARD COPY QTY 5.AUTO SORT 6.PAPER SIZE GROUP INCH 7.SHARPNESS *1 STANDARD EXPOSURE automatically changes to MANUAL when TEXT/PHOTO or PHOTO is selected. *2 STD. IMAGEQUALITY automatically changes to TEXT ORIGINAL when AUTO is selected. Descriptions Select the document type. -
Page 184: Fax Settings
4. FAX SETTINGS 1.USER SETTINGS 1.TEL LINE SETTINGS 1.USER TEL NO. 2.TEL LINE TYPE 3.TX START SPEED 4.RX START SPEED 2.UNIT NAME 3.TX TERMINAL ID 16-6 Menu Descriptions Name Specifies the basic operation settings in the Fax mode. Specifies the telephone line settings. Your telephone and fax number can be registered within 20 digits, including spaces. - Page 185 Name 4.DENSITY CONTROL 1.LIGHT 2.STANDARD 3.DARK 5.OFFHOOK ALARM 6.R-KEY SETTING PSTN 2.REPORT SETTINGS 1.TX REPORT OUTPUT NO PRINT ERROR ONLY REPORT WITH TX IMAGE Descriptions Adjusts the scanning density. Sets for dark documents. (3) Sets for standard documents. (5) Sets for light documents. (7) Enables/disables the offhook alarm that alerts you when the handset is not in the handset cradle.
- Page 186 OUTPUT YES 2.RX REPORT OUTPUT NO PRINT ERROR ONLY OUTPUT YES 3.ACTIVITY REPORT 3.TX SETTINGS 1.ECM TX 2.PAUSE TIME 16-8 Menu Descriptions Name Prints a report every time you send a document. REPORT WITH TX IMAGE Enables/disables printing of the first page of the fax under the report.
- Page 187 Name 3.AUTO REDIAL 1.REDIAL TIMES 2.REDIAL INTERVAL 4.TIME OUT 4.RX SETTINGS 1.ECM RX 2.FAX/TEL OPT. SET 1.RING START TIME Descriptions Sets whether to perform automatic redial when the other line is busy or no answer. Customizes the redial operation. Sets the number of retries. 01 to 10TIMES (02 TIMES) Sets period of time between redialings.
- Page 188 2.F/T RING TIME 3.F/T SWITCH ACTION 3.INCOMING RING 4.MAN/AUTO SWITCH 16-10 Menu Descriptions Name Sets the length of time the machine rings to alert you of an incoming call. 010 to 060SEC (022 SEC) Selects the action taken after the F/T RING TIME expires.
- Page 189 Name 5.REMOTE RX REMOTE RX ID 5.PRINTER SETTINGS 1.RX REDUCTION 1.RX REDUCTION 2.SELECT REDUCE DIR 2.TONER SUPPLY LOW RX TO MEMORY KEEP PRINTING Descriptions Enables/disables remote receiving. The machine enables remote receiving. You can dial code on the remote extension to start receiving a document.
- Page 190 6.POLLING BOX 1.SETUP FILE 1.FILE NAME 2.PASSWORD 3.ERASE AFTER TX 2.CHANGE DATA 1.FILE NAME 2.PASSWORD 3.ERASE AFTER TX 3.DELETE FILE 7.SYSTEM SETTINGS 1.MEMORY LOCK RX 16-12 Menu Descriptions Name Sets the functions of SETUP FILE, CHANGE DATA and DELETE FILE. Registers a polling box.
- Page 191 Name OUTPUT NO OUTPUT YES 2.FAX DEFAULT 1.RESOLUTION STANDARD FINE PHOTO SUPER FINE ULTRA FINE 2.SCAN DENSITY 3.LOCK PHONE 4.COUNTRY SELECT* * This setting is only available for some countries. Descriptions No report prints while in the Memory Lock mode. A report prints while the machine is in the Memory Lock mode.
-
Page 192: Add. Registration
5. ADD. REGISTRATION 1.1-TOUCH SPD DIAL 1-TOUCH SPD DIAL 1.TEL NUMBER ENTRY 2.NAME 2.CODED SPD DIAL CODED SPD DIAL 1.TEL NUMBER ENTRY 2.NAME 3.GROUP DIAL 1.TEL NUMBER ENTRY 2.NAME 6. PRINTER SETTINGS 1.PRESET PRINT QTY 2.AUTO ERROR SKIP 16-14 Menu Descriptions Name Registers the information on One-Touch Speed Dialing. -
Page 193: Timer Settings
Name 3.ERROR TIME OUT 4.PRINTER RESET 7. TIMER SETTINGS Name 1.DATE/TIME SETTING 2.AUTO CLEAR 3.ENERGY SAVER 4.DATE SETUP Descriptions The auto error skip is on. The error is skipped and shifted to the next job automatically without indicating an error code. The auto error skip is off. -
Page 194: System Settings
5.SUMMER TIME 1.BEGIN DATE/TIME 2.END DATE/TIME 8. SYSTEM SETTINGS SYSTEM SETTINGS PASSWORD 1.SYS. ADMIN. INFO 1.SYS. ADMIN. ID. 2.SYSTEM PASSWORD 2.DEPT. ID MANAGEMNT 16-16 Menu Descriptions Name Sets the summer time. The summer time setting is disabled. The summer time setting is enabled. Sets the MONTH, WEEK, DAY and TIME when the summer time starts. - Page 195 Name 1.DEPT. ID ENTRY 1.PASSWORD 2.COPY LIMITS 3.TX LIMITS 2.COUNT MANAGEMENT 1.COUNT INFORMATION 1.PRINT COUNT 2.SEND COUNT 2.COUNT RESET 1. ON 2. OFF 3.RESTRICTIONS 1.RESTRICT PRINTING 2.RESTRICT TX Descriptions Set the Department ID number from 00 to 99, and enter the Department ID from 1 to 9999999.
-
Page 196: Print Lists
9. PRINT LISTS 1.USER DATA 2.SPEED DIAL LIST 1.1-TOUCH LIST 1.NO SORT 2.SORT 2.CODED DIAL LIST 1.NO SORT 2.SORT 3.GROUP DIAL LIST 3.DEPT. INFO LIST 4.CANCEL REPORT REPORT STATUS CANCEL REPORT? YES CANCEL REPORT? NO 16-18 Menu Descriptions Name Prints out a list of items set or registered in the Menu. -
Page 197: Appendix A Specifications
× Weight: Environmental requirements: Applicable standards: PC Interface: * Based on Canon FAX Standard Chart No.1, JBIG, standard mode ** Based on Canon FAX Standard Chart No.1, standard mode Public Switched Telephone Network MH, MR, MMR, JBIG FAX modem 33600, 31200, 28800, 26400, 24000, 21600, 19200, 16800, 14400, 12000, 9600, 7200, 4800, 2400 bps (automatic fallback) Approx. -
Page 198: Plain Paper Fax
9 density adjustment levels Laser Beam printing Approx. 18 pages/minute** Automatic dialing: – One-Touch Speed Dialing (31 locations) – Coded Speed Dialing (100 locations (FAX-L380S)/169 locations (FAX-L390)) – Group Dialing (130 locations (FAX-L380S)/199 locations (FAX-L390)) Regular 10-button dialing (with numeric buttons) - Page 199 * Based on 75 g/m paper ** Based on Canon FAX Standard Chart No.1, A4, standard mode Plain Paper Fax...
-
Page 200: Copier
Copier Resolution: Default size: Zoom: Multiple copies: Telephone • Automatic FAX/TEL switchover • Answering machine connection (CNG detecting signal) • Telephone connection • Optional handset connection* • Remote reception by telephone (Default reception ID: 25) • Tone button • Redial/Pause button * This feature is available for certain countries only. -
Page 201: Printer
Cassette Feeding: 250 sheets (FAX-L380S)/500 sheets (FAX-L390) of 64 Multi-Purpose Feeder: 1 sheet The Canon genuine Cartridge T Starter (Yield: Approx. 2,500 page of printouts based on 5% coverage of a A4-size page) The Canon genuine Cartridge T (Yield: Approx. 3,500 page of printouts... -
Page 202: Printable Area: Papers
Printable Area: Papers The shaded area in the following figure shows the printable area for papers. ■ Printable area: Max. 5.0 mm Max. 5.0 mm Max. 5.0 mm Max. 5.0 mm Printer A4-size LTR-size 210 mm 8.5” Max. 0.2” Max. 0.2” 297 mm 11.0”... -
Page 203: Printable Area: Envelopes
Printable Area: Envelopes The shaded portion in the following figure shows the printable area for envelopes. ■ Printable area: European DL 110 mm Max. 5.0 mm Max. 5.0 mm 220 mm Max. 5.0 mm Max. 5.0 mm CAUTION For some envelope types, the edges of the envelope can not be printed on. U.S. -
Page 204: Document Sizes
Document Sizes The following illustrations show the largest and smallest documents you can feed into the machine. Maximum Document Size 216 mm The figure below shows how much of a A4-, LTR-, or LGL-size document the machine scans when faxing or scanning. The margin at each edge is outside the machine’s scanning area. -
Page 205: Printer Driver
Printer Driver System requirements: IBM or compatible computer with the following Pentium processor: Microsoft Windows® 98, Windows® Me, Windows® 2000, or Windows® XP –Windows® 98: A 90-megahertz (MHz) Pentium processor or higher/At least 32 MB of RAM and 115 MB of available hard disk space –Windows®... -
Page 206: Attaching The Optional Handset To The Machine
Please note that the shape of your handset may differ from the one shown in this section. However, both handsets have exactly the same functions and performance. Make sure you have the following items. If anything is damaged or missing, notify your Canon dealer immediately. -
Page 207: Attaching The Handset To Your Machine
Attaching the Handset to Your Machine To attach the handset to your machine, follow these steps: Remove the screws from the plugs and insert the plugs into the holes on the handset cradle. Insert the plugs with the handset cradle in the holes on the machine. NOTE If you have difficulty inserting the plugs, turn the machine so that the left side is facing you and the right side is placed against a wall. - Page 208 Insert the screws into the plugs and push them in with your finger. Connect the handset cord to the input jack marked CAUTION When carrying the machine, do not lift it by the handset cradle as it may break. at the back of the machine. Handset...
-
Page 209: Adjusting The Ringer Volume Switch
Adjusting the Ringer Volume Switch The ringer volume switch allows you to select the ring volume of the handset for incoming calls. Use a pen or other pointed object to adjust the switch to high or low. RINGER VOLUME SWITCH The type of handsets you can connect is different depending on the area you use your machine. -
Page 210: Country-Specific Features
Country-Specific Features United Kingdom Connecting External Device If the connectors of the external devices cannot be connected to the jacks on the machine, you will need to purchase one or more B.T. adaptors to connect them as follows: B.T. ADAPTOR Ringer Equivalence Number (R.E.N.) Your British Telecom line has a maximum R.E.N. -
Page 211: Germany
Germany This product is designed for use for residential, commercial and light-industrial purposes. Applicable Standards Electrical Safety: CE, GS Radiation: CISPR Pub 22 Class B Other: Energy Start compliant, CE Marking, Telefax Standard (DTS) Connecting the Telephone Line Cord Follow the procedure below to connect the telephone line cord. REAR COVER POWER CONNECTOR... -
Page 212: Connecting A Telephone
NFN-code. NOTE • Canon cannot guarantee that all answering machines will be compatible with your machine, due to varying specifications. • If you have connected an external device to your machine, be sure to set the correct receive mode (See Chapter •... -
Page 213: Glossary
Automatic redialing When the receiving fax machine is busy or does not answer, or when an error occurs while sending, the machine waits a specified time and then automatically redials the number. If the receiving fax is still busy or does not answer, the machine waits the specified time and dials again. - Page 214 Dialing methods Ways of pressing one or more buttons to access a number to connect to an outside party or fax machine. Dialing methods include One-Touch, Coded Speed Dialing, Group Dialing, Directory Dialing, and regular dialing with the numeric buttons.
- Page 215 FINE The resolution setting for documents with very small characters and lines. G3, Group 3 fax machine Defined by CCITT/ITU-T. Uses encoding schemes to transmit image data while reducing the amount of data that needs to be transmitted, thus reducing transmission time. G3 fax machines can transmit one page in less than one minute.
- Page 216 Interface The connection between two devices that makes it possible for them to communicate with each other. The machine features a USB interface, which makes it compatible with IBM and similar personal computers. Interface cable The cable used to create the interface between a printer and a computer. Interface port The machine comes with one USB port, located on the back of the machine.
- Page 217 The document setting you use for sending or copying documents with intermediate tones, such as photographs. Polling One fax machine requesting another to send a document. The receiving party calls the fax machine holding the document to be sent, and requests that it be sent. Printable area The area of a sheet of paper on which a printer can reproduce text or graphics (the printing area is smaller than the paper).
- Page 218 Reception See Receiving. Redialing-automatic See Automatic Redialing. Redialing-manual See Manual Redialing. Reduction mode The machine’s automatic feature that slightly reduces the received image to allow room at the top of the page for the sender’s ID information. You can also reduce the size of large incoming documents using the <RX REDUCTION>...
- Page 219 Transmit Terminal ID. See Sender ID. See Sending. ™ (Ultra High Quality) An exclusive Canon digital image processing system that incorporates 256 shades of gray along with a special edge enhancement feature which ensures that text and photos are transmitted with ultimate clarity.
- Page 220 Index Numerics ((-), )(+) buttons, 2-15 Activity Report, 13-1 ADD. REGISTRATION, 16-14 ADF (Automatic Document Feeder), 2-11, 2-12 Alarm indicator, 2-14 AnsMode, 7-1, 7-5 Answering machine using, 7-5 Attaching components document output tray, 2-5 output tray, 2-5 B.T. adaptor, C-1 Broadcasting, 6-13 Canceling automatic redialing, 6-11...
- Page 221 DOCUMENTATION, 2-2 Energy Saver button, 2-14 Energy saver mode restoring from, 2-16 setting manually, 2-16 Enlarge/Reduce button, 2-14 Entering date and time, 3-3 method, 3-1 numbers for Coded Speed Dialing, 5-5 numbers for Group Dialing, 5-9 numbers for One-Touch Speed Dialing, 5-2 your fax number and name, 3-4 Envelope loading in the cassette, 4-5...
- Page 222 One-Touch Speed Dialing, 5-1, 6-7 changing or deleting numbers, 5-3 storing numbers, 5-2 using, 5-4 Operation panel, 2-11, 2-12, 2-14 Orientation, 4-11 Output tray, 2-11, 2-12 Paper cassette installing, 2-6 Paper jam clearing, 14-1 Paper output area face down, 4-13 face up, 4-13 guidelines, 4-12 selecting, 4-12...
- Page 223 System Administrator’s ID changing/cancelling, 9-2 setting, 9-2 SYSTEM ERROR, 14-10 System Monitor button, 2-14 SYSTEM SETTINGS, 16-16 Telephone line connecting, 2-8 Telephone Line Cord, 2-2 Telephone line jack, 2-13 Telephone line type setting, 3-5 TIMER SETTINGS, 16-15 Tone button, 2-14 Tone dialing, 10-3 Toner cartridge handling and storing, 2-17...
- Page 224 CANON INC. 30-2, Shimomaruko 3-chome, Ohta-ku, Tokyo 146-8501, Japan CANON U.S.A., INC. One Canon Plaza, Lake Success, NY 11042, U.S.A. CANON CANADA INC. 6390 Dixie Road Mississauga, Ontario L5T 1P7, Canada CANON EUROPA N.V. Bovenkerkerweg 59-61 1185 XB EG Amstelveen, The Netherlands CANON FRANCE S.A.S.
Need help?
Do you have a question about the L380S and is the answer not in the manual?
Questions and answers