Table of Contents
Advertisement
Quick Links
Advertisement
Table of Contents

Related Manuals for Ronix 6115


Summary of Contents for Ronix 6115
- Page 1 ELECTRIC POLISHER 6115...
-
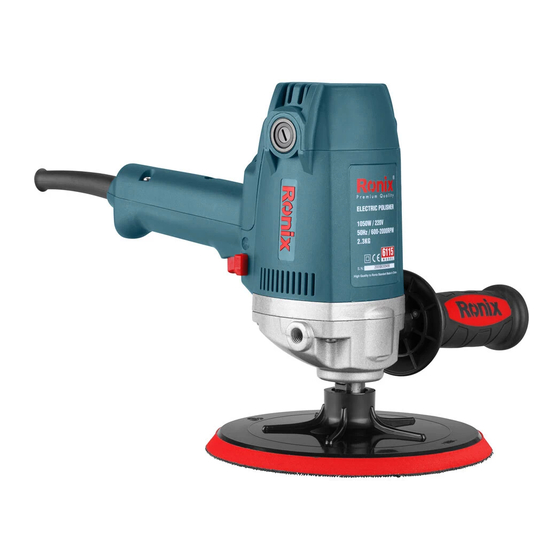
Page 2: Specifications
SPECIFICATIONS Model 6115 Rated Voltage 220V Frequency 50HZ Input Power 1050W No Load speed 600-2000r/min Disc Capacity 180mm Net weight 2.3KG hex wrench 1pc washer 2pcs Hexagon screws 2pcs carbon brush 2pcs Accessories polish disk 1pc manual 1pc loop handle 1pc... -
Page 3: General Safety Rules
Mnufacturer reserves the right to change specifications without notice. Specifications may differ from country to country. GENERAL SAFETY RULES WARNING! Read and understand all instructions. Failure to follow all instructions listed below, may result in electric shock. Fire and/ or serious personal injury. SAVE THESE INSTRUCTIONS WORKS AREA - Keep your work area clean and well it. -
Page 4: Personal Safety
or moving parts. Replace damaged cords immediately. Damaged cord increase the risk of electric shock. - When operating a power tool outside, use an outdoor extension cord marked ‘W-A” or “W”. These cord are rated for outdoor use and reduce the risk of electric shock. - Page 5 tool will do the job better and safer at the rate for which it is designed. - Do not use tool id switch does not turn it on or off. Any tool that cannot be controlled with the switch is dangerous and must be repaired. - Disconnect the plug from the power source before making any adjustments.
- Page 6 tool warning label. Wheels and other accessories running over rated speed can fly apart and cause injury. - Check the backing pad carefully for cracks, damage or deformity before operation. Replace cracked, damaged or deformed pad immediately. - Hold tool by insulated gripping surfaces when performing and operation where the cutting tool may contact hidden wiring or its own cord.
- Page 7 SAVE THESE INSTRUCTIONS WARNING! MISUSE or failure to follow the safety rules stated in this instruction manual may cause serious personal injury. SYMBOLS The following show the symbols used for the tool. voltage no load speed. ampere --/ min revolutions or reciprocation per minute hertz CLASS II CONSTRUCTION INSTALLING OR REMOVING WOOL BONNET...
- Page 8 INSTALLING THE LOOP HANDLE Always install the loop handle on the tool before operation. Hold the tool’s switch handle and the loop firmly with both hands during operation. Install the loop handle so that its protrusion will fit into the matching hole in the tighten them with the hex wrench.
- Page 9 SPEED ADJUSTING DIAL 1) This tool is equipped with electronic adjusting switch. Usually be set on “1” position before starting. 2) The tool speed can be changed by turning the speed adjusting dial to a given number setting from 1 to 6.(At the time when the switch trigger is fully pushed.) 3) Higher speed is obtained when the dial is turned in the direction of number6.
-
Page 10: Replacing Carbon Brushes
If the tool is not working well, ask your local center for repair. Ronix service To maintain product SAFETY and RELIABLITY, repairs, and other maintenance or adjustment should be performed by Ronix Authorized or Factory service centers, always using Ronix replacement parts. USER MANUAL...
Need help?
Do you have a question about the 6115 and is the answer not in the manual?
Questions and answers