Table of Contents
Advertisement
Quick Links
Advertisement
Table of Contents

Related Manuals for Cardinal Priefert 190P


Summary of Contents for Cardinal Priefert 190P
- Page 1 Priefert 190P Digital Weight Indicator Quick Set Up Page 1...
- Page 2 Page 2...
-
Page 3: Charge Battery
Unpack Unpack the box and check that you have each of the following: 190P Digital Weight Indicator Data Cable (PN: 3502-B476-0A) Cable Gland (PN: 6610-2248) Mounting Gimbal (PN: 8400-C004-08) Rubber Feet (x4) (PN: 6540-1004) Manual on CD (PN: 8400-M022-01) Charge Battery To charge the battery pack, plug-in the power cord to an AC power outlet. -
Page 4: Operation
OPERATION The following sections give a quick overview of the 190P indicator and its operation. For detailed information please refer to the 190 Installation, Technical and Operation Manual (PN: 8400-M022-01) on the CD received with the indicator. Keypad and Display The Model 190 uses a capacitive touch keypad that requires a “finger touch”... - Page 5 Description ON/OFF: The ON/OFF key is used to turn the indicator on and off. Press the ON/OFF key when the indicator is off to turn the indicator ON. The 190 will perform a display test (turn on all segments) and then show the model number and software version.
- Page 6 Description TARE (Enter): The TARE key is used during normal operation to store the current Gross weight as the new Tare weight. The display will change to the Net weight and the Net annunciator will turn on. Pressing the TARE key when in the Net weight mode will cause the display to show the Tare weight.
- Page 7 Description Fn/ (Up Arrow): The Fn/ key is used for several functions. During indicator setup, when a setup parameter (not a parameter value or setting) is displayed, pressing the Fn/ key will "backup" to the previous parameter prompt. Also during setup, when a parameter value or setting is displayed, pressing the Fn/...
- Page 8 Fn/ Key Functions The Fn/ key is used to select several additional functions that may have been enabled during the setup and calibration of the indicator. Those functions include: Hold, Count, Time and Date, Peak Hold, Checkweigher, Live Weight, Weight Accumulation and Backlight Color. IMPORTANT! The Hold, Count and Live Weight functions cannot be enabled if the Legal-For-Trade option (LFt=yes) was selected during setup.
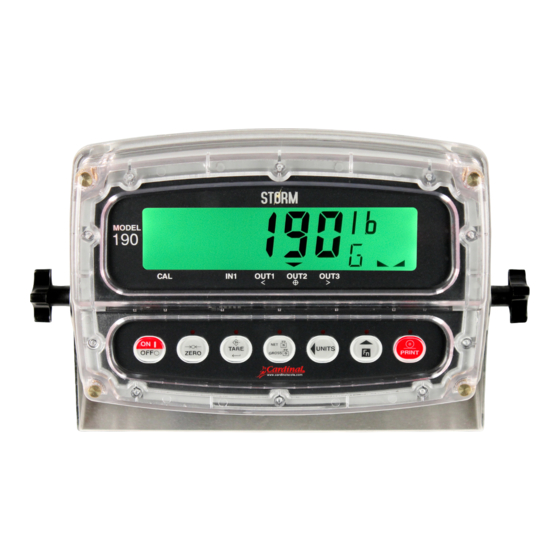
- Page 9 Annunciators The Model 190 is equipped with annunciators that are turned on to indicate that the display is in the mode corresponding to the annunciator label or that the status indicated by the label is active. This section describes each annunciator. Refer to Figure No. 13 for the location of the annunciators.
-
Page 10: Digital Input
This annunciator is located to kilograms the right of the weight display and is used to indicate that the displayed unit of weight measurement is kilograms. This annunciator is located to grams the right of the weight display and is used to indicate that the displayed unit of weight measurement is grams. - Page 11 This annunciator is used to signal ACCEPT that the displayed weight is within OUT2 the acceptable weight limits for the Checkweigher feature. That is, the weight is equal to or greater than the minimum acceptable weight and equal to or less than the maximum acceptable weight.
-
Page 12: Setup Review
Serial Input/Output Configuration (Select YES or NO) baUd= Select Serial Port Baud Rate prty= Select Serial Port Parity Enable or Disable Continuous Output to the Serial Port Cont1= type= If Cont1=YES (Select Continuous Output Format, SMA or Cardinal Scoreboard) Page 10... - Page 13 Select Option Card Parity when Opt= 0 or 1 Cont2= Enable or Disable Continuous Output to the Option Port type= If Opt=1 and Cont2=YES (Select Continuous Output Format, SMA or Cardinal Scoreboard) baUd= Select Field Bus Option Baud Rate when Opt= 2...
- Page 14 Ticket Format Selection The 190 includes support for visual tickets. Visual tickets are designed by the PC based programs Visual Print or nControl and then downloaded to the indicator. The 190 allows one programmable format in addition to the standard print tab settings format.
- Page 15 Time and Date Functions With the Time and Date function enabled during setup of the indicator, the function must be activated before it can be used. Refer to section 4.14 Function Setup, the FUnC (FUnC?) parameter to enable the Fn/ key Time and Date function. NOTE: With USA=yes, the date format is month-day-year.
- Page 16 Checkweigher The Model 190 indicator has logic level outputs that can be used to control peripheral devices used to signal when the weight is within preset limits. The output state of the Checkweigher (before reaching the preset weight) is defined in section 4.4 SETUP, the d out= (Digital Output) parameter.
- Page 17 The display will change to show the Hi 1= prompt. Press the TARE key again. The display will show the current value for the maximum acceptable weight for ID 1. If the setting displayed is acceptable, press the TARE key to save it.
- Page 18 Target Weight Selection From the weight display, briefly press and then release the Fn/▲ key. The display will show the prompt id=. Press the TARE key. The display will show the ID of the currently selected target weight. If the setting displayed is acceptable, press the TARE key to save it. Otherwise, use the Fn/▲...
- Page 19 Page 17...
- Page 20 8400-0154-0M 06/15 Page 18...
Need help?
Do you have a question about the Priefert 190P and is the answer not in the manual?
Questions and answers