
Related Manuals for AVANT A440199


Summary of Contents for AVANT A440199
- Page 1 English Fence mower 2021 1 Operator's Manual for Attachment Fence mower Product number A440199 www.avanttecno.com A444986 2021 1 EN 2020-...
- Page 2 Fence mower 2021 1...
-
Page 3: Table Of Contents
Fence mower 2021 1 CONTENTS 1. FOREWORD ............................4 Warning symbols used in this manual ........................... 5 2. DESIGNED PURPOSE OF USE......................6 3. SAFETY INSTRUCTIONS FOR USING THE FENCE MOWER ............. 7 Personal protective equipment ..........................9 Safe shutdown procedure ............................9 4. -
Page 4: Foreword
If you sell or transfer the equipment, be sure to hand over this manual to the new owner. If the manual is lost or damaged, you can request a new one from your Avant dealer or from the manufacturer. -
Page 5: Warning Symbols Used In This Manual
5 (34) Warning symbols used in this manual The following warning symbols are used throughout this manual. They indicate factors that must be taken into account to reduce the risk of personal injury or damage to property: WARNING SAFETY ALERT SYMBOL This symbol means: “Warning, be alert! Your safety is involved!”... -
Page 6: Designed Purpose Of Use
2. Designed purpose of use This AVANT Fence mower is an attachment that is suitable for use with AVANT compact loaders that are shown in Table 1. The Fence mower is intended for trimming and cutting the hay and shrub under fences and around fence posts. -
Page 7: Safety Instructions For Using The Fence Mower
7 (34) 3. Safety instructions for using the Fence mower Please bear in mind that safety is the result of several factors. The loader-attachment combination is highly powerful and improper or careless use or maintenance may cause serious personal injury or property damage. - Page 8 8 (34) Use the attachment only for its intended use and only with original tools on the attachment. Shut down the loader and place the attachment to a safe position as shown in Safe stopping procedure before any cleaning, maintenance, or adjustments. WARNING ...
-
Page 9: Personal Protective Equipment
9 (34) 3.1 Personal protective equipment Remember to wear proper personal protective equipment: The noise level at the driver's seat may exceed 85 dB(A) depending on loader model and operating cycle. Extended exposure to loud noise can cause hearing impairment. Wear hearing protection while working with the loader. ... -
Page 10: Technical Specifications
(cutting head at the right side): Minimum width in transport position: 1172 mm Weight: 122 kg Recommended hydraulic flow: 30-40 l/min, 20,0 MPa (200 bar) Maximum input of hydraulic energy: 50 l/min, 22,5 MPa (225 bar) Suitable Avant loaders: See Table 1... -
Page 11: Safety Labels And Main Components Of The Attachment
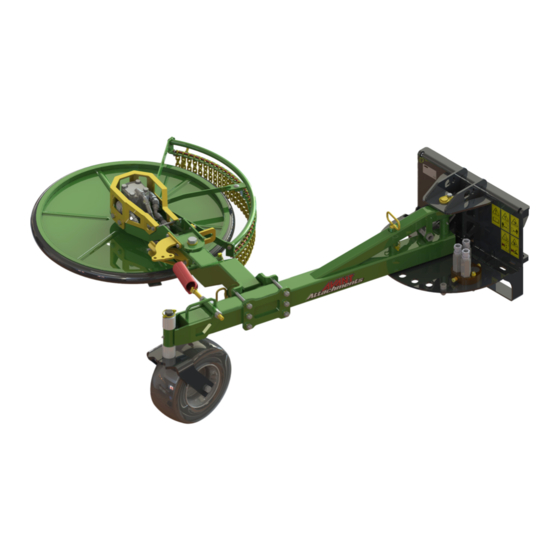
11 (34) 4.1 Safety labels and main components of the attachment Listed below are the labels and markings on the attachment. They must be visible and readable on the equipment. Replace any unclear or missing label. New labels are available via your retailer or contact information provided on the cover. - Page 12 Operate attachment only from the driver’s seat. A440866 Attachment identification plate Table 4 - Fence mower - Main components Frame with Avant quick coupling brackets Cutting head Support disc Blade (2 pcs) Hydraulic motor Rubber bumper Turnable cutting arm...
-
Page 13: Attaching The Attachment
Do not stay in the area between the attachment and the loader. Mount the attachment only on level surface. WARNING Never move or lift an attachment that has not been locked. Avant quick coupling system: Step 1: Lift the quick attach plate locking pins up and turn them backwards into the slot so that they are locked in the upper position. -
Page 14: Connecting And Disconnecting Hydraulic Hoses
5.1 Connecting and disconnecting hydraulic hoses On Avant loaders the hydraulic hoses are connected using the multi connector system. If you have an Avant 300-700 series loader with the conventional quick couplers and wish to change to the multi connector system, contact your Avant dealer or service point for instructions or installation services. - Page 15 15 (34) Keep all fittings as clean as possible; use the protective caps on both the attachment and the loader. Dirt, ice, etc. may make using the fittings significantly more difficult. Never leave the hoses hanging on the ground; place the couplings onto the holder on the attachment.
-
Page 16: Operating The Attachment
16 (34) 6. Operating the attachment Check the attachment and the operating environment once more before starting to work, and that all obstacles have been removed from the operating area. Quick inspection of the equipment and the operating area before use are parts of ensuring safety and the best performance of the equipment. -
Page 17: Safety Distance
17 (34) Risk of cutting and entanglement from contact with moving parts - Never leave the equipment unattended while the engine is running. The attachment may start unexpectedly when removing a blockage, for example, if the hydraulic system is WARNING pressurized. -
Page 18: Checks Before Use
18 (34) 6.2 Checks before use Check that the blades at the cutting head can rotate freely and that there is no string or other foreign material around them. Check that the cutting head can tilt back when it hits an obstacle. Check the spring, rubber bumper, ... -
Page 19: Use
19 (34) 6.4 Use Risk of crushing or entanglement from contact with moving parts - Never leave the equipment unattended while the engine is running. Follow safe stopping procedure. DANGER Risk of thrown parts - Avoid running the attachment at very high speed. Operating the attachment at too high speed may cause high vibrations, noise, or thrown parts from the attachment, or damage that could lead to personal injury. -
Page 20: Adjustments
20 (34) Avoid sharp turns while operating the Fence mower. Lift the attachment off the ground before sharp turns. Avoid hitting the ground hard with the mower, and avoid pressing the attachment too hard against the ground. If the front wheels of the loader tend to lift off the ground, the attachment is pressed too hard against the ground. -
Page 21: Floating System
21 (34) 6.5.2 Floating system For more even cutting performance the Fence mower is equipped with a floating system. The floating system allows the cutting head to float upwards, which makes working on uneven surfaces considerably easier and more efficient. There are 4 positions to select for the vertical position of the cutting head as shown in the adjacent figure. -
Page 22: Spring Release System
22 (34) 6.5.4 Spring release system The spring tension can be adjusted with the eye bolt (1). If the tension can't be adjusted enough with the bolt, there are 3 quick clamping positions on the bracket (3) to adjust the tension of the spring (2). -
Page 23: Transport Position
23 (34) Keeping the rotating speed sufficiently high and drive speed low on demanding conditions are essential to avoid blockages. Keep the equipment clean, so that material will not stick on it. Wet, thick, and log grass can get coiled around the blades if drive speed is too high. When mowing high or wet hay more than one run may be needed for even results. -
Page 24: Storage
24 (34) 6.9 Storage Uncouple and store the attachment on level ground. The best way to store the attachment is a place where it is protected from direct sunlight, rain, and extreme temperatures. Avoid leaving the attachment laying directly on the ground. Place it on blocks of wood or on a pallet, for example. -
Page 25: Maintenance And Service
Finding any fault means that the hydraulic hose or component must be replaced and the equipment must not be used until it is repaired. Spare parts are available from your nearest AVANT retailer or authorised service point. Leave the repair work to professional service technicians, if you don’t have adequate knowledge and... -
Page 26: Cleaning The Attachment
26 (34) 7.2 Cleaning the attachment Clean the attachment regularly to prevent accumulation of dirt which is more difficult to remove. A pressure washer and mild detergent can be used for cleaning. Do not use strong solvents, and do not spray directly at the hydraulic components, or at the labels on the attachment. -
Page 27: Lubrication
27 (34) 7.5 Lubrication There are a total of 4 lubricating points at the joints of the attachment. Appropriate lubrication interval depends heavily on use and operating conditions. Lubricant must be added at least after every 10 hours of use. Adequate lubrication must be ensured, and if the bearings are dirty, lubricant must be added;... - Page 28 28 (34) Allow the hydraulic systems of the loader and of the attachment to cool down completely before any work on hydraulic systems. Make sure that the loader boom or any other part of the attachment can’t move causing crushing or pinching hazards: Lower the loader boom to its lower position and lower the mower firmly on the ground.
- Page 29 29 (34) Test to find any leaks Before checking for leakages, or going near any hydraulic fitting, to avoid possible ejection of pressurized hydraulic oil: Shut down the loader engine Depressurize the hydraulic system completely DANGER Wipe the hydraulic components clean to find leaks more ...
-
Page 30: Installation
Contact your Avant dealer or service if you are unsure about safe procedures, or need more information, or installation service. -
Page 31: End Of Life Disposal
See page 27. Start carefully operate attachment according to instructions on page 19. Please contact your nearest AVANT service partner or dealer if you have additional questions about operation attachment. 7.7 End of life disposal When the attachment is at the end of its useful life recycle and dispose of the attachment properly. -
Page 32: Warranty Terms
32 (34) 8. Warranty terms Avant Tecno Oy grants a warranty of one year (12 months) from the date of purchase for the attachment it manufactures. The warranty covers repair costs as follows: Work costs are covered, if the repair is not performed at the factory. - Page 33 SFS-EN ISO 12100, SFS-EN ISO 4413 Mallit / Modeller / Models Avant Hydraulitoiminen aidanalusleikkuri; Avant-kuormaajan työlaite Hydraulisk stolpklippare; arbetsredskap för Avant lastare A440199 Hydraulic Fence mower; attachment for Avant loaders 4.1.2021 Ylöjärvi, Finland Risto Käkelä, Toimitusjohtaja / Verkställande direktör / Managing Director...
Need help?
Do you have a question about the A440199 and is the answer not in the manual?
Questions and answers