
Related Manuals for AVANT A449770


Summary of Contents for AVANT A449770
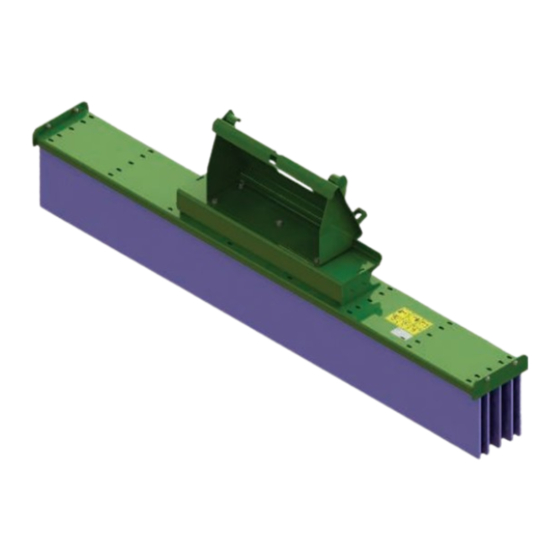
- Page 1 Push broom 2021 1 English Operator's Manual for Attachment Push broom Product number 1200 mm A449770 1500 mm A437121 2000 mm A447153 A450220 2021 1 EN 2021- www.avanttecno.com...
- Page 2 Push broom 2021 1...
-
Page 3: Table Of Contents
Push broom 2021 1 CONTENTS 1. FOREWORD ............................4 Warning symbols used in this manual ........................... 5 2. DESIGNED PURPOSE OF USE......................6 3. SAFETY INSTRUCTIONS FOR USING THE ATTACHMENT ............7 Personal protective equipment ..........................9 Safe shutdown procedure ............................9 4. -
Page 4: Foreword
If you sell or transfer the equipment, be sure to hand over this manual to the new owner. If the manual is lost or damaged, you can request a new one from your Avant dealer or from the manufacturer. -
Page 5: Warning Symbols Used In This Manual
5 (30) Warning symbols used in this manual The following warning symbols are used throughout this manual. They indicate factors that must be taken into account to reduce the risk of personal injury or damage to property: WARNING SAFETY ALERT SYMBOL This symbol means: “Warning, be alert! Your safety is involved!”... -
Page 6: Designed Purpose Of Use
It is also possible to install the Push broom straight on the front of Avant Root grapple bucket, Silage grab or Timber grab without removing any hoses. With the brush you can clear the site from braches and woodchips, and there is no need to leave the driver's seat. -
Page 7: Safety Instructions For Using The Attachment
7 (30) 3. Safety instructions for using the attachment Please bear in mind that safety is the result of several factors. The loader-attachment combination is highly powerful and improper or careless use or maintenance may cause serious personal injury or property damage. - Page 8 Also read the safety instructions and correct use of the loader from the operator's manual of the loader. Additional safety instructions when operating the Push broom with Avant Root grapple bucket, Silage forks or Timber grab Risk of misuse - Always read the operator's manual of all machines that you will use.
-
Page 9: Personal Protective Equipment
9 (30) Risk of crushing - Going under the loader boom or an attachment can cause serious injury or death. Never go under the loader boom and prevent others from getting near DANGER lifted boom or attachment. Going under a raised attachment or loader boom is dangerous, as the boom may lower due to loss of stability, mechanical fault or when other person operates the controls of the loader. -
Page 10: Technical Specifications
4. Technical specifications Table 2 - Push broom - Specifications Product number A449770 A437121 A447153 Can be installed to Avant quick coupling plate or onto Installation: Root grapple bucket, Log grab or Silage forks Total length: 252 mm 252 mm... - Page 11 4 A449778 / Attachment identification plate A437491 / A447155 Table 4 - Push broom - Main components Standard coupling adapter with Avant quick coupling brackets Brush Fastening frame for coupling adapters Bolts (5 pcs) for coupling adapters Locking plate for brush elements (2 pcs)
-
Page 12: Attaching The Attachment
WARNING Never move or lift an attachment that has not been locked. 5.1.1 Installing the front brush Avant quick coupling system: Step 1: Lift the locking pins of the quick coupling plate of the loader up, and turn them backwards into the slot, so that they are locked in the upper position. - Page 13 If your loader is not listed in Table 1 on page 6, ask your Avant dealer before using this attachment.
-
Page 14: Operating The Attachment
14 (30) 6. Operating the attachment Check the attachment and the operating environment once more before starting to work, and that all obstacles have been removed from the operating area. Quick inspection of the equipment and the operating area before use are parts of ensuring safety and the best performance of the equipment. -
Page 15: Operating The Push Broom
15 (30) 6.3 Operating the Push broom Adjusting the attachment to correct working position The correct position of the Push broom depends of the material being moved and surface type. The broom works in the most efficient way, when the quick coupling bracket is set to slightly forward tilted position and when light load is applied on it, as shown in the adjacent figure. -
Page 16: Transport Position
16 (30) 6.3.1 Transport position Lift the push broom off the ground before transport drive. Keep the loader stable. Always transport the attachment as low and close to the ground as possible. Keep the telescopic boom retracted during drive. Keep the loader stable. Always transport the attachment as low and close to the ground as possible. -
Page 17: Operating The Push Broom With Root Grapple Bucket
1. Undo the fixing bolts (2) and remove the frame (1) from the Push broom (3). 2. Drive the loader that is equipped with Avant Root 3. Lock the attachment by lowering the grapple (6) grapple bucket (4) next to the Push broom (3). Slide... -
Page 18: Operating The Push Broom With Other Attachments
Tilt the attachment carefully, as small adjustments may put too much pressure onto the broom. 6.4 Operating the Push broom with other attachments Work can be started when the Avant Silage forks or Timber grab has been mounted. Check the attachment once more before starting work. ... -
Page 19: Operating The Push Broom With Silage Grab
19 (30) 6.4.1 Operating the Push broom with silage grab Starting to operate the Push broom with Silage grab Install the optional silage fork adapter by using existing fixing points. 1. Undo the fixing bolts [5 pcs] (2) and remove the 2. - Page 20 When operating the Push broom while it is mounted to the Silage grab, operate in similar way as when using the broom separately. Tilt the attachment carefully, as small adjustments may pressurize the broom too much. The AVANT Push broom is an attachment that is suitable for use with AVANT Silage grabs that are shown in Table 5.
-
Page 21: Operating The Push Broom With Timber Grab
21 (30) 6.4.2 Operating the Push broom with Timber grab The optional coupling bracket makes it possible to use the Avant Timber grabs A37457 and A37456 with all Avant Push brooms widths. Starting to operate the Push broom with Timber grab Install the optional coupling bracket by using existing fixing points. - Page 22 22 (30) 4. Drive the loader that is equipped with Timber grab (8) next to the Push broom (3) and open the grapple. 5. Tilt the timber grab slightly upwards as indicated with an arrow in the adjacent figure. The claws of the lock plate (5) must be against the flat surface of the coupling bracket (4).
- Page 23 23 (30) Installation principle Before grabbing the push broom with a timber grab, the claws of the lock plate must be against the flat surface of the coupling bracket. Grabbing the tube of the coupling bracket with the grapple of the timber grab aligns the lock plate with the coupling plate.
-
Page 24: Side Brushes
±45º (model A36505) or ±360º (model A424406). Read the instructions provided with the tilt adapter and in the operator's manual of the loader. More information about the tilt adapters is available from your AVANT retailer or from the AVANT web pages at www.avanttecno.com. -
Page 25: Storing The Attachment
25 (30) 6.7 Storing the attachment Uncouple and store the attachment on level ground. The best way to store the attachment is a place where it is protected from direct sunlight, rain, and extreme temperatures. To prevent the bristles from bending, it is important to ensure that the brush is stored correctly. If the attachment is left in a way that all the weight is applied on the brush, the bristles may bend permanently and the performance of the attachment will decrease. -
Page 26: Maintenance And Service
26 (30) 7. Maintenance and Service The attachment has been designed to be as maintenance free as possible. Continuous maintenance includes regular cleaning and lubrication, and monitoring the condition of the attachment. Because of the crushing hazard caused by lowering machine parts, all maintenance work must be done when moving parts have been lowered down completely and the attachment is lowered flat against the ground. -
Page 27: Brush
27 (30) 7.4 Brush The material of the bristles is polypropylene and in normal operating conditions the brush has a good wear resistance capability. As the brush wears down it loses its effectiveness an and excessively worn brush may be replaced. 7.4.1 Brush elements Replace the brush elements as follows:... -
Page 28: End Of Life Disposal
28 (30) 7.5 End of life disposal When the attachment is at the end of its useful life recycle and dispose of the attachment properly. Dismantle the attachment and separate the different materials, such as plastic, steel, and rubber, for example. Handle them by following the current local regulations. -
Page 29: Warranty Terms
29 (30) 8. Warranty terms Avant Tecno Oy grants a warranty of one year (12 months) from the date of purchase for the attachment it manufactures. The warranty covers repair costs as follows: Work costs are covered, if the repair is not performed at the factory.
Need help?
Do you have a question about the A449770 and is the answer not in the manual?
Questions and answers