Table of Contents
Advertisement
Quick Links
Advertisement
Table of Contents

Subscribe to Our Youtube Channel
Related Manuals for AVANT Collecting broom 1100


Summary of Contents for AVANT Collecting broom 1100
- Page 1 English Collecting broom 1100 2018 1 Operator's Manual for Attachment Collecting broom 1100 Product number Collecting Broom 1100 A36883 - with side brush A426229 - with side brush and watering system A426231 www.avanttecno.com A430125 2018 1 EN 2018-...
- Page 2 Collecting broom 1100 2018 1...
-
Page 3: Table Of Contents
Collecting broom 1100 2018 1 CONTENTS 1. FOREWORD ............................4 Warning symbols used in this manual ..........................5 2. DESIGNED PURPOSE OF USE ......................6 3. SAFETY INSTRUCTIONS FOR USING THE ATTACHMENT ............7 Personal protective equipment ........................... 9 4. TECHNICAL SPECIFICATIONS ......................10 Safety labels and main components of the attachment.................. -
Page 4: Foreword
If you sell or transfer the equipment, be sure to hand over this manual to the new owner. If the manual is lost or damaged, you can request a new one from your Avant dealer or from the manufacturer. -
Page 5: Warning Symbols Used In This Manual
5 (40) Warning symbols used in this manual The following warning symbols are used throughout this manual. They indicate factors that must be taken into account to reduce the risk of personal injury or damage to property: WARNING: SAFETY ALERT SYMBOL This symbol means: “Warning, be alert! Your safety is involved!”... -
Page 6: Designed Purpose Of Use
Consult your nearest Avant service point if necessary. The collecting broom 1100 is not designed for any other use than specified and must not be used for any other purposes than intended. -
Page 7: Safety Instructions For Using The Attachment
Never lift or move an unlocked attachment. The Collecting broom 1100 is designed to be used by one operator at a time. Do not WARNING let others near the danger area of the equipment when it is in use. - Page 8 8 (40) Make sure to use only an attachment that is in good condition. Check the attachment thoroughly in regular intervals. Do not modify the attachment in a manner that would affect its safety. It is prohibited to drill holes on the attachment, and welding or other means of fixing hooks or other objects on the attachment is strictly prohibited.
-
Page 9: Personal Protective Equipment
9 (40) Risk of crushing - Never allow anyone to get under a lifted attachment or loader boom. Keep in mind that the loader boom can be lowered or tilted even if the engine has WARNING been shut down (crushing hazard). The loader is not intended to be left to keep a load elevated for longer periods. -
Page 10: Technical Specifications
10 (40) 4. Technical specifications Table 2 – Collecting broom 1100 - Technical specifications Product number A36883 A426229 A426231 Working width: 1100 mm 1350 mm 1350 mm Total weight: 1374 mm 1577 mm 1577 mm Option Side brush available Standard... -
Page 11: Safety Labels And Main Components Of The Attachment
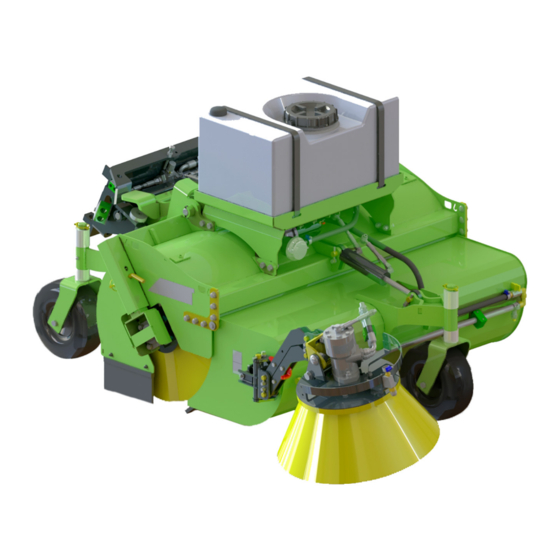
11 (40) 4.1 Safety labels and main components of the attachment Listed below are the labels and markings on the attachment. They must be visible and readable on the equipment. Replace any unclear or missing label. New labels are available via your retailer or contact information provided on the cover. - Page 12 Beware of thrown objects; keep a safe distance from the equipment. (2 m), 2 pcs. A423101 Identification plate Table 4 - Collecting broom 1100 - Main components Frame, including collecting box OptiFloat quick attach plate mechanism Support wheel, 3 pcs Support wheel adjustment on each wheel...
-
Page 13: Attaching The Attachment
Do not stay in the area between the attachment and the loader. Mount the attachment only on level surface. WARNING Never move or lift an attachment that has not been locked. Avant quick coupling system: Step 1: Lift the quick attach plate locking pins up and turn them backwards into the slot so that they are locked in the upper position. -
Page 14: Connecting And Disconnecting Hydraulic Hoses
5.1 Connecting and disconnecting hydraulic hoses On Avant loaders the hydraulic hoses are connected using the multi connector system. If you have an Avant 300-700 series loader with the conventional quick couplers and wish to change to the multi connector system, contact your Avant dealer or service point for instructions or installation services. - Page 15 15 (40) Keep all fittings as clean as possible; use the protective caps on both the attachment and the loader. Dirt, ice, etc. may make using the fittings significantly more difficult. Never leave the hoses hanging on the ground; place the couplings onto the holder on the attachment.
-
Page 16: Electric Connection
16 (40) 5.2 Electric connection Electric functions of the attachment: The pump of the optional Water spraying system is electric. The electric water pump of the Water spraying system can be controlled with the standard electric harness that is supplied with the attachment, or with the Attachment control switch pack of the loader. - Page 17 17 (40) If your loader is equipped with the attachment control switch pack, and the loader is manufactured after 2016: If the loader is equipped with the attachment control switch pack, and the the electric socket integrated in the multiconnector, the electric harness of the attachment is connected when the multiconnector coupled.
-
Page 18: Using The Broom
18 (40) 6. Using the broom Check the attachment and the operating environment once more before starting to work, and that all obstacles have been removed from the operating area. Quick inspection of the equipment and the operating area before use are parts of ensuring safety and the best performance of the equipment. -
Page 19: Checks Before Use
19 (40) 6.1 Checks before use Before starting work, remove large items that can’t be collected with the broom from the working area. Drive carefully on uneven terrain and note the effect of heavy load at the front of the loader to the ... -
Page 20: Operating The Broom
20 (40) 6.3 Operating the broom The broom is operated with the auxiliary hydraulics of the loader. The broom has two operating modes: Auxiliary hydraulics control lever: Broom on its support Broom lifted off the (or electric joystick buttons): wheels: ground: Broom rotate Close collector box... - Page 21 21 (40) Operate the controls of the loader and its attachment in a careful and smooth manner, and avoid sharp turns and sudden changes in speed or direction whenever using the collecting broom. Direction of operation: The broom is intended to rotate only to its normal operating direction so that the broom will function as collecting broom.
-
Page 22: Optifloat
22 (40) 6.3.1 OptiFloat® The attachment is equipped with a mechanical floating system, which enables efficient operation on uneven terrains. Floating refers to a linkage that allows the attachment to follow the contours of the ground surface without moving the loader boom. OptiFloat® allows the attachment to tilt sideways as well and eliminates the need for floating of the loader boom. -
Page 23: Adjusting Operating Height
23 (40) 6.5 Adjusting operating height The operating height of the broom can be adjusted with the plastic sleeves on the vertical axles of the support wheels. Suitable setting depends on the operating area and the material being handled, and the height should also be adjusted as the broom wears down. -
Page 24: Side Brush
24 (40) 6.6 Side brush The collector broom can be equipped with a side brush. Using the side brush improves the reach of the collector broom when operating near walls, for example. The side brush is rotated by its own individual hydraulic motor, and the rotation of the side brush can be adjusted with the valve on the attachment. -
Page 25: Setting The Side Brush
25 (40) 6.7 Setting the side brush Lifting and lowering: If the side brush is not needed, it can be locked off the ground with the red locking bracket. Activating of side brush: The side brush is activated or stopped with the knob at the valve of the broom. -
Page 26: Water Spraying System
26 (40) 6.8 Water spraying system A water spraying system is available for reducing the spreading of dust during use of the broom. The system contains: 1. 60-litre water tank and an electric pump under the tank 2. Shut off valve 3. -
Page 27: Transport Position
27 (40) 1. Alternatively, when the loader is equipped with the optional Attachment control switch pack, it can be used to control the discharge chute rotation and throw height of the snow blower. See page 16 for instructions about how to connect the electric harness of the attachment. -
Page 28: Storing The Attachment
28 (40) 6.10 Storing the attachment Uncouple and store the attachment on level ground, but avoid leaving the attachment laying directly on the bristles. The best way to store the attachment is a place where it is protected from direct sunlight, rain, and extreme temperatures. -
Page 29: Installing A Side Brush
The manufacturer or it’s representative are not responsible for damages, losses or injuries resulted from incorrect or incomplete installations. Contact your nearest Avant dealer or service point, if you have any additional questions or require installation services. -
Page 30: Safety Instructions For Hydraulic Assemblies
30 (40) 7.2 Safety instructions for hydraulic assemblies High-pressure ejection of fluid may penetrate skin and cause serious injuries: Risk high pressure fluid injection through skin - High-pressure ejection of fluid may penetrate skin and cause serious DANGER injuries. Before handling hydraulic components, make sure that hydraulic... -
Page 31: Tightening Hydraulic Fittings
31 (40) 7.3 Tightening hydraulic fittings Tighten the fittings carefully according to given instructions and safety procedures. Keep in mind that over tightening will break a fitting. Tigthen basic fittings carefully with hand tools using moderate torque. The elbow fittings should be tightened at last, after hoses have been fitted to their clamps. Tapered JIC-type fittings: ... -
Page 32: Fitting A Side Brush Or Changing The Installation Side
32 (40) Check the routing of hoses and movements of the attachment After tightening the hydraulic components, test the movements of the attachment thoroughly. Check that the hydraulic hoses can not get stretched or pinched in any position of the loader boom or the attachment, or that the hoses are not in contact with sharp edges. - Page 33 33 (40) The hydraulic motor must be fitted according to which side the brush is installed to. Positions of the hydraulic motor and hydraulic hose lines depending on the side to which the brush is installed: Fitting the side brush on the left side Fitting the side brush on the right side ...
- Page 34 34 (40) Table 5 - Side brush - Hydraulic connections Right brush Left brush 1 brush, right (standard setting) 1 brush, left Hydraulic motor drain line: R (free return line)
-
Page 35: Maintenance And Service
Finding any fault means that the hydraulic hose or component must be replaced and the equipment must not be used until it is repaired. Spare parts are available from your nearest AVANT retailer or authorised service point. Leave the repair work to professional service technicians, if you don’t have adequate knowledge and... -
Page 36: Inspection Of Metal Structures
36 (40) 8.2 Inspection of metal structures Also the metal structures of the attachment must be inspected regularly. Check visually for damages and inspect the quick attach brackets and their surrounding area carefully. The attachment must not be used if it is deformed, cracked, or torn. -
Page 37: Lubrication
37 (40) 8.5 Lubrication There are several lubrication points on the collecting broom as shown in the figure below. In addition, depending on the selected options, there may be several lubricating points on the accessories. Suitable lubrication interval depends heavily on operating conditions. -
Page 38: Warranty Terms
38 (40) 9. Warranty terms Avant Tecno Oy grants a warranty of one year (12 months) from the date of purchase for the attachment it manufactures. The warranty covers repair costs as follows: Work costs are covered, if the repair is not performed at the factory. - Page 39 2006/42/EC as amended). The following harmonized standards have been applied: SFS-EN ISO 12100, SFS-EN ISO 4413 Mallit / Modeller / Models: Avant Hydraulitoiminen keräävä harjalaite; Avant-kuormaajan työlaite A36883 Hydraulisk sopvals med uppsamlare; arbetsredskap för Avant lastare A426229 HydraulicCollecting broom; attachment for Avant loaders A426231 5.6.2018 Ylöjärvi, Finland Risto Käkelä, Toimitusjohtaja / Verkställande direktör /...
Need help?
Do you have a question about the Collecting broom 1100 and is the answer not in the manual?
Questions and answers