Advertisement
Quick Links
Advertisement

Related Manuals for Fortis FS20FATEBKB


Summary of Contents for Fortis FS20FATEBKB
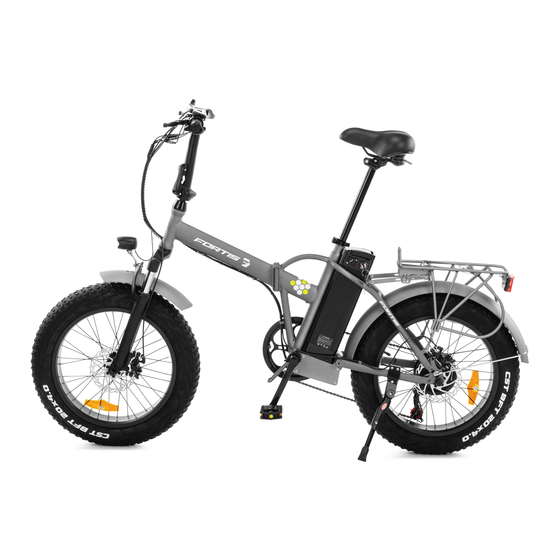
- Page 1 20" FAT TYRE FOLDABLE ELECTRIC BIKE FS20FATEBKB...
-
Page 2: Safety And Warnings
SAFETY & WARNINGS Read all of the instructions in this guide before using this product. Retain this guide for future reference. Do not skip, substitute or modify any steps or procedures in this guide, as doing so could result in personal injury or product damage. Before First Ride •... - Page 3 • Do not remove feet from the pedals while they are in motion. Wear running shoes or other footwear suitable for exercise. • Dry after each use to remove moisture. Wipe regularly with a mild, non-abrasive cleaner and water solution. To avoid damaging the finish, never use a petroleum- based solvent.
- Page 4 ASSEMBLY This electric Bike has been assembled and checked before leaving the factory. It has been partially disassembled for shipment and can be reassembled by following the simple steps below: Step 1: Getting started • Remove the bike from the packaging. DO NOT dispose of the original packaging until assembly is complete.
- Page 5 • The bike can now be unfolded, and the clamp locked back into place to prevent the bike from collapsing. Take note of the correct position of the clamp as shown below. Correct Correct Incorrect Step 3: Handlebars • The handlebar assembly comes pre-assembled from the factory. •...
- Page 6 • Tighten the handlebars stem lock screw using a hex/Allen key until they secure. • While holding the front wheels with your legs, tighten the screw, ensuring the screw is completely fastened. • Close the clamp to lock the handlebars in place. Note: It is recommended to use a torque wrench to tighten the screw between 20Nm - 24Nm.
- Page 7 Step 4: Seat Post • Use the seat post quick release to adjust the height of the seat until it is at a suitable height for you. Ensure that the minimum insertion mark is completely covered and that the seat is pointing forward in alignment with the bicycle •...
- Page 8 Step 5: Rear reflector Remove the rear reflector nuts and attach to the rear seat using a spanner, ensuring it is securely in place. Note: Before using the bike, remove the “PULL” sticker from the rear reflector. Pedals • Install the pedal marked “R” on the right crank and tightened clockwise using a 15mm spanner.
-
Page 9: Operation
OPERATION Charging Before charging the bike, turn the power switch to “OFF” and remove the key. Keep the charger in a dry and a well ventilated area during operation. • Connect the charger plug to the bike battery case socket and then connect it to a power outlet. - Page 10 LCD Display • A: Press to increase the level of electronic assistance (between 0 – 5). Press and hold to turn the front light on or off. • B: Press and hold to turn the display on or off. • C: Press to decrease the level of electronic assistance (between 0 –...
- Page 11 • Front and rear lights: Securely fastened and fully functional. • Mud guards and cargo rack: Securely fastened • Pedals and crank: Securely fastened and fully functional.
- Page 12 • Seat and seat post: Aligned straight and securely fastened. • Front and rear brakes: Securely fastened and fully functional • Front and rear tires: aligned straight sufficient air pressure and in good condition front and rear wheels nuts are securely tightened •...
- Page 13 Riding • Turn the ignition key to the "ON” position. • Turn on the LCD display. • Adjust the seat, place your foot on one of the pedals and do a final check to confirm everything is in working order, especially the brakes. •...
- Page 14 Front and rear brakes • It is normal that the brakes may become loose after a period of usage. • It is important to regularly check the brake disc/pads prior to each ride. If the brake pads are worn out, they will need to be replaced. If the brake cable is loose, adjust the cable fastener and ensure that the brake levers have sufficient travel/respond distance.
- Page 15 Front mud guard nut • The Front mud guard has been assembled and checked before leaving the factory. Under normal conditions, this nyloc (self-locking) nut shouldn’t need to be adjusted or replaced. • If this nyloc nut should need to be replaced, there are spare nyloc nuts for the front mud guard in the toolkit bag.
-
Page 16: Cleaning And Care
CLEANING & CARE WARNING: Before performing any maintenance, turn off the power and remove the ignition key. • Test the bike regularly and check that the unit is operating normally and safely. • Always keep your bike clean. • Keep the battery poles clean to prevent reduced efficiency or burnt poles. •... -
Page 17: Troubleshooting
TROUBLESHOOTING Problems Possible causes Solution • Battery completely • discharged Charge battery No power to the LCD • • Cable connecting battery is Reconnect cable display or motor loose • Change the fuse • Fuse has burned • Insufficient battery charge •... - Page 18 NOTES...
- Page 19 Need more information? We hope that this user guide has given you the assistance needed for a simple set-up. For the most up-to-date guide for your product, as well as any additional assistance you may require, head online to help.kogan.com...
Need help?
Do you have a question about the FS20FATEBKB and is the answer not in the manual?
Questions and answers
What psi do you put 20inc tyres