Table of Contents
Advertisement
Quick Links
Advertisement
Table of Contents

Summary of Contents for Fortis FS7MDLDBWMA
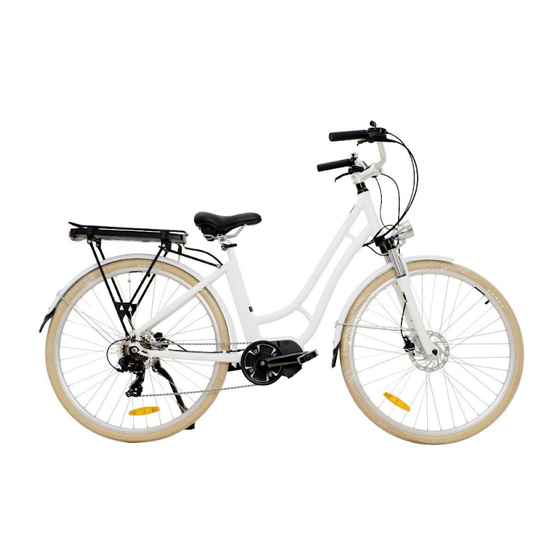
- Page 1 700C 36V MID-DRIVE LADIES ELECTRIC ROAD BIKE (7-SPEED, 7.8AH BATTERY) FS7MDLDBWMA...
-
Page 3: Safety And Warnings
SAFETY & WARNINGS Electric Assisted Bike Regulations The EN 15194 EU standard or EPAC (Electric Power Assisted Cycle) conforms to the following characteristics for electric power assisted bikes: • Motor assistance only starts when the cyclist pedals. • The assistance cuts out as soon as the cyclist stops pedalling. •... - Page 4 14. Store the battery in a dry place after having completely recharged it. Avoid extreme temperatures (both low and high) as they can damage the battery. Optimal operating range: -10°C to 35°C. Cleaning and Maintenance • Use a damp cloth with neutral detergent to clean the bike frame. Do not use any detergents or cleaning liquids liable to deteriorate the frame or components.
- Page 5 OVERVIEW Basic overview Brake lever Bell Handlebars Handlebar stem Control pad Seat Rack Headlight Battery Bike frame Fork Rear sprocket Front brakes Rear derailleur Pedals Front wheel Crankset Rear wheel Chain...
- Page 6 ASSEMBLY Stem & Handlebar Assembly WARNING To prevent steering system damage and possible loss of control, the stem must be inserted enough so that the minimum insertion marks are completely covered (see Figure 1). Minimum insertion mark Figure 1 Remove the plastic shipping cap from the bottom of the stem; insert the stem and handlebar assembly into the fork, making sure the stem wedge is loose.
- Page 7 Wheel Mounting Make sure the brakes are loose enough to allow the wheel to pass through the brake pads easily. If not already loose, disconnect the front brake by detaching the cable guide from the carrier. Place wheel into fork dropouts (Figure 3a) Install retaining washers with raised lip pointed towards the fork and insert into the small hole of the fork blade.
- Page 8 Seat Assembly Insert the seat stem into the frame (see Figure 5). Pull the quick-release lever free and insert the seat-post to the minimal insertion marker indicated on the seat-post. Insert at least to the minimal indication on the seat stem using rotary movements. You can use grease to help assembly.
-
Page 9: Before First Use
BEFORE FIRST USE Recommendations and Component Control before Use Before using your bicycle for the first time, you must check that all adjustments have been correctly made. • Check that the front and rear brakes work, check brake pads for wear. •... - Page 10 Bearings Check that all bearings are properly adjusted and lubricate if needed. Make sure that they are not too loose or that they have seized up. Check steering bearings, wheel bearings, pedal bearings and bottom bracket bearings. Crank set and Pedals Make sure that the pedals are correctly tightened and that the teeth of the crank set do not show any unusual wear.
-
Page 11: Operation
OPERATION Presentation and Electrical Start-Up Control buttons Power Mode (i) – Walk Turn on and off the electric bike Power Cycle through menus, Increase (+) or decrease (-) + / – values setting values. Also used to set the level of assistance. - Page 12 LED display area Battery status Actual speed Assistance level Power bar Current front derailleur (FD), rear derailleur gear shifting position and shifting recommendation. Additional information, such as average speed, pedalling cadence, etc.
- Page 13 LCD Operation Instructions 1. Turn on/off Long press the power button to start/shut down the system. If the LCD stands by for more than 5 minutes without any operation or riding, the system will shut down by itself. 2. Assistant gearing adjustment Adjust the assist gear by pressing the + or –...
- Page 14 4. WALK mode: Short press the "Mode" (i) button to unlock, then immediately press and hold the Walk button. When you hold down the Walk button, the E-bike will be in push power mode. 5. Settings Global settings menu contains several submenus. To enter the Settings menu, press the “Mode”...
- Page 15 Short press the "Mode (i)" button to activate the backlight Settings. Press + or - to change the current value of the LCD backlight. Long press Mode (i) to confirm the value of the BLG-LCD backlight. 5.2 Push-Walk Mode Speed: Short-press the "Mode (i)"...
- Page 16 CHARGING Battery Mounting and Locking Use the battery key which supplied in carton to take out the battery. Use the battery key to fix the battery. Press the power display button on the battery to check the battery volume. Battery Charging With the supplied charger, you can charge the battery directly whilst it is on the bike or use the key to take out the battery;...
-
Page 17: Cleaning And Care
CLEANING & CARE Care and Lubrication Only use specific bicycle lubricants. Pedals A few drops every 6 months on the axle. Chain Spray the whole surface every 6 months. Bottom bracket Every 6 months, please have serviced professionally. Motor Every year, please have serviced professionally. Maintenance and Advice Never modify your bicycle with non-certified parts. -
Page 18: Troubleshooting
TROUBLESHOOTING Error Code Meaning Troubleshooting • Backpedal • Reboot the e-bike. Performance - Motor output • Contact Kogan.com for support stops. 0 x 90 (Advice: check the torque sensor; Description - Torque sensor Replace the motor controller unit; problem Replace motor controller and torque sensor) •... - Page 19 NOTES...
- Page 20 Need more information? We hope that this user guide has given you the assistance needed for a simple set-up. For the most up-to-date guide for your product, as well as any additional assistance you may require, head online to help.kogan.com.


Need help?
Do you have a question about the FS7MDLDBWMA and is the answer not in the manual?
Questions and answers