Advertisement
Quick Links
Advertisement

Related Manuals for Fortis FS20ELBIKEB


Summary of Contents for Fortis FS20ELBIKEB
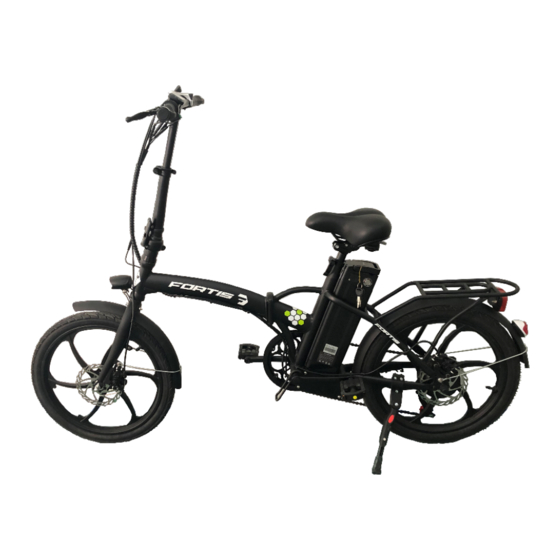
- Page 1 20" 36V 10AH FOLDABLE ELECTRIC BIKE FS20ELBIKEB...
-
Page 3: Safety And Warnings
SAFETY & WARNINGS • Read all of the following instructions before use. Keep this user guide for future reference. Do not skip, substitute or modify any steps or procedures in this guide, as doing so could result in personal injury or product damage. •... - Page 4 • This bike can be used in the rain; however, it must not be submerged in water or puddles. The controller, motor and other electrical devices may be short circuited, causing damage and creating possible dangerous situations. • Never spray your bike directly and do not get the electrical components wet (the battery connector, motor, controller, cables, handlebar controls, etc.) •...
- Page 5 ASSEMBLY Step 1: Getting Started Remove the bike from the packaging. DO NOT dispose of the original packaging until assembly is complete. Check all packaging to ensure all necessary components are found before beginning assembly. Tools required: • Spanner • Allen key Step 2: Unfolding Bike •...
- Page 6 • Unfold the bike. Lock the folding buckle back into place to prevent the bike from collapsing. Follow the below images to understand the correct position for locking the folding buckle after unfolding the bike. Incorrect Correct Incorrect Step 3: Handlebar/Stem •...
- Page 7 • Clamp the front wheels with your legs. Use the Allen key to tighten the screw, make sure the screw is securely fastened. It is recommended to secure the screw with a torque wrench. Ideally it should be tightened between 20N.m to 24N.m. Do not exceed 24N.m.
- Page 8 • Using the quick release, adjust the handlebar up and down until it is at the correct height for you. Pay attention to the minimum insert depth of handlebar, insert as deep as possible. Ensure the cables are not damaged. •...
- Page 9 Step 4: Seat and Seat Post • Unfold the release buckle. Insert the seat post into the bicycle frame. Press down on the seat to align. • Tighten the buckle and ensure the seat is firmly fastened. During this operation, you either use hands or spanner to adjust seat.
- Page 10 Step 6: Pedals • Fit the right pedal (marked “R” on the pedal shaft) on the right-hand crank and tighten it firmly clockwise. • Fit the left pedal (marked “L”) on the left-hand crank and tighten it firmly anticlockwise. Use a 15mm spanner. Note: The threads will be stripped if you mistake the left and right pedals.
-
Page 11: Operation
OPERATION Charging Before charging, you must turn off the power supply and pull out the key. Keep the charger in a dry and ventilated condition when it is being charged. • Connect the charger output plug with the battery socket case properly and then insert the input plug into the electrical outlet. - Page 12 • If you do not ride your electric bike for a long time, the battery should be charged at least once a month. This will ensure the battery life. Do not use in the state of low battery capacity. Do not leave your battery in a fully discharged state for long periods of time.
- Page 13 LCD Display The bike is equipped with an LCD display. Before riding turn on the LCD display by holding the “B” button. Then press the “A” or “C” button to adjust the level of electronic assistance. The levels range from “0” to “5”.
- Page 14 Riding Instructions Step 1: Pre-Riding Check Before every ride ensure you perform the following pre-ride safety checks. • Ensure the steering stem are securely fastened prior to each ride. • Ensure Front and Rear lights are securely fastened/fully functional prior to each ride.
- Page 15 • Ensure Seat post/angle fastener are securely fastened prior to each ride. • Ensure Front and Rear brake discs are securely fastened/fully functional prior to each ride. • Ensure Front and Rear tire alignment and pressure are fully functional prior to each ride.
- Page 16 Step 2: Riding Turn on the power switch, turn the ignition key to "ON” position. Turn on the LCD Display, the LCD DISPLAY will light ON, indicating the unit is powered. Like riding a normal bicycle, put up the stand and seat yourself on the seat. Put one foot on pedal and do a final check to see that everything is okay and working well, especially the front and rear brakes.
- Page 17 Folding Buckle • When you open the folding buckle, lift the handle up, then you can open it, as below. • When you close the folding buckle, lock it back into place to prevent the bike from collapsing. The correct position for the folding buckle is as indicated below. Right way Wrong way Wrong way...
- Page 18 Rear Derailleur The rear derailleur system will be pre-assembled. When you use the rear derailleur system, if the chain jumps in gears or cannot be switched in gears, turn the black button slightly and adjust. To make the adjustment of rear derailleur system, it is recommended to contact the experienced professional.
- Page 19 Parking Shut the power off and pull out the key to the battery case while parking. The power switch should be turned off when pushing so that you do not start up the motor by accident. Use a chain lock to further secure your bicycle when necessary. Notes: •...
-
Page 20: Cleaning And Care
CLEANING & CARE WARNING: Before carrying out any sort of maintenance, turn off the power switch and remove the ignition key. • Take a test ride to check the unit is riding normally and safely. • Always keep your bike clean. •... - Page 21 Cleaning • The bike should be cleaned with a damp sponge, taking special care not to get electrical parts wet (battery connection, rear axle, electric cables, handlebar controls, etc.). • Dry with a cloth. • When cleaning your electric bike, do not use a steady direct stream of water from a hose.
-
Page 22: Troubleshooting
TROUBLESHOOTING Problems Possible causes Solution The battery is completely Charge the battery. discharged. When the bike is powered on, the indicator light does not turn on, the motor does not work, the The electric cable connecting Fix the cable firmly. LCD display does not turn on the battery is loose. - Page 23 NOTES...
- Page 24 Need more information? We hope that this user guide has given you the assistance needed for a simple set-up. For the most up-to-date guide for your product, as well as any additional assistance you may require, head online to help.kogan.com...
Need help?
Do you have a question about the FS20ELBIKEB and is the answer not in the manual?
Questions and answers