Advertisement
Advertisement

Related Manuals for Erbauer EJS750


Summary of Contents for Erbauer EJS750
- Page 1 EAN 3663602796091 EJS750 ORIGINAL INSTRUCTIONS...
-
Page 2: Table Of Contents
Safety instructions Product description Assembly Care & maintenance Guarantee Declaration of conformity... - Page 3 WARNING! Please read all safety warnings carefully and be sure that they are fully understood before handling the tool.
- Page 4 Product description...
- Page 5 T type U type...
-
Page 7: Safety Instructions
Safety instructions GENERAL POWER TOOL SAFETY WARNING WARNING: Read all safety warnings, instructions, illustrations and specifications provided with this power tool. Failure to follow all instructions listed below may result in electric shock, fire and/or serious injury. Save all warnings and instructions for future reference. The term "power tool"... - Page 8 3) PERSONAL SAFETY a) Stay alert, watch what you are doing and use common sense when operating a power tool. Do not use a power tool while you are tired or under the influence of drugs, alcohol or medication. A moment of inattention while operating power tools may result in serious personal injury.
- Page 9 g) Use the power tool, accessories and tool bits etc. in accordance with these instructions, taking into account the working conditions and the work to be performed. Use of the power tool for operations different from those intended could result in a hazardous situation. h) Keep handles and grasping surfaces dry, clean and free from oil and grease.
- Page 10 The following information applies to professional users only but is good practice for all users: ADDITIONAL SAFETY WARNINGS FOR CONSTRUCTION DUST The updated Control of Substances Hazardous to Health Regulations 1st October 2012 now also targets to reduce the risks associated with silica, wood and gypsum dusts.
- Page 11 WARNING! Some dust particles created by power sanding, sawing, grinding, drill and other construction jobs contain chemicals known to cause cancer, birth defects or other reproductive harm. Some examples of these chemicals are: • Lead from lead-based paints. • Crystalline silica from bricks and cement and other masonry products. •...
- Page 12 WARNING! The vibration emission during actual use of the power tool can differ from the declared total value depending on the ways in which the tool is used: • How the materials are grinded, cut or drilled. • If the tool is in good condition and well maintained. •...
- Page 13 VIBRATION AND NOISE REDUCTION To reduce the impact of noise and vibration emission, limit the time of operation, use low-vibration and low-noise operating modes as well as wear personal protective equipment. Take the following points into account to minimise the vibration and noise exposure risks: 1.
-
Page 14: Product Description
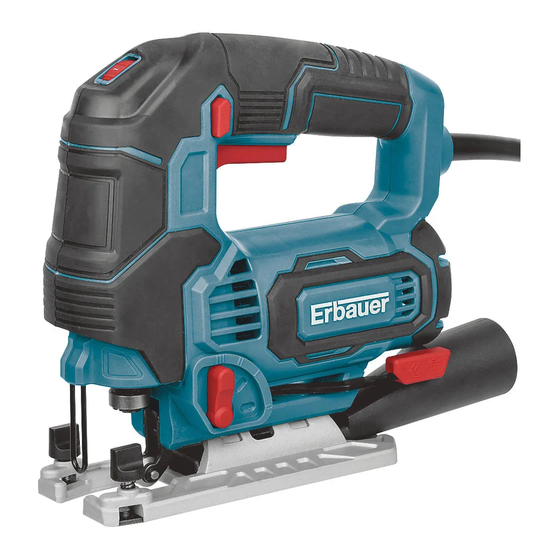
Product description Part index The index below refers to Fig. 1 on page 4. Lock-on button 12. Bracket On/off switch 13. Wing screw (x2) Handle 14. Tool socket Cord guard a. Release lever (in Fig. B) Air vents 15. Blade guard Quick release lever of base plate 16. - Page 15 The sound emission values have been obtained according to the noise test code given in EN 62841-1 and EN 62841-2-11. The noise for the operator may exceed 80 dB(A) and ear protection measures are necessary. Rating label explanation EJS750 = Model number E = Erbauer JS = Jig Saw 750 = Power (Watts)
-
Page 16: Assembly
Assembly Unpacking 1. Unpack all parts and lay them on a flat, stable surface. 2. Remove all packing materials and shipping devices, if applicable. 3. Make sure the delivery contents are complete and free of any damage. If you find that parts are missing or show damage do not use the product but contact your dealer. - Page 17 Saw blade WARNING! Always use saw blades according to the intended use! For example, never use a saw blade intended for working on wood for working on metal or vice versa! Observe the technical specifications of this product and the saw blades when purchasing and using saw blades! Attachments are sharp and hot after use! Handle them with care! Wear safety gloves when handling attachments to avoid injuries like burns and...
- Page 18 Angle adjustment (Fig. C, D) WARNING! Always ensure the product is switched off and disconnected from the power supply before carrying out any work on the product! The base plate (8) can be angled by 45° to the left or right for bevel cuts. Please always adjust the cutting angle according to your needs.
- Page 19 Attach a proper dust extraction device, e.g. a suitable vacuum cleaner attachment (35mm) to the vacuum cleaner adaptor (7) (Fig. E). 1. Insert the vacuum adaptor (7) into gap between enclosure and base plate and fix it in position (step 1). 2.
-
Page 20: Use
Intended use This product is intended for cutting wood and similar material e. g. MDF and chipboard, plastic and metal using appropriate saw blades. The product must be used in an upright position only with the base plate lying flat on the workpiece. - Page 21 Continuous mode 1. Switch the product on by pressing the on/off switch (2) and hold it in position. 2. Press the lock-on button (1) to lock the on/off switch (2). 3. Release both switches. The on/off switch (2) is now locked-on for continuous use. 4.
- Page 22 Pendulum selector Adjust the pendulum speed according to the workpiece material and thickness. Illustration Position Pendulum speed Application Fine cuts in thin workpieces; Cutting tight curves or circles; cutting metal. Hard workpieces (e.g. Slow chipboard). Thick workpieces (e.g. wood Medium and plastics).
- Page 23 • Take the cutting channel into consideration when cutting along marked cutting lines. Do not cut directly on the line but next to it. • It is recommended to make a trial cut before working on the actual workpiece to determine the position and width of the cutting channel, especially after replacing the blade or changing bevel angle.
-
Page 24: Care & Maintenance
Care & maintenance WARNING! Always switch the product off, disconnect the product from the power supply and let the product cool down before performing inspection, maintenance and cleaning work! Only perform care and maintenance work according to these instructions! All further works must be performed by a qualified specialist! Clean 1. - Page 25 UK plug (only for UK market) Replacement of the plug shall always be carried out by the manufacturer of the tool or his service organization and follow the instructions below. IMPORTANT: The wires in the mains lead are coloured in accordance with the following code: Blue –...
- Page 26 Transportation WARNING! Always carry the product by its main handle. Never use the cord for carrying the product. 1. Switch the product off and disconnect it from the power supply. 2. Protect the product from any heavy impact or strong vibrations which may occur during transportation in vehicles.
-
Page 27: Guarantee
Guarantee At Erbauer we take special care to select high quality materials and use manufacturing techniques that allow us to create ranges of products incorporating design and durability. We carry out stringent testing procedures on all our tools and are confident that they can provide regular, sustained daily use during the period covered. -
Page 28: Declaration Of Conformity
London W2 6PX United Kingdom Declare that the product 750W Jig Saw EJS750 Serial number: from 000001 to 999999 Complies with the essential health and safety requirements of the following directives: 2006/42/EC The Machinery Directive References to the following harmonized standard were made:... - Page 29 Rapenburgerstraat 175E 1011 VM Amsterdam The Netherlands Declare that the product 750W Jig Saw EJS750 Serial number: from 000001 to 999999 Complies with the essential health and safety requirements of the following directives: 2006/42/EC The Machinery Directive References to the following harmonized standard were made:...
- Page 32 Manufacturer • Fabricant • Producent • Producator • Fabricante: Kingfisher International Products Limited, 3 Sheldon Square, London, W2 6PX, United Kingdom www.kingfisher.com/products Kingfisher International Products B.V. Rapenburgerstraat 175E 1011 VM Amsterdam The Netherlands Distributor: www.diy.com www.screwfix.com www.screwfix.ie To view instruction manuals online, visit www.kingfisher.com/products...
Need help?
Do you have a question about the EJS750 and is the answer not in the manual?
Questions and answers