Alpine INE-W960HDMI Owner's Manual

Alpine INE-W960HDMI Owner's Manual

In-dash gps navigation receiver
Table of Contents

Advertisement

Quick Links

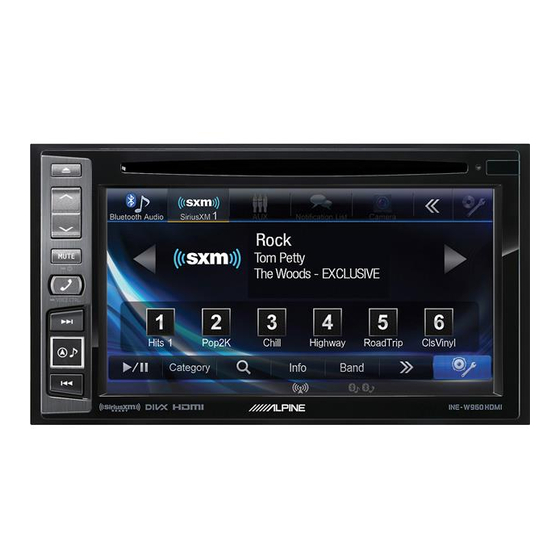
IN-DASH GPS NAVIGATION RECEIVER
INE-W960HDMI
INE-NAV-60HDMI
INE-W960SHDMI
• OWNER'S MANUAL
Please read before using this equipment.
• MODE D'EMPLOI
Veuillez lire avant d'utiliser cet appareil.
Open only to legal US. residents./ Uniquement accessible aux personnes résidant légalement aux États-Unis./
Solo para ciudadanos residentes legalmente en EE.UU./ Aberto somente para residentes legais nos EUA.
Thank you for purchasing this Alpine product. Please take a moment to protect your purchase by
registering your product now at the following address: www.alpine-usa.com/registration.
You will be informed of product and software updates (if applicable), special promotions, news about
Alpine, and entered for a chance to win prizes.
Merci d'avoir acheté ce produit Alpine. Nous vous invitons à consacrer un moment à la protection de
votre achat en enregistrant votre produit dès maintenant à l'adresse suivante :
www.alpine-usa.com/registration.
Vous serez tenu informé des mises à jour des produits et des logiciels (le cas échéant), des promotions
spéciales, de l'actualité d'Alpine, et vous aurez une chance de remporter des prix.
Gracias por adquirir este producto Alpine. Con solo unos pocos pasos podrá proteger su producto,
registrándolo a través de la siguiente dirección: www.alpine-usa.com/registration.
Recibirá información sobre nuevos productos y software, promociones especiales, novedades sobre
Alpine y participará en el sorteo de premios.
• MANUAL DE OPERACIÓN
Léalo antes de utilizar este equipo.
• MANUAL DO PROPRIETÁRIO
Leia antes de usar este equipamento.
R R
EN
FR
ES
PT
Designed by ALPINE Japan
68-33122Z70-A

Advertisement

Table of Contents
loading

Summary of Contents for Alpine INE-W960HDMI

  • Page 1 You will be informed of product and software updates (if applicable), special promotions, news about Alpine, and entered for a chance to win prizes. Merci d’avoir acheté ce produit Alpine. Nous vous invitons à consacrer un moment à la protection de votre achat en enregistrant votre produit dès maintenant à l’adresse suivante : www.alpine-usa.com/registration.
  • Page 2 ALPINE ELECTRONICS MARKETING, INC. ALPINE ELECTRONICS OF AUSTRALIA PTY. LTD. ALPINE ITALIA S.p.A. 1-7, Yukigaya-Otsukamachi, Ota-ku, 161-165 Princes Highway, Hallam Viale Cristoforo Colombo, 8 Tokyo 145-0067, JAPAN Victoria 3803, Australia 20090 Trezzano sul Naviglio MI, Italy Phone: 03-5499-4531 Phone 03-8787-1200 Phone +39 02 484781 ALPINE ELECTRONICS OF AMERICA, INC.
  • Page 3: Table Of Contents

    ENGLISH Contents PTY (Program Type) Tuning ......20 Displaying Radio Text ........20 Operating Instructions CD/MP3/WMA/AAC Playback ............21 Repeat Play .............21 PRECAUTIONS M.I.X. (Random Play) ........21 M.I.X. ALL (Shuffle Songs) IMPORTANT INFORMATION ....... 7 (Concerning MP3/WMA/AAC) ....21 WARNING Selecting Folders (Concerning MP3/WMA/AAC) ....22 Points to Observe for Safe Usage .....
  • Page 4 Setup Adjusting the Crossover Settings (X-Over) ............38 Setup Operation Adjusting the Parametric Equalizer Curve (Parametric EQ) ........... 38 General Setup Other Setting ........... 39 General Setup Operation ........ 30 Volume Setting ..........39 Setting the Volume for Each Source ... 39 Text Display Setting ........
  • Page 5 Adjusting the Caller Volume ......48 BLUETOOTH Audio Adjusting the Microphone Level ....48 Playback ............57 Adjusting the Ring Tone Volume ....48 Repeat Play ............. 58 Deleting All the Histories ....... 48 M.I.X. (Random Play) ........58 Changing the Phone book List Order ..... 48 Search Function ..........
  • Page 6 Repeat Play ............. 70 Installation and Random Play (Shuffle) ........70 Connections Random Play (Shuffle Songs) ......70 ® Pandora internet radio (optional) Warning ..........88 (INE-W960/INE-NAV-60 only) Caution ........... 88 ® Precautions ..........88 Listening to Pandora ........71 “Thumbs”...
  • Page 7: Operating Instructions

    They contain instructions on how to use this to reach your destination. The system does not reflect road product in a safe and effective manner. Alpine cannot be closures or construction, road characteristics (i.e. type of road responsible for problems resulting from failure to observe the surface, slope or grade, weight or height restrictions, etc.), traffic...
  • Page 8: Warning

    Failure to do so may cause personal injury or damage to the in a safe location before performing these functions. Failure to do product. Return it to your authorized Alpine dealer or the nearest so may result in an accident.
  • Page 9: Notice

    • High humidity and water • Excessive dust If you have problems, do not attempt to repair the unit yourself. • Excessive vibrations Return it to your Alpine dealer or the nearest Alpine Service Station for servicing. Correct Handling Never Attempt the Following Do not drop the disc while handling.
  • Page 10: Discs Playable On This Unit

    Using The discs listed below can be played on this unit. such accessories can cause operational problems. We recommend not using these accessories on discs played in Alpine DVD players. Recorded Mark (logo)
  • Page 11 Discs that cannot be played Tips for making your own discs DVD-ROMs, DVD-RAMs, CD-ROMs (excluding MP3/WMA/ The INE-W960/INE-NAV-60/INE-W960S plays DVD Video, ® AAC files), photo CDs, etc. DivX , Audio CD and has a built in MP3/WMA/AAC decoder. The following information is designed to help you create your own DualDisc music CDs (either Audio CD or MP3/WMA/AAC encoded CD-R/ This unit is not compatible with DualDisc.
  • Page 12 • This unit is compatible with discs recorded in the standard DVD-Video format. Alpine accepts no responsibility for lost data, etc., even if data, etc., • Note that discs not finalized (processed to enable to play on is lost while using this product.
  • Page 13 Bluetooth SIG, Inc. and any use of such marks by Alpine Electronics, Inc. is under licence. Other trademarks and trade names are those of their respective owners. • The terms HDMI and HDMI High-Definition Multimedia...
  • Page 14: Getting Started

    • Power cable.................1 Controllable with Remote Control • Flush head screw (M5×8)............6 This unit can be controlled with an optional Alpine remote control. • Screw (M5×8) ..............8 For details, consult your Alpine dealer. Point the optional remote • GPS Antenna ..............1 control transmitter at the remote control sensor.
  • Page 15: Turning The System On

    Turning the System On Inserting/Ejecting a Disc With the Alpine system, when the ignition key is turned to ACC or ON, the opening screen will be automatically displayed. Inserting the Disc When the system is used for the first time, the Insert the disc with the label side facing up.
  • Page 16: Top Banner And Bottom Banner Fade Out Setting

    If the TuneIt App is not launched, this option is not available. Top banner and Bottom banner Fade Out When Camera Select is set to “Off,” this option is not available. Setting Screen Off Function When “Top/Bottom Banner Fade Out” is set to “ON,” the Top banner This mode is useful if you feel the unit’s display is too bright at night.
  • Page 17: Touch Operation

    Touch Operation About the Indicator Display You can operate the system by using the touch panel on the screen. The Indicator Bar at the bottom of the screen displays various types of information, like the current time. • Be sure to touch the onscreen button lightly with the pad of your finger to protect the display.
  • Page 18: Displaying Audio/Visual Information On The Navigation Screen

    Displaying Audio/Visual Information on the Navigation screen You can display the currently playing information (Frequency, Track No., etc.) in the Indicator Bar of the Navigation screen. Touch [...
  • Page 19: Radio/Rbds

    Radio/RBDS Presetting Stations Manually Tune in a desired radio station you wish to store in The RBDS (Radio Broadcast Data System) is a radio information the preset memory by manual or automatic seek system. The RBDS allows you to receive a variety of information such tuning.
  • Page 20: Pty (Program Type) Tuning

    PTY (Program Type) Tuning FM Radio mode Touch [PTY] of Bottom banner. The Select PTY list screen is displayed. Touch the selected program type to start searching for a station in the type. If no PTY station is found, “No PTY.” will be displayed. Displaying Radio Text Text messages from a radio station can be displayed.
  • Page 21: Cd/Mp3/Wma/Aac

    CD/MP3/WMA/AAC Repeat Play Touch [ ] to repeatedly play back. The tracks (files) will be played repeatedly. Display example for MP3/WMA/AAC main screen The repeat mode switches every time the button is touched. Repeat (OFF) Repeat MP3/WMA/AAC: Repeat Repeat Folder* (OFF) Repeat * Only files in a folder are repeatedly played back.
  • Page 22: Selecting Folders (Concerning Mp3/Wma/Aac)

    Selecting Folders (Concerning MP3/ About MP3/WMA/AAC WMA/AAC) CAUTION Touch [ ] or [ ] of Bottom banner to select the Except for private use, duplicating audio data (including MP3/ folder. WMA/AAC data) or distributing, transferring, or copying it, whether for free or for a fee, without permission of the copyright holder is strictly prohibited by the Copyright Act and by Searching from CD Text international treaty.
  • Page 23 Supported playback sampling rates and bit rates Order of files Files are played back in the order that the writing software writes them to the disc. Therefore, the playback order may not be Sampling rates: 8 kHz - 48 kHz (Disc/USB) what’s expected.
  • Page 24: Dvd

    The DVD operation screen display Touch the screen while the DVD playback screen is displayed. The DVD operation screen is displayed. Display example for DVD Video main screen • The operation screen changes to the visual screen in the DVD mode for 5 seconds after an operation has been performed.
  • Page 25: Playing A Disc

    If a Menu Screen Appears Playing a Disc On DVD mode, menu screens may appear automatically. If this happens, perform the operation described below to start playback. WARNING Direct Menu Operations It is dangerous for the driver to watch the DVD/TV/ Video while driving the vehicle.
  • Page 26: Numeric Keypad Input Operations

    Numeric Keypad Input Operations Stopping Playback Touch [10Key] of Bottom banner. Touch and hold [ ] for at least 2 seconds during The numeric keypad input mode screen appears playback. If [10Key] is not displayed, touch [<<] in the bottom banner “...
  • Page 27: Playing Still Frames (Pausing)

    Playing Still Frames (Pausing) Repeat Playback Use this function to play the disc’s titles, chapters or tracks, etc., repeatedly. During playback, Touch [ / ] of Bottom banner. Touch [ ] of Bottom banner. The repeat mode switches every time the button is touched. Touch [ / ] or [ ] in the middle of the screen to...
  • Page 28: Searching Directly By Chapter Number

    Searching Directly by Chapter Number Switching the Angle On DVDs in which scenes have been filmed from multiple angles, the angle can be switched during playback. Use this function to easily move to the beginnings of the chapters on the Touch [Angle] of Bottom banner.
  • Page 29: About Divx

    ® About DivX ® DivX is a codec (software) to compress moving images while maintaining image quality using a highly advanced compression ratio and operating speed. ® • Official DivX Certified product ® ABOUT DIVX VIDEO: DivX is a digital video format created by DivX, LLC, a subsidiary of Rovi Corporation.
  • Page 30: Setup Operation

    Touch [General]. Setup Setup Operation Touch the [SETUP] icon on the Audio/Visual Playback screen to display the Setup main screen. [Setup] icon The General Setup screen appears. Select the desired item. General Setup Setting items: Text Display / Clock Display / Top/Bottom Banner Fade Out / General Setup Operation Screen/LED Customize / Visual / About /...
  • Page 31: Format Settings

    Format Settings Setting Top banner and Bottom banner Display The character code to be used for tag text information displayed on the screen can be selected from 7 character codes. [Top/Bottom Banner Fade Out] is selected on the General setup menu Setting item: Format in step 3.
  • Page 32: Adjusting The Dimmer Of Button Lighting At Night

    Switching Display Modes Setting item: Display Mode Setting contents: FULL (Initial setting) / NORMAL Wallpaper File List in USB memory • Built in Wallpaper Image File is “Alpine BG.” Preview of selected file Color select switch Switching the Display Color...
  • Page 33: Adjusting Brightness

    You can view the version information of this product. Make note of this You can initialize all data, to restore the factory settings. Remove the information and refer to it whenever you contact Alpine Tech Support or CD/DVD disc, etc. from the system before operation an Alpine-authorized dealer.
  • Page 34: Installation Setup

    Installation Setup Sound Setup [Installation] is selected on the General setup menu in step 3. See “General Setup Operation” (page 30). Sound Setup Operation Setting item: Installation The Installation check screen is displayed. To display the Sound Setup Menu screen: Your vehicle must be parked with the ignition key in the ACC or ON position.
  • Page 35: Car Specific Sound Setup

    Touch [ ] or [ ] etc., to change its setting. Setting the MX (Media Xpander) • When the pop-up window for setup is displayed, touch [ ] to close the window after setting. [Media Xpander] is selected on the Sound setup menu in step 3. Refer Touch [ ] to return to the previous screen.
  • Page 36: Equalizer Presets (Eq Presets)

    MX CD Adjusting the Subwoofer Level CD mode processes a large quantity of data. This data is used to reproduce the sound cleanly by making use of the data You can set the Subwoofer level when a Subwoofer is connected. quantity.
  • Page 37: Setting The Bass Engine Type

    Setting the BASS ENGINE Type Adjusting the Time Correction (TCR) You can set your favorite BASS ENGINE type. [TCR] is selected on the Sound setup menu in step 3. Refer to “Sound Setting contents: Standard (Initial setting) / Punch / Rich / Mid Setup Operation”...
  • Page 38: Adjusting The Crossover Settings (X-Over)

    Adjusting the Crossover Settings (X- Adjusting the Parametric Equalizer Over) Curve (Parametric EQ) [X-Over] is selected on the Sound setup menu in step 3. Refer to [Parametric EQ] is selected on the Sound setup menu in step 3. Refer “Sound Setup Operation” (page 34). to “Sound Setup Operation”...
  • Page 39: Other Setting

    • Settings exceeding the frequency of adjacent bands are not available. Setting the Subwoofer Phase • While adjusting the Parametric EQ, you should consider the frequency response of the connected speakers. The subwoofer output phase is toggled Subwoofer Normal (0°) or •...
  • Page 40: About Time Correction

    These values are the time correction values for the different About Time Correction speakers. Setting these values to make each sound reach the listening position at the same time as the sound of other speakers. Time Correction Value List The distance between the listener and the speakers in a car vary widely due to the complex speaker placement.
  • Page 41: About The Crossover

    ] to return to the previous screen. outside that recommended may cause damage to the speakers. For the recommended crossover frequencies of Alpine speakers, refer • Immediately after changing the Source Setup (while the system is to the respective Owner’s Manual.
  • Page 42: Disc Setting

    To play in a language other than those displayed Disc Setting 1 Touch [DVD Menu Language Code], [Audio Language Code] or [Subtitle Language Code]. [Disc] is selected on the Source setup menu in step 3. Refer to “Source The numeric keypad screen is displayed. 2 Touch the 4-digit numeral of the language number.
  • Page 43: Setting The Tv Screen Mode

    Set the rating level of PARENTAL 4:3 PAN-SCAN: Select this when connected to a conventional 4:3 size monitor. 4 Touch [Parental Control]. The picture will fill the entire TV screen. However, due to the 5 Touch [ ] on [ ] to turn “On". mismatch in aspect ratio, parts of the movie at the extreme left Select “Off”...
  • Page 44: Aux Setting

    AUX Setting SiriusXM Setting (INE-W960/INE-NAV-60 only) [Auxiliary (AUX)] is selected on the Source setup menu in step 3. Refer to “Source Setup Operation” (page 41). [SiriusXM] is selected on the Source setup menu in step 3. Refer to “Source Setup Operation” (page 41). Setting the AUX Mode Managing Artist, Song and Sports Team Connection with external input devices is available through the iPod...
  • Page 45: Setting The Favorite Sports Team Alerts

    Setting all Source Alert Setting the Parental Lock You can enable Alert even on sources other than SiriusXM. You can lock out channels with passcode protection. Channels that are Touch [Alert]. locked cannot be accessed without entering the passcode. You can unlock a channel or change the passcode using this menu option.
  • Page 46: Signal Strength Information

    Refer to “Source Setup Operation” (page 41). Use the keypad to enter the current (old) 4-digit Set ALPINE APP to USB when an iPhone is connected, or set to passcode. BLUETOOTH when a Smartphone (Android OS or BlackBerry OS) is (The initial passcode is set to 0000).
  • Page 47: Bluetooth Setup

    BLUETOOTH Setup Displaying BLUETOOTH Information [Bluetooth Information] is selected on the BLUETOOTH setup menu The BLUETOOTH function is always available on this unit. in step 3. Refer to “BLUETOOTH Setup Operation” (page 47). You can, therefore, search for a BLUETOOTH device for pairing at any You can display the BLUETOOTH device name and device address of time.
  • Page 48: Setting The Passcode

    Deleting a BLUETOOTH Device from the list Adjusting the Microphone Level You can delete the information of a previously connected BLUETOOTH compatible device. [Microphone Level] is selected on the BLUETOOTH setup menu in Touch [Set Bluetooth Device]. step 3. Refer to “BLUETOOTH Setup Operation” (page 47). You can adjust the microphone level, during the call.
  • Page 49: Camera Setup

    Camera Setup AUX Camera Setting [Camera] is selected on the Camera setup menu in step 3. Refer to “Camera Setup Operation” (page 49). Camera Setup Operation Setting the Camera Input With an optional camera connected, its video is output to the monitor. When the camera is connected, set this item.
  • Page 50: Camera Interrupt Setting (Power Off Mode)

    Adjusting guides simultaneously (for Rear camera only) About the Rear Camera Guide Touch [Link]. The 3 vertical guides of the currently-selected guide link To display the guide, set “Guide Display On/Off Setting” (page 50) to together, allowing them to be adjusted simultaneously. On.
  • Page 51 <Screen> The distance guidance mark represents the distance to a flat road surface. Therefore in the case of an upward slope behind the car, the distance guides are displayed closer to the rear bumper than the actual distance. For example, if there is an obstacle on the upward slope, it may appear farther away than its actual position.
  • Page 52: Bluetooth Operation

    Owner’s Manual are based upon the latest available information and are believed to be accurate at the time of printing. Alpine reserves the right to change or modify any information or specifications without notice or obligation.
  • Page 53: Changing The Connecting Bluetooth Device

    Changing the connecting BLUETOOTH Calling Device Use the Phone menu screen to make a phone call. If multiple BLUETOOTH devices are registered in this device, you can Using Short Cut Dialing to Make a Call change the connection among the registered devices. You can assign up to 4 phone numbers for one-touch dialing to make a Press the (Phone) button.
  • Page 54: Dialing A Number In The Phone Book

    Dialing a Number in the Phone Book Voice Dial Function You can use the phone book of the mobile phone to make a phone call. While connecting to a voice dial compatible hands-free phone, you can Before using, you need to transfer the phone book from the mobile make a telephone call by voice dial operation.
  • Page 55: Operations During A Conversation

    Operations During a Conversation Phone Book Function Display example Display example for Phone Book screen An icon is displayed to indicate that multiple phone Name, Phone number, Type* numbers are registered under an entry. * Depending on the model, Type may not be displayed. Conversation time Synchronizing the Phone Book Adjusting the Speech Volume...
  • Page 56: Searching In The Phone Book

    Searching in the Phone Book Assigning as a Short Cut Dialing Number If there are 6 or more entries in the phone book you transferred, you can make a call using the phone book search function. Assigning from Call History Press the (Phone) button.
  • Page 57: Call Waiting Function

    Call Waiting Function BLUETOOTH Audio If a call comes in from another phone during a call, a notice is displayed If a BLUETOOTH compatible mobile phone, portable player, etc. is on the screen. This function can only be used if the connected mobile connected by wireless, you can play back a song (operation is phone has a call waiting function service included.
  • Page 58: Repeat Play

    Repeat Play Available for AVRCP Ver. 1.3 and 1.4 only. Touch [ ] during playback. The repeat mode switches every time the button is touched. (FILE) (ALL) (OFF) • Operations may differ depending on the connected BLUETOOTH compatible device. M.I.X. (Random Play) Available for AVRCP Ver.
  • Page 59: Auxiliary Device (Optional)

    AUX Operation Screen Display During Video File Auxiliary Device Playback Touch the screen. The AUX operation screen is displayed. (Optional) Example for AUX, DVD, Game mode display Operating Auxiliary Devices (Optional) To operate devices connected to the AUX terminals of INE-W960/INE- NAV-60/INE-W960S, follow the procedure described below.
  • Page 60: About The Dvd Operation Screen

    Menu operation mode screen display example About the DVD Operation Screen When the external DVD player playback screen is displayed, you can touch the screen to display the operation screen. For details on how to operate, refer to the Owner’s Manual of the connected DVD player. External DVD player display example [Key] The menu operation mode will be displayed.
  • Page 61: About The Dvd Changer Operation Screen

    About the DVD Changer Operation Screen Operating a TV When the External DVD changer playback screen is displayed, you can To operate a TV Receiver (TV) (Optional), set “Setting the Primary touch the screen to display the operation screen. For details on how to AUX Name (AUX Setup)”...
  • Page 62: Applying Tuneit

    TuneIt, is downloadable from Apple’s App Store; the Android user can download it from Google Play. For details, consult your Alpine dealer. • The application program and related specifications and data may be deleted or terminated without notice.
  • Page 63: Camera Operation (Optional)

    Displaying the Notification List Camera Operation Touch the Notification List icon on the Top banner, or (List) of the notification display. (Optional) Example of the Notification List display When an optional camera is connected, the view video of camera can be output to the monitor.
  • Page 64: Usb Memory (Optional)

    About creating a tag information library USB Memory You can scan music files in a USB memory device and create a library of tag information in this unit. Library creation starts when the USB (Optional) memory device is connected. The time it takes to create the library depends on the number of files in the USB memory device, but it may take several minutes.
  • Page 65: Repeat Play

    Repeat Play Random Play (Shuffle Songs) Operation differs depending on whether the most recent song search This operation is available only if the most recent song search was a Tag was a Tag Search or a Folder/File Search. Search. Touch [ ] during playback.
  • Page 66: File/Folder Name Search

    For example: Searching by Artist name Direct Up/Down Function The following example explains how an ARTISTS search is performed. Another search mode can be used for the same operation, although the hierarchy differs. This operation is available only if the most recent song search was a Tag Search.
  • Page 67: Ipod/Iphone (Optional)

    Display example for iPod/iPhone main screen (Info iPod/iPhone mode) Audio mode (Optional) A separately sold USB iPod/iPhone AV cable (KCU-461iV) or a separately sold Lightning to USB cable (KCU-471i) is required depending on the type of iPod/iPhone. When the INE-W960/INE-NAV-60/INE-W960S is connected by the above cable, the controls on the iPod are disabled.
  • Page 68: Playback

    Searching by artist name Playback Touch [ (Search)] of Bottom banner during playback. Touch [iPod (Audio or Video)] of Top banner. The Search screen is displayed. The display shows the iPod mode screen. Touch [ ] or [ ] or to select the desired track (file). Returning to the beginning of the current track (file): Touch [ ].
  • Page 69: Searching For A Desired Video File

    Searching for a Desired Video File Direct Up/Down Function You can select a movie, music video, etc., from the list screen. If you touch [ ] of the album name in the search mode, this album will be played back repeatedly. To go to the previous or next Album, use the •...
  • Page 70: Repeat Play

    Repeat Play Touch [ ] to repeatedly play back the currently track. The tracks (files) will be played repeatedly. Touch [ ] again to deactivate Repeat play. Repeat (OFF) Repeat Random Play (Shuffle) Touch [ ] during playback. The files will be played back in a random sequence. The Shuffle mode switches every time [ ] is touched.
  • Page 71: Pandora ® Internet Radio (Optional)

    • Depending on the signal status, song may be stopped during • Before this operation, set ALPINE APP to USB or BLUETOOTH playback. depending on the connected Smartphone. For details, refer to •...
  • Page 72: Searching For A Desired Station

    Searching for a Desired Station QuickMix You can display your station list and select stations directly from the Use QuickMix to create a playlist based on two or more of your Pandora INE-W960/INE-NAV-60. stations. Edit your QuickMix station selections on the Pandora Compatible Application for iPhone when it is not connected to the INE- Alphabet Search W960/INE-NAV-60.
  • Page 73: How To Input Characters And Numbers (Keypad)

    How to Input Characters and Numbers (Keypad) The displayed screens and procedures may vary slightly depending on the function used, but the basic input method is the same. Input screen area. (Delete) Returns to the previous character and erases it. Touching here for more than 2 seconds will erase all input characters.
  • Page 74: Siriusxm Satellite Radio (Optional)

    Touch the [SiriusXM] on the Top banner. SiriusXM Satellite The SiriusXM main screen display appears. • The SiriusXM source selection icon will not be listed if the SiriusXM Tuner is not connected properly. Check the tuner Radio (Optional) connections if the icon is not shown. Touch [ ] or [ ] to select the desired channel.
  • Page 75: Changing The Display

    Changing the Display Tuning Channels Using Presets Text information, such as the channel name, artist name/feature, and Touch [Band] on the Bottom banner repeatedly until song/program title, is available with SiriusXM. The unit can display this the desired band is displayed. text information as explained below.
  • Page 76: Selecting The Channel Directly

    Searching by My Games Receiving and Tuning to an Alert 1 Touch [My Games]. This is displayed only when games for stored teams are broadcasting. Whenever a stored sports team, artist, or song is playing on another 2 Touch the desired team. channel, an interruption alert appears on the unit display.
  • Page 77: Replay Function

    Replay Function Parental Control Function In SiriusXM mode, you can pause, rewind and replay live Satellite The Parental Control feature allows you to limit access to any SiriusXM Radio. channels, including those with mature content. For information on setting the Parental Control passcode, refer to “Setting the Parental Lock”...
  • Page 78: Product Software Update

    * These functions differ from disc to disc. For details, refer to the disc’s This product use software that can be updated through a USB memory instructions. device. Download the software from the Alpine website and update the product using the USB memory device. Updating this product Check the Alpine website for details on updating.
  • Page 79: List Of Language Codes

    List of Language Codes (For details, see page 42.) Language Abbreviation Langua g e Abbre viation Code Abbre viation Code Language Code 6565 Af ar 7369 Inter lingue 8278 Kirundi 6566 Abkhazian 7375 Inupiak 8279 Romanian 6570 Afr ikaans 7378 Indonesian 8285 Russian...
  • Page 80: List Of Country Codes

    List of Country Codes (For details, see page 42.) Abbreviation Code Country Abbreviation Code Country Abbreviation Code Country 6568 Andorra 6877 Dominica 7573 Kiribati 6569 United Arab Emirates 6879 Dominican Republic 7577 Comoros Afghanistan 6890 Algeria 7578 Saint Kitts and Nevis 6570 6571 Antigua and Barbuda...
  • Page 81 Abbreviation Code Country Abbreviation Code Country Abbreviation Code Country 8069 Peru 8374 Svalbard and Jan Mayen 8487 Taiwan, Province of China 8070 French Polynesia 8375 Slovakia 8490 Tanzania, United Republic of 8071 Papua New Guinea 8376 Sierra Leone 8565 Ukraine 8072 Philippines 8377...
  • Page 82: In Case Of Difficulty

    This guide will help you isolate the problem if the unit is at fault. Otherwise, make sure the rest of your system is Disc properly connected, or then consult your authorized Alpine dealer. Disc playback sound is wavering. • Moisture condensation in the disc Module.
  • Page 83: If This Message Appears

    Playback does not start. USB device error. • Disc is loaded upside-down. • An iPod/iPhone that is not supported by the unit is connected. - Check the disc and load it with the labeled side facing upward. - Connect an iPod/iPhone that is supported by the unit. •...
  • Page 84 Navigation Video resolution not supported. ® • The file being played is a DivX file with an unsupported The vehicle’s position is erroneous. resolution. • The GPS reception is poor. ® - Play a DivX file with a supported resolution. - Drive the vehicle in an area of good GPS reception to allow the unit to recalibrate itself.
  • Page 85: Specifications

    PICKUP Specifications Wave length DVD: 666 nm CD: 785 nm MONITOR SECTION Laser power CLASS II Screen Size 6.1" GPS SECTION LCD Type Transparent type TN LCD Operation System TFT active matrix GPS Reception frequency 1575.42 ±1 MHz Number of Picture Elements 1,152,000 pcs. (800 × 3 × 480) GPS Reception sensitivity -130 dB max.
  • Page 86: End User License Agreement (Microsoft)

    INDEPENDENTLY DETERMINED HOW TO USE THE SOFTWARE terms are provided, then the terms of this EULA shall IN THE DEVICE, AND MS HAS RELIED UPON ALPINE TO apply, except that MS, Microsoft Corporation or affiliate CONDUCT SUFFICIENT TESTING TO DETERMINE THAT THE entity providing the Supplemental Component(s) shall be SOFTWARE IS SUITABLE FOR SUCH USE.
  • Page 87: End User License Agreement (Here)

    Should you have any questions concerning this EULA, or if you cosmetic discrepancy in layout found in the System. desire to contact ALPINE for any other reason, please refer to The right to use the System shall expire either when the user destroys this software, or when any of the terms for use is the address provided in the documentation for the DEVICE.
  • Page 88: Installation And Connections

    INE-W960/INE-NAV-60/INE-W960S has the appropriate amperage. Failure to do so may result in damage to REACH OF CHILDREN. the unit and/or the vehicle. When in doubt, consult your Alpine Swallowing them may result in serious injury. If swallowed, dealer.
  • Page 89: Installation

    Mounting the Microphone. Installation For safe use, make sure of the following: • location is stable and firm. • driver’s view and operations are not obstructed. • microphone is located where the driver’s voice can be easily picked up (on the sun visor, etc.). Caution Do not block the unit’s fan or heat sink, thus preventing When you speak into the microphone, you should not have...
  • Page 90 Reinforce the head unit with the metal mounting Installation example using the Original Mounting strap (not supplied). Secure the ground lead of the Bracket unit to a clean metal spot using a screw (*1) already Mount the original mounting bracket to the unit attached to the vehicle’s chassis.
  • Page 91 • Connect the ground lead securely to a bare metal spot (remove any paint, dirt or grease if necessary) of the car chassis. • If you add an optional noise suppressor, connect it as far away from the unit as possible. Your Alpine dealer carries various noise suppressors, contact them for further information.
  • Page 92: Connections

    Connections GPS Antenna (Included) Vehicle Antenna Microphone (Included) AUX OUTPUT To Rear Monitor Input terminal (Yellow) REAR OUTPUT (Red/White) FRONT OUTPUT To input terminal of amplifier (Red/White) when adding an external amplifier SUBW (Red/White) CAMERA To Camera with RCA Output (Yellow) terminal REMOTE OUT...
  • Page 93 To steering remote control interface box. Left Rear (+) Speaker Output Lead (Green) For details about connections, consult your nearest Alpine dealer. Left Rear (–) Speaker Output Lead (Green/Black) AUX/PRE OUT Connector...
  • Page 94: System Example

    System Example Connection of an iPod/iPhone with Lightning connector or USB memory USB connector iPod/iPhone with Lightning connector (Sold separately) USB extension cable (Included) Lightning to USB Cable KCU-471i (Sold separately) USB Memory (Sold separately) • Do not leave a iPod/iPhone/USB memory in a vehicle for a long time. Heat and humidity may damage the iPod/iPhone/USB memory and you may not be able to play it again.
  • Page 95 Connection of an External device iPod VIDEO input connector CAMERA/AUX/PRE OUT Connector To Audio Output terminal To Video Output terminal CAMERA/AUX/PRE OUT cable DVD Changer (Sold separately) REMOTE OUT REMOTE IN (Brown) (White/Brown) 1 AV/RCA interface cable (4-pole mini AV plug to 3- 3 RCA Extension Cable (Sold Separately) RCA) (Sold separately) 4 Remote Control Output Lead (Brown)
  • Page 96 Connection of a DVD Player To Video Output terminal DVD Player (Sold separately) To Audio Output terminal iPod VIDEO input connector AV/RCA interface cable (4-pole mini AV plug to 3- RCA Extension Cable (Sold Separately) RCA) (Sold separately) Video/Audio Input Connectors YELLOW is for input video, RED is right and WHITE is left input the audio.
  • Page 97 Connection of an External Amplifier Power Supply Connector CAMERA/AUX/PRE OUT Connector CAMERA/AUX/PRE OUT cable Amplifier 4 ch (Sold separately) (Red) Input (White) Front speaker (Red) Input (White) Rear speaker Amplifier for subwoofer (Sold separately) (Red) Input Subwoofer (White) REMOTE TURN-ON REMOTE ON (Blue/White) (Blue/White)
  • Page 98 Connection of cameras CAMERA/AUX/PRE OUT Connector CAMERA/AUX/PRE OUT cable To Video Output terminal (Yellow) Camera with RCA video output (Sold separately) Power Supply Connector HCE-C105, etc. Reverse Lead Connect to the plus side of the car’s reverse lamp. (Orange/White) 1 CAMERA Input RCA Connector (CAMERA) 2 RCA Extension Cable (Sold separately)
  • Page 99 N’oubliez pas de consacrer un moment à la protection de votre achat en enregistrant votre produit dès maintenant à l’adresse suivante : www.alpine-usa.com/registration. Recuerde que con solo unos pocos pasos podrá proteger su producto, registrándolo a través de la siguiente...
  • Page 100 ALPINE ELECTRONICS OF AMERICA, INC. (“Alpine”), is dedicated to quality craftsmanship and is pleased to offer this Warranty. We suggest that you read it thoroughly. Should you have any questions, please contact your Dealer or contact Alpine at one of the telephone numbers listed below.

This manual is also suitable for:

Ine-nav-60hdmiIne-w960shdmi

Table of Contents