Alpine INE-W960A Owner's Manual

Alpine INE-W960A Owner's Manual

Advanced navi station
Table of Contents

Advertisement

ALPINE ELECTRONICS MARKETING, INC.
1-7, Yukigaya-Otsukamachi, Ota-ku,
Tokyo 145-0067, JAPAN
Phone: 03-5499-4531
ALPINE ELECTRONICS OF AMERICA, INC.
19145 Gramercy Place, Torrance,
California 90501, U.S.A.
Phone 1-800-ALPINE-1 (1-800-257-4631)
ALPINE ELECTRONICS OF AUSTRALIA PTY. LTD.
161-165 Princes Highway, Hallam
Victoria 3803, Australia
Phone 03-8787-1200
JEIL Moon Hwa Co.
18-6, 3Ga, Pil_dong, Jung_gu, Seoul, Korea
AUDIO/VISUAL SECTION
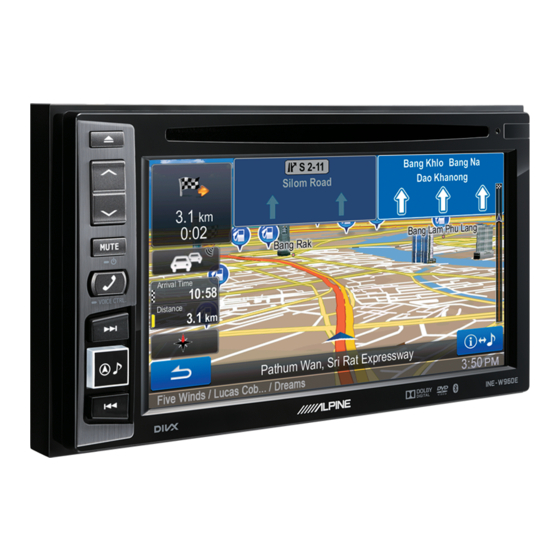
ADVANCED NAVI STATION
INE-W960A
INE-W960E
• OWNER'S MANUAL
Please read before using this equipment.
ALPINE ELECTRONICS GmbH
Wilhelm-Wagenfeld-Str. 1-3, 80807 München, Germany
ALPINE ELECTRONICS OF U.K. LTD.
Fletchamstead Highway, Coventry CV4 9TW, U.K.
ALPINE ELECTRONICS FRANCE S.A.R.L.
(RCS PONTOISE B 338 101 280)
98, Rue de la Belle Etoile, Z.I. Paris Nord Il,
B.P. 50016, 95945 Roissy Charles de Gaulle
Phone 089-32 42 640
Alpine House
www.alpine.co.uk
Cedex, France
Phone +33-(0)1-48638989
R R
ALPINE ITALIA S.p.A.
Viale Cristoforo Colombo, 8
20090 Trezzano sul Naviglio MI, Italy
Phone +39 02 484781
ALPINE ELECTRONICS DE ESPAÑA, S.A.
Portal de Gamarra 36, Pabellón, 32
01013 Vitoria (Alava)-APDO 133, Spain
Phone 945-283588
Designed by ALPINE Japan
Printed in Korea
INE-W960E_OM
M3514558010

Advertisement

Table of Contents
loading
Need help?

Need help?

Do you have a question about the INE-W960A and is the answer not in the manual?

Questions and answers

Subscribe to Our Youtube Channel

Summary of Contents for Alpine INE-W960A

  • Page 1 01013 Vitoria (Alava)-APDO 133, Spain Phone 1-800-ALPINE-1 (1-800-257-4631) Phone 945-283588 ALPINE ELECTRONICS FRANCE S.A.R.L. ALPINE ELECTRONICS OF AUSTRALIA PTY. LTD. (RCS PONTOISE B 338 101 280) 161-165 Princes Highway, Hallam 98, Rue de la Belle Etoile, Z.I. Paris Nord Il, Victoria 3803, Australia B.P.
  • Page 2: Table Of Contents

    Contents Presetting Stations Automatically ....16 Tuning to Preset Stations ........ 16 Operating Instructions CD/MP3/WMA/AAC Playback ............17 Repeat Play ............. 17 PRECAUTIONS M.I.X. (Random Play) ........17 M.I.X. ALL (Shuffle Songs) IMPORTANT INFORMATION, PLEASE (Concerning MP3/WMA/AAC) ....17 READ CAREFULLY BEFORE USING THIS PRODUCT.
  • Page 3 Adjusting Colour of Picture ......28 Radio Setting ..........39 Adjusting Image Contrast ......28 Setting the TUNER (FM) Tone Quality About INE-W960A/INE-W960E ....28 (Tuner Condition) ........39 Displaying the Product Information .... 28 AUX Setting ........... 40 ®...
  • Page 4 Auxiliary Device (Optional) Camera Setup Operating Auxiliary Devices (Optional) ..54 Camera Setup Operation ......... 43 Operating an External DVD Player ....55 AUX Camera Setting ........44 Change to the External DVD Mode .... 55 Setting the Camera Input ......44 About the DVD Operation Screen ....
  • Page 5 Random Play (Shuffle Songs) ......67 ® Pandora internet radio (optional) (INE-W960A only) ® Listening to Pandora ........68 “Thumbs” Feedback ........68 Searching for a Desired Station ...... 69 Creating a New Station ........69 QuickMix ............69 Bookmarking a Desired Track or Artist ..69 How to Input Characters and Numbers (Keypad) ............
  • Page 6: Operating Instructions

    They contain instructions on how to use this • Glance at the screen only when necessary and safe to do so. If product in a safe and effective manner. Alpine cannot be prolonged viewing of the screen is necessary, stop in a safe and responsible for problems resulting from failure to observe the legal manner and location.
  • Page 7: Caution

    Failure to do so may cause personal injury or damage to the DO NOT OPERATE ANY FUNCTION THAT TAKES YOUR product. Return it to your authorized Alpine dealer or the nearest ATTENTION AWAY FROM SAFELY DRIVING YOUR VEHICLE. Alpine Service Centre for repairing.
  • Page 8 New Disc to times when the vehicle is parked. This ensures the focus of the driver’s attention will be on the road and not on the INE-W960A/ INE-W960E. This has been done for the safety of the driver and Outside Bumps passengers.
  • Page 9: Discs Playable On This Unit

    Region numbers supported by this unit are as follows. DVDs with a region number other than those listed below, cannot be played on this DVD player. Music CD Audio 12 cm INE-W960A INE-W960E ® DivX Audio + Video 12 cm...
  • Page 10 Tips for making your own discs Using DVD-Rs/DVD-RWs/DVD+Rs/DVD+RWs ® The INE-W960A/INE-W960E plays DVD Video, DivX , Audio • This unit is compatible with discs recorded in the standard CD and has a built in MP3/WMA/AAC decoder. DVD-Video format. • Note that discs not finalised (processed to enable to play on...
  • Page 11 CAUTION protected by U.S. patents and other intellectual property rights of Rovi Corporation. Reverse engineering and disassembly are Alpine accepts no responsibility for lost data, etc., even if data, etc., prohibited. is lost while using this product. • Manufactured under licence from Dolby Laboratories. Dolby and the double-D symbol are trademarks of Dolby Laboratories.
  • Page 12: Getting Started

    An Alpine Remote Control Interface Box (optional) is required. For details, contact your Alpine dealer. Accessory List Controllable with Remote Control This unit can be controlled with an optional Alpine remote control. • INE-W960A/INE-W960E............1 For details, consult your Alpine dealer. Point the optional remote • Power cable.................1 control transmitter at the remote control sensor.
  • Page 13: Turning The System On

    Turning the System On Inserting/Ejecting a Disc With the Alpine system, when the ignition key is turned to ACC or ON, the opening screen will be automatically displayed. Inserting the Disc When the system is used for the first time, the Insert the disc with the label side facing up.
  • Page 14: Top Banner And Bottom Banner Fade Out Setting

    ]: Closes the window. If the source button is hidden, touch [<<] [>>]. ® Radio / Disc* / USB/iPod* / Pandora (INE-W960A only) / Bluetooth Audio / AUX* / AUX-2* / Notification List* / Camera* Screen Off When no disc is inserted or no USB memory/iPod is connected, this option is not available.
  • Page 15: Selecting An Item In A List

    Indicates the battery level of the connected Selecting an Item in a List BLUETOOTH device. Battery To scroll through a list, perform the following operations. No Battery Level 1 Level 2 Level 3 Level Icon Touch the screen and slide your finger up and down. The screen will scroll along with your finger movement.
  • Page 16: Radio

    Presetting Stations Manually Radio Tune in a desired radio station you wish to store in the preset memory by manual or automatic seek Display example for Radio main screen tuning. Touch and hold any one of the preset buttons for at least 2 seconds.
  • Page 17: Cd/Mp3/Wma/Aac

    Touch [ (Search)] of Bottom banner during • The INE-W960A/INE-W960E can play back MP3/WMA/AAC files playback. saved to CD or DVD. Use a format compliant with this unit. For further information about playing or storing MP3/WMA/AAC Touch [Shuffle Songs].
  • Page 18: Selecting Folders (Concerning Mp3/Wma/Aac)

    Selecting Folders (Concerning MP3/ About MP3/WMA/AAC WMA/AAC) CAUTION Touch [ ] or [ ] of Bottom banner to select the Except for private use, duplicating audio data (including MP3/ folder. WMA/AAC data) or distributing, transferring, or copying it, whether for free or for a fee, without permission of the copyright holder is strictly prohibited by the Copyright Act and by Searching from CD Text international treaty.
  • Page 19 Supported playback sampling rates and bit rates Order of files Files are played back in the order that the writing software writes them to the disc. Therefore, the playback order may not be Sampling rates: 8 kHz - 48 kHz (Disc/USB) what’s expected.
  • Page 20: Dvd/Video Cd

    Video while driving the vehicle. The driver may be distracted from looking ahead and an accident could occur. Install the INE-W960A/INE-W960E correctly so that the driver cannot watch DVD/TV/Video unless the vehicle is stopped and the emergency brake is applied.
  • Page 21: If A Menu Screen Appears

    Select a desired menu item by touching [ ], [ ] or [ Caution • Not all functions will operate for every DVD. See the individual DVD’s instructions for details on the features supported. • Fingerprints on a disc may adversely affect playback.
  • Page 22: Displaying The Menu Screen

    Displaying the Menu Screen Finding the Beginnings of Chapters/ Tracks/Files With a DVD having two or more menus, a menu screen will appear for the programmes available, in addition to the main programmes. During playback, touch [ ] or [ ]. Touch [Menu] of Bottom banner.
  • Page 23: Selecting Folders

    • This function cannot be used on discs on which no title numbers are Selecting Folders recorded. • Some disc may not accept any operation. Touch [ ] or [ ] of Bottom banner to select the folder. Searching Directly by Chapter Number •...
  • Page 24: Switching The Angle

    ® Switching the Angle About DivX ® On DVDs in which scenes have been filmed from multiple angles, the DivX is a codec (software) to compress moving images while angle can be switched during playback. maintaining image quality using a highly advanced compression ratio and operating speed.
  • Page 25: Setup Operation

    Setting items: Text Display / Clock Display / Setup Top/Bottom Banner Fade Out / Screen/LED Customize / Visual / About / Installation / Demo mode • Depending on the item, repeat step 3. Setup Operation Touch [ ] or [ ] etc., to change its setting.
  • Page 26: Clock Display Setting

    Clock Display Setting Screen/LED Customize [Clock Display] is selected on the General setup menu in step 3. Refer [Screen/LED Customize] is selected on the General setup menu in step to “General Setup Operation” (page 25). 3. Refer to “General Setup Operation” (page 25). The clock indication on the monitor display is turned on or off respectively.
  • Page 27: Switching The Display Colour And Wallpaper Image (Background)

    Touch [ ] to return to the previous screen. Wallpaper File List in USB memory • Built in Wallpaper Image File is “Alpine BG.” • Immediately after changing the settings of Display Setup (While the Preview of selected file system is writing data automatically) do not turn the ignition key to Colour select switch OFF.
  • Page 28: Switching Display Modes

    Displaying the Product Information You can view the version information of this product. Make note of this information and refer to it whenever you contact Alpine Tech Support or an Alpine-authorised dealer. In FULL mode, the monitor displays a normal picture wider to fit Setting item: Version Info in a wide-screen monitor.
  • Page 29: Installation Setup

    Parametric EQ* / Other / Defeat* * When BASS ENGINE SQ of Quick Sound Setup is set to “On,” the message “This function not available. Please check the Alpine App connection or BASS ENGINE SQ in the settings. ” will be displayed.
  • Page 30: Car Specific Sound Setup

    ® • MP3/WMA/AAC/iPod/USB Audio/DivX /Bluetooth Audio correspond to MX Compressed Media. * INE-W960A only MX FM The medium to high frequencies become more clear, and produces well balanced sound in all the bands. MX DVD • If Preset3 was already saved for Time Correction/X-Over/Parametric EQ, the data will be overwritten.
  • Page 31: Equalizer Presets (Eq Presets)

    MX Pandora (INE-W960A only) Setting the MX (Media Xpander) This corrects information that was omitted at the time of compression. This reproduces a well-balanced sound close to For details on Setting the MX (Media Xpander), refer to page 30. the original.
  • Page 32: Adjusting The Bass Engine Level

    Adjusting the BASS ENGINE Level Adjusting the Time Correction (TCR) You can adjust the BASS ENGINE Level. [TCR] is selected on the Sound setup menu in step 3. Refer to “Sound Setting item: Level Setup Operation” (page 29). Setting contents: 0 to 6 (Initial setting: 3) Before performing the following procedures, refer to “About Time Correction”...
  • Page 33: Adjusting The Crossover Settings (X-Over)

    Calling the X-Over adjusted value Adjusting the Crossover Settings (X- Calling the pre-set X-Over adjusted value. Over) Touch [Preset1], [Preset2], or [Preset3] on the X- Over screen. The setting stored in the Preset will be recalled. [X-Over] is selected on the Sound setup menu in step 3. Refer to “Sound Setup Operation”...
  • Page 34: Other Setting

    Adjusting the Level Other Setting Touch [ ] or [ ] of “Level” to adjust the level of selected band. [Other] is selected on the Sound setup menu in step 3. Refer to “Sound Setting contents: -7 to +7 (Initial setting: 0) Setup Operation”...
  • Page 35: About Time Correction

    About Time Correction Example 2. Listening Position: All Seats Adjust the time correction level of each speaker to almost the same level. The distance between the listener and the speakers in a car vary widely due to the complex speaker placement. This difference in the distances Sit in the listening position (driver’s seat, etc.) and from the speakers to the listener creates a shift in the sounds image and measure the distance (in meters) between your head...
  • Page 36: About The Crossover

    Depending on the speakers, a passive 27.2 10.7 200.6 79.1 network may not be necessary. If you are unsure about this point, please 30.6 12.1 204.0 80.4 consult your authorised Alpine dealer. 34.0 13.4 207.4 81.7 37.4 14.7 210.8 83.1 Cut-off frequency Slope 40.8...
  • Page 37: Source Setup

    Determine the recommended crossover frequency of the speakers. Adjusting to a frequency range outside that recommended may cause damage to the speakers. For the recommended crossover frequencies of Alpine speakers, refer to the respective Owner’s Manual. Source Setup Operation We are not responsible for damage or malfunction of speakers caused by using the crossover outside the recommended value.
  • Page 38: Disc Setting

    To play in a language other than those displayed Disc Setting 1 Touch [DVD Menu Language Code], [Audio Language Code] or [Subtitle Language Code]. [Disc] is selected on the Source setup menu in step 3. Refer to “Source The numeric keypad screen is displayed. 2 Touch the 4-digit numeral of the language number.
  • Page 39: Setting The Tv Screen Mode

    Set the rating level of PARENTAL 4:3 PAN-SCAN: Select this when connected to a conventional 4:3 size monitor. 4 Touch [Parental Control]. The picture will fill the entire TV screen. However, due to the 5 Touch “ ” on “ ” to turn “On". mismatch in aspect ratio, parts of the movie at the extreme left Select “Off”...
  • Page 40: Aux Setting

    [App connection method] is selected on the Source setup menu in Setup Operation” (page 37). step3. Refer to “Source Setup Operation” (page 37). Set ALPINE APP to USB when an iPhone is connected, or set to BLUETOOTH when an Android Smartphone is paired. Setting the AUX Mode...
  • Page 41: Bluetooth Setup

    BLUETOOTH Setup Registering the BLUETOOTH Device [Set Bluetooth Device] is selected on the BLUETOOTH setup menu in The BLUETOOTH function is always available on this unit. step 3. You can, therefore, search for a BLUETOOTH device for pairing at any Refer to “BLUETOOTH Setup Operation”...
  • Page 42: Setting The Passcode

    Setting the Passcode Adjusting the Caller Volume [Pass code Change] is selected on the BLUETOOTH setup menu in [Caller Volume] is selected on the BLUETOOTH setup menu in step 3. step 3. Refer to “BLUETOOTH Setup Operation” (page 41). Refer to “BLUETOOTH Setup Operation” (page 41). You can adjust the receive volume, during the call.
  • Page 43: Deleting All The Histories

    Deleting All the Histories Camera Setup [Delete Call History] is selected on the BLUETOOTH setup menu in step 3. Camera Setup Operation Refer to “BLUETOOTH Setup Operation” (page 41). Dialled/Received/Missed Incoming histories are all deleted. With an optional camera connected, its video is output to the monitor. Setting item: Delete Call History When the camera is connected, set this item.
  • Page 44: Aux Camera Setting

    Adjusting guides simultaneously AUX Camera Setting Touch [Link]. The 3 vertical guides of the currently-selected guide link [Camera] is selected on the Camera setup menu in step 3. together, allowing them to be adjusted simultaneously. Refer to “Camera Setup Operation” (page 43). Setting the Camera Input Setting item: Camera Select / Camera Signal*/Guide Adjustment*...
  • Page 45: About The Rear Camera Guide

    <Screen> About the Rear Camera Guide To display the guide, set “Guide Display On/Off Setting” (page 44) to On. Also, to adjust the guide, refer to “Adjusting the Rear Camera Guide” (page 44). You can also turn off the guide in the Rear camera display screen.
  • Page 46 The distance guidance mark represents the distance to a flat road surface. Therefore in the case of an upward slope behind the car, the distance guides are displayed closer to the rear bumper than the actual distance. For example, if there is an obstacle on the upward slope, it may appear farther away than its actual position.
  • Page 47: Bluetooth Operation

    BLUETOOTH compatible device to this unit. Setup Before Using The device name of this unit is “INE-W960A/INE-W960E” and the initial number of the passcode is “0000.” Also refer to the Owner’s Manual of the connected device(s).
  • Page 48: Changing The Connecting Bluetooth Device

    Changing the connecting BLUETOOTH Calling Device Use the Phone menu screen to make a phone call. If multiple BLUETOOTH devices are registered in this device, you can Using Short Cut Dialling to Make a Call change the connection among the registered devices. You can assign up to 4 phone numbers for one-touch dialing to make a Press the (Phone) button.
  • Page 49: Dialing A Number In The Phone Book

    Say the telephone number* or name* you want to Dialing a Number In the Phone Book call, into the microphone. * The number and name depend on the voice dial information You can use the phone book of the mobile phone to make a phone call. stored in the mobile phone.
  • Page 50: Dtmf (Touch-Tone) Function

    DTMF (Touch-Tone) Function Adding the Phone Book Transmits a DTMF (Touch-Tone) during a call. Press the (Phone) button. The phone menu screen is displayed. Touch [Keypad]. The number input screen appears. Touch [ Input number. Touch [Download]. • You can transmit a Touch-Tone signal during a call. Touch [Add].
  • Page 51: Deleting The Phone Book Entries

    Deleting the Phone Book Entries Assigning as a Short Cut Dialling Number Deleting One Entry from the Phone Book Press the (Phone) button. Assigning from Call History The Phone menu screen is displayed. Press the (Phone) button. Touch [ The Phone menu screen is displayed. The Phone Book screen is displayed.
  • Page 52: Call Waiting Function

    Call Waiting Function BLUETOOTH Audio If a call comes in from another phone during a call, a notice is displayed If a BLUETOOTH compatible mobile phone, portable player, etc. is on the screen. This function can only be used if the connected mobile connected by wireless, you can play back a song (operation is phone has a call waiting function service included.
  • Page 53: Playback

    Playback M.I.X. (Random Play) Available for AVRCP Ver. 1.3 and 1.4 only. Touch [Bluetooth-Audio] of Top banner. Touch [ ] during playback. The M.I.X. mode switches every time [ ] is touched. Touch [ ] or [ ] to select the desired track (file). Returning to the beginning of the current file: Touch [ ].
  • Page 54: Auxiliary Device (Optional)

    Example for AUX, AUX2, DVD, Game mode display Operating Auxiliary Devices (Optional) To operate devices connected to the AUX terminals of INE-W960A/ INE-W960E, follow the procedure described below. • Set AUX In to “AUX.” Refer to “Setting the AUX Mode” (page 40).
  • Page 55: Operating An External Dvd Player

    [Subtitle] Operating an External DVD Player Switches sub titles. * The buttons provide the same functions above. To operate an External DVD player (Optional), set “Setting the Primary AUX Name (AUX Setup)” (page 40) or “Setting the Secondary AUX Menu operation mode screen display example Name”...
  • Page 56: Operating An External Dvd Changer

    Operating an External DVD Changer Operating the Mobile Digital TV Receiver (DVB-T) To operate an External DVD changer (Optional), set “Setting the Primary AUX Name (AUX Setup)” (page 40) or “Setting the Secondary To operate the Mobile Digital TV Receiver (DVB-T) (Optional), set AUX Name”...
  • Page 57: Operating A Tv

    Operating a TV To operate a TV Receiver (TV) (Optional), set “Setting the Primary AUX Name (AUX Setup)” (page 40) or “Setting the Secondary AUX Name” (page 40) to “TV.” Change to the TV mode Touch [TV] of Top banner. The display shows the TV mode screen.
  • Page 58: Applying Tuneit

    TuneIt, is downloadable from Apple’s App Store; the Android user can download it from Google Play. For details, consult your Alpine dealer. • The application program and related specifications and data may be deleted or terminated without notice.
  • Page 59 Displaying the Notification List Touch the Notification List icon on the Top banner, or (List) of the notification display. Example of the Notification List display • If there are no notifications in the Notification List, “No Notifications. ” is displayed. Other operations TTS (Text To Speech) Start/Stop switch Like switch:...
  • Page 60: Camera Operation (Optional)

    Camera Operation (Optional) When an optional camera is connected, the view video of camera can be output to the monitor. Depending on your camera, please choose the camera type first. For details, refer to “Camera Setup” (page 43). Rear camera: If an HCE-C305R*/HCE-C300R*/HCE-C200R/HCE-C115/HCE- C105 camera is connected, when the vehicle is reversed, the rear camera view (guide marks for vehicle width and available...
  • Page 61: Usb Memory (Optional)

    Playback USB Memory (Optional) Touch [USB] of Top banner. The USB mode is activated and the display changes to the USB screen. You can play back music files (MP3/WMA/AAC) and video files Touch [ ] or [ ] or to select the desired track (file). ®...
  • Page 62: Random Play (M.i.x.)

    Searching for a Desired Song Operation differs depending on whether the most recent song search INE-W960A/INE-W960E can carry out 2 kinds of searches. was a Tag Search or a Folder Search. • For details on Video file search, refer to “Searching for a Desired Touch [ ] during playback.
  • Page 63: File/Folder Name Search

    To Search for a Song in the Album of the Artist Select the Desired Folder (Folder up/ 1 Touch the desired artist’s name. All albums of the selected artist are displayed. down) Touch the desired album’s name. This operation is available only if the most recent song search was a All songs of the selected album are displayed.
  • Page 64: Ipod/Iphone (Optional)

    Lightning to USB cable (KCU-471i) is required depending on the type of iPod/iPhone. When the INE-W960A/INE-W960E is connected by the above cable, the controls on the iPod are disabled. • An iPod/iPhone with the Lightning connector does not support iPod video playback on the unit.
  • Page 65: Playback

    To Search for the Album of the Artist INE-W960A/INE-W960E. Therefore, a maximum of 64 characters is 1 Touch the selected artist name. recommended. The maximum number of characters for the unit is 64.
  • Page 66: Searching For A Desired Video File

    Searching for a Desired Video File Direct Up/Down Function You can select a movie, music video, etc., from the list screen. If you touch [ ] of the album name in the search mode, this album will be played back repeatedly. To go to the previous or next Album, use the •...
  • Page 67: Random Play (Shuffle)

    Random Play (Shuffle) Touch [ ] during playback. The files will be played back in a random sequence. The Shuffle mode switches every time [ ] is touched. Shuffle Songs Shuffle Albums (OFF) Shuffle Songs Shuffle Albums: The songs on each album are played back in proper order.
  • Page 68: Pandora ® Internet Radio (Optional) (Ine-W960A Only)

    “station” that plays their music and more music like it. • The operation to replay a previous song is not available. ® The INE-W960A enables you to interact with your Pandora account ® • Pandora limits the number of skips allowed on their service. If you by connecting an iPhone and smartphone that has the latest version of attempt to skip songs beyond the limit, “No skips remaining”...
  • Page 69: Searching For A Desired Station

    You can display your station list and select stations directly from the Use QuickMix to create a playlist based on two or more of your Pandora INE-W960A. stations. Edit your QuickMix station selections on the Pandora Compatible Application for iPhone when it is not connected to the INE- Alphabet Search W960A.
  • Page 70: How To Input Characters And Numbers (Keypad)

    How to Input Characters and Numbers (Keypad) The displayed screens and procedures may vary slightly depending on the function used, but the basic input method is the same. Input screen area. (Delete) Returns to the previous character and erases it. Touching here for more than 2 seconds will erase all input characters.
  • Page 71: Product Software Update

    * These functions differ from disc to disc. For details, refer to the disc’s This product use software that can be updated through a USB memory instructions. device. Download the software from the Alpine website and update the product using the USB memory device. Updating this product Check the Alpine website for details on updating.
  • Page 72: List Of Language Codes

    List of Language Codes (For details, see page 38.) Abbre viation Code Language Abbre viation Code Language Abbreviation Code Langua g e 6565 Af ar 7369 Inter lingue 8278 Kirundi 6566 Abkhazian 7375 Inupiak 8279 Romanian Afr ikaans 7378 Indonesian 8285 Russian 6570...
  • Page 73: List Of Country Codes

    List of Country Codes (For details, see page 38.) Country Abbreviation Code Country Abbreviation Code Country Abbreviation Code Andorra 6877 Dominica 7573 Kiribati 6568 6569 United Arab Emirates 6879 Dominican Republic 7577 Comoros 6570 Afghanistan 6890 Algeria 7578 Saint Kitts and Nevis 6571 Antigua and Barbuda 6967...
  • Page 74 Abbreviation Code Country Abbreviation Code Country Abbreviation Code Country 8069 Peru 8374 Svalbard and Jan Mayen 8487 Taiwan, Province of China 8070 French Polynesia 8375 Slovakia 8490 Tanzania, United Republic of 8071 Papua New Guinea 8376 Sierra Leone 8565 Ukraine 8072 Philippines 8377...
  • Page 75: In Case Of Difficulty

    This guide will help you isolate the problem if the unit is at fault. Otherwise, make sure the rest of your system is Disc properly connected, or then consult your authorised Alpine dealer. Disc playback sound is wavering. • Moisture condensation in the disc Module.
  • Page 76: If This Message Appears

    Please check BLUETOOTH audio device. - The unit is rebooted automatically. • The BLUETOOTH audio device was not connected correctly. - Check the settings for INE-W960A/INE-W960E and the Unable to access the DVD drive. BLUETOOTH audio device and reconnect. Please enquire details from the service center.
  • Page 77 Navigation Video resolution not supported. ® • The file being played is a DivX file with an unsupported The vehicle’s position is erroneous. resolution. • The GPS reception is poor. ® - Play a DivX file with a supported resolution. - Drive the vehicle in an area of good GPS reception to allow the unit to recalibrate itself.
  • Page 78: Specifications

    Laser power CLASS II Specifications GPS SECTION GPS Reception frequency 1575.42 ±1 MHz MONITOR SECTION GPS Reception sensitivity -130 dB max. Screen Size 6.1" LCD Type Transparent type TN LCD BLUETOOTH SECTION Operation System TFT active matrix BLUETOOTH Specification Bluetooth V2.1+EDR Number of Picture Elements 1,152,000 pcs.
  • Page 79: End User License Agreement (Microsoft)

    INDEPENDENTLY DETERMINED HOW TO USE THE SOFTWARE terms are provided, then the terms of this EULA shall IN THE DEVICE, AND MS HAS RELIED UPON ALPINE TO apply, except that MS, Microsoft Corporation or affiliate CONDUCT SUFFICIENT TESTING TO DETERMINE THAT THE entity providing the Supplemental Component(s) shall be SOFTWARE IS SUITABLE FOR SUCH USE.
  • Page 80: End User License Agreement (Here)

    This license does not include the right to Should you have any questions concerning this EULA, or if you grant sub-licenses. desire to contact ALPINE for any other reason, please refer to the address provided in the documentation for the DEVICE. LIMITATIONS ON USE...
  • Page 81 LIMITED WARRANTY GOVERNING LAW HERE warrants that, subject to the warnings set out below, for a This Agreement shall be governed by the laws of the jurisdiction, period of 12 months after acquisition of your copy of the in which you reside at the date of acquisition of the Database. Database, it will perform substantially in accordance with Should you at that moment reside outside the European Union or HERE’s Criteria for Accuracy and Completeness existing on the...
  • Page 82: Installation And Connections

    Do not tap into these leads to provide power for this safety-related system), or tanks should NEVER be used for unit. When connecting the INE-W960A/INE-W960E to the fuse installations or ground connections. Using such parts could disable box, make sure the fuse for the intended circuit of the INE- control of the vehicle and cause fire etc.
  • Page 83: Installation

    Mounting the Microphone. Installation For safe use, make sure of the following: • location is stable and firm. • driver’s view and operations are not obstructed. • microphone is located where the driver’s voice can be easily picked up (on the sun visor, etc.). Caution Do not block the unit’s fan or heat sink, thus preventing When you speak into the microphone, you should not have...
  • Page 84 (*1) already chassis. attached to the vehicle’s chassis. Connect all the Attach the Original Mounting Bracket to each side of the INE-W960A/ leads of the INE-W960A/INE-W960E according to INE-W960E, using the screws supplied with INE-W960A/INE-W960E.
  • Page 85 • The diagram and the fuse amperage shown above are in the case when INE-W960A/INE-W960E is used individually. • If the switched power (ignition) lead of the INE-W960A/INE-W960E is connected directly to the positive (+) post of the vehicle’s battery, the INE- W960A/INE-W960E draws some current (several hundred milliamperes) even when its switch is placed in the OFF position, and the battery may be discharged.
  • Page 86: Connections

    Connections GPS Antenna (Included) Vehicle Antenna Microphone (Included) AUX OUTPUT To Rear Monitor Input terminal (Yellow) REAR OUTPUT (Red/White) FRONT OUTPUT To input terminal of amplifier when adding an external amplifier (Red/White) SUBW (Red/White) CAMERA To Camera with RCA Output (Yellow) terminal REMOTE OUT...
  • Page 87 Steering Remote Control Interface Connector Left Rear (–) Speaker Output Lead (Green/Black) To steering remote control interface box. For details about connections, consult your nearest Alpine Left Front (+) Speaker Output Lead (White) dealer. Left Front (–) Speaker Output Lead (White/Black) AUX/PRE OUT Connector Right Front (–) Speaker Output Lead (Grey/Black)
  • Page 88: System Example

    System Example Connection of an iPod/iPhone with a Lightning connector or USB memory USB connector iPod/iPhone with a Lightning connector (Sold separately) USB extension cable (Included) Lightning to USB Cable KCU-471i (Sold separately) USB Memory (Sold separately) • Do not leave a iPod/iPhone/USB memory in a vehicle for a long time. Heat and humidity may damage the iPod/iPhone/USB memory and you may not be able to play it again.
  • Page 89 Connection of an External device iPod VIDEO input connector CAMERA/AUX/PRE OUT Connector To Audio Output terminal To Video Output terminal CAMERA/AUX/PRE OUT cable DVD Changer (Sold separately) REMOTE OUT REMOTE IN (Brown) (White/Brown) AV/RCA interface cable (4-pole mini AV plug to 3- RCA Extension Cable (Sold Separately) RCA) (sold separately) Remote Control Output Lead (Brown)
  • Page 90 Connection of a DVD Player To Video Output terminal DVD Player (sold separately) To Audio Output terminal iPod VIDEO input connector AV/RCA interface cable (4-pole mini AV plug to 3- RCA Extension Cable (Sold Separately) RCA) (sold separately) Video/Audio Input Connectors YELLOW is for input video, RED is right and WHITE is left input the audio.
  • Page 91 Connection of a Mobile Digital TV Receiver iPod VIDEO input connector CAMERA/AUX/PRE OUT Connector To Audio Output terminal To Video Output terminal CAMERA/AUX/PRE OUT cable Mobile Digital TV Receiver (Sold separately) REMOTE OUT REMOTE IN (Brown) (White/Brown) AV/RCA interface cable (4-pole mini AV plug to 3- RCA Extension Cable (Sold Separately) RCA) (sold separately) Remote Control Output Lead (Brown)
  • Page 92 Connection of an External Amplifier Power Supply Connector CAMERA/AUX/PRE OUT Connector CAMERA/AUX/PRE OUT cable Amplifier 4 ch (Sold separately) (Red) (White) Input Front speaker (Red) Input Rear speaker (White) Amplifier for subwoofer (Sold separately) (Red) Input Subwoofer (White) REMOTE TURN-ON REMOTE ON (Blue/White) (Blue/White)
  • Page 93 Connection of camera CAMERA/AUX/PRE OUT Connector CAMERA/AUX/PRE OUT cable To Video Output terminal (Yellow) Camera with RCA video output (sold separately) Power Supply Connector HCE-C105, etc. Reverse Lead Connect to the plus side of the (Orange/White) car’s reverse lamp. CAMERA Input RCA Connector (CAMERA) RCA Extension Cable (sold separately)
  • Page 95 NAVIGATION SECTION User Manual Alpine Navigation Navigation software for the Alpine INE-W960A/INE-W960E Australian English January 2015, ver. 1.0...
  • Page 96 Thank you for choosing the Alpine unit as your navigator. Start using your device right away. This document is the detailed description of the navigation software. You can easily discover the software while you are using it; however, we still recommend that you read this manual to...
  • Page 97 Table of contents 1 Warnings and Safety information ................. 6 2 Getting started ......................7 2.1 Buttons and other controls on the screen ............... 8 2.1.1 Using keyboards ........................9 2.1.2 Beyond single screen tap ....................10 2.2 Map screen ........................11 2.2.1 Navigating on the map .......................
  • Page 98 3.1.5 Selecting the destination from your Address Book ............47 3.1.6 Selecting a recent destination from the History ..............48 3.1.7 Entering the coordinate of the destination ................. 49 3.1.8 Navigate to a location stored in a picture ................50 3.1.9 Building a route from the list of destinations (Create Route) ..........
  • Page 99 5.3.8 Trip monitor settings ......................82 5.4 Trip monitor ......................... 82 6 Glossary ........................83 7 Copyright note ....................... 85...
  • Page 100: Warnings And Safety Information

    1 Warnings and Safety information The navigation system helps you find your way to your destination with a connected GPS receiver. The software does not transmit your GPS position; others cannot track you. It is important that you look at the display only when it is safe to do so. If you are the driver of the vehicle, we recommend that you operate your software before you start your journey.
  • Page 101: Getting Started

    2 Getting started When using the navigation software for the first time, an initial setup process starts automatically. Do as follows: Select the written language of the application interface. Later you can change it in Regional settings (page 81). Read the End User Licence Agreement. Tap to continue.
  • Page 102: Buttons And Other Controls On The Screen

    The initial setup is now complete. The Configuration wizard can be restarted later from the Settings menu (page 71). After the initial setup, the Map screen appears and you can start using the software. 2.1 Buttons and other controls on the screen When you are using the software, you usually tap buttons on the touch screen.
  • Page 103: Using Keyboards

    Radio When there are only a few Tap one of the buttons to button choices, radio buttons may select a new value. be used instead of lists. Only one value can be selected. Switch When there are only two Tap it to turn the switch choices, a checkmark on or off.
  • Page 104: Beyond Single Screen Tap

    Entering upper and lower When entering a text, the first character appears in upper case case letters while the rest of the text is in lower case. Tap to enter an upper case letter or tap twice to turn on Caps Lock. Tap again and lower case letters return.
  • Page 105: Map Screen

    Gestures You need to drag and drop the screen only in cases like: (drag&drop) Moving the handle on a slider. Scrolling the list: grab the list anywhere and slide your finger up or down. Depending on the speed of the sliding, the list will scroll fast or slow, only a bit or till the end.
  • Page 106 The data fields are different when you are navigating an active route and when you have no specified destination (the orange line is not displayed). Default data fields when cruising without a destination (tap any of the fields to change its value): Field Description...
  • Page 107: Position Markers

    2.2.2 Position markers 2.2.2.1 Vehimarker and Lock-on-Road When your GPS position is available, the software marks your current position with the Vehimarker. By default, this marker is a blue arrow, but you can change this icon in Settings. When on-road navigation is selected, the Vehimarker may not show your exact GPS position and heading.
  • Page 108: Turn Preview And Next Street

    2.2.3.2 Turn preview and Next street When navigating a route, the top section of the Map screen shows information about the next route event (manoeuvre) and the next street or the next city/town. There is a field in the top left corner that displays the next manoeuvre. Both the type of the event (turn, roundabout, exiting motorway, etc.) and its distance from the current position are displayed.
  • Page 109: Lane Information And Signposts

    Approaching the destination. These fields also act as buttons: Tap the Turn preview field and the voice guidance will repeat the latest instruction with updated distance information. Tap the Next street field to open the Itinerary. 2.2.3.3 Lane information and Signposts When navigating on multilane roads, it is important to take the appropriate lane in order to follow the recommended route.
  • Page 110: Motorway Exit Services

    2.2.3.5 Motorway exit services You may need a petrol station or a restaurant during your journey. This feature displays a new button on the map when you are driving on motorways. Tap this button to open a panel with the details of the next few exits or service stations. Tap any of them to display it on the map and add it as a waypoint to your route if needed.
  • Page 111: Elements Of The Active Route

    2.2.3.7 Elements of the active route Your software shows the route in the following way: Symbol Name Description Current GPS position and Your current position displayed on the map. If Start point roads are near, it is aligned to the nearest road. Normally if GPS position is available, the route starts from the current position.
  • Page 112: Manipulating The Map

    In the first column you can see the number of traffic events on your route. The second column contains the full count of traffic events in the categories. Tap any of the even types to list the event in that category or select the top row to open the list of all traffic events: Now tap any of the list items to see its details, and to display the affected road segment in its full length on the map:...
  • Page 113 Zooming in and out Changes how much of the map is displayed on the screen. Your software uses high-quality vector maps that let you examine the map at various zoom levels, always with optimised content. It always displays street names and other text with the same font size, never upside-down, and you only see the streets and objects that you need.
  • Page 114: Quick Menu

    2.2.5 Quick menu The Quick menu is a selection of controls and functions that are frequently needed during navigation. It can be opened directly from the Map screen by tapping The menu will close after a few seconds of inactivity or if you tap Most of these functions are shortcuts.
  • Page 115 This button skips the next waypoint from the route. This button opens a 2D map scaled and positioned to show the entire route. This button opens the Visual Guidance settings screen. This button opens the list of traffic event types. This button lets you bypass parts of the recommended route.
  • Page 116: Checking The Details Of The Current Position (Where Am I?)

    This button opens the parameters of the selected Vehicle profile. 2.2.6 Checking the details of the current position (Where Am I?) This screen contains information about the current position (or about the last known position if GPS reception is not available) and a button to search for useful Places nearby. You can access this screen from the map in one of the following ways: If the current street is displayed below the Vehimarker (the current position on the map), tap it to open the Where Am I? screen.
  • Page 117: Navigation Menu

    The following services can be searched around the current position or the last known position: : Car repair and roadside assistance services : Medical and emergency services : Police stations : Petrol stations Tap any of the buttons, select a Place from the list, and navigate to it. 2.3 Navigation menu You can reach all parts of the software from the Navigation menu.
  • Page 118 to get information about your current position, the GPS reception or the trips you have taken or to run some additional applications.. to customise the way the navigation software works. Press the MAP hardware button to start navigating on the map.
  • Page 119: On-Road Navigation

    3 On-road navigation When first started, Alpine unit calculates routes using the road network of the high quality vector maps provided with the product. You can set up your route in different ways: If you need a route for immediate navigation, you can select the destination and start navigating to it right away (normal navigation).
  • Page 120: Entering An Address

    3.1.1.1 Entering an address To enter an address as the destination, do as follows: In the Navigation menu, tap the following buttons: By default, the software proposes the country and city/town where you are. If needed, , enter the first few letters of the country name on the keyboard, and select one country from the list of results.
  • Page 121 If the desired name does not show up, the names that match the string appear in a list after entering a couple of characters (to open list results before appears automatically, ). Select the street from the list. Enter the house number: Enter the house number on the keyboard.
  • Page 122: Entering The Midpoint Of A Street As The Destination

    If you know that you will use this destination frequently, before tapping to confirm the destination, put it in the Address Book first: Tip! then , give a name for the new entry, and tap to save the location. The map with the destination returns automatically.
  • Page 123: Selecting An Intersection As The Destination

    Instead of entering the house number, tap the input field above. The midpoint of the street is selected as the destination. A full screen map appears with the selected point in the middle. If necessary, tap the map somewhere else to modify the destination. The Cursor ( ) appears at the new location.
  • Page 124 If the desired name does not show up, the names that match the string appear in a list after entering a couple of characters (to open the list of results before it appears automatically, tap ). Select the street from the list. Instead of entering the house number, tap .
  • Page 125: Selecting A City/Town Centre As The Destination

    3.1.1.4 Selecting a city/town centre as the destination The city/town centre is not the geometric centre of the city/town but an arbitrary point the map creators have chosen. In towns and villages, it is usually the most important intersection; in larger cities, it is one of the important intersections.
  • Page 126: Entering An Address With A Postal Code

    After a short summary of the route parameters, the map appears showing the entire route. The route is automatically calculated. Tap to modify route parameters, or tap and start your journey. 3.1.1.5 Entering an address with a postal code All of the above address searching possibilities can be performed with entering the postal code instead of the city/town name.
  • Page 127 The most likely street name is always shown in the input field. To accept it, tap If the desired name does not show up, the names that match the string appear in a list after entering a couple of characters (to open the list of results before it appears automatically, tap ).
  • Page 128: Tips On Entering Addresses Quickly

    3.1.1.6 Tips on entering addresses quickly When you are entering the name of a city/town or a street: Only those letters are offered on the keyboard that appear in possible search results. All other characters are greyed out. As you are typing, the most likely result is always displayed in the input field. If the guess is correct, tap to select it.
  • Page 129 If you are in the Navigation menu, tap and then tap Using the keyboard, start entering the name of the Place. After entering a few letters, tap to open the list of Places with names containing the entered character sequence. (optional) The Places in the list are ordered by the length of the necessary detour (when navigating a route) or by their distance from the current position (when no destination is given).
  • Page 130: Searching For A Place Of Interest Using Preset Categories

    3.1.2.2 Searching for a Place of Interest using preset categories The Preset search feature lets you quickly find the most frequently selected types of Places. In the Navigation menu, tap the following buttons: The preset search categories appear: If an active route exists, petrol stations are searched along the route. If there is no active route (destination is not selected), they are searched around the current position.
  • Page 131 If an active route exists, accommodation is searched around the destination of the route. If there is no active route (destination is not selected), they are searched around the current position. If the current position is not available either (no GPS signal), they are searched around the last known position.
  • Page 132: Searching For A Place Of Interest By Category

    3.1.2.3 Searching for a Place of Interest by category You can search for Places of Interest by their categories and subcategories. In the Navigation menu, tap the following buttons: Select the area around which the Place should be searched for: to search around the current position or if it is not available, around the last know position.
  • Page 133 Select one of the Place subcategories (e.g. Hotel or Motel) or tap to list all Places in the selected main category around the selected location or along the route. Sometimes the list of brands in the selected Place subcategory appears. Select one brand or tap to list all Places in the selected subcategory around the selected location or along the route.
  • Page 134: Searching For A Place Of Interest By Name

    11. (optional) Tap to see the details of the selected Place. Tap to return to the map. 12. If necessary, tap the map somewhere else to modify the destination. The Cursor ) appears at the new location. Tap to confirm the destination, or tap to select a different destination.
  • Page 135 to search along the active route, and not around a given point. This is useful when you search for a later stopover that results in a minimal detour only, such as searching for upcoming petrol stations or restaurants. (The result list will be ordered by the length of the necessary detour.) (optional) If you have selected , select the city/town to search in.
  • Page 136 if you have not done it before. Using the keyboard, start entering the name of the Place. After entering a few letters, tap to open the list of Places with names containing the entered character sequence. 10. (optional) The Places in the list are ordered by their distance from the current or last known position, from the selected city/town, from the destination or by the length of the necessary detour.
  • Page 137: Selecting Nearby Assistance From 'Where Am I

    14. After a short summary of the route parameters, the map appears showing the entire route. The route is automatically calculated. Tap to modify route parameters, or tap and start your journey. 3.1.2.5 Selecting nearby assistance from 'Where Am I?' You can quickly search for nearby assistance from the 'Where Am I?' screen.
  • Page 138 Tap any of the quick search buttons to get an instant list of that type of Places. (optional) The Places in the list are ordered by their distance from the current or last known position, from the selected city/town, from the destination or by the length of the necessary detour.
  • Page 139: Using The Free Form Search

    3.1.3 Using the free form search A quick way to search for an address, a Place, an Address Book entry or a History item is to use the free form search. Do as follows: In the Navigation menu, tap Open the menu and tap In the left field enter the name you are looking for.
  • Page 140: Selecting A Map Location As The Destination

    3.1.4 Selecting a map location as the destination In the Navigation menu, tap the following buttons: Locate your destination on the map: move and scale the map as needed. Tap the location that you want to select as your destination. The Cursor ( appears.
  • Page 141: Selecting The Destination From Your Address Book

    3.1.5 Selecting the destination from your Address Book You can select a location that you have already saved as an Address Book entry to be your destination. Adding a location to the Address Book is described on page 59. Access the Address Book: If you are on the Map screen, tap and then tap If you are in the Navigation menu, tap...
  • Page 142: Selecting A Recent Destination From The History

    3.1.6 Selecting a recent destination from the History The destinations that you have set earlier appear in the History. Access the History: If you are on the Map screen, tap and then tap If you are in the Navigation menu, tap and then tap The list of recent destinations appears.
  • Page 143: Entering The Coordinate Of The Destination

    3.1.7 Entering the coordinate of the destination You can also select a destination by entering its coordinate. Do as follows: In the Navigation menu, tap Open the menu and tap You can enter the latitude and longitude values in any of the following formats: decimal degrees;...
  • Page 144: Navigate To A Location Stored In A Picture

    3.1.8 Navigate to a location stored in a picture You can also set the location stored in a picture as your destination. Do as follows: In the Navigation menu, tap Open the menu and tap The list of picutres stored on the USB memory appears. Select one picture from the list.
  • Page 145: Building A Route From The List Of Destinations (Create Route)

    3.1.9 Building a route from the list of destinations (Create Route) You can also build your route destination by destination from the Route menu. In the Navigation menu, tap There is only one line in the list of route points, the start point of the route, normally the current GPS position.
  • Page 146: Viewing The Entire Route On The Map

    3.2 Viewing the entire route on the map It is easy to get a map overview of the active route. Do as follows: In the Navigation menu, tap . The active route is displayed in its full length on the map together with additional information and controls.
  • Page 147: Modifying The Route

    to bypass a part of the route. to delete the active route. to open a list with more options like changing route parameters, simulating the route, saving the active route or loading a previously saved route. to return to the Navigation menu. 3.4 Modifying the route When navigation is already started, there are several ways to modify the active route.
  • Page 148: Setting A New Starting Position For The Route

    to append the newly selected destination at the end of the route. The other destinations of the route remain intact. The previous final destination is now the last waypoint. 3.4.2 Setting a new starting position for the route For normal navigation, all routes are planned from the current position. In order to check future routes, simulate them or see their length in time and distance, you can turn off the GPS receiver.
  • Page 149: Editing The List Of Destinations (Edit Route)

    The Destination menu appears and you can select the start point of the route the same way you select a destination. When the new start point is set, tap The map returns with a transparent Vehimarker (showing that there is no GPS reception).
  • Page 150: Cancelling The Active Route

    to delete a destination. to modify the start point of the route. to reorder the list. You can do it manually or you can let the application optimise the route for you. 3.4.4 Cancelling the active route To cancel the navigated route, do one of the following: If you are on the Map screen, tap and then tap .
  • Page 151: Changing The Vehicle Used In Route Planning

    You see the basic details of three route alternatives with the selected route planning method. Tap any of them to see it on the map. Or if you cannot find a good alternative, tap and scroll down for routes with different routing methods. Select one of the route alternatives then tap to return to the Map screen.
  • Page 152: Changing The Road Types Used In Route Planning

    The software recalculates the route optimised for the new vehicle type. The orange line now shows the new recommended route. 3.4.7 Changing the road types used in route planning To recalculate the active route with different road type preferences, do as follows. These changes can also be made in Settings.
  • Page 153: Saving A Location As An Address Book Entry

    3.5 Saving a location as an Address Book entry You can add any location to the Address Book, the list of frequently used destinations. Planning a route to one of these destinations was described earlier. Select a destination as described before. It can be an address, a Place, any location on the map, a previously used destination from History, a coordinate or a location where a photo was taken.
  • Page 154: Saving A Location As An Alert Point

    3.6 Saving a location as an alert point You can save any map location as an alert point (for example a speed camera or a railway crossing). Browse the map and select a location. The red Cursor appears there. Scroll down the list and tap On the newly opened screen, select the type of the alert point, the direction from which you expect the alert, and (if applicable) the speed limit for this alert point.
  • Page 155: Editing An Alert Point

    3.7 Editing an alert point You can edit a previously saved or uploaded alert point (for example a speed camera or a railway crossing). Browse the map and select the alert point to edit. The red circle appears around the alert point.
  • Page 156: Watching The Simulation Of The Route

    3.8 Watching the simulation of the route You can run a simulated navigation that demonstrates the active route. Do as follows: In the Navigation menu, tap . The simulation starts from the starting point of the route, and using a realistic speed, it leads you through the whole recommended route. (optional) You have the following controls during the simulation: : Jump to the next route event (manoeuvre).
  • Page 157 to stop the simulation.
  • Page 158: Off-Road Navigation

    4 Off-road navigation When first started, Alpine unit calculates routes using the road network of the high quality vector maps provided with the product. You can switch the application to off-road mode in Navigation settings in one of the following...
  • Page 159: Reference Guide

    5 Reference Guide On the following pages you will find the description of the different concepts and menu screens of the software. 5.1 Concepts 5.1.1 Smart Zoom Smart Zoom provides much more than just a usual automatic zoom feature: While following a route: when approaching a turn, it will zoom in and raise the view angle to let you easily recognise your manoeuvre at the next junction.
  • Page 160 Roads are used only if access for cars is allowed. Private roads and resident-only roads are used only if they are inevitable to reach the destination. Walkways are excluded from routes. All manoeuvres are available in intersections. Directional constraints are taken into account the way that opposite direction is allowed with a low speed.
  • Page 161: Green Routing

    5.1.3 Green routing Route calculation is not only about finding the quickest or shortest route. For some of the vehicle types, you can also check the fuel consumption and CO emission when planning a route, and you can create cost effective routes with less effect on the environment. In Route settings, you can edit the parameters of the selected vehicle.
  • Page 162: Traffic Information In Route Planning

    You can also choose to see the speed limit sign on the map all the time. 5.1.5 Traffic information in route planning The recommended route is not always the same between two points. Offline statistical traffic information (historical speed information or traffic patterns) can be taken into account in the route calculation based on the time of day and the day of week whenever suitable data exists.
  • Page 163 to open the list of traffic even categories : In the first column you can see the number of traffic events on your route. The second column contains the full count of traffic events in the categories. Tap any of the even types to open the list of traffic events or tap the first line to show all events: Now tap any of the list items to see its details, and to display the affected road segment in its full length on the map:...
  • Page 164: Information Menu

    5.2 Information menu The Information menu provides you with various options and additional applications. In the Navigation menu, tap Button Description Tap this button to get information about the current location and to find nearby help. Tap this button to open the GPS Information screen with satellite position and signal strength information.
  • Page 165: Settings Menu

    The Fuel consumption monitor helps you keep track of the consumption of your car even if you do not use navigation for all your journeys. Set the initial odometer value and then record the distance taken and fuel filled in whenever you fill your car. You can also set reminders for regular car maintenance.
  • Page 166: Sound And Warnings

    For details, see page 7. Delete all saved data and reset all settings to their factory defaults. Visit alpine.naviextras.com to get additional content, such as new maps or 3D landmarks and useful applications. The About section provides you with product information. Read the Software and Database End User License Agreement, or check the map and other contents of the application.
  • Page 167 Tap this button to adjust the enhanced TTS features. The following settings are available: You can set the feature to read out traffic messages. Whenever a route is calculated, the software can read out the quick summary of the route. When you cross country borders, the application can read out the information about the country you have just entered.
  • Page 168: Customise Quick Menu

    You can control the volume of the following sound types: Button Description These controls affect the volume of the guidance sounds (verbal instructions). Turn off the attention tone preceding verbal instructions or adjust its volume. These controls affect the volume of the alert sounds (beeps). Key sounds provide audible confirmation of tapping the touch screen.
  • Page 169: Route Settings

    This setting determines how your software uses the received real-time traffic information in route calculation. When calculating a new route, or when recalculation becomes necessary based on the received Traffic events, your software avoids traffic events if it makes sense. You can also set the minimum delay that triggers route recalculation, and you can instruct the application if you want to confirm every recalculation.
  • Page 170 The software includes toll roads (pay roads where there is a per-use charge) in the routes by default. If you disable toll roads, your software plans the best toll-free route. The software includes ferries in a planned route by default. However, a map does not necessarily contain information about the accessibility of temporary ferries.
  • Page 171 Set the maximum speed you travel with the vehicle. Vehicle types: When creating a new vehicle profile, select one of the below vehicle types. Manoeuvre restrictions and directional constraints are taken into account when planning a route. Roads are used only if access for cars is allowed. Private roads and resident-only roads are used only they are inevitable to reach the destination.
  • Page 172: Map Settings

    Route Planning Method types: Button Description Gives a quick route if you can travel at or near the speed limit on all roads. Usually the best selection for fast and normal cars. Gives a short route to minimise the distance to travel. It can be practical for slow vehicles.
  • Page 173: Visual Guidance Settings

    Switch between daytime and night colour modes or let the software switch between the two modes automatically a few minutes before sunrise and a few minutes after sunset. Select the colour scheme used in daytime mode. Select the colour scheme used in night mode. Replace the default position marker to one of the 3D vehicle models.
  • Page 174 You may need a petrol station or a restaurant during your journey. This feature displays a new button on the map when you are driving on motorways. Tap this button to open a panel with the details of the next few exits or service stations. Tap any of them to display it on the map and add it as a waypoint to your route if needed.
  • Page 175: Regional Settings

    Parking at the destination may not be easy in city areas. As you approach the destination, the software can offer parking category Places near your destination. Tap the "P" button to open a top-down map with the destination and the offered parking Places. Select one and modify the route accordingly.
  • Page 176: Trip Monitor Settings

    5.3.8 Trip monitor settings Trip logs contain useful information about your trips. Trip logs can be saved manually when you reach your destination or you can turn on the automatic saving here. You can access these logs in the Trip monitor. Trip monitor is available from the More menu. This is not a button.
  • Page 177: Glossary

    6 Glossary 2D/3D GPS reception The GPS receiver uses satellite signals to calculate its (your) position and needs at least four signals to give a three-dimensional position, including elevation. Because the satellites are moving and because objects can block the signals, your GPS device might not receive four signals.
  • Page 178 Route A sequence of route events, i.e. manoeuvres (for example, turns and roundabouts) to reach the destination. The route contains one start point and one or more destinations. The start point is the current (or last known) position by default. If you need to see a future route, the start point can be replaced with any other given point.
  • Page 179: Copyright Note

    Alpine Electronics, Inc. © 2015 – Alpine Electronics, Inc. All rights reserved. © 2015 – NNG Kft. All rights reserved. © 2015 HERE. All rights reserved. See...
  • Page 180 About the Rules of Bluetooth Electromagnetic Radiation Regulation Country Rules of Electromagnetic Radiation Regulation Thailand This telecommunication equipment conforms to NTC technical requirement.

This manual is also suitable for:

Ine-w960e

Table of Contents

Save PDF