Table of Contents
Advertisement
I
AUDIONISUAL SECTION
IN-DASH GPS NAVIGATION RECEIVER
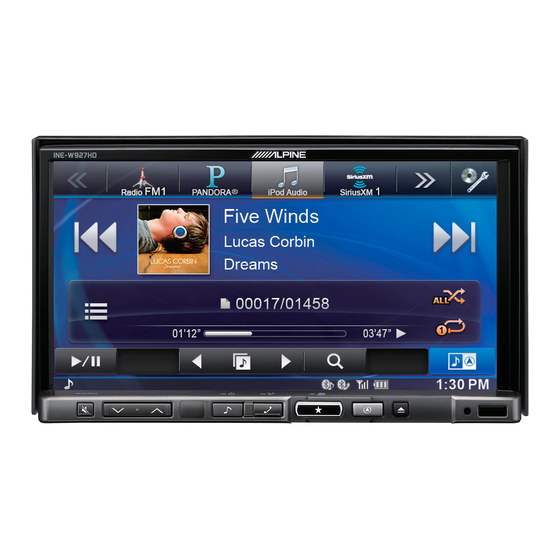
INE-W927HD
~i~~d
c
iPhone
0
Bluetooth®
works with
PANDORA
internet radio
H?}Radio·
This HD Radio receiver enables:
Pso) HD2/HD3) Digital
Sound)
iTunes-Tagging) Artist Experience)
DVD
USB
PlAYBACK
IIJ~gHtv
DIVX_ MP3 AAC
QUICK REFERENCE GUIDE
GUIDE DE REFERENCE RAPIDE
GUfA DE REFERENCIA RAPIDA
vIDE 0
TM
Please register your product at www.alpine-usa.com/registration for a chance to win prizes.
Enregistrez-vous sur www.alpine-usa.com/registration et tentez de rem porter des prix.
Registre su producto en Ia direcci6n www.alpine-usa.com/registration para optar a excelentes
premios.
•
•
II
Advertisement
Chapters
Table of Contents

Related Manuals for Alpine INE-W927HD


Summary of Contents for Alpine INE-W927HD
- Page 1 GUIDE DE REFERENCE RAPIDE GUfA DE REFERENCIA RAPIDA Please register your product at www.alpine-usa.com/registration for a chance to win prizes. Enregistrez-vous sur www.alpine-usa.com/registration et tentez de rem porter des prix. Registre su producto en Ia direcci6n www.alpine-usa.com/registration para optar a excelentes...
- Page 4 manual Touch operation, Location of Controls, Turning Power On or Off Owner's Getting Started Touch operation You can operate the system by using the touch panel on the screen. • Common onscreen buttons EJI: Returns to the previous screen. Depending on the function, this button may cancel the operations performed on the screen.
- Page 7 Owner's manual User Registration User Registration You can register up to two users. Configure the User 1 and User 2 settings for each user. Press the* (My Favorites) button. Touch [Search]. The My Favorites screen is displayed. Touch [Start]. My FaY<Uites Old you know this IJ'1It supporis...
- Page 9 Owner's manual DVD Operation When you touch the DVD playback screen, the DVD operation screen is displayed. The following is an example of the DVD-VIDEO operation screen. Finds the beginning of the Finds the beginning of current chapter/Finds a next chapter/Fast-forwards previous chapter within when touched for at least one second after playback...
- Page 10 Owner's manual iPod/i Phone (Optional) iPod/iPhone Operation (Optional) An iPod/iPhone can be connected to this unit by using the connection kit. You can connect a video-capable iPod to enjoy not only Music but also Video files. Audio mode ..- - - - - - - iPod/ iPhone information Artwork display - - - - - - - - - - - - - .
- Page 16 Connections 2/2 REMOTE OUT - - To remote input lead (Brown) REMOTE IN - - To remote output lead (Brown) SPEED SENSOR - - To the vehicle speed pause line (Green/White) CAMERAl - - To Front/Rear camera CAMERA2 - - To Rear/Other camera CAMERASW - - Notused - - T o steering remote control interface box...
- Page 17 Owner's manual Specifications Specifications MONITOR SECTION PICKUP Screen Size 7.0" DVD: 666 nm Wave length LCD Type Transparenttype TN LCD CD: 785 nm Operation System TFT active matrix Laser power CLASS II Number of Picture Elements 1,152,000 pes. GPSSECTION (800 480) GPS Reception frequency 1575.42 ±...
- Page 20 ALPINE ELECTRONICS OF AMERICA, INC. AND ALPINE OF CANADA INC. ("Alpine"), are dedicated to quality craftsmanship and are pleased to offer this Warranty. We suggest that you read it thoroughly. Should you have any questions, please contact your Dealer or contact Alpine at one of the telephone numbers listed below.
- Page 21 ALPINE ELECTRONIQUE DE L:AMERIQUE, INC. et ALPINE ELECTRONIQUE DU CANADA, INC. (Alpine) sont heureuses de vous offrir cette garantie. Nous vous suggerons dele lire attentivement et en entier. Si vous avez Ia moindre question, veuillez contacter l'un de nos concessionnaires ou appeler directement Alpine aux numeros listes ci-dessous.
- Page 22 80807 Munchen, Germany Phone 089-32 42 640 Take a moment to protect your purchase by registering your product now at www.alpine-usa. com/registration. You will also be updated on product information, special promotions, Alpine news and may be eligible to win prizes.
- Page 23 NAVIGATION SECTION IN-DASH GPS NAVIGATION RECEIVER INE-W927HD QUICK REFERENCE GUIDE GUIDE DE REFERENCE RAPIDE GUfA DE REFERENCIA RAPIDA...
- Page 25 Go to a Destination The following example briefly describes how to input a destination. Touch [Go to] from Navigation Menu. Select a destination input method. ([Find Address] is selected.) Type in the city name or postcode until displayed in the selection list. Select the matching entry.
- Page 26 Enter a house number. Touch [Done] to access the confirmation screen. Touch [Select] to initialize route calculation and start navigation.
- Page 27 Colombo 8, 20090 Trezza no Phone 1-800-ALPINE-1 (1-800-257-4631) Sui Naviglio (MI), Italy 1-888-NAV-HELP (1-888-628-4357) Phone 02-484781 ALPINE ELECTRONICS OF AUSTRALIA PTY. LTD. ALPINE ELECTRONICS DE ESPANA, S.A. 161-165 Princes Highway, Portal de Gamarra 36, Pabell6n, 32 Hallam Victoria 3803, Australia...
- Page 28 To customers/A l'attention de l'utilisateur/ .ff#MLPINE~ InformaciOn para los clientes English • NAVIGATION SECTION <The User Manual and Quick Reference Guide has revision as shown here.> The Find Address screen display has been corrected. Incorrect Correct • NAVIGATION SECTION <Le Manuel d'utilisation et le Guide de reference rapide a subi les modifications suivantes.> L' affichage de l' ecran Rechercher l' Adresse est corrige.
- Page 29 You will be informed of product and software updates (if applicable), special promotions, news about Alpine, and entered for a chance to win prizes. Merci d’avoir acheté ce produit Alpine. Nous vous invitons à consacrer un moment à la protection de votre achat en enregistrant votre produit dès maintenant à l’adresse suivante : www.alpine-usa.com/registration.
- Page 30 ALPINE ELECTRONICS OF AMERICA, INC. ALPINE ITALIA S.p.A. Phone 01-48638989 19145 Gramercy Place, Torrance, Viale C. Colombo 8, 20090 Trezzano ALPINE ELECTRONICS OF AUSTRALIA PTY. LTD. California 90501, U.S.A. Sul Naviglio (MI), Italy Phone 1-800-ALPINE-1 (1-800-257-4631) 161-165 Princes Highway, Hallam...
-
Page 31: Table Of Contents
ENGLISH Contents Settings When Switching Users ......24 How to Input Characters and Numbers (Keypad) ............24 Operating Instructions Top banner and Bottom banner Fade Out Setting ............25 Switching Sources ...........25 PRECAUTIONS Screen Off Function ........25 Switching the Dual Screen Display ....25 IMPORTANT INFORMATION ....... - Page 32 Adjusting Picture Quality ......43 Files ............. 35 Saving and Calling the Adjusted Picture Quality ............. 43 Playing Still Frames (Pausing) ....... 36 About INE-W927HD ........43 Forward frame-by-frame Playback ....36 Displaying the Product Information .... 43 Slow Motion Playback ........36 ®...
- Page 33 Setting the Favorite Sports Team Alerts ..52 Hands-Free Phone Control Setting the Parental Lock ......53 Connecting a BLUETOOTH Device ....61 Signal Strength Information ......53 Disconnecting the BLUETOOTH AUX Setting ........... 53 Connection ..........61 Setting the AUX Mode ........ 53 Changing the connecting BLUETOOTH Setting the Primary AUX Name (AUX Setup) ..........
- Page 34 Operating a TV ..........69 Searching for a Desired Song ......79 Change to the TV Mode ......69 File/Folder Name Search ......79 About the TV Operation Screen ....69 Tag Search ........... 79 Direct Up/Down Function ......80 Camera Operation (Optional) Select the Desired Folder (Folder up/down) ...
- Page 35 Installation and Connections Warning ..........97 Caution ........... 97 Precautions ..........97 Installation ............98 Connections ..........101 System Example ........... 103 LIMITED WARRANTY...
-
Page 36: Operating Instructions
They contain instructions on how to use this to reach your destination. The system does not reflect road product in a safe and effective manner. Alpine cannot be closures or construction, road characteristics (i.e. type of road responsible for problems resulting from failure to observe the surface, slope or grade, weight or height restrictions, etc.), traffic... -
Page 37: Warning
KEEP SMALL OBJECTS SUCH AS SCREWS OUT OF THE • This software is designed for use exclusively in the REACH OF CHILDREN. INE-W927HD. It cannot and may not be used in conjunction Swallowing them may result in serious injury. If swallowed, with other hardware. -
Page 38: Notice
Installation Location Damaged Disc Make sure the INE-W927HD will not be installed in a location Do not attempt to play cracked, warped, or damaged discs. Playing subjected to: a bad disc could severely damage the playback mechanism. -
Page 39: Discs Playable On This Unit
This will restrict operation of these functions to times when the vehicle is parked. This ensures the focus of the driver’s attention will be on the road and not on the INE-W927HD. This has been done for the safety of the driver and passengers. - Page 40 Discs that cannot be played Tips for making your own discs ® DVD-ROMs, DVD-RAMs, CD-ROMs (excluding MP3/WMA/ The INE-W927HD plays DVD Video, DivX , Audio CD and has a AAC files), photo CDs, etc. built in MP3/WMA/AAC decoder. The following information is designed to help you create your own...
- Page 41 • This unit is compatible with discs recorded in the standard DVD-Video format. Alpine accepts no responsibility for lost data, etc., even if data, etc., • Note that discs not finalized (processed to enable to play on is lost while using this product.
- Page 42 • The BLUETOOTH word mark and logos are registered trademarks owned by the Bluetooth SIG, Inc. and any use of such marks by Alpine Electronics, Inc. is under license. • “MPEG Layer-3 audio coding technology licensed from Fraunhofer IIS and Thomson.”...
-
Page 43: Features
Features Auto User Setting Change With the INE-W927HD, you can register up to two users. Each user can configure their own preferred settings. By registering their respective BLUETOOTH devices to the unit, each user can be identified automatically. USER1 USER2... -
Page 44: Easy Sound Setting By Car Type (I-Personalize)
Easy Sound Setting by Car Type (i-Personalize) Car Specific Sound Setup This function lets you set and reproduce the best audio environment for the environment in your car. On the unit, select and set the car category/steering wheel position/speaker type and size/seat material. For details of how to configure the settings, refer to “Car Specific Sound Setup”... -
Page 45: Dual Screen Display Position
Dual Screen Display Position You can switch the right and left screens using drag & drop. To switch the screens, touch the middle of the screen you want to move and drag it to the desired display position. The screens will switch positions when you remove your finger. -
Page 46: Getting Started
Press and hold MUTE for at least 3 seconds to activate the • The unit can be turned on by pressing any button. “Setting the Balance/Fader/Subwoofer” mode. • The INE-W927HD is a precision device. Careful handling of the unit (UP/DOWN)button should provide you with years of trouble-free operation. -
Page 47: Turning The System On
Insert the disc with the label side facing up. Turning the System On Disc Slot With the Alpine system, when the ignition key is turned to ACC or ON, the opening screen will be automatically displayed. SD memory card slot* When the system is used for the first time, the language selection menu is displayed. -
Page 48: Adjusting The Volume
Adjusting the Volume User Registration Adjust the volume by pressing Volume decreases/increases continuously by pressing and holding You can register up to two users. Configure the User 1 and User 2 Volume: 0 - 35 settings for each user. Press the (My Favorites) button. -
Page 49: Setting My Favorites
Touch [Search]. Adding My Favorites You can register up to eight My Favorites for each user. You cannot, however, register the same items (categories). Touch [ The addition items (categories) are displayed. Touch the desired addition item (category). The system starts searching for BLUETOOTH devices. When the search is completed, the BLUETOOTH Device List is displayed. -
Page 50: Editing My Favorites
Changing the User Name Editing My Favorites Touch the [Name] of the user you want to change. You can delete names in My Favorites or change the layout. The Input User Name screen (Keypad) is displayed. Touch [ Input the name and touch [OK]. “... -
Page 51: Displaying The Camera Image
5 letters maximum) Header (fixed) • Save the setting data in the root folder. • For details about procedures of download, see ALPINE’s web site. Touch [Downloaded Sound Settings]. Setting data files are displayed in a list with a maximum of 5 items. -
Page 52: Settings When Switching Users
Settings When Switching Users How to Input Characters and Numbers (Keypad) The functions/settings that are affected when switching users are as shown below. Character input is required for user registration, place searches, etc. The displayed screens and procedures may vary slightly depending on Item Ref. -
Page 53: Top Banner And Bottom Banner Fade Out Setting
Switching Sources Using the Top banner Top banner and Bottom banner Fade Out Touch the source button for the Top banner at the top of the Audio/ Setting Visual Playback screen and select the desired source. Source button When “Top/Bottom Banner Fade Out” is set to “ON,” the Top banner and Bottom banner on the Audio/Visual Playback screen fade out after 5 Top banner seconds if no operation is performed. -
Page 54: Touch Operation
Full Screen About the Indicator Display The Indicator Bar at the bottom of the screen displays various types of information, like the current time. Touch Operation You can operate the system by using the touch panel on the screen. The display will differ depending on the source. For •... -
Page 55: Radio/Hd Radio™/Rbds
Listening to the Radio Press the (SOURCE) button. INE-W927HD can receive HD Radio signals based on digital radio broadcast standards in addition to analog radio broadcasts using RBDS. Touch [Radio] of Top banner. HD Radio signals are broadcast in the service areas of the current AM/... -
Page 56: Presetting Stations Manually
Presetting Stations Manually Forced Analog Mode Press the Digital/Analog button to receive analog broadcasts only. Tune in a desired radio station you wish to store in Touch [Digital/Analog]. the preset memory by manual or automatic seek tuning. • If digital broadcast is received, this operation switches reception to analog mode. -
Page 57: Displaying Radio Text
• During tagging, the iPod/iPhone takes priority to save the tag information. If no iPod/iPhone is connected, the tag information is saved to this unit. Displaying Radio Text • When the memory of iPod/iPhone is full, “iPod Memory Full, Tag Count X”... -
Page 58: Cd/Mp3/Wma/Aac
] again or touch [ ] in the middle of the screen to start playback. • The INE-W927HD can play back MP3/WMA/AAC files saved to CD or DVD. Use a format compliant with this unit. For further information about playing or storing MP3/WMA/AAC files, refer to pages 31 and 32 before using the unit. -
Page 59: Selecting Folders (Concerning Mp3/Wma/Aac)
Selecting Folders (Concerning MP3/ About MP3/WMA/AAC WMA/AAC) CAUTION Touch [ ] or [ ] of Bottom banner to select the Except for private use, duplicating audio data (including MP3/ folder. WMA/AAC data) or distributing, transferring, or copying it, whether for free or for a fee, without permission of the copyright holder is strictly prohibited by the Copyright Act and by Searching from CD Text international treaty. - Page 60 Supported playback sampling rates and bit rates Order of files Files are played back in the order that the writing software writes them to the disc. Therefore, the playback order may not be Sampling rates: 48 kHz, 44.1 kHz, 32 kHz, 24 kHz, 22.05 kHz, what’s expected.
-
Page 61: Dvd
The DVD operation screen display Touch the screen while the DVD playback screen is displayed. The DVD operation screen is displayed. Display example for DVD Video main screen • The operation screen changes to the visual screen in the DVD mode for 5 seconds after an operation has been performed. -
Page 62: Playing A Disc
The menu operation mode will be displayed. stopped and the emergency brake is applied. If the INE-W927HD is not installed correctly, the driver will be able to watch the DVD/TV/Video while driving the vehicle and may be distracted from looking ahead causing an accident. -
Page 63: Numeric Keypad Input Operations
Numeric Keypad Input Operations Stopping Playback Touch [10KEY] of Bottom banner. Touch and hold [ ] for at least 2 seconds during The numeric keypad input mode screen appears playback. If [10KEY] is not displayed, touch [<<] in the bottom banner “... -
Page 64: Playing Still Frames (Pausing)
Playing Still Frames (Pausing) Repeat Playback Use this function to play the disc’s titles, chapters or tracks, etc., repeatedly. During playback, Touch [ / ] of Bottom banner. Touch [ ] of Bottom banner. The repeat mode switches every time the button is touched. Touch [ / ] or [ ] in the middle of the screen to... -
Page 65: Searching Directly By Chapter Number
Searching Directly by Chapter Number Switching the Angle On DVDs in which scenes have been filmed from multiple angles, the angle can be switched during playback. Use this function to easily move to the beginnings of the chapters on the Touch [ANGLE] of Bottom banner. -
Page 66: About Divx
® About DivX ® DivX is a codec (software) to compress moving images while maintaining image quality using a highly advanced compression ratio and operating speed. ® • Official DivX Certified product ® ABOUT DIVX VIDEO: DivX is a digital video format created by DivX, LLC, a subsidiary of Rovi Corporation. -
Page 67: Setup
Touch [General]. Setup Setup Operation Touch the [SETUP] icon on the Audio/Visual Playback screen to display the Setup main screen. [SETUP] icon The General Setup screen appears. Select the desired item. General Setup Setting items: Language / Remote Sensor / Top/Bottom Banner Fade Out / Screen/LED Customize / Visual / About / General Setup Operation Installation... -
Page 68: Format Settings
Format Settings The character code to be used for tag text information displayed on the Setting Top banner and Bottom banner screen can be selected from 7 character codes. Display Setting item: Format Sel. Setting contents: EU1 / EU2 (Initial setting) / RUS / CHI / THA / [Top/Bottom Banner Fade Out] is selected on the General setup menu in step 3. -
Page 69: Adjusting The Dimmer Of Button Lighting At Night
Adjusting the Dimmer of Button Lighting at Visual Setting Night [Visual] is selected on the General setup menu in step 3. Refer to You can adjust the brightness of the button lighting at night with the “General Setup Operation” (page 39). dimmer. -
Page 70: Switching Display Modes
Switching Display Modes Adjusting the Live Contrast Setting item: Display Mode This function automatically adjusts the areas on the screen that are too Setting contents: WIDE (Initial setting) / CINEMA / NORMAL bright or too dark and corrects them to natural brightness. Setting item: Live Contrast Setting contents: OFF (Initial setting) / LOW / HIGH Selecting the Visual EQ Mode (Factory’s... -
Page 71: Adjusting Image Contrast
Setting item: Installation The Installation check screen is displayed. You can view the version information of this product. Make note of this information and refer to it whenever you contact Alpine Tech Support or an Alpine-authorized dealer. Setting item: Version Info Contents: Serial No. -
Page 72: Sound Setup
Touch [ ] or [ ] etc., to change its setting. Sound Setup • When the pop-up window for setup is displayed, touch [ ] to close the window after setting. Touch [ ] to return to the previous screen. Sound Setup Operation •... -
Page 73: Adjusting The Subwoofer Level
MX DVD (Movie) Adjusting the Subwoofer Level The dialog portion of the video is reproduced more clearly. You can set the Subwoofer level when a Subwoofer is connected. (DVD Music) This disc contains a large quantity of data such as music clip. Setting item: SubW. -
Page 74: Adjusting The Parametric Equalizer Curve (Parametric Eq)
Setting the Bandwidth Adjusting the Parametric Equalizer Touch [ ] or [ ] of “Q Adjust” to select the bandwidth. Curve (Parametric EQ) Setting contents: 1 (Initial setting) / 2 / 3 To adjust another band, repeat step 1, and adjust all [Parametric EQ] is selected on the Sound setup menu in step 3. -
Page 75: Adjusting The Crossover Settings (X-Over)
To store the adjusted setting value, touch and hold To store the adjusted setting value, touch and hold [Preset1], [Preset2], or [Preset3] for at least 2 [Preset1], [Preset2], or [Preset3] for at least 2 seconds. seconds. • Touch [Flat] to set all values to 0.0. •... -
Page 76: About Time Correction
These values are the time correction values for the different About Time Correction speakers. Setting these values to make each sound reach the listening position at the same time as the sound of other speakers. Time Correction Value List The distance between the listener and the speakers in a car vary widely due to the complex speaker placement. -
Page 77: About The Crossover
Adjusting to a frequency range outside that recommended may cause damage to the speakers. For the recommended crossover frequencies of Alpine speakers, refer to the respective Owner’s Manual. We are not responsible for damage or malfunction of speakers caused... -
Page 78: Source Layout Setting
Setting of the DVD Menu Language Set the language used for the menus (title menu, etc.). Source Layout Setting Setting item: DVD Menu Language Setting contents: Auto (Initial setting) / EN / JP / DE / ES / FR / IT / [Source Layout] is selected on the Source setup menu in step 3. -
Page 79: Setting The Rating Level (Parental Lock)
Setting the Rating Level (Parental Lock) Setting the TV Screen Mode This function can help limit the viewing of movies to children of Use the procedure described below to modify the output screen appropriate age levels only. according to the type of TV monitor (rear monitor) being used. If the rear monitor is not connected, the screen setting is 16:9. -
Page 80: Sirius Xm Setting
Deleting all stored Alert Sirius XM Setting The operation will delete all stored songs, artists and teams alert information. [SiriusXM] is selected on the Source setup menu in step 3. Refer to Touch [Delete All]. “Source Setup Operation” (page 49). A message is displayed. -
Page 81: Setting The Parental Lock
Changing the Lock Passcode Setting the Parental Lock Touch [Edit Code]. You can lock out channels with passcode protection. Channels that are The numeric keypad screen is displayed. locked cannot be accessed without entering the passcode. You can unlock a channel or change the passcode using this menu option. Use the keypad to enter the current (old) 4-digit passcode. -
Page 82: Setting The Primary Aux Name (Aux Setup)
Setting the Primary AUX Name (AUX Setting the AUX3 Sel. (Switching the Visual Setup) Input Signal System) When AUX In is set to “ON”, this setting is available. After setting to “AUX3” in “Setting the AUX3 In Sel.,” this setting can be carried out. -
Page 83: Bluetooth Setup
BLUETOOTH Setup BLUETOOTH Setting [BLUETOOTH] is selected on the BLUETOOTH setup menu in step 3. Refer to “BLUETOOTH Setup Operation” (page 55). BLUETOOTH Setup Operation Setting item: BLUETOOTH Setting contents: Off / On (Initial setting) Off: BLUETOOTH function is not used. To display the BLUETOOTH Setup Menu screen: Select when you would like to pair your BLUETOOTH Your vehicle must be parked with the ignition key in the ACC or... -
Page 84: Automatic Connection Setting
Setting the BLUETOOTH Device Changing the Character Code of the Select one of 5 paired BLUETOOTH compatible devices that you Phone Book previously registered. Touch [Set BLUETOOTH Device]. [Default Phonebook Encoding] is selected on the BLUETOOTH setup menu in step 3. Refer to “BLUETOOTH Setup Operation” (page 55). Touch [Audio] or [Hands-free] of the device you You can select the character code that is used when transferring the want to connect from the Paired Device list. -
Page 85: Setting The Time For Automatic Reception Of A Call
Setting the Time for Automatic Adjusting the Caller Volume Reception of a Call [Caller Volume] is selected on the BLUETOOTH setup menu in step 3. Refer to “BLUETOOTH Setup Operation” (page 55). [Auto Answer Time] is selected on the BLUETOOTH setup menu in You can adjust the receive volume, during the call. -
Page 86: Camera Setup
Camera Setup Direct Camera Setting [Direct Camera] is selected on the Camera setup menu in step 3. Refer to “Camera Setup Operation” (page 58). Camera Setup Operation Setting the Camera Input With an optional camera connected, its video is output to the monitor. When the camera is connected, set this item. -
Page 87: Aux Camera Setting
Display example for front camera mode AUX Camera Setting [AUX Camera] is selected on the Camera setup menu in step 3. Refer to “Camera Setup Operation” (page 58). Setting the Camera Input Setting item: Camera Select / Camera Signal* / Guide Adjustment* Setting contents: Off / Rear* (Initial setting) / OTHER... -
Page 88: Camera Interrupt Setting (Power Off Mode)
Adjusting guides simultaneously (for Rear camera only) Touch [Link]. The 3 vertical guides of the currently-selected guide link together, allowing them to be adjusted simultaneously. Turning guide display ON/OFF Turning the selected guide off. Touch [ON/OFF]. The currently selected guide will turn off. To turn the guide on, touch [ON/OFF] again. -
Page 89: Bluetooth Operation
About BLUETOOTH and then connect that BLUETOOTH compatible device to this unit. The device name of this unit is “ALPINE NAVI” and the initial BLUETOOTH is a wireless technology allowing communication number of the passcode is “0000.” Also refer to the Owner’s Manual between a mobile device or personal computer over short distances. -
Page 90: Changing The Connecting Bluetooth Device
Changing the connecting BLUETOOTH Calling Device Use the Phone menu screen to make a phone call. If multiple BLUETOOTH devices are registered in this device, you can Using Short Cut Dialing to Make a Call change the connection among the registered devices. You can assign up to 4 phone numbers for one-touch dialing to make a Press the (PHONE) button. -
Page 91: Dialing A Number In The Phone Book
Dialing a Number in the Phone Book Adjusting the Speech Volume You can use the phone book of the mobile phone to make a phone call. You can adjust the transmit volume and receive volume respectively. Before using, you need to transfer the phone book from the mobile Touch [ ] or [ ] for “Vol.”... -
Page 92: Adding The Phone Book
• You can store up to 1,000 phone numbers in the phone book for USER1 and USER2, respectively. • You can store up to 5 phone numbers by one person’s name. Assigning as a Short Cut Dialing Number Adding the Phone Book Assigning from Call History (PHONE) button. -
Page 93: Call Waiting Function
Call Waiting Function BLUETOOTH Audio If a call comes in from another phone during a call, a notice is displayed If a BLUETOOTH compatible mobile phone, portable player, etc. is on the screen. This function can only be used if the connected mobile connected by wireless, you can play back a song (operation is phone has a call waiting function service included. -
Page 94: Repeat Play
The repeat mode switches every time the button is touched. Operating Auxiliary Devices (Optional) (FILE) To operate devices connected to the AUX terminals of INE-W927HD, (GROUP) follow the procedure described below. • Set AUX In to “On.” Refer to “Setting the AUX Mode” (page 53). -
Page 95: Operating An External Dvd Player
AUX Operation Screen Display During Video File About the DVD Operation Screen Playback Touch the screen. When the external DVD player playback screen is displayed, you can The AUX operation screen is displayed. touch the screen to display the operation screen. For details on how to operate, refer to the Owner’s Manual of the connected DVD player. -
Page 96: Operating An External Dvd Changer
Menu operation mode screen display example About the DVD Changer Operation Screen When the External DVD changer playback screen is displayed, you can touch the screen to display the operation screen. For details on how to operate, refer to the Owner’s Manual of the connected DVD changer. •... -
Page 97: About The Dvb-T Operation Screen
About the DVB-T Operation Screen Operating a TV When you touch the screen in the DVB-T mode, the operation screen is To operate a TV Receiver (TV) (Optional), set “Setting the Primary displayed. For details on how to operate, refer to the Owner’s Manual of AUX Name (AUX Setup)”... -
Page 98: Camera Operation (Optional)
Camera Operation Switching the Image Pattern for the Rear Camera (Optional) If the camera has a view switch function, the Direct Change switch is displayed. When an optional camera is connected, the view video of camera can be Touch the screen when the image from the rear output to the monitor. -
Page 99: About The Rear Camera Guide
Distance guidance mark About the Rear Camera Guide The distance guides represent the ground level distance from the rear bumper. It is difficult to accurately estimate the distance to objects To display the guide, set “Guide Display ON/OFF Setting” (page 70) to above ground level. -
Page 100: Front Camera Operation
Error between the screen and the actual road surface When there is a steep downward slope behind the car (example) In the following conditions, errors are produced between the screen guidance and the actual road surface. (The illustrations represent a case <Screen>... -
Page 101: About The Adjustment Of Guide Display On/Off Setting And Adjustment Of Caution Display Location
Touch [Panorama], [Corner] or [Top]. The image pattern changes. [Panorama]: Panorama View [Corner]: Corner View [Top]: Ground View • For detailed information about image patterns, see the camera Owner's Manual. About the Adjustment of Guide Display ON/OFF Setting and Adjustment of Caution Display Location As with the rear camera, the front camera guide display ON/OFF setting and Caution display location can be adjusted. -
Page 102: Siriusxm Satellite Radio (Optional)
SiriusXM Satellite Tuning Channels by Category Channels are grouped into categories based on the type of content heard Radio (Optional) on the channels. Touch [Category] on the SiriusXM main screen to activate the category browsing mode. SiriusXM Tuner operation: When an optional SiriusXM Tuner is connected to this unit, The channels within the category of the current channel are the following operations may be performed. -
Page 103: Checking The Siriusxm Radio Id Number
Checking the SiriusXM Radio ID Number Search Function To subscribe to the SiriusXM Satellite Radio service, it is necessary to Touch [ (Search)] of Bottom banner. locate and identify the Radio ID of your SiriusXM Tuner. The Radio ID Search list screen is displayed. contains 8 characters and can be found on the bottom of your SiriusXM Tuner or can be displayed on when selecting Channel 0 by following the Touch the desired category. -
Page 104: Selecting The Channel Directly
Selecting the Channel Directly Receiving and Tuning to an Alert You can directly select the channel number on the display of the Whenever a stored sports team, artist, or song is playing on another numeric keypad. channel, an interruption ALERT appears on the unit display. To tune to the game, artist or song identified by the alert, follow the steps below: Touch [Direct Channel]. -
Page 105: Parental Lock Function
• When the memory of iPod/iPhone is full, “iPod memory full, Tag Parental Lock Function count X” is displayed. The tag information will be stored to the unit. • If the tagging operation is interrupted by a hands-free phone call, the tagging operation will be canceled and the unit will display “Cannot This function can help restrict the listening of channels to children of Tag”. -
Page 106: Usb Memory (Optional)
USB Memory Playback (Optional) Press the (SOURCE) button. Touch [USB] of Top banner. The USB mode is activated and the display changes to the You can play back music files (MP3/WMA/AAC) and video files USB screen. ® (DivX ) stored in a USB memory device on the internal player of this system. -
Page 107: Random Play (M.i.x.)
The search mode screen appears. Searching for a Desired Song Touch [Artists]. The Artists search screen is displayed. INE-W927HD can carry out 2 kinds of searches. Select the desired artist. File/Folder Name Search To Play Back the Artist Directly 1 Touch [ ] of the artist’s name. -
Page 108: Direct Up/Down Function
To Search for a Song in the Album of the Artist 1 Touch the desired artist’s name. All albums of the selected artist are displayed. Touch the desired album’s name. All songs of the selected album are displayed. Touch the desired song’s name. The selected song is played back. -
Page 109: Ipod/Iphone (Optional)
461iV (sold separately). You can connect a video-capable iPod to enjoy video as well as music. When the INE-W927HD is connected by the above cable, the controls on the iPod are disabled. • Internet or telephone functions, etc., of the iPhone or iPod touch are not controllable from the unit, but these functions can be controlled using the iPhone or iPod touch itself. -
Page 110: Playback
• If a song is playing on the iPod/iPhone when it is connected to the Touch the desired song’s name. INE-W927HD, it will continue playing after the connection. The selected song is played back. • An episode may have several chapters. The chapter can be changed... -
Page 111: Alphabet Skip Function
Alphabet Skip Function Search Position Memory The unit is provided with a alphabet skip function for effective During iPod/iPhone playback, you can quickly move back up the searching. When you use this function in the search mode, you can selected hierarchy, a level at time. quickly search an artist or a song, etc. -
Page 112: Pandora ® Internet Radio (Optional)
“No skips remaining” is Display example for iPhone Pandora Radio screen displayed. • INE-W927HD remembers the source just before turning off the power. Even if you reconnect an iPhone without launching Pandora Application while the power is off, Pandora mode (not iPod mode) is displayed when power is turned back on. -
Page 113: Thumbs" Feedback
• In some situations, creating a new station may not be available. “Unable to create station.” will be displayed. You can display your station list and select stations directly from the INE-W927HD. QuickMix Alphabet Search Touch [... -
Page 114: Bookmarking A Desired Track Or Artist
Bookmarking a Desired Track or Artist The currently playing song or artist can be bookmarked and saved to your Pandora account. During playback, touch [Artwork display]. The type selection telop is displayed. Artwork display Touch [Track] or [Artist]. The current track or artist is bookmarked. “ ”... -
Page 115: Product Software Update
* These functions differ from disc to disc. For details, refer to the disc’s This product use software that can be updated through a USB memory instructions. device. Download the software from the Alpine website and update the product using the USB memory device. Updating this product Check the Alpine website for details on updating. -
Page 116: List Of Language Codes
List of Language Codes (For details, see page 50.) Language Abbre viation Code Language Abbreviation Code Langua g e Abbre viation Code 6565 Af ar 7369 Inter lingue 8278 Kirundi 6566 Abkhazian 7375 Inupiak 8279 Romanian 6570 Afr ikaans 7378 Indonesian 8285 Russian... -
Page 117: List Of Country Codes
List of Country Codes (For details, see page 50.) Abbreviation Code Country Abbreviation Code Country Abbreviation Code Country Andorra 6877 Dominica 7573 Kiribati 6568 6569 United Arab Emirates 6879 Dominican Republic 7577 Comoros 6570 Afghanistan 6890 Algeria 7578 Saint Kitts and Nevis 6571 Antigua and Barbuda 6967... - Page 118 Abbreviation Code Country Abbreviation Code Country Abbreviation Code Country 8069 Peru 8374 Svalbard and Jan Mayen 8487 Taiwan, Province of China 8070 French Polynesia 8375 Slovakia 8490 Tanzania, United Republic of 8071 Papua New Guinea 8376 Sierra Leone 8565 Ukraine 8072 Philippines 8377...
-
Page 119: In Case Of Difficulty
Otherwise, make sure the rest of your system is - Make sure the antenna is fully extended; if broken, replace the properly connected, or then consult your authorized Alpine dealer. antenna with a new one. -
Page 120: If This Message Appears
Please check mobile device. Please inquire details from the service center. • The mobile phone was not connected correctly. - Check the settings for INE-W927HD and the mobile phone • An access error to DVD drive occurred for some reasons. and reconnect. - Page 121 Unable to download phonebook. Video frame rate not supported. ® • Phonebook failed to read due to mobile phone disconnection, • The file being played is a DivX file with an unsupported frame etc. rate. ® - Check the mobile phone connection, and then conduct - Play a DivX file with a supported frame rate.
-
Page 122: Specifications
PICKUP Specifications Wave length DVD: 666 nm CD: 785 nm MONITOR SECTION Laser power CLASS II Screen Size 7.0" LCD Type Transparent type TN LCD GPS SECTION Operation System TFT active matrix GPS Reception frequency 1575.42 ±1 MHz Number of Picture Elements 1,152,000 pcs. (800 × 3 × 480) GPS Reception sensitivity -130 dB max. -
Page 123: End User License Agreement (Microsoft)
INDEPENDENTLY DETERMINED HOW TO USE THE SOFTWARE terms are provided, then the terms of this EULA shall IN THE DEVICE, AND MS HAS RELIED UPON ALPINE TO apply, except that MS, Microsoft Corporation or affiliate CONDUCT SUFFICIENT TESTING TO DETERMINE THAT THE entity providing the Supplemental Component(s) shall be SOFTWARE IS SUITABLE FOR SUCH USE. -
Page 124: End User License Agreement (Navteq)
Should you have any questions concerning this EULA, or if you The warranty on the System shall not extend to an exchange or desire to contact ALPINE for any other reason, please refer to refund due to misspelling, omission of letters, or any other the address provided in the documentation for the DEVICE. -
Page 125: Installation And Connections
When connecting the INE-W927HD to the fuse box, make installations or ground connections. Using such parts could disable sure the fuse for the intended circuit of the INE-W927HD has control of the vehicle and cause fire etc. the appropriate amperage. Failure to do so may result in damage KEEP SMALL OBJECTS SUCH AS SCREWS OUT OF THE to the unit and/or the vehicle. -
Page 126: Installation
Mounting the GPS Antenna inside the vehicle. Installation 1 Clean the mounting location. 2 Put on the GPS Antenna mounting plate. 3 Mount the GPS Antenna. Caution Do not block the unit’s fan or heat sink, thus preventing air circulation. If blocked, heat will accumulate inside GPS Antenna the unit and may cause a fire. - Page 127 • For the screw marked “*2,” use an appropriate screw for the chosen mounting location. Remove the mounting sleeve from the main unit (see Slide the INE-W927HD into the dashboard until it “Removal” on page 99). clicks. This ensures that the unit is properly locked Slide the unit into the mounting sleeve and secure it.
- Page 128 • The diagram and the fuse amperage shown above are in the case when INE-W927HD is used individually. • If the switched power (ignition) lead of the INE-W927HD is connected directly to the positive (+) post of the vehicle’s battery, the INE-W927HD draws some current (several hundred milliamperes) even when its switch is placed in the OFF position, and the battery may be discharged.
-
Page 129: Connections
Connections Antenna REMOTE OUT To remote input lead (Brown) REMOTE IN To remote output lead (Brown) (Green/White) SPEED SENSOR To the vehicle speed pause line CAMERA1 To Front/Rear camera CAMERA2 To Rear/Other camera CAMERA SW TOPVIEW Camera Switch connector* To steering remote control interface Microphone (Included) (Yellow) To Video Output terminal... - Page 130 With this lead properly wired, the video picture Remote Control Input Lead (Brown) automatically switches to the rear camera whenever the car Connect the external Alpine product to the remote control is put into reverse (R). output lead. Power Antenna Lead (Blue)
-
Page 131: System Example
System Example Connection of a USB Memory GPS Antenna (included) USB connector USB extension cable USB Memory (Sold separately) (Included) • Do not leave USB memory, in a vehicle for a long time. Heat and humidity may damage the USB memory. Connection of an iPod/iPhone iPod/iPhone (Sold separately) - Page 132 Connection of an External device To Video Output terminal DVD Player (sold separately) To Audio Output terminal DVE-5207, etc. CAMERA/W. REMOTE Connector iPod VIDEO input connector AUX/PRE OUT Connector To Video Output terminal AUX/PRE OUT cable (Yellow) (Red) DVD Changer (Sold separately) (White) To Audio Output terminal To Video Input terminal...
- Page 133 Connection of an External Amplifier Power Supply Connector AUX/PRE OUT Connector AUX/PRE OUT cable Amplifier 4 ch (Sold separately) (Red) Input (White) Front speaker (Red) Input Rear speaker (White) Amplifier for subwoofer (Sold separately) (Red) Input Subwoofer (White) REMOTE TURN-ON REMOTE ON (Blue/White) (Blue/White)
- Page 134 Connection of cameras (Direct camera and AUX camera) CAMERA/W. REMOTE Connector CAMERA 1 Direct rearview camera (sold separately) HCE-C117D, etc. To Video Output terminal CAMERA 2 Camera with RCA video output (sold separately) Camera cable 1 Direct CAMERA Input Connector 3 CAMERA Input RCA Connector 2 Camera extension cable (Included with direct 4 RCA Extension Cable (sold separately)
- Page 135 Connection of cameras (HCE-C212F + HCE-C210RD or HCE-C200F + HCE-C200R) AUX/PRE OUT Connector AUX/PRE OUT Cable (Yellow) Control Unit To Video Output Terminal (Red) (White) REVERSE Camera Control Lead (Orange/White) (Orange/Black) To plus side of the back lamp signal lead of the car. 1 Video/Audio Input Connectors (AUX INPUT) 2 RCA Extension Cable (sold separately) •...
- Page 136 N’oubliez pas de consacrer un moment à la protection de votre achat en enregistrant votre produit dès maintenant à l’adresse suivante : www.alpine-usa.com/registration. Recuerde que con solo unos pocos pasos podrá proteger su producto, registrándolo a través de la...
-
Page 137: Limited Warranty
LIMITED WARRANTY ALPINE ELECTRONICS OF AMERICA, INC. AND ALPINE OF CANADA INC. (“Alpine”), are dedicated to quality craftsmanship and are pleased to offer this Warranty. We suggest that you read it thoroughly. Should you have any questions, please contact your Dealer or contact Alpine at one of the telephone numbers listed below. - Page 138 User Manual Alpine Navigation Navigation software for the Alpine INE-W927HD US English (EN)
- Page 139 Thank you for choosing the Alpine unit as your navigator. Start using your device right away. This document is the detailed description of the navigation software. You can easily discover the software while you are using it; however, we still recommend that you read this manual to fully understand the...
- Page 140 Table of contents 1 Warnings and Safety information ................... 6 2 Getting started ........................... 7 2.1 Buttons and other controls on the screen ..................8 2.1.1 Using keyboards............................9 2.1.2 Beyond single screen tap........................... 10 2.2 Map screen ..........................11 2.2.1 Navigating on the map ..........................
- Page 141 3.1.2.4 Searching for a Place of Interest by name ........................ 45 3.1.3 Using the free form search ........................48 3.1.4 Selecting a map location as the destination ....................49 3.1.5 Selecting the destination from your Address Book ................... 50 3.1.6 Selecting a recent destination from the History ..................51 3.1.7 Entering the coordinate of the destination ....................
- Page 142 5.3.6 Regional settings ............................81 5.3.7 Trip monitor settings ..........................81 5.4 Trip monitor ..........................82 6 Glossary ............................ 83 7 Copyright note ......................... 85...
-
Page 143: Warnings And Safety Information
1 Warnings and Safety information The navigation system helps you find your way to your destination with a connected GPS receiver. The software does not transmit your GPS position; others cannot track you. It is important that you look at the display only when it is safe to do so. If you are the driver of the vehicle, we recommend that you operate your software before you start your journey. -
Page 144: Getting Started
2 Getting started When using the navigation software for the first time, an initial setup process starts automatically. Do as follows: Select the written language of the application interface. Later you can change it in Regional settings (page 81). Read the End User License Agreement. Tap to continue. -
Page 145: Buttons And Other Controls On The Screen
If needed, modify the default route planning options. Later you can change them in Route settings (page 74). The initial setup is now complete. The Configuration wizard can be restarted later from the Settings menu (page 70). After the initial setup, the Map screen appears and you can start using the software. 2.1 Buttons and other controls on the screen When you are using the software, you usually tap buttons on the touch screen. -
Page 146: Using Keyboards
List When you need to select from Grab the list anywhere and several options, they appear in a slide your finger up or down. list. Depending on the speed of the sliding, the list will scroll fast or slow, only a bit or till the end. Alternatively, move between pages with the buttons and tap the... -
Page 147: Beyond Single Screen Tap
Correcting your entry on the keyboard to remove the unneeded character(s). Tap and hold the button to delete several characters or the entire input string. Entering a space, for example between a first name and a Tap the button at the bottom center of the screen. family name or in multi-word street names Entering upper and lower case... -
Page 148: Map Screen
Alpine unit audio system to appear on the other half. You can decide which side of the map is the navigation. Simply tap the audio part and drag it to the other side of the screen. - Page 149 When GPS position is available, the Vehimarker is displayed in full color, now showing your current position. There are screen buttons and data fields on the screen to help you navigate. During navigation, the screen shows route information. Two data fields are displayed on the left. The data fields are different when you are navigating an active route and when you have no specified destination (the orange line is not displayed).
- Page 150 : 3D perspective view rotated in your direction of travel. : 2D top-down view facing North. : 2D top-down view rotated in your direction of travel.
-
Page 151: Position Markers
2.2.2 Position markers 2.2.2.1 Vehimarker and Lock-on-Road When your GPS position is available, the software marks your current position with the Vehimarker. By default, this marker is a blue arrow, but you can change this icon in Settings. When on-road navigation is selected, the Vehimarker may not show your exact GPS position and heading. -
Page 152: Turn Preview And Next Street
2.2.3.2 Turn preview and Next street When navigating a route, the top section of the Map screen shows information about the next route event (maneuver) and the next street or the next city/town. There is a field in the top left corner that displays the next maneuver. Both the type of the event (turn, traffic circle, exiting freeway, etc.) and its distance from the current position are displayed. -
Page 153: Lane Information And Signposts
Approaching a waypoint. Approaching the destination. These fields also act as buttons: Tap the Turn preview field and the voice guidance will repeat the latest instruction with updated distance information. Tap the Next street field to open the Itinerary. 2.2.3.3 Lane information and Signposts When navigating on multilane roads, it is important to take the appropriate lane in order to follow the recommended route. -
Page 154: Freeway Exit Services
This feature can be turned off in Visual Guidance settings. 2.2.3.5 Freeway exit services You may need a gas station or a restaurant during your journey. This feature displays a new button on the map when you are driving on freeways. Tap this button to open a panel with the details of the next few exits or service stations. -
Page 155: Elements Of The Active Route
2.2.3.7 Elements of the active route Your software shows the route in the following way: Symbol Name Description Current GPS position and Start Your current position displayed on the map. If roads are point near, it is aligned to the nearest road. Normally if GPS position is available, the route starts from the current position. -
Page 156: Manipulating The Map
In the first column you can see the number of traffic events on your route. The second column contains the full count of traffic events in the categories. Tap any of the even types to list the event in that category or select the top row to open the list of all traffic events: Now tap any of the list items to see its details, and to display the affected road segment in its full length on the map:... - Page 157 Zooming in and out Changes how much of the map is displayed on the screen. Your software uses high-quality vector maps that let you examine the map at various zoom levels, always with optimized content. It always displays street names and other text with the same font size, never upside-down, and you only see the streets and objects that you need.
-
Page 158: Checking The Details Of The Current Position (Where Am I?)
2.2.5 Checking the details of the current position (Where Am I?) This screen contains information about the current position (or about the last known position if GPS reception is not available) and a button to search for useful Places nearby. You can access this screen from the map in one of the following ways: If the current street is displayed below the Vehimarker (the current position on the map), tap it to open the Where Am I? screen. -
Page 159: Navigation Menu
: Police stations : Gas stations Tap any of the buttons, select a Place from the list, and navigate to it. 2.3 Navigation menu You can reach all parts of the software from the Navigation menu. When you open the menu, the destination search buttons appear on the screen. -
Page 160: On-Road Navigation
3 On-road navigation When first started, Alpine unit calculates routes using the road network of the high quality vector maps provided with the product. You can set up your route in different ways: If you need a route for immediate navigation, you can select the destination and start navigating to it right away (normal navigation). -
Page 161: Entering An Address (United States)
any of the above, starting the search with the ZIP code (page 36) You can also search for an address with the free form search (page 48). 3.1.1.1 Entering an address (United States) To enter an address as the destination, do as follows: In the Navigation menu, tap the following buttons: By default, the software proposes the country and state where you are. - Page 162 Enter the street name: Start entering the street name on the keyboard. Find the street you need: The most likely street name is always shown in the input field. To accept it, tap If the desired name does not show up, the names that match the string appear in a list after entering a couple of characters (to open the list of results before it appears automatically, tap ).
-
Page 163: Entering An Address (Canada)
Tip! you know that will this destination frequently, before tapping to confirm the destination, put it in the Address Book first: tap then , give a name for the new entry, and tap to save the location. The map with the destination returns automatically. - Page 164 If the desired name does not show up, the names that match the string appear in a list after entering a couple of characters (to open the list of results before it appears automatically, tap ). Select the city/town from the list. Enter the street name: (if you have selected a city/town above, this step is not needed).
-
Page 165: Entering An Address (Mexico)
A full screen map appears with the selected point in the middle. If necessary, tap the map somewhere else to modify the destination. The Cursor ( ) appears at the new location. Tap to confirm the destination, or tap to select a different destination. - Page 166 The most likely city/town name is always shown in the input field. To accept it, tap If the desired name does not show up, the names that match the string appear in a list after entering a couple of characters (to open the list of results before it appears automatically, tap ).
-
Page 167: Entering An Address Starting With The Street Name (In The United States Only)
A full screen map appears with the selected point in the middle. If necessary, tap the map somewhere else to modify the destination. The Cursor ( ) appears at the new location. Tap to confirm the destination, or tap to select a different destination. - Page 168 Enter the street name: Start entering the street name on the keyboard. Find the street you need: The most likely street name is always shown in the input field. To accept it, tap If the desired name does not show up, the names that match the string appear in a list after entering a couple of characters (to open the list of results before it appears automatically, tap ).
-
Page 169: Entering The Midpoint Of A Street As The Destination
3.1.1.5 Entering the midpoint of a street as the destination You can navigate to the midpoint of a street if the house number is not available: In the Navigation menu, tap the following buttons: Select the country, state and city/town as described earlier (page 24). Enter the street name: (if you have selected a city/town above, this step is not needed). -
Page 170: Selecting An Intersection As The Destination
A full screen map appears with the selected point in the middle. If necessary, tap the map somewhere else to modify the destination. The Cursor ( ) appears at the new location. Tap to confirm the destination, or tap to select a different destination. - Page 171 Instead of entering the house number, tap . The midpoint of the street is selected as the destination. A full screen map appears with the selected point in the middle. If necessary, tap the map somewhere else to modify the destination. The Cursor ( ) appears at the new location.
-
Page 172: Selecting A City/Town Center As The Destination
3.1.1.7 Selecting a city/town center as the destination The city/town center is not the geometric center of the city/town but an arbitrary point the map creators have chosen. In towns and villages, it is usually the most important intersection; in larger cities, it is one of the important intersections. -
Page 173: Entering An Address With A Zip Code
to confirm the destination, or tap to select a different destination. After a short summary of the route parameters, the map appears showing the entire route. The route is automatically calculated. Tap to modify route parameters, or tap and start your journey. 3.1.1.8 Entering an address with a ZIP code All of the above address searching possibilities can be performed with entering the ZIP code instead of the city/town name. - Page 174 Enter the street name: Start entering the street name on the keyboard. Find the street you need: The most likely street name is always shown in the input field. To accept it, tap If the desired name does not show up, the names that match the string appear in a list after entering a couple of characters (to open the list of results before it appears automatically, tap ).
-
Page 175: Tips On Entering Addresses Quickly
After a short summary of the route parameters, the map appears showing the entire route. The route is automatically calculated. Tap to modify route parameters, or tap and start your journey. 3.1.1.9 Tips on entering addresses quickly When you are entering the name of a city/town or a street: Only those letters are offered on the keyboard that appear in possible search results. -
Page 176: Selecting The Destination From The Places Of Interest
3.1.2 Selecting the destination from the Places of Interest You can select your destination from the Places of Interest included with your software. Using the same screen, you can find a Place in different ways: with the Quick search feature, you can quickly find a nearby Place by its name with the Preset search feature, you can find frequently searched types of Places with only a few screen taps you can search for a Place by its category... -
Page 177: Searching For A Place Of Interest Using Preset Categories
(optional) The Places in the list are ordered by the length of the necessary detour (when navigating a route) or by their distance from the current position (when no destination is given). If you need to reorder the list, tap Browse the list if necessary and tap one of the list items. - Page 178 The preset search categories appear: If an active route exists, gas stations are searched along the route. If there is no active route (destination is not selected), they are searched around the current position. If the current position is not available either (no GPS signal), they are searched around the last known position.
-
Page 179: Searching For A Place Of Interest By Category
(optional) The Places in the list are ordered by their distance from the current or last known position, from the destination or by the length of the necessary detour. If you need to reorder the list, tap Browse the list if necessary and tap one of the list items. A full screen map appears with the selected point in the middle. - Page 180 to search for a place within a selected city/town. (The result list will be ordered by the distance from the center of the selected city/town.) to search for a place around the destination of the active route. (The result list will be ordered by the distance from the destination.) to search along the active route, and not around a given point.
- Page 181 Sometimes the list of brands in the selected Place subcategory appears. Select one brand or tap to list all Places in the selected subcategory around the selected location or along the route. Finally, the results appear in a list. (optional) The Places in the list are ordered by their distance from the current or last known position, from the selected city/town, from the destination or by the length of the necessary detour.
-
Page 182: Searching For A Place Of Interest By Name
13. After a short summary of the route parameters, the map appears showing the entire route. The route is automatically calculated. Tap to modify route parameters, or tap and start your journey. 3.1.2.4 Searching for a Place of Interest by name You can search for Places of Interest by their names. - Page 183 (optional) If you have selected , select the city/town to search in. Select one of the main Place categories (e.g. Accommodation) to search in or tap to search among all Places. Select one of the Place subcategories (e.g. Hotel or Motel) to search in or tap to search in the selected Place category.
- Page 184 Using the keyboard, start entering the name of the Place. After entering a few letters, tap to open the list of Places with names containing the entered character sequence. 10. (optional) The Places in the list are ordered by their distance from the current or last known position, from the selected city/town, from the destination or by the length of the necessary detour.
-
Page 185: Using The Free Form Search
3.1.3 Using the free form search A quick way to search for an address, a Place, an Address Book entry or a History item is to use the free form search. Do as follows: In the Navigation menu, tap Open the menu and tap In the left field enter the name you are looking for. -
Page 186: Selecting A Map Location As The Destination
to confirm the destination, or tap to select a different destination. After a short summary of the route parameters, the map appears showing the entire route. The route is automatically calculated. Tap to modify route parameters, or tap and start your journey. 3.1.4 Selecting a map location as the destination In the Navigation menu, tap the following buttons: Locate your destination on the map: move and scale the map as needed. -
Page 187: Selecting The Destination From Your Address Book
3.1.5 Selecting the destination from your Address Book You can select a location that you have already saved as an Address Book entry to be your destination. Adding a location to the Address Book is described on page 59. Access the Address Book: in the Navigation menu, tap and then tap The Address Book is displayed. -
Page 188: Selecting A Recent Destination From The History
3.1.6 Selecting a recent destination from the History The destinations that you have set earlier appear in the History. Access the History: If you are in the Navigation menu, tap and then tap The list of recent destinations appears. Smart History promotes three destinations to the first page based on your previous routes (most likely destinations). -
Page 189: Entering The Coordinate Of The Destination
3.1.7 Entering the coordinate of the destination You can also select a destination by entering its coordinate. Do as follows: In the Navigation menu, tap Open the menu and tap You can enter the latitude and longitude values in any of the following formats: decimal degrees; degrees and decimal minutes;... -
Page 190: Navigate To A Location Stored In A Picture
3.1.8 Navigate to a location stored in a picture You can also set the location stored in a picture as your destination. Do as follows: In the Navigation menu, tap Open the menu and tap The list of picutres stored on the microSD card appears. Select one picture from the list. A full screen map appears with the selected point in the middle. -
Page 191: Building A Route From The List Of Destinations (Create Route)
3.1.9 Building a route from the list of destinations (Create Route) You can also build your route destination by destination from the Route menu. In the Navigation menu, tap There is only one line in the list of route points, the start point of the route, normally the current GPS position. -
Page 192: Viewing The Entire Route On The Map
3.2 Viewing the entire route on the map It is easy to get a map overview of the active route. Do as follows: In the Navigation menu, tap . The active route is displayed in its full length on the map together with additional information and controls. -
Page 193: Setting A New Starting Position For The Route
to add the newly selected location as an intermediate destination to your route. The other destinations of the route remain intact. Note: the new waypoint is placed among destinations to keep the route optimal. To decide where a waypoint to appear, use the Edit Route feature. to append the newly selected destination at the end of the route. -
Page 194: Editing The List Of Destinations (Edit Route)
The Destination menu appears and you can select the start point of the route the same way you select a destination. When the new start point is set, tap The map returns with a transparent Vehimarker (showing that there is no GPS reception). If an active route already existed, it is now recalculated starting from the selected location. -
Page 195: Canceling The Active Route
to delete a destination. to modify the start point of the route. to reorder the list. You can do it manually or you can let the application optimize the route for you. 3.3.4 Canceling the active route To cancel the navigated route, tap in the Navigation menu, and then tap .. -
Page 196: Saving A Location As An Address Book Entry
Or if you cannot find a good alternative, tap and scroll down for routes with different routing methods. Select one of the route alternatives then tap to return to the Map screen. The software recalculates the route. The orange line now shows the new recommended route. 3.4 Saving a location as an Address Book entry You can add any location to the Address Book, the list of frequently used destinations. -
Page 197: Saving A Location As An Alert Point
3.5 Saving a location as an alert point You can save any map location as an alert point (for example a speed camera or a railroad crossing). Browse the map and select a location. The red Cursor appears there. Scroll down the list and tap On the newly opened screen, select the type of the alert point, the direction from which you expect the alert, and (if applicable) the speed limit for this alert point. -
Page 198: Watching The Simulation Of The Route
Scroll down the list and tap On the newly opened screen, modify the type of the alert point, the direction from which you expect the alert, or (if applicable) the speed limit for this alert point. to save the changes to the alert point. 3.7 Watching the simulation of the route You can run a simulated navigation that demonstrates the active route. - Page 199 (optional) You have the following controls during the simulation: : Jump to the next route event (maneuver). : Pause the simulation. : Jump to the previous route event (maneuver). : Tap to increase the speed of the simulation to 4, 8 or 16 times faster. Now tap again to return to the normal speed.
-
Page 200: Off-Road Navigation
4 Off-road navigation When first started, Alpine unit calculates routes using the road network of the high quality vector maps provided with the product. You can switch the application to off-road mode from the Navigation menu. Tap and then Most of the procedures described for on-road navigation also apply to off-road navigation. However, there are some that are not available in this navigation mode (for example you cannot open the itinerary as you have no maneuvers just route points and straight lines between them). -
Page 201: Reference Guide
5 Reference Guide On the following pages you will find the description of the different concepts and menu screens of the software. 5.1 Concepts 5.1.1 Smart Zoom Smart Zoom provides much more than just a usual automatic zoom feature: While following a route: when approaching a turn, it will zoom in and raise the view angle to let you easily recognize your maneuver at the next junction. - Page 202 Maneuver restrictions and directional constraints are taken into account when planning a route. Roads are used only if access for cars is allowed. Private roads and resident-only roads are used only if they are inevitable to reach the destination. Walkways are excluded from routes. All maneuvers are available in intersections.
-
Page 203: Green Routing
Whenever data exist, route calculation takes into account statistical traffic data for the given day of week and time of day. Real-time Traffic events are also taken into account and sometimes greatly modify the route. Your software automatically recalculates the route if you deviate from the proposed itinerary or if a newly received Traffic event concerns a part of the recommended route. -
Page 204: Speed Limit Warning
5.1.4 Speed limit warning Maps may contain information about the speed limits of the road segments. The software is able to warn you if you exceed the current limit. This information may not be available for your region (ask your local dealer), or may not be fully correct for all roads in the map. - Page 205 the FM radio stations for TMC data, and the decoded information will immediately be used in route planning. When your software receives traffic information that may affect your route, the program will warn you that it is recalculating the route, and navigation will continue with a new route that is optimal considering the most up-to-date traffic conditions.
-
Page 206: Information Menu
5.2 Information menu The Information menu provides you with various options and additional applications. In the Navigation menu, tap Button Description Tap this button to get information about the current location and to find nearby help. Tap this button to open the GPS Information screen with satellite position and signal strength information. -
Page 207: Settings Menu
Access travel applications: the unit converter helps you convert between various different international units for temperature, speed, area or pressure, etc. Access travel applications: the clothing size converter helps you convert between various different international size units for men's or women's cloth types and shoes. - Page 208 7. Delete all saved data and reset all settings to their factory defaults. Visit alpine.naviextras.com to get additional content, such as new maps or 3D landmarks and useful applications. The About section provides you with product information. Read the Software and Database End User License Agreement, or check the map and other contents of the application.
-
Page 209: Sound And Warnings
5.3.1 Sound and Warnings Adjust the sound volume, mute your device or change the voice guidance language. In addition, you can enable and set up different warnings and alerts. Button Description Tap this button to adjust the volume of the different sounds in the application. A new screen shows the different sound types and their controls. - Page 210 Maps may contain information about the speed limits of the road segments. The software is able to warn you if you exceed the current limit. This information may not be available for your region (ask your local dealer), or may not be fully correct for all roads in the map.
-
Page 211: Traffic Settings
5.3.2 Traffic settings The recommended route is not always the same between two points. Whenever suitable data exists, traffic information can be taken into account in the route calculation. Button Description Use this switch to enable or disable historical traffic data and traffic patterns. This locally stored information can be very useful in normal circumstances but for example on public vacations it may be better to turn off in order not to take into account normal weekday traffic jams. - Page 212 Excluding a road type is a preference. It does not necessarily mean total prohibition. If your destination can only be accessed using some of the excluded road types, they will be used but only as much as necessary. In this case a warning icon will be shown on the Route screen, and the part of the route not matching your preference will be displayed in a different color on the map.
- Page 213 When creating a new vehicle profile, first you need to select the vehicle type. Then you need to set the following parameters. You can modify the same parameters when you edit an existing profile: Button Description Tap this button to rename the profile for something meaningful. Enter the average consumption of your vehicle when used in built-up areas.
- Page 214 Maneuver restrictions and directional constraints are taken into account when planning a route. Roads are used only if access for buses is allowed. Private roads, resident-only roads and walkways are excluded from routes. Maneuver restrictions and directional constraints are taken into account when planning a route.
-
Page 215: Map Settings
5.3.4 Map settings You can fine-tune the appearance of the Map screen. Adjust the map view to your needs, choose suitable color themes from the list for both daytime and night use, change the blue arrow to a 3D car model, show or hide 3D buildings, turn track logging on or off, and manage you Place visibility sets (which Places to show on the map). -
Page 216: Visual Guidance Settings
Show or suppress 3D city models, 3D artistic or block representation of full city building data containing actual building size and position on the map. Turn on or off track log saving, that is, saving the sequence of the locations your journeys go through. - Page 217 When entering tunnels, the surface roads and buildings can be disturbing. This feature shows a generic picture of a tunnel instead of the map. A top-down overview of the tunnel and remaining distance are also displayed. Turn on the route progress bar to see your route as a straight line on the right side of the map.
-
Page 218: Regional Settings
5.3.6 Regional settings These settings allow you to customize the application for your local language, measurement units, time and date settings and formats, as well as to choose the time zone. Button Description This button displays the current written language of the user interface. By tapping the button, you can select a new language from the list of available languages. -
Page 219: Trip Monitor
5.4 Trip monitor If you save your trip logs when you arrive at some of your destinations or let the application automatically save the trip logs for you, those logs are all listed here. Tap one of the trips to see the trip statistics, speed and elevation profile. -
Page 220: Glossary
6 Glossary 2D/3D GPS reception The GPS receiver uses satellite signals to calculate its (your) position and needs at least four signals to give a three-dimensional position, including elevation. Because the satellites are moving and because objects can block the signals, your GPS device might not receive four signals. If three satellites are available, the receiver can calculate the horizontal GPS position but the accuracy is lower and the GPS device does not give you elevation data: only 2D reception is possible. - Page 221 Route A sequence of route events, i.e. maneuvers (for example, turns and traffic circles) to reach the destination. The route contains one start point and one or more destinations. The start point is the current (or last known) position by default. If you need to see a future route, the start point can be replaced with any other given point.
-
Page 222: Copyright Note
The product and the information contained herein are subject to change without prior notification. This manual may not, in whole or in part, be reproduced or transmitted in any form either electronically or mechanically, including photocopying and recording, without the express written consent of Alpine Electronics, Inc. - Page 229 Model No. English It's important to keep your map up-to-date. Register now and we will keep you informed of map updates. To register, complete and return this card or call a number below. Please tick the box Email ok if you would like to receive information by Email.
Need help?
Do you have a question about the INE-W927HD and is the answer not in the manual?
Questions and answers