Table of Contents
Advertisement
Advertisement
Table of Contents

Related Manuals for Keysight Technologies N778 B Series


Summary of Contents for Keysight Technologies N778 B Series
- Page 1 Keysight N778xB Getting Started Guide...
- Page 2 FURNISHING, USE, OR PERFORMANCE OF agreement and written consent from related to commercial computer software THIS DOCUMENT OR ANY INFORMATION Keysight Technologies as governed by or commercial computer software docu- CONTAINED HEREIN. SHOULD KEYSIGHT United States and international copyright mentation that is not customarily provided AND THE USER HAVE A SEPARATE laws.
-
Page 3: Table Of Contents
Contents 1 Getting Started General Safety Summary Safety Instructions Initial Safety Information Regulatory Information Declaration of Conformity Warranty Quick Start Information N7781B Setup (Polarimetry) N7782B Setup (PER Analysis) N7784B Setup (Polarization Stabilization) N7785B Setup (Polarization Scrambling) N7786B Setup (Polarization Synthesis) N7788B Setup (PMD/PDL Analysis) N7783B Setup (PER Analysis) N7781BD Setup (Polarimetry) - Page 4 Contents Connecting Tunable Laser Sources Run the Configuration Wizard Using the N778xB/BD GPIB Interface (Remote GPIB) Changing the GPIB Address Accessories Operating N778xB/BD instruments Operating N778xBD instruments Keysight N778xB Getting Started Guide...
-
Page 5: Getting Started
Keysight N778xB Getting Started Guide Getting Started General Quick Start Information / 12 Getting Started / 19... -
Page 6: General
Keysight Technologies assumes no liability for the customer's failure to comply with these requirements. Product manuals are provided with your instrument on CD-ROM and/or in printed form. -
Page 7: Initial Safety Information
Getting Started • If you need to turn off the power, unplug the instrument at the mains or remove the power cable connector from the appliance coupler at the rear of the instrument. For this reason, the power cable connection should be easily accessible - allowing you to turn off the power quickly. - Page 8 Getting Started Table 1 Parameters of Lasers Included in certain instruments (see column headers for respective product options) N7782B #101 #401 #401/#501 Laser Type Fabry-Perot Fabry-Perot Fabry-Perot Wavelength or 850nm 1310nm 1550nm Wavelength Range Max. CW output 0.2mW power Beam waist diameter 9 μm 9 μm 9 μm...
-
Page 9: Regulatory Information
Getting Started Regulatory Information Compliance with Canadian EMC Requirements: This ISM device complies with Canadian ICES-001. Cet appareil ISM est conforme à la norme NMB-001 du Canada Table 2 Notice for Germany: NoiseDeclaration Acoustic Noise Emission LpA < 50 dB Operator position Normal operation per ISO 7779... - Page 10 Keysight Technologies Test and Measurement Support, Services and Assistance Keysight Technologies aims to maximize the value you receive, while minimizing your risk and problems. We strive to ensure that you get the test and measurement capabilities you paid for and obtain the support you need.
- Page 11 Getting Started Phone or Fax United States: (tel) 1 800 829 4444 (fax) 1 800 829 4433 Canada: (tel) 877 894 4414 (fax) 1 800 746 4866 Europe: (tel) +31 (0) 20 547 2111 (fax) +31 (0) 20 547 2190 Japan: (tel) 120 421 345 (fax) 120 421 678 Latin America: (tel) +55 11 4197 3600 (fax) +55 11 4197 3800 Australia: (tel) 1 800 629 485 (fax) 1 800 142 134...
-
Page 12: Quick Start Information
Getting Started Quick Start Information This section demonstrates how to connect your instruments optically and electrically for typical applications. They are intended as a quick start information, although it is strongly recommended that you refer the User's Guide (Part No. N7781-90001) prior to operating the instruments. Each application supports different modes of operation, some of which may require additional connections, which are described in the respective application section of the User's Guide (Part No. -
Page 13: N7781B Setup (Polarimetry)
Getting Started N7781B Setup (Polarimetry) Polarimeter Optical Input (SMF) N7781B USB or GPIB Personal Computer Figure 2 N7781B Setup N7782B Setup (PER Analysis) Standard Option (No Internal Laser Source) Paddles Laser Output Input (SMF or PMF) Tunable PER Analyzer Wavelength Laser Source N7782B GPIB... - Page 14 Getting Started Option 401, 501, 101 (With Internal Laser Source) and N7783B Paddles N7783B Thermal Cycling Unit Input (SMF or PMF) Output (SMF) PER Analyzer N7782B Expansion USB or GPIB Personal Computer Figure 4 N7782B with internal laser source and N7783B Setup Please read the laser safety warnings of section “Safety Instructions”...
-
Page 15: N7784B Setup (Polarization Stabilization)
Getting Started N7784B Setup (Polarization Stabilization) Polarization Patchcord Stabilized Signal Input Output (SMF) Input (SMF) Output LiNbO3 Polarization Powermeter Controller N7784B USB or GPIB Personal Computer Figure 5 N7784B Setup N7785B Setup (Polarization Scrambling) Polarization LiNbO3 Polarization Scrambled Controller Input Output Signal (SMF) -
Page 16: N7786B Setup (Polarization Synthesis)
Getting Started N7786B Setup (Polarization Synthesis) Polarization Synthesized / Polarization Scrambled / Polarization Stabilized Signal Input Output (SMF) (SMF) LiNbO3 Polarization Polarimeter Controller N7786B USB or GPIB Personal Computer Figure 7 N7786B Setup N7788B Setup (PMD/PDL Analysis) Laser Laser Input Polarimeter Input Output Output... -
Page 17: N7783B Setup (Per Analysis)
Getting Started N7783B Setup (PER Analysis) Splice under Test N7783B N7783B Thermal Cycling Unit Thermal Cycling Unit Polarimeter Input / Analyzer Input Laser Output (SMF or PMF) N7781B/BD N7782B Laser Source N7786B N7788B/BD Expansion USB or GPIB Personal Computer Figure 9 N7783B Setup For further PER/PMF crosstalk measurement setups, refer to User's Guide (Part No. -
Page 18: N7788Bd Setup (Pmd/Pdl Analysis)
Getting Started N7788BD Setup (PMD/PDL Analysis) Laser Input Polarimeter Input Laser Output Output (SMF) (SMF) (SMF) Tunable LiNbO3 Polarization Laser Source Polarimeter Controller N7788B Trigger Trigger GPIB Output Input Figure 11 N7788BD Setup Press the Modify Knob twice to access the on-screen keyboard. NOTE Keysight N778xB Getting Started Guide... -
Page 19: Getting Started
Getting Started Getting Started This section of the document covers all N778xB/BD instruments. There may be applications or functions described within, which cannot be performed with a specific instrument. The sections or chapters of this manual contain product numbers like N778xB/N778xBD. These product numbers indicate the instruments that the specific section applies to. -
Page 20: Unpacking The N778Xb/Bd
Getting Started Optional: • National Instruments LabView™ 6.1 or higher • MATLAB 6.1 or higher Unpacking the N778xB/BD • Unpack your shipment. • Inspect the shipping containers for damage. • Inspect the instruments. • Verify that you received the options and accessories that you ordered. Keep the shipping containers and cushioning material until you have inspected the contents of the shipment for completeness and have checked the equipment mechanically and electrically. -
Page 21: Connectors And Controls
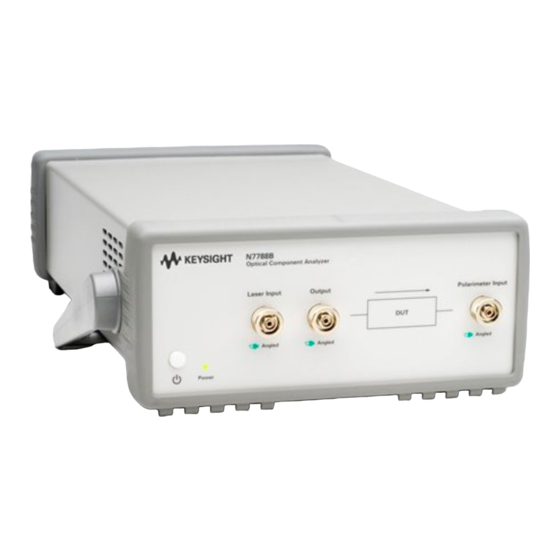
If anything is missing or defective, contact your nearest Keysight Technologies sales office. If the shipment was damaged, contact the carrier, then contact the nearest Keysight Technologies sales office. Connectors and Controls The following sections provide an overview of the optical and electrical connectors, as well as the control elements of the N778xB/BD instruments. - Page 22 Getting Started N7782B Front Panel Standard Option (No Internal Laser Source) Figure 13 N7782B Front Panel Power button and power LED Optical connector - Analyzer Input (SMF) Option 401, 501, 101 (With Internal Laser Source) Figure 14 N7782B Front Panel with internal laser source Power button and power LED Optical connector - Laser Output (SMF) Optical connector - Analyzer Input (SMF)
- Page 23 Getting Started N7784B Front Panel Figure 15 N7784B Front Panel Power button and power LED Optical connector - LiNbO polarization controller (PC) Input (SMF) Optical connector - LiNbO polarization controller (PC) Output (SMF) Optical connector - Polarization beam splitter (PBS) Input (SMF) Optical connector - Polarization beam splitter (PBS) Output (PMF) Control button and control operation LED N7785B Front Panel...
- Page 24 Getting Started N7786B Front Panel Figure 17 N7786B Front Panel Power button and power LED Optical connector - Polarization Synthesizer Input (SMF) Optical connector - Polarization Synthesizer Output (SMF) Control button and control operation LED N7788B Front Panel Figure 18 N7788B Front Panel Power button and power LED Optical connector - Laser Input (SMF)
- Page 25 Getting Started N778xB Rear Panel Figure 19 N778xB Rear Panel IEEE 488.2 connector (GPIB) Service connector Expansion connector (e.g. used for Trigger #2, Analog-Input, Analog-Output, control of N7783B Thermal Cycling Units (For more details, refer to “Expansion Port Connector Pinout” section in the User's Guide, Part No.
- Page 26 Getting Started N7783B Rear Panel Figure 20 N7783B Rear Panel Power Supply input (For more details, refer to “Power Supply Information and Environmental Conditions” section in the User's Guide, Part No. N7781-90001). Expansion input (connect to N778xB/BD) Expansion output (can be used to connect a second N7783B) N7781BD Front Panel Figure 21 N7781BD Front Panel...
- Page 27 Getting Started N7788BD Front Panel 9 10 Figure 22 N7788BD Front Panel Power button Touch screen Modify knob Escape (ESC) button Accept (OK) button Cursor left button Cursor right button USB connector (compliant with USB2.0) Optical connector - Laser Input (SMF) 10 Optical connector - Polarization Controller Output (SMF) 11 Optical connector - Polarimeter Input (SMF) N778xBD Rear Panel...
-
Page 28: Software Installation/Software Updates
Getting Started Trigger Input #1, TTL-Compatible (For more details, refer to "Digital Inputs" section in the User's Guide, Part No. N7781-90001). Trigger Output, TTL-Compatible (For more details, refer to "Digital Outputs" section in the User's Guide, Part No. N7781-90001). Power Cord Input (For more details, refer to “Power Supply Information and Environmental Conditions”... - Page 29 Getting Started Please install the Photonic Application Suite (Main) package before you NOTE plug in any Keysight N778xB instrument(s) to the USB port of the PC! This ensures that the drivers are available when you plug-in the instrument(s). If you have connected the instrument(s) prior to software installation, you may have to delete the instrument(s) manually from the Windows Device Manager.
- Page 30 Getting Started Figure 24 Photonic Applications Package Manager Click the Help link on the bottom left of the Package Manager window to NOTE access instructions and troubleshooting tips for using the Package Manager. The Package manager lists all known packages and shows which version of each of the packages is installed on your PC, if any.
- Page 31 Getting Started To the right there is a list of available actions for each of the packages: • Download If your computer is connected to the Internet, the Package Manager will check for the latest available versions and show the action “Download”...
-
Page 32: Connect The Instrument
Getting Started There are a number of functions at the bottom of the Package Manager Window: • www.keysight.com/find/N7700 Show Photonic Application Suite product website including ordering information (Internet access required). • Manage Subscriptions Enter or remove access codes for accessing restricted packages (Internet access required). - Page 33 If USB drivers have been installed for the corresponding instrument with a PAS revision less than 1.5 installed on the PC, they will be listed as Keysight Technologies N778x USB Instruments in the section Universal Serial Bus controllers. If USB drivers have been installed for the corresponding instrument with a PAS revision 1.5 or higher installed on the PC, they will be listed as...
- Page 34 Getting Started You can manually change the associated drivers from the Windows Device Manager as shown in the following pictures. Keysight N778xB Getting Started Guide...
- Page 35 Getting Started Keysight N778xB Getting Started Guide...
- Page 36 Getting Started Keysight N778xB Getting Started Guide...
- Page 37 Getting Started When reverting to the <1.5 drivers, there may be a warning about the NOTE drivers not having passed Windows Logo testing. If so, please click Continue Anyway to complete the operation. Libusb- win32 is a library that allows userspace application to access NOTE USB devices on Windows operation systems (Win2k, WinXP, Vista, Win7).
-
Page 38: Connecting Tunable Laser Sources
Getting Started Connecting the Instrument to the GPIB Interface National Instruments VISA has to be installed. Use a standard GPIB cable to connect the N778xB/BD to the PC. On the PC, VISA has to be installed to provide the GPIB functionality. Usually VISA comes with your GPIB board, but may not be automatically installed on your system. -
Page 39: Run The Configuration Wizard
Getting Started Connect the TLS to the appropriate interface, turn it on and run the Configuration Wizard. The TLS should then be listed under "Misc. Instruments". Don't forget the BNC trigger cable. Some laser sources need a trigger cable connected to the N778xB/BD. Refer to User's Guide (Part No. -
Page 40: Changing The Gpib Address
Getting Started Figure 25 Options Dialog The polarizationNAVIGATOR™ software fully supports the remote GPIB NOTE port. However, it does not behave like a standard GPIB interface for other software such as LabView™. Changing the GPIB Address The default GPIB address of the N778xB/BD is set to 30. To change the GPIB address, proceed as follows: •... -
Page 41: Accessories
Getting Started • Show the properties dialog of the instrument by right-clicking on its item and choosing Properties • Click on Change at Device on the Interface-Tab. • Enter new GPIB address (10..30) and click on OK. • Turn the instrument off and back on to apply the changed address. •... - Page 42 Getting Started Keysight Product No Narrative Description N7782B-022 angled contact connector N7782B-KIT Kit -Shipping N7783B Thermal Cycling Unit N7783B-KIT Kit -Shipping N7784B Polarization Controller N7784B-021 straight contact connector N7784B-022 angled contact connector N7784B-KIT Kit -Shipping N7785B Synchronous Scrambler N7785B-021 straight contact connector N7785B-022 angled contact connector N7785B-KIT...
- Page 43 Getting Started Keysight Product No Narrative Description N7788B-031 straight DUT Port N7788B-032 angled DUT Port N7788B-KIT Kit -Shipping Table 4 Keysight Product Options 2 Keysight Product No Narrative Description N7781BD Polarization Analyzer N7781BD-300 Polarization Analyzer, 1270 nm to 1375 nm N7781BD-400 Polarization Analyzer, 1270 nm to 1375 nm and 1460 nm to 1620 nm...
-
Page 44: Operating N778Xb/Bd Instruments
Getting Started Operating N778xB/BD instruments When the polarizationNAVIGATOR™ is started it will not automatically perform any measurements. The application bar will list all installed applications, while the browser window will show an icon for each N778xB/BD or supported external instrument (e.g. tunable laser sources) that has been either added by using the Configuration Wizard or added and configured manually and that can be directly interacted with. -
Page 45: Operating N778Xbd Instruments
Getting Started You can add applications by right-clicking the root of the NOTE application-node and selecting “add”. To reset the linkage of an application to certain instruments, you can delete the application using the “delete” key and re-adding it. On next activation, the application will try to find the necessary instruments again Refer to User's Guide (Part No. - Page 46 Getting Started Throughout the system the touch screen acts as a mouse. For right click operations there is an always-on-top icon, which will turn the next touch to a right-click touch. If this icon is not on the screen it can be reactivated from the system tray by clicking on the pm-icon and setting a mark next to the Right button.
- Page 47 Getting Started Network Access Measurements are stored in D:\My Documents\My PolarizationNavigator Files and D:\My Documents\My PolarizationNavigator History. You can access these files from a remote computer by using the Windows Explorer, the Internet Explorer or an FTP client. When connected through a local area network, you can use the instruments name, which is its serial number to access the folders, e.g.: ftp://DE47800301/Measurements/...
- Page 48 Getting Started Remote Control The N778xBD can be controlled remotely. Doing this you can either use the Remote Desktop Connection tool of Windows XP or a web interface based on an Active-X control. The N778xBD is configured to listen for remote access requests.
- Page 49 Getting Started You will then be prompted to enter the server name, i.e. its IP address, if you connected using the IP address or the instruments serial number (e.g. DE47800301) if you connected using the instruments name. In addition you can choose the screen resolution (640x480 is the native resolution of the instrument).
- Page 50 Getting Started Figure 27 Windows Task Manager Recovery Console The N778xBD instruments provide an emergency recovery tool. If the system is corrupted, you can connect a keyboard to the instrument and press ESC during the boot process. You will be prompted to do so while still in text mode.
- Page 52 This information is subject to change without notice. © Keysight Technologies 2020 Edition 2.1, October 2020 Printed in Malaysia www.keysight.com...
Need help?
Do you have a question about the N778 B Series and is the answer not in the manual?
Questions and answers