Table of Contents
Advertisement
Advertisement
Table of Contents

Subscribe to Our Youtube Channel
Related Manuals for Enel X JUICEBOX PRO


Summary of Contents for Enel X JUICEBOX PRO
- Page 1 JUICEBOX PRO & JUICEBOX PLUS USER MANUAL...
-
Page 2: Table Of Contents
In this document 1. Getting to know your JuiceBox 2. JuiceBox modes 2.1 Connect & Charge mode 2.2 Unlock to Charge mode 3. Getting online 3.1. Getting JuiceBox online using cellular connectivity 3.2. Association with a second account using cellular connectivity 3.3. -
Page 3: Getting To Know Your Juicebox
1. Getting to know your JuiceBox With its cutting-edge technology, JuiceBox is the innovative home charger that makes your charging experience smart, reliable, and cost-effective. This manual will guide you through the main features of your JuiceBox, so you can get the most out of your charging experience. -
Page 4: Juicebox Modes
2. JuiceBox modes Before setting up your JuiceBox, it’s important to determine which mode your JuiceBox will use. JuiceBox has 2 modes: Connect&Charge mode and Unlock to Charge mode. 2.1 Connect & Charge mode NOTE This mode is suggested when the JuiceBox is installed in areas with access that is exclusive to the user. -
Page 5: Getting Online
3. Getting online You JuiceBox can be connected to Enel X’s smart charging platform through either a Wi- Fi or cellular internet connection (the latter available only for JuiceBox Pro Cellular and Plus Cellular). This allows you to control your JuiceBox anytime, from anywhere, using the JuicePass app. - Page 6 2. Select START CONFIGURATION 3. Select Add via cellular connectivity and click on the arrow to proceed.
- Page 7 The default power (in kW) defines the actual power delivered from the charger. If a JuiceMeter enables Load Optimization Plus functionality (available only for JuiceBox Pro), the maximum power provided by the JuiceBox will be the lower number between the cap set during the JuiceMeter’s installation and the power level selected...
- Page 8 The model and maximum power information are populated automatically and cannot be changed. 6. Select the mode of use of your JuiceBox, choosing between Connect&Charge or Unlock To Charge. Then click on the arrow to proceed. NOTE For more information on the modes of use, refer to the section Charging your vehicle...
- Page 9 7. If Unlock To Charge mode was selected, you can register a RFID card to your JuiceBox or Skip for later. If Connect&Charge mode is selected instead, you will directly access the following screen. NOTE You can add a RFID card to your account at any time in the menu section My Account. If the JuiceBox is set in Unlock To Charge and no RFID card is registered, it is still possible to start a charging session with a start command from the JuicePass app (refer to the section Charging your vehicle).
- Page 10 8. You did it! The JuiceBox is now online and ready to charge...
-
Page 11: Association With A Second Account Using Cellular Connectivity
3.2. Association with a second account using cellular connectivity (AVAILABLE ONLY FOR JUICEBOX PRO CELLULAR AND JUICEBOX PLUS CELLULAR) 1. On the top left corner of the home screen, select 3 horizontal lines > Home Charging. NOTE In case another JuiceBox was previously configured, click on the symbol + next to Home Charging 2. - Page 12 3. Select Add via cellular connectivity and click on the arrow to proceed.
- Page 13 4. Scan or insert the serial number of your JuiceBox. Once done, click on the arrow to proceed. NOTE The serial number is on the label on the side of your JuiceBox. 5. Enter the PIN code needed to complete the process. The PIN code should be shared by the user whom first associated the JuiceBox to his/her account.
- Page 14 6. You did it! Your JuiceBox is now connected to your account.
-
Page 15: Getting Juicebox Online Using Wi-Fi Connectivity
3.3. Getting JuiceBox online using Wi-Fi connectivity 1. On the top left corner of the home screen, select 3 horizontal lines > Home Charging. NOTE In case another JuiceBox was previously configured, click on the + symbol next to Home Charging. - Page 16 2. Select START CONFIGURATION. 3. Select Add via Wi-Fi and click on the arrow to proceed.
- Page 17 4. Select CONNECT NOW. NOTE Before you proceed to the following step, go to the Settings of your smartphone and disable the automatic connection of the device to the known networks present in the area. At the end of the process, when the JuiceBox will be online, you can activate again the automatic connection to the known networks present in the area.
- Page 18 6. Wi-Fi networks are scanned and listed on the screen. Select the network you want to connect your JuiceBox to.
- Page 19 7. Enter the password of the network selected and select CONNECT CHARGER TO WIFI NOTE Once password verification is completed, the smartphone may not reconnect automatically to the hotspot of the JuiceBox. After 20 seconds, if you are not redirected to the following screen, go to the Settings of your phone and restore the connection to the hotspot of the JuiceBox.
- Page 20 The default power (in kW), defines the actual power delivered from the charger. If a JuiceMeter enables Load Optimization Plus functionality (available only for JuiceBox Pro), the maximum power provided by the JuiceBox will be the lower number between the cap set during the JuiceMeter’s installation and the power level selected through JuicePass app.
- Page 21 10. Select the mode of use of your JuiceBox, choosing between Connect&Charge or Unlock To Charge. Then click on the arrow to proceed. NOTE For more information on the modes of use, refer to the section Charging your vehicle...
- Page 22 11. If Unlock To Charge mode is selected, you can register a RFID card to your JuiceBox or select Skip for later. If Connect&Charge mode is selected instead, you will directly access the following screen. NOTE You can add a RFID card to your account at any time in the menu section My Account. If the JuiceBox is set in Unlock To Charge and no RFID card is registered, it is still possible to start a charging session with a start command from the JuicePass app (refer to the section Charging your vehicle).
- Page 23 12. You did it! The JuiceBox is now online and ready to charge.
-
Page 24: Association With A Second Account Using Wi-Fi Connectivity
3.4 Association with a second account using Wi-Fi con- nectivity 1. On the top left corner of the home screen, select 3 horizontal lines > Home Charging. NOTE In case another JuiceBox was previously configured, click on the symbol + next to Home Charging... - Page 25 2. Select START CONFIGURATION 3. Select Add via Wi-Fi and click on the arrow to proceed.
- Page 26 4. Select Add a charger already connected to a network 5. Identify the charger by scanning the local network, or scanning the serial number of the JuiceBox in QR code format. 6. Enter the PIN code needed to complete the process. The PIN code should be shared by the user whom first associated the JuiceBox to his/her account.
- Page 27 NOTE The PIN code can be retrieved at any time by a user already associated in the settings menu of the JuiceBox, in the section Sharing. 7. You did it! Your JuiceBox is now connected to your account.
-
Page 28: Charging Your Vehicle
4. Charging your vehicle 4.1. Connect&Charge mode This section describes how to charge a vehicle with a JuiceBox set in Connect&Charge mode. To start charging, connect your vehicle to the JuiceBox: > Cable version: Connect the JuiceBox charging cable to your vehicle >... -
Page 29: Unlock To Charge Mode
4.2 Unlock to Charge mode This section describes how to charge a vehicle with a JuiceBox set in Connect&Charge mode, using either app JuicePass or a RFID card. 4.2.1. USING THE JUICEPASS APP TO START CHARGING IMMEDI- ATELY To start charging, access the Home charging section in JuicePass app and Slide to unlock. Plug in your vehicle within 90 seconds to start charging. - Page 30 To stop charging, select Slide to stop in the JuicePass app. Charging stops automatically and the charging cable can be removed. NOTE It is also possible to issue a STOP command from the vehicle.
-
Page 31: Using A Rfid Card To Start Charging Immediately
4.2.2. USING A RFID CARD TO START CHARGING IMMEDIATELY NOTE Your RFID card is added to your account in the Getting Online section. If it is not the case, you can pair a RFID card with the JuiceBox at any time, in the menu section My Account. -
Page 32: Charging History
5. Charging history To see the history of the charging sessions performed in the past, select 3 horizontal lines > Charging history. The list of your charging sessions will appear. -
Page 33: Settings
6. Settings You can access the JuiceBox page in either of the two ways: 1. On the top right corner of the home screen, click on the JuiceBox icon. 2. On the top left corner of the home screen, select 3 horizontal lines > Home Charging. - Page 34 NOTE If a JuiceMeter enables Load Optimization Plus functionality (available only for JuiceBox Pro), the maximum power provided by the JuiceBox will be the lower number between the cap set during the JuiceMeter’s installation and the power level selected through JuicePass app.
-
Page 35: Led Indicator
7. LED indicator COLOR MEANING > Solid: Online White > Blinking: Online, waiting for cable insertion (90-second duration) > Solid: Offline Purple > Blinking: Offline, waiting for cable insertion (90-second duration) > Solid: Charging complete (vehicle not drawing power) > Solid (3-second duration): Start/stop command Green received from app or RFID card...
Need help?
Do you have a question about the JUICEBOX PRO and is the answer not in the manual?
Questions and answers
Juicebox 40 - I cant connect my juicebox 40 it keep asking my pin #? Which I dont remember setting up ? Any how?
To reset or retrieve the PIN for the Enel X JuiceBox Pro, a user who is already associated with the JuiceBox must go to the settings menu in the JuiceBox app, then navigate to the "Sharing" section. There, the PIN code can be retrieved and shared with others who want to connect the device to their account.
This answer is automatically generated
JuiceBox 40
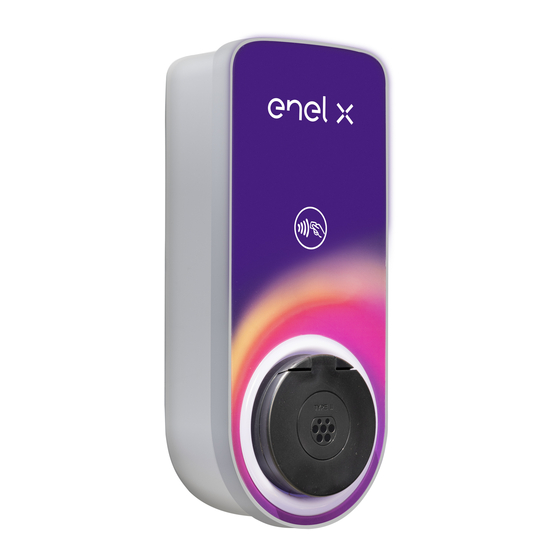
The Enel X JuiceBox Pro 40 is a compact, high-power, ruggedized electric vehicle charging station (EVSE) with built-in WiFi. It is designed for both indoor and outdoor use and is suitable for businesses offering EV charging to customers, tenants, or employees. It features built-in cable management, a security lock, dynamic LED lights for status display, and supports flexible installation options such as hardwire, wall mount, or pedestal mount. It is compatible with all EVs and adjusts power output automatically for safe charging.
This answer is automatically generated