
Subscribe to Our Youtube Channel
Related Manuals for Microtek ArtixScanDI 7200S


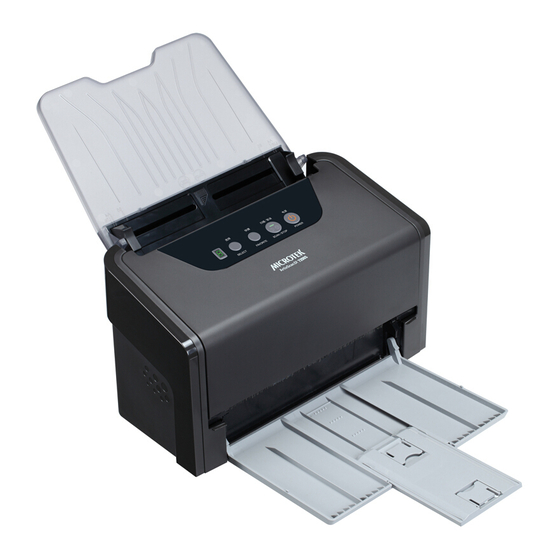
Summary of Contents for Microtek ArtixScanDI 7200S
- Page 1 Document Imaging Scanner ArtixScanDI 7200S ArtixScanDI 7280S User's Manual www.microtek.com...
-
Page 2: Preface
The contents of this manual have been checked carefully for accuracy, and every effort has been made to ensure that there are no errors. However, Microtek makes no guarantee as to the accuracy of the contents of this document and reserves the right to make changes to the contents without prior warning. -
Page 3: Fcc Compliance Statement
FCC Compliance Statement This equipment (Model: MSS-1200A4LU3) has been tested and found to comply with the limits for a Class B digital device, pursuant to Part 15 of the FCC rules. These limits are designed to provide reasonable protection against harmful interference in a residential installation. -
Page 4: Safety Precautions
Safety Precautions Before using your scanner, read the following safety guides carefully, which detail the proper operation of the scanner and its accessories to prevent injuries or damage to users or equipment. Power Source and AC Power Cord: • Use a power source only with a power rating specified on the marking label. •... -
Page 5: Table Of Contents
Table of Contents Preface ....................2 FCC Compliance Statement ..............3 Safety Precautions ................4 Knowing about Your Scanner ...............7 Features of Your Scanner ..............7 Installation Requirements ..............9 Taking a Closer Look ............... 10 Front/Top View ................. 10 Open/Back View ............... 11 Initial Setup ..................12 Step 1: Unpacking Package Contents .......... - Page 6 Utilizing Scanned Documents ............37 Scanning for OCR ................37 Scanning for E-mail ................. 39 Scanning for Copying ..............40 Scanning to Cloud ................41 Scanning as Text-to-Speech (TTS) ............ 42 Scanner Buttons ................44 Starting up the Scanner Button Settings Interface ....... 45 Customizing the Scanner Buttons ............
-
Page 7: Knowing About Your Scanner
Knowing about Your Scanner The scanner (ArtixScan DI 7200S/ArtixScan DI 7280S) is a sheet-fed color document scanner with an built-in automatic document feeder (ADF) that can hold up to 100 sheets of papers for the unattended volume scanning. It features optical resolution of 600 dpi, duplex (double-sided) scanning, and extra long page support. - Page 8 • Additional USB hub ability — The scanner with embedded USB hub allows you to connect an external Microtek’s flatbed scanners, using Universal Serial Bus technology to a single USB port. • New and Advanced Microtek ScanWizard DI software — ScanWizard DI offers a host of features and image adjustment controls for scanning.
-
Page 9: Installation Requirements
Installation Requirements In order to use your scanner, your computer must satisfy the following system requirements: • CD-ROM/DVD-ROM drive (for installing software) • Color display with 24-bit color output capability • 1 GB RAM or more (2 GB is recommended) •... -
Page 10: Taking A Closer Look
Taking a Closer Look Front/Top View Names of Parts Functions of Parts Scanner Cover Used to cover the inner parts of the scanner. Document Output Tray Stores the stacked documents which have been scanned. Output Tray Extender Used to extend the length of the Document Output Tray. Paper Stopper (1) Stops a stack of the output documents. -
Page 11: Open/Back View
Open/Back View Names of Parts Functions of Parts Output Rollers Used to eject documents after scanning. Separation Roller Assembly Used to separate each sheet of documents when a stack of documents are fed into the feeder. Release Button Lifts up to open the scanner cover. Glass Surfaces The places where the CCD cartridges are stored. -
Page 12: Initial Setup
Initial Setup After unpacking your scanner package, follow the steps in order for a quick and easy installation process. Step 1: Unpacking Package Contents After unpacking your scanner package, please check for the major components listed below. Power Adapter Scanner Power Cord SuperSpeed USB Cable Software CDs/DVDs... -
Page 13: Step 2: Installing The Software
After you finish the installation of software, if you found that the installed drivers and software cannot run your product or your computer system properly later, please go to the Microtek Download Service site at www.microtek.com/service.php to download and install any updates you may require. -
Page 14: Step 3: Opening Feed Tray & Output Tray
Step 3: Opening Feed Tray & Output Tray Open Document Feed Tray 1. Lift up the Document Feed Tray to the highest level which can be opened. Document Feed Tray 2. Along the tracks of the two sides of the Document Feed Tray, slide the feed tray down until the supporters of the tray touch the bottom edge of the... - Page 15 Open Document Output Tray and Paper Stabilizer Bring down the Document Output Tray from the top towards the direction as shown in the graph. Document Output Tray Then, locate the Paper Stabilizer located at the bottom of the scanner cover. Lower it down gently from the top towards the direction as shown in the graph.
-
Page 16: Step 4: Connecting The Scanner
Step 4: Connecting the Scanner To the Power Adapter 1. Connect the power adapter to the back of the scanner. 2. Plug one end of the power cord into the power adapter, and plug the other end of the power cord into a wall outlet or other power source. To the SuperSpeed USB Cable 3. - Page 17 5. Press and hold the Power button ( ) until the orange LED lights on. Power button Once the scanner is powered on, the green LED will be lighted up, and the 7-segment LED display (SSD) will also be activated as well. The system will detect the scanner automatically.
-
Page 18: Connecting To An External Usb Device
Connecting to an External USB Device The scanner comes with two USB ports, one is used to connect with the computer, and the other is used to connect with an external Microtek's flatbed scanner. 1. Follow the procedure (Steps 1 through 4) for “Initial Setup” section to connect your scanner first. -
Page 19: Positioning Documents
WARNING: The document feeder is not designed for scanning photos; doing so may damage your originals. Microtek accepts no responsibility for damage that may arise from misuse of equipment. ArtixScan DI 7200S/7280S User's Manual... - Page 20 4. Align the stack of originals with the center of the Document Feed Tray by sliding the two Guide Arms toward the stacked papers if needed. Guide Arms 5. Pull out the Output Tray Extender to carry the longer paper if needed. Output Tray Extender 6.
-
Page 21: Paper Stopper And Paper Stabilizer Notice
Paper Stopper and Paper Stabilizer Notice The Paper Stopper is designed to prevent the paper stacks falling in a mess after they were scanned and output into the output tray. Before scanning a stack of papers, please follow the steps below to fix the Paper Stopper into the right position in the tray, in order to keep output papers stay neatly in the tray after the scan. - Page 22 The Paper Stabilizer located at the bottom of the scanner cover is majorly designed to keep the stability for the paper stacks when they fall into the output tray from the output slot of the scanner. It is very helpful to scan documents with mixed paper sizes.
-
Page 23: To Load Cards
To Load Cards 1. Slide the Guide Arms toward the center of the feed tray and free up the enough space to put the card inside. Guide Arms 2. Load and center the card into the Document Feed Tray, with the front side facing up and the top edge directing toward the feeder. -
Page 24: Document Notices
Please refer to the section as below for the detail. • The scanner is not designed for scanning photos; doing so may damage your originals. Microtek accepts no responsibility for damage that may arise from misuse of equipment. • The scanner can handle paper/card specifications: –... -
Page 25: Scanning Scenarios
Scanning Scenarios Microtek only demos the use of the ScanWizard DI (PC) in succeeding pages in this guide. For more details about using the ScanPotter (Mac) to scan your documents, please refer to the ScanPotter Reference Manual in the Microtek software CD/DVD. - Page 26 Select the appropriate image type in the Color Mode as your image output type. – Select RGB Color (24 bits) to scan the image in color. – Select Grayscale (8 bits) to scan the image in grayscale. Select Black & White (1 bit) to scan the image in black-and-white. –...
- Page 27 7. Go to the “General” panel by clicking the General tab in the Settings window. Specify the settings for your requirements there. If necessary, specify the image settings for the front or back side of documents separately by using the Sides of Material control when Scan Source is set as “ADF (Duplex)”.
- Page 28 File Location menu box Click on a thumbnail image to enlarge it in the Image View Window at the right side of the interface. AP control panel (Main interface) TWAIN driver control panel (Scan Setup interface) ArtixScan DI 7200S/7280S User's Manual...
-
Page 29: Scanning Documents With Barcodes
NOTE: If you want to know more about how to deal with documents with barcodes, refer to the ScanWizard DI Reference Manual in the Microtek Software CD/DVD. 8. In the Main interface, select and click the Normal Scan button to start scanning. - Page 30 File Location menu box Click on a thumbnail image to enlarge it in the Image View Window at the right side of the interface. AP control panel (Main interface) TWAIN driver control panel (Scan Setup interface) ArtixScan DI 7200S/7280S User's Manual...
-
Page 31: Scanning Cards
Scanning Cards This scanning scenario guides users to scan any hard-copied card into an image and saves it for viewing or recording purpose. It helps users to skip complicated scan settings. 1. Load the card to be scanned onto the scanner’s document feed tray. 2. -
Page 32: Scanning Documents Automatically
Scanning Documents Automatically This scanning scenario guides users to perform an automatic scan by using the Auto Paper Detection function. It works only when the scanner is equipped with a paper detecting sensor 1. Launch ScanWizard DI as a stand-alone program by clicking on the ScanWizard DI icon on the desktop. - Page 33 Set the time interval to control the automatic scan Set the time period to close automatic scan automatically Load the document to be scanned onto the scanner’s document feed tray. Once the scanner detects the document, the scanner will start scanning automatically based on a predefined time interval.
-
Page 34: Scanning Documents From An Application
1. Load the document to be scanned into the scanner’s document feed tray. 2. Launch your application (e.g., Adobe PhotoShop). 3. Select the “Microtek ScanWizard DI (TWAIN)” driver in the Import options from the File menu. When succeeded, the ScanWizard DI (TWAIN) driver interface appears on the screen. -
Page 35: Scanning And Saving Documents In Fast Jpeg Compression File Format
Scanning and Saving Documents in Fast JPEG Compression File Format This scanning scenario guides users to use Fast JPEG Compression file format scan and save documents. This feature is useful when when users need to scan bunch of color materials and save them in short period of time. 1. - Page 36 Click on a thumbnail image to enlarge it in the Image View Window at the right side of the interface. AP control panel (Main interface) TWAIN driver control panel (Scan Setup interface) ArtixScan DI 7200S/7280S User's Manual...
-
Page 37: Utilizing Scanned Documents
Utilizing Scanned Documents Depending on your needs, you may utilize your scanned and saved documents directly in the following ways. Scanning for OCR The OCR (Optical Character Recognition) function allows to convert the scanned and saved images into text files that can be edited in any common word processing applications (e.g., Word, Excel, PowerPoint). - Page 38 3. In the OCR Settings window, set up related requirements: – Save Location: Specify a directory for saving the converted files. – Language: Select a language in which the original text document is written. Supported options include most common used languages in the world.
-
Page 39: Scanning For E-Mail
Scanning for E-mail The e-mail function allows the scanner to save and send the scanned images to the default E-mail application assigned by the system. This lets you share your scanning results with others fast and easily. 1. Check the box next to the images or use the selection tools (All and Invert) to select the image files you want to send out by E-mail in the Thumbnail View window. -
Page 40: Scanning For Copying
Scanning for Copying The Print function allows the scanner to work like a copier. Using together with your printer, documents can be printed successively without interruptions. This feature transforms your scanner and printer into a convenient copy station. 1. Check the box next to the images or use the selection tools (All and Invert) to select the image files you want to make a copy in the Thumbnail View window. -
Page 41: Scanning To Cloud
Scanning to Cloud The Cloud function allows to save the scanned image files locally and also attach it to paste to the internet storage spaces assigned by the webside service providers. This lets you back up your scanning results in a safer way. 1. -
Page 42: Scanning As Text-To-Speech (Tts)
Scanning as Text-to-Speech (TTS) The Text-to-Speech (TTS) function allows to convert the scanned and saved images into text files that can be read out word by word by the system. 1. Check the box next to the image to select the image file you want to save and transfer as a TTS file in the Thumbnail View window. - Page 43 4. When done, click the OK button to perform TTS. Once TTS is complete, The scanned and recognized file will be opened in “Text to Speech” window. ArtixScan DI 7200S/7280S User's Manual...
-
Page 44: Scanner Buttons
Scanner Buttons Your scanner is equipped with three physical buttons, Select, Scan/Stop and Favorite, used to automate a number of customized and predefined operations, such as scanning to a file, sending an image to your printer or e-mail account, scanning for OCR, etc. Customizing is done through the Scanner Button Settings interface, as explained next. -
Page 45: Starting Up The Scanner Button Settings Interface
Starting Up Scanner Button Settings Interface Before setting up scanner function buttons, follow the steps below to enable the Scanner Button Settings interface. 1. Look for the Scanner icon at the right corner of Toolbar on your Windows desktop. Click Settings to enable the Scanner Button Settings interface... -
Page 46: Customizing The Scanner Buttons
Customizing the Scanner Buttons 1. Launch ScanWizard DI. 2. Follow the procedures (steps 3 through 11) for the “Scanning Documents” section to specify your scanning requirements in the ScanWizard DI panel. 3. When you finish specifying the scanning settings, exit the ScanWizard DI. Follow the steps in “Starting Up the Scanner Button Settings Interface”... -
Page 47: How The Scanner Button Works
5. Specify the function settings according to your requirements, then click the Save button. The parameters currently specified for your selected function button are saved. To define another custom function button if desired, follow steps 2 through 5 of this section. NOTE: 1. -
Page 48: Care And Cleaning
Care and Cleaning To ensure optimal performance from the your scanner, it is important to clean several critical parts of the scanner on a regular basis. The recommended cleaning cycle time would be after 3,000 to 5,000 scans. Cleaning the Scanner Glass Surfaces 1. -
Page 49: Cleaning The Rollers
Cleaning the Rollers Prolonged used of the scanner may result in accumulation of ink and other residue on the feeder’s rollers, affecting their efficiency. Clean the rollers periodically to maintain performance. 1. Lift up the Release button in the direction as shown in the graph to open the scanner cover. - Page 50 Cleaning the Recesses of the Roller Cover 1. Lift up the Release button in the direction as shown in the graph to open the scanner cover. Release button Scanner cover 2. When the scanner cover is opened, you can find two recesses at the top of the roller cover.
-
Page 51: Cleaning The Sensors
Cleaning the Sensors 1. Lift up the Release button in the direction as shown in the graph to open the scanner cover. Release button Scanner cover 2. When the scanner cover is opened, you can find four sets of sensors (Ultrasonic Double-feed sensors, I/O sensors, and Tray sensors) locating at the inner sides of the scanner. -
Page 52: Maintenance
Maintenance The Separation Roller Assembly and the Feed Roller Assembly in your scanner are designed to make document feeding smooth. After usage for a period of time, the Separation Roller and Feed Rollers may become worn out, and problems such as document double-feed may occur. - Page 53 3. To remove the Separation Roller, hold the roller and then take it out from the assembly unit. 4. To install a new Separation Roller onto the assembly unit, gently hold both sides of the roller and insert two flanges on the roller into the notches of the assembly unit.
-
Page 54: Replacing The Feed Roller Assembly
Replacing the Feed Roller Assembly 1. Lift up the Release button in the direction as shown in the graph to open the scanner cover. Locate the Feed Roller Assembly at the inner side of the scanner. Release button Feed Roller Assembly Scanner cover 2. - Page 55 3. To change the roller at the top: Rotate the lever on the roller shaft down to loosen the roller. Lever Roller shaft Move the roller shaft to the left horizontally. Hold the both sides of the roller to pull it out carefully from its compartment.
- Page 56 5. Follow the instructions described in the step 3 and 4 to change a new roller for the roller at the bottom. Remove the old roller from the bottom Insert a new roller at the bottom 6. After done, push the roller cover up until you hear a “click”. In order to avoid breaking down the levers at the corners of the roller cover, remember to push...
-
Page 57: Appendix
Appendix Fixing Paper Jams 1. Lift up the Release button Release button in the direction of the arrow shown to open the scanner cover. Scanner cover 2. Remove the jammed paper by taking out it in an upward direction. 3. Close the scanner cover. You should hear a click sound when the scanner cover returns to its original position. -
Page 58: Troubleshooting
Troubleshooting The green LED lighting (the SCAN/STOP button) indicates the status of the scanner. The orange LED lighting (the POWER button) stands for power and should always stay on steady when the scanner is on. Orange LED All On: Ready to scan. Green LED Flashing Green: Scanning. - Page 59 6. When trying to scan, an error message appears on your screen that reads, “ADF is not ready or no paper”. Make sure there are papers on the Document Feed Tray. Make sure the top edges of papers have been inserted into the feeder. Finally, close the scanner cover and restart scanning.
-
Page 60: How To Scan The Document Using The Document Sheath (Optional)
How to Scan the Document Using the Document Sheath (Optional) A document sheath is an optional accessory for the scanner you purchased. It is a transparent and unfoldable coverings used together with your scanner when combing two images as one through the ADF. It is very useful when you want to scan an A3 size document with an A4 scanner. - Page 61 C. Scan the Document with ScanWizard DI. 1. Launch ScanWizard DI (either as a stand-alone by clicking the program icon, or by using the “File-Import” or “Scan” command from an application program). 2. Select ADF (Duplex) as your image input device in the Scan Source drop- down menu.
-
Page 62: Specifications Of Artixscan Di 7200S
Specifications of ArtixScan DI 7200S Type Sheet-fed color document scanner Scanning Modes Color, grayscale, and black-and-white in a single scanning pass Input: 48-bit color/16-bit grayscale/1-bit B&W Output: 24-bit color/8-bit grayscale/1-bit B&W Optical Resolution 600 dpi Scanning Sensor CCD (x 2) Light Source LED (Light Emitting Diode) Scanning Speed... -
Page 63: Specifications Of Artixscan Di 7280S
Specifications of ArtixScan DI 7280S Type Sheet-fed color document scanner Scanning Modes Color, grayscale, and black-and-white in a single scanning pass Input: 48-bit color/16-bit grayscale/1-bit B&W Output: 24-bit color/8-bit grayscale/1-bit B&W Optical Resolution 600 dpi Scanning Sensor CCD (x 2) Light Source LED (Light Emitting Diode) Scanning Speed... - Page 64 ArtixScan DI 7200S/7280S User's Manual...
Need help?
Do you have a question about the ArtixScanDI 7200S and is the answer not in the manual?
Questions and answers