Endress+Hauser iTEMP TMT84 Operating Instructions Manual
Temperature head transmitter with profibus pa protocol
Hide thumbs
Also See for iTEMP TMT84:
- Brief operating instructions (40 pages) ,
- Safety instructions (28 pages) ,
- Safety instructions (24 pages)

Related Manuals for Endress+Hauser iTEMP TMT84


Summary of Contents for Endress+Hauser iTEMP TMT84
- Page 1 Operating Instructions ® iTEMP TMT84 Temperature Head Transmitter ® with PROFIBUS PA Protocol BA00257R/09/en/02.11 71137264 Device software 01.01...
- Page 2 Customer-specific configuration Complex measurement tasks require additional functions to be configured that the user can individually select, set and adapt to his process conditions by setting the appropriate parameters. A detailed description of all the functions and device parameters. Endress+Hauser...
-
Page 3: Table Of Contents
Spare parts ......44 Return ........44 Endress+Hauser... -
Page 4: Safety Instructions
EN 61326 as well as NAMUR recommendations NE 21 and NE 89. Warning! Power must be fed to the device from an 9 to 32 VDC power supply in accordance with NEC Class 02 (low voltage/current) with short-circuit power limit to 8 A/150 VA. Endress+Hauser... -
Page 5: Notes On Safety Conventions And Icons
ESD - Electrostatic discharge Protect the terminals against electrostatic discharge. Failure to comply with this instruction can result in the destruction of parts or malfunction of the electronics. Endress+Hauser... -
Page 6: Identification
Measurement, Control, Regulation and Laboratory Procedures" and with the EMC requirements of IEC/EN 61326. 2.3.1 CE mark, declaration of conformity The device meets the legal requirements of EU Directives. The manufacturer confirms a positive completion of all tests by fitting the unit with a CE mark. Endress+Hauser... -
Page 7: Registered Trademarks
An overview of other approvals and certification can be found in chapter ’Technical data'. Registered trademarks ® • PROFIBUS Registered trademark of the PROFIBUS Nutzerorganisation e.V. (Profibus User Organization), Karlsruhe, Germany ® • iTEMP Registered trademark of Endress+Hauser Wetzer GmbH + Co. KG, Nesselwang, Germany Endress+Hauser... -
Page 8: Installation Instructions
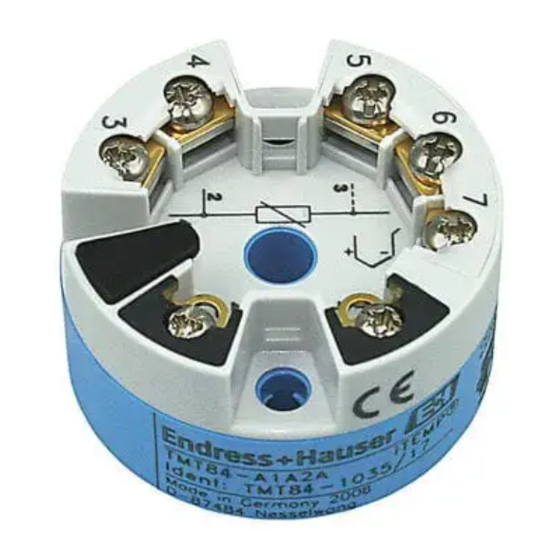
(see Safety Instructions XA or CD). Installation instructions A screwdriver is needed to mount the head transmitter. " Caution! Do not overtighten the mounting screws as this could damage the head transmitter. Maximum torque = 1 Nm (¾ pound-feet). Endress+Hauser... - Page 9 5. Then screw down the head transmitter (5) to the insert (3) in the terminal head. 6. After wiring (see chapter 4), close the terminal head cover (8) back on tight. Item B Mounting in a field housing Field housing cover Mounting screws with springs Head transmitter Circlips Field housing Endress+Hauser...
- Page 10 • Fit the necessary neck tube nipples and adapter (3) on the thermowell. • Make sure sealing rings are installed if such rings are needed for harsh environmental conditions or special regulations. Endress+Hauser...
-
Page 11: Post-Installation Check
Fig. 4: Mounting the display Note! The display can only used with the suitable Endress+Hauser terminal heads TA30 and caps with display window. Post-installation check After installing the device, always run the following final checks: Device condition and specifications... - Page 12 Installation instructions TMT84 Does the device comply to the measurement point specifications, such as See chapter 10 "Technical data" ambient temperature, measurement range etc.? Endress+Hauser...
-
Page 13: Wiring
Quick wiring guide Terminal assignment a0007285-en Fig. 5: Wiring the head transmitter ESD - electrostatic discharge Protect the terminals from electrostatic discharge. Failure to observe this may result in destruction or malfunction of parts of the electronics. Endress+Hauser... -
Page 14: Connecting The Sensor Cables
Fine-strand wire without ferrule: 2. Operate lever opener with tool (B). 3. Insert the wire end into the terminal (B). 4. Release lever opener. 5. Check the connection by pulling on the wire lightly. Repeat from step 1 if necessary. Endress+Hauser... -
Page 15: Profibus® Pa Cable Specification
Max. cable length (incl. spurs >1m/3ft) 1900 m (6233 ft) 1200 m (3937 ft) * Not specified Suitable fieldbus cables from other manufacturers for non-hazardous areas are listed below: • Siemens: 6XV1 830-5BH10 • Belden: 3076F • Kerpen: CeL-PE/OSCR/PVC/FRLA FB-02YS(ST)YFL Endress+Hauser... - Page 16 EMC interference is present. These measures have been taken into account for this device. Operation in the event of disturbance variables as per NAMUR NE21 is thus guaranteed. Where applicable, national installation regulations and guidelines must be observed during the installation! Endress+Hauser...
- Page 17 General information and further pointers on wiring can be found in the Operating Instructions ® "Guidelines for Planning and Commissioning PROFIBUS DP/PA - Field Communication" (BA034S/04) which can also be found on the CD-ROM. (Additional sources: www.endress.com Download). Endress+Hauser...
-
Page 18: Fieldbus Connection
T-boxes, junction boxes, etc. This connection technology using prefabricated distribution modules and plug-in connectors offers substantial advantages over conventional wiring: • Field devices can be removed, replaced or added at any time during normal operation. Communication is not interrupted. Endress+Hauser... - Page 19 4-channel or 8-channel distribution modules. Therefore, the device is optionally available with a fitted fieldbus connector ex works. Fieldbus connectors for subsequent fitting can be ordered from Endress+Hauser as a spare part (see chapter 8 'Accessories'). Shielding the feed line/T-Box Cable connections with good EMC properties must be used, preferably with wraparound cable shielding (iris spring).
-
Page 20: Post-Connection Check
Has the max. length of the fieldbus cable been observed in accordance with the fieldbus specifications? ä 15 Has the max. length of the spurs been observed in accordance with the fieldbus specifications? Is the fieldbus cable fully shielded and correctly grounded? Endress+Hauser... -
Page 21: Operation
• Switching (turning) the display 180 ° a0008323 Fig. 10: Head transmitter operating options ® Configuration/operating programs for operation using PROFIBUS PA (fieldbus functions, device parameters) DIP switches for hardware settings on the rear of the optional display (write protection, device address, turn dis- play) Endress+Hauser... -
Page 22: Display And Operating Elements
"- - - -" (no valid measured value available), (see chapter 'Status messages’. 5.2.3 Local operation You can make hardware settings for the fieldbus interface using miniature switches (DIP switches) on the rear of the optional display Page 24. Endress+Hauser... -
Page 23: Operating Options
Operating options 5.3.1 "FieldCare" operating program FieldCare is Endress+Hauser's FDT-based Plant Asset Management Tool for the configuration and diagnosis of intelligent field devices. Using status information, FieldCare serves as a simple but ® effective tool for monitoring devices. Access to the iTEMP TMT84 occurs exclusively via Profibus communication. -
Page 24: Hardware Settings (Optional)
Turning the display The display can be turned 180° via DIP switch. The DIP switch setting is saved and displayed via a read-only parameter (DISP_ORIENTATION) in the display transducer block. The setting is retained when the display is removed. Endress+Hauser... - Page 25 Wait until the company logo appears on the display. Remove the display and set the "SW/HW" DIP switch to SW. Fit the display once more and wait until the company logo appears. The bus address 126 is used when the device is restarted. Endress+Hauser...
-
Page 26: Commissioning
9, 'Troubleshooting'. The device begins normal operation after approx. 8 seconds, the attached display after approx. 12 seconds. Normal measuring mode commences as soon as the switch-on procedure is completed. Various measured values and/or status values appear on the display. Endress+Hauser... -
Page 27: Commissioning The Profibus® Pa Interface
• Select the "PV Transducer 1" option The following settings are possible: CHANNEL – Primary Value Transducer 1 – Secondary Value 1 Transducer 1 – Reference Junction Temperature – Primary Value Transducer 2 – Secondary Value 1 Transducer 2 Endress+Hauser... -
Page 28: System Integration
Each device is given an identification number (ID) from the Profibus User Organization. The name of the GSD file is derived from this. This ID number starts with the manufacturer code 15xx for Endress+Hauser. For better classification and clarity, Endress+Hauser GSD names are as follows: EH0215xx... - Page 29 There are some GSD files whose modules are transferred using an extended identification (e.g. 0x42, 0x84, 0x08, 0x05). These GSD files are in the "Extended" folder. 6.4.2 Contents of download file • All Endress+Hauser GSD files • Endress+Hauser bitmap files • Useful information on the devices 6.4.3 Working with the GSD files The GSD files must be integrated in the automation system.
- Page 30 The same device address configured for iTEMP TMT184 must be used. ® Connect the iTEMP TMT84 Adjust the following settings if necessary (if the default value was changed): Configure the application-specific parameters Set the units for the process variables Endress+Hauser...
-
Page 31: Cyclical Data Exchange
As per profile 3.02: TMT84 GSD file used or IDENT_NUMBER_SELECTOR set to 1 and "CondensedStatus" parameter to ON. If IDENT_NUMBER_SELECTOR = 127, the GSD file used for establishing the cyclical data exchange determines whether diagnosis occurs according to profile 3.01 or profile 3.02. Endress+Hauser... - Page 32 –Primary value of the transducer Select in the CHANNEL parameter Secondary Value TB1 –Measured value of sensor at sensor input Select in the CHANNEL parameter Internal Temperature –Measured value of the internal reference measuring point Endress+Hauser...
- Page 33 Once configuration has been completed, this is transferred to the automation system as a binary file. The system can now be started. The automation system establishes a connection to the configured devices. The process-related device parameters can now be set using a class 2 master, e.g. with the help of FieldCare. Endress+Hauser...
-
Page 34: Acyclical Data Exchange
The device supports MS2AC communication with 2 available SAPs. MS1AC communication is supported by the device. The memory module is designed for 10 writes. Maintenance In general, no specific maintenance is required for this device. Endress+Hauser... -
Page 35: Accessories
• M12 71005802 • M20x1,5 • 7/8" 71089147 Display TID10 for Endress+Hauser head transmitters iTEMP® TMT8x, TID10-** pluggable; dot-matrix display; DIP switch for hardware setting Troubleshooting Troubleshooting instructions Always start troubleshooting with the checklists below if faults occur after start up or during operation. -
Page 36: Displaying The Device Status On The Profibus® Pa
(Failure, Function Check, Out of Specification, Maintenance Required), thereby providing the user with information on the cause and possible corrective measures. If there is no diagnostic message, the status signal "ok" appears. The graphic shows a failure caused by a line break at sensor 1: Endress+Hauser... - Page 37 As per profile 3.02: TMT84 GSD file used or IDENT_NUMBER_SELECTOR set to 1 and "CondensedStatus" parameter to ON. If IDENT_NUMBER_SELECTOR = 127, the GSD file used for establishing the cyclical data exchange determines whether diagnosis is according to profile 3.01 or profile 3.02. Endress+Hauser...
-
Page 38: Status Messages
• SV2 = secondary value 2 = sensor value 2 in temperature transducer block 1 = sensor value 1 in temperature transducer block 2 • PV1 = Primary value 1 • PV2 = Primary value 2 • RJ1 = Reference junction 1 • RJ2 = Reference junction 2 Endress+Hauser... - Page 39 SV1, SV2, PV1, Calibration Incorrect 2 = BAD Error in calibration parameters. PV2, RJ1, RJ2 F-431 3 = Sensor Failure/Maintenance alarm, more diagnostics available Remedy: Local display: 4 = OK Device defective, replace F431 *) see note on ä 42 Endress+Hauser...
- Page 40 • If available, test the display module with other suitable E+H head transmitters • Display module defective Replace module *) see note on ä 42 Endress+Hauser...
- Page 41 1 = 0x70*/0x73(0x074) Cause of error: Simulation Active 2 = UNCERTAIN Simulation is active. C-482 3 = Init value/simulated value, start (end) 4 = OK Remedy: Local display: C482 Measured Value *) see note on ä 42 Endress+Hauser...
- Page 42 The sensor resistance can affect the resistance data in the table. If all the sensor connection cable resistances are increased at the same time, the values given in the table are halved. The corrosion detection system presumes that this is a slow process with a continuous increase in the resistance. Endress+Hauser...
-
Page 43: Application Errors Without Messages
Sensor incorrectly connected Connect the connecting cables correctly (observe polarity, ä 13) Sensor, sensing head defective Check sensor, sensing head Programming Incorrect sensor type set in the SENSOR_TYPE device function; set the correct thermocouple (TC) Device defective Replace device Endress+Hauser... -
Page 44: Spare Parts
No longer compatible. The device and Operating Instructions change. Change to functions and operation. Compatible. Operating Instructions change. Fixes and internal changes. Operating Instructions do not change. Date Firmware version Modifications Documentation 07/2008 1.00.zz Original firmware/software BA257R/09/en/07.08 71076269 06/2011 1.01.zz PROFIBUS Profile 3.02 update BA00257R/09/en/01.11 71137264 Endress+Hauser... -
Page 45: Technical Data
• With 2-wire circuit, compensation of wire resistance possible (0 to 30 ) • With 3-wire and 4-wire connection, sensor wire resistance up to max. 50 per wire Resistance 10 to 400 Resistance transmitter 10 to 2000 Endress+Hauser... - Page 46 Status message in accordance with PROFIBUS PA Profile 3.01/3.02 specification. Linearization/transmission Temperature linear, resistance linear, voltage linear behavior Mains voltage filter 50/60 Hz Galvanic isolation U = 2 kV AC (sensor input to the output) 11 mA Current consumption Switch-on delay Endress+Hauser...
- Page 47 • Linearization for copper/nickel resistance thermometers (RTD): The equations of the polynomial for nickel are described as: – The equations for copper, in conjunction with the temperature, are described as: T = -50°C to 200°C (-58°F to 392°F) Endress+Hauser...
- Page 48 Input temperature drift = 10K (18°F), Pt100, measuring range 0 to 100°C (32 to 212°F) Maximum process temperature: 100°C (212°F) Measured resistance value: 138.5 (s. IEC 60751) at maximum process temperature Typical temperature drift in : (0.001% of 138.5 ) * 10 = 0.01385 Endress+Hauser...
- Page 49 • Max. rel. humidity: 95% as per IEC 60068-2-30 Degree of protection IP 00, in the installed state, depends on the terminal head or field housing used Shock and vibration resistance 10 to 2000 Hz at 5g as per IEC 60 068-2-6 Endress+Hauser...
- Page 50 Item A: Spring travel L 5 mm (not relevant for US - M4 securing screws) Item B: Securing elements for attachable measured value display Item C: Interface for measured value display contacting a0007672 Fig. 17: Version with spring terminals. The same dimensions except for height of housing. Endress+Hauser...
- Page 51 10.0.7 Certificates and approvals CE mark The device meets the legal requirements of EU Directives. Endress+Hauser confirms positive com- pletion of all tests by fitting the device with a CE mark. Ex approval Contact your Endress+Hauser sales office for information on Ex versions currently available (ATEX, FM, CSA, etc.).
- Page 52 • Certified according to PROFIBUS PA Profile 3.02 • The device can also be operated with certified devices of other manufacturers (interoperability) 10.0.8 Documentation Additional Ex documentation: • ATEX II1G: XA069R/09/a3 • ATEX II3G: XA073R/09/a3 • ATEX II3D: XA074R/09/a3 Endress+Hauser...
-
Page 53: Operation Using Profibus® Pa
® TMT84 11 Operation using PROFIBUS ® Operation using PROFIBUS The operation is geared towards the user role of the operator in question and groups the operating parameters into appropriate operating menus. Two setup modes are available in this user-oriented operating system: The "Standard" setup and the "Expert"... - Page 54 ® 11 Operation using PROFIBUS TMT84 11.2 Standard setup The following parameter groups are available in the standard setup. These parameters are used for basic device configuration. The head transmitter can be put into operation with this limited param- eter set. 11.2.1 Group Display/Operation The settings for displaying the measured value on the optional TID10 plug-in display are made in...
- Page 55 ® TMT84 11 Operation using PROFIBUS Display/operation Menu item Parameter "Display/opera- Parame- tion" Name Description ter access (Expert- System Display) Display format n read/ For selecting the number of places displayed after the dec- write imal point. Configuration option from 0 to 4. The option 4 means 'AUTO'.
- Page 56 ® 11 Operation using PROFIBUS TMT84 11.2.2 Group Setup Information on the device mode, such as the target mode, and parameters for the basic configuration of the measuring inputs, such as the sensor type. All the settings that are needed to operate the device can be made in the Standard setup mode.
- Page 57 ® TMT84 11 Operation using PROFIBUS Setup Menu item Parameter Parame- "Setup" Name Description ter access Block Mode General information on Block Mode Block Mode contains three elements: • the block's current operating mode (Actual Mode) • the modes supported by the block (Permitted Mode): Analog Input (AI): AUTO, MAN, OOS Physical Block: AUTO, OOS Transducer Block: AUTO...
- Page 58 ® 11 Operation using PROFIBUS TMT84 Setup Menu item Parameter Parame- "Setup" Name Description ter access Unit n read/ Configuration of temperature unit for PV value n write Options: • 1000 - K • 1001 - °C • 1002 - °F •...
- Page 59 ® TMT84 11 Operation using PROFIBUS Setup Menu item Parameter Parame- "Setup" Name Description ter access Measuring type n read/ Displays the calculation process for Primary Value 1. write Options: Sensor Transducer 1 (Measuring mode 1): • PV = SV1: Secondary value 1 •...
- Page 60 ® 11 Operation using PROFIBUS TMT84 Setup Menu item Parameter Parame- "Setup" Name Description ter access Threshold value n read/ Value for switching in PV mode for sensor switching. write Entry in the range of -270°C to 2200°C (-454°F to 3992°F).
- Page 61 ® TMT84 11 Operation using PROFIBUS Procedure for configuring drift detection for sensor 1: 1. Start 2. Select Type of measurement "PV =ABS(SV1-SV|) if PV < sensor drift detection limit value" or "PV =ABS(SV1- SV2) if PV > sensor drift detection limit value" ...
- Page 62 ® 11 Operation using PROFIBUS TMT84 Advanced setup Menu item Parameter "Setup" Parame- Submenu Name Description ter access "Advanced setup" HW write protection read Displays the status of hardware write protection. Display: – 0 - Off write protection disabled, parameters can be changed.
- Page 63 ® TMT84 11 Operation using PROFIBUS 11.2.3 Group Diagnostics All the information that describes the device, the device status and the process conditions can be found in this group. The individual parameters are summarized in the Diagnostics menu: System information Page 63 ...
- Page 64 0x4002 - PROFIBUS PA, Compact Class B Profile Revision read Displays the profile version implemented in the device. Manufacturer read Displays the manufacturer ID number. Display: 0x11(hex);17 (decimal): Endress+Hauser Product designation read Displays the manufacturer-specific device designation. Display: iTEMP TMT84 PROFIBUS Ident read...
- Page 65 ® TMT84 11 Operation using PROFIBUS Submenu Diagnostics - Measured values - Min./max. value This menu is only visible in the online mode. In this menu, you can view the maximum indicators of the PV values, the two measuring inputs and the internal reference measurement.
- Page 66 ® 11 Operation using PROFIBUS TMT84 Submenu Diagnostics - Device test/reset This menu is only visible in the online mode. By means of a reset, the device can be set to a defined state depending on the reset code. Device test/reset Menu item Parameter "Diagnostics"...
- Page 67 ® TMT84 11 Operation using PROFIBUS 11.3 Setup Expert The parameter groups for the Expert setup contain all the parameters of the Standard setup and other parameters that are solely reserved for experts. System Page 67 Display Page 54 Settings and description of the measur- ing point ...
- Page 68 ® 11 Operation using PROFIBUS TMT84 System Menu item Parameter Parame- "Diagnostics" Name Description ter access PROFIBUS Ident read/ For selecting the configuration behavior. Number Selector write Note! Every PROFIBUS device must check an identification number assigned by the PROFIBUS User Organization during the configuration phase.
- Page 69 ® TMT84 11 Operation using PROFIBUS System Menu item Parameter Parame- "Diagnostics" Name Description ter access System alarm delay Alarm hysteresis: Value as to the time a device status (Failure or Maintenance) and measured value status (Bad or Uncertain) is delayed until the status is output. Can be configured between 0 and 10 seconds.
- Page 70 ® 11 Operation using PROFIBUS TMT84 Sensor 1 / Sensor 2 Menu item Parameter "Sensor" Parame- Submenu Name Description ter access "Sensor 1" or "Sen- sor 2" Input Range and read/ Configuration of the input measurement range. Mode n write •...
- Page 71 ® TMT84 11 Operation using PROFIBUS Sensor 1 / Sensor 2 Menu item Parameter "Sensor" Parame- Submenu Name Description ter access "Sensor 1" or "Sen- sor 2" Measure type n read/ Displays the calculation process for Primary Value 1, also see Chapter 11.2.2 write Note! SV1 = Secondary Value 1 =...
- Page 72 ® 11 Operation using PROFIBUS TMT84 Sensor 1 / Sensor 2 Menu item Parameter "Sensor" Parame- Submenu Name Description ter access "Sensor 1" or "Sen- sor 2" Offset n read/ Offset for Primary Value 1 write The following values are permitted: •...
- Page 73 ® TMT84 11 Operation using PROFIBUS Submenu "Special linearization 1" or "Special linearization 2" Procedure for configuring a special linearization using Callendar-Van Dusen coefficients from a cal- ibration certificate: 1. Start 2. Configure the type of measurement e.g. PV=SV1 ...
- Page 74 ® 11 Operation using PROFIBUS TMT84 Special linearization 1 / Special linearization 2 Menu item Parameter "Sensor" Parame- Submenu Name Description ter access "Special lineariza- tion n" Call.-v. Dusen coeff. read/ Sensor linearization based on the Callendar-Van Dusen write method. Call.-v.
- Page 75 ® TMT84 11 Operation using PROFIBUS Special linearization 1 / Special linearization 2 Menu item Parameter "Sensor" Parame- Submenu Name Description ter access "Special lineariza- tion n" Poly. coeff. A read/ Sensor linearization of copper/nickel resistance thermom- write eters (RTD). Poly.
- Page 76 ® 11 Operation using PROFIBUS TMT84 Communication Menu item Parameter Parame- "Communication" Name Description ter access (only visible in Set Unit To Bus read/ Transfers configured system units to the automation online mode) write system. During the transfer, the scaling of the OUT SCALE value in the Analog Input Block is automatically overwritten with the configured PV SCALE and the unit from the Transducer Block is copied over the "Out Scale - Unit"...
- Page 77 ® TMT84 11 Operation using PROFIBUS Failsafe mode If an input or simulation value has the status BAD, the Analog Input function block uses the failsafe mode defined in the "Failsafe mode" parameter. The "Failsafe mode" parameter (Page 84) offers the following options: Options in the FAILSAFE TYPE parameter Failsafe mode:...
- Page 78 ® 11 Operation using PROFIBUS TMT84 The result is that with an input value of, for example, 100°C (212 °F), a value of 50% is output via the OUT parameter. A0008277 Fig. 2: Scaling procedure in the Analog Input function block Analog Input Menu item Parameter...
- Page 79 ® TMT84 11 Operation using PROFIBUS Analog Input Menu item Parameter Parame- "Communication" Name Description ter access Actual Mode read Displays the current operating mode. Options: 0x08 AUTO 0x10 MAN 0x80 OOS Display: AUTO AI n channel read/ Assignment between the logical hardware channel of the write Transducer Block and the input of the Analog Input func- tion block.
- Page 80 ® 11 Operation using PROFIBUS TMT84 Analog Input Menu item Parameter Parame- "Communication" Name Description ter access (only visible in Quality Displays the quality (measured value status) for the "Out- read online mode) put value". 0x80 - Good 0x84 - Good: Parameters changed 0x88 - Good: Warning limit 0x8C - Good: Alarm limit 0x90 - Good: Unacknowledged block alarm (Pr.
- Page 81 ® TMT84 11 Operation using PROFIBUS Analog Input Menu item Parameter Parame- "Communication" Name Description ter access Filter Time Const. read/ Entry of the filter time constant (in seconds) of the digital write filter of the 1st order. This time is required in order for 63% of a change in the Analog Input (input value) to have an effect on OUT (out- put value).
- Page 82 ® 11 Operation using PROFIBUS TMT84 Analog Input Menu item Parameter Parame- "Communication" Name Description ter access Unit read/ For selecting the output unit. write Factory settings: Analog Input function block = 0x07CD (1997)= none Note! OUT UNIT (output unit) does not affect measured value scaling.
- Page 83 ® TMT84 11 Operation using PROFIBUS Analog Input Menu item Parameter Parame- "Communication" Name Description ter access Limit Hysteresis read/ For entry of the hysteresis value for the upper and lower write warning or alarm limit values. The alarm conditions remain active as long as the mea- sured value is within the hysteresis.
- Page 84 ® 11 Operation using PROFIBUS TMT84 Analog Input Menu item Parameter Parame- "Communication" Name Description ter access Fail Safe Mode read/ For selecting failsafe mode in the event of a device error or write bad measured value. ACTUAL MODE (current operating mode of the block) remains in AUTO MODE (automatic operation).
- Page 85 ® TMT84 11 Operation using PROFIBUS 11.3.3 Group Diagnostics All the information that describes the device, the device status and the process conditions can be found in this group. The individual parameters are summarized in the Diagnostics menu in this chapter: Diagnostics Menu item Parameter...
- Page 86 ® 11 Operation using PROFIBUS TMT84 Diagnostics Menu item Parameter Parame- "Diagnostics" Name Description ter access Extended read Manufacturer-specific diagnostics information encoded in diagnostics bits. Several messages are possible. See the "Status diagnostics bits" at the end of this manual. Extended diagnos- read Displays the bit mask that outputs the manufacturer-spe-...
- Page 87 ® TMT84 11 Operation using PROFIBUS Submenu "System information" In addition to the system information described from Page 63 onwards, the following parameter is also available in the Expert setup. System information Menu item Parameter "Diagnostics" Parame- Submenu "System Name Description ter access informations"...
- Page 88 Slot/Index lists 11.4.1 General explanatory remarks Abbreviations used in the Slot/Index lists: • Endress+Hauser matrix The number of the page on which you will find the explanation of the parameter. Object Type: – Record Contains data structures (DS) –...
- Page 89 ® TMT84 11 Operation using PROFIBUS 11.4.2 Device management slot 1 Parameter Name Device Management Slot 1 Directory Header/ Record Unsigned 16 Composite Directory Entries Composite Directory Entry/ Record Unsigned 16 Composite Directory Entries not used 2 -15 – – –...
- Page 90 ® 11 Operation using PROFIBUS TMT84 Name Parameter not used – – – – – – – SET UNIT TO BUS Simple Unsigned 8 DISPLAY_VALUE Record LocalDispVal not used – – – – – – – PROFILE_REVISION Simple OctetString Cst(D) Simple Unsigned 8 CLEAR_LAST_ERROR...
- Page 91 ® TMT84 11 Operation using PROFIBUS 11.4.4 Transducer Block slot 1 Name BLOCK_OBJECT – Record DS-32 ST_REV – Simple Unsigned16 TAG_DESC Simple Octet String STRATEGY Simple Unsigned 16 ALERT_KEY Simple Unsigned 8 TARGET_MODE Simple Unsigned 8 MODE_BLK – Record DS-37 ALARM_SUM –...
- Page 92 ® 11 Operation using PROFIBUS TMT84 Name POLY_COEFF_B Simple Float POLY_COEFF_C Simple Float POLY_COEFF_R0 Simple Float POLY_MEAS_RANGE_MAX Simple Float POLY_MEAS_RANGE_MIN Simple Float not used 158 - 161 – – – – – – – CORROSION_DETECTION Simple Unsigned 8 CORROSION_CYCLES Simple Unsigned 8 SENSOR_DRIFT_ALERT_VALUE Simple...
- Page 93 ® TMT84 11 Operation using PROFIBUS 11.4.6 Analog Input Block (AI 1) slot 1 Name not used 2 - 15 – – – – – – – BLOCK_OBJECT – Record DS-32 ST_REV – Simple Unsigned 16 TAG_DESC Simple Octet String STRATEGY Simple Unsigned 16...
- Page 94 ® 11 Operation using PROFIBUS TMT84 11.4.7 Analog Input Block (AI 2) slot 2 Analog Input Block slot 2 contains the same parameters as Analog Input Block slot 1.. Name All the parameters as in Chapter 11.4.6 0-65 – – –...
-
Page 95: Index
Output ........46 Output variables Abbreviations of the output variables ....38 Endress+Hauser... - Page 96 Diagnosis bits TMT84, 3.02 (1) Pos. 56 57 58 59-71 72 73 74 75 76 77 78 79 80 81 82 83 84 85 86 87 88 89 90 91 92 93 94 95 96 97 98 99 100 101-103 Profile 3.01 with Amendment 2 1.0 1.1 1.2 1.3-2.7 3.0 3.1 3.2 3.3 3.4 3.5 3.6 3.7 4.0 4.1 4.2 4.3 4.4 4.5 4.6 4.7 5.0 5.1 5.2 5.3 5.4 5.5 5.6 5.7 6.0 6.1 6.2 6.3 6.4 6.5-6.7 1.3 Electr.
- Page 97 Diagnosis bits TMT84, 3.02 (2) Pos 24 25 26 27 28 29 30 31 32 33 34 35 36 37 38 39 40 41 42 43 44 45 46 47 48 49 50 51 52 53 54 55 Profile 3.01 with Amendment 2 Nr.
- Page 98 Diagnosis bits TMT84 3.01 (1) Pos. 56 57 58 59-71 72 73 74 75 76 77 78 79 80 81 82 83 84 85 86 87 88 89 90 91 92 93 94 95 96 97 98 99 100 101-103 Profile 3.01 without Amendment 2 1.0 1.1 1.2 1.3-2.7 3.0 3.1 3.2 3.3 3.4 3.5 3.6 3.7 4.0 4.1 4.2 4.3 4.4 4.5 4.6 4.7 5.0 5.1 5.2 5.3 5.4 5.5 5.6 5.7 6.0 6.1 6.2 6.3 6.4 6.5-6.7 1.3 Electr.
- Page 99 Diagnosis bits TMT84 3.01 (2) Pos 24 25 26 27 28 29 30 31 32 33 34 35 36 37 38 39 40-54 55 Profile 3.01 without Amendment 2 No. 1.0 1.1 1.2 1.3 1.4 1.5 1.6 1.7 2.0 2.1 2.2 2.3 2.4 2.5 2.6 2.7 3.0-4.6 4.7 Electr.
- Page 100 PV Status handling PVtemp PV Status THRESHOLD_VALUE SENSOR_MEAS_TYPE post-calculation DRIFT_VALUE calculation DRIFT_SENSITIVITY Diagnosis information SENSOR_MEAS_TYPE Configuration error PV = SV1 PV = SV2 PV Status post-calculation PVtemp Val PVtemp Stat. PVtemp Val PVtemp Stat. ConfigurationPVtemp Stat. PV Stat. good good PV = SV1 good good...
- Page 102 www.endress.com/worldwide BA00257R/09/en/02.11 71137264 FM+SGML6.0...
Need help?
Do you have a question about the iTEMP TMT84 and is the answer not in the manual?
Questions and answers