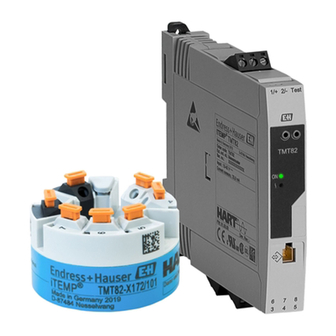
Endress+Hauser iTEMP TMT82 Brief Operating Instructions
2-channel temperature transmitter
Hide thumbs
Also See for iTEMP TMT82:
- Operating instructions manual (124 pages) ,
- Safety instructions (28 pages) ,
- Brief operating instructions (28 pages)
Table of Contents
Advertisement
Quick Links
KA01095T/09/EN/18.19
71463446
2019-12-17
Products
Brief Operating Instructions
iTEMP TMT82
2-channel temperature transmitter
These instructions are Brief Operating Instructions; they do
not replace the Operating Instructions included in the scope of
supply.
Detailed information can be found in the Operating
Instructions and the additional documentation.
Available for all device versions via:
• Internet: www.endress.com/deviceviewer
• Smart phone/tablet: Endress+Hauser Operations App
Solutions
Services
Advertisement
Table of Contents

Related Manuals for Endress+Hauser iTEMP TMT82


Summary of Contents for Endress+Hauser iTEMP TMT82
- Page 1 These instructions are Brief Operating Instructions; they do not replace the Operating Instructions included in the scope of supply. Detailed information can be found in the Operating Instructions and the additional documentation. Available for all device versions via: • Internet: www.endress.com/deviceviewer • Smart phone/tablet: Endress+Hauser Operations App...
- Page 2 TMT82 Order code: XXXXX-XXXXXX Ser. no.: XXXXXXXXXXXX Ext. ord. cd.: XXX.XXXX.XX Serial number www.endress.com/deviceviewer Endress+Hauser Operations App A0023555 Endress+Hauser...
-
Page 3: Table Of Contents
TMT82 Table of contents Table of contents Important document information ..........3 Function of document and how to use . -
Page 4: Symbols
Important document information iTEMP TMT82 1.1.2 Safety Instructions (XA) When using in hazardous areas, compliance with national regulations is mandatory. Separate Ex-specific documentation is provided for measuring systems that are used in hazardous areas. This documentation is an integral part of these Operating Instructions. The installation... -
Page 5: Tool Symbols
TMT82 Basic safety instructions Tool symbols Symbol Meaning Flat blade screwdriver A0011220 Crosstip screwdriver A0011219 Allen key A0011221 Open-ended wrench A0011222 Torx screwdriver A0013442 Registered trademarks HART® Registered trademark of the HART® FieldComm Group Basic safety instructions Requirements for the personnel... -
Page 6: Designated Use
Incoming acceptance and product identification iTEMP TMT82 Designated use The device is a universal and user-configurable temperature transmitter with either one or two sensor inputs for for a resistance thermometer (RTD), thermocouples (TC), resistance and voltage transmitters. The head transmitter version of the device is intended for mounting in a terminal head (flat face) as per DIN EN 50446. -
Page 7: Product Identification
(www.endress.com/deviceviewer): All data relating to the device and an overview of the Technical Documentation supplied with the device are displayed. • Enter the serial number on the nameplate into the Endress+Hauser Operations App or scan the 2-D matrix code (QR code) on the nameplate with the Endress+Hauser Operations App: all the information about the device and the technical documentation pertaining to the device is displayed. - Page 8 Incoming acceptance and product identification iTEMP TMT82 Input: 11-42V Ser.no.: 012345678910 Dev.Rev: x Ext. ord. cd.: XXXXXXXXXXXXX# xx.yy.zz TMT82- XXXXX/XX iTEMP 12345678ABCDEFGH Made in Germany 201x 12345678ABCDEFGH D-87484 Nesselwang A0014561 1 Nameplate of the head transmitter (example, Ex version)
-
Page 9: Scope Of Delivery
TMT82 Incoming acceptance and product identification 3.2.2 Name and address of manufacturer Name of manufacturer: Endress+Hauser Wetzer GmbH + Co. KG Address of manufacturer: Obere Wank 1, D-87484 Nesselwang or www.endress.com Scope of delivery The scope of delivery of the device comprises: •... -
Page 10: Mounting
Mounting iTEMP TMT82 Mounting Mounting requirements 4.1.1 Dimensions 5 (0.2) A0007301 3 Head transmitter version with screw terminals. Dimensions in mm (in) Spring travel L ≥ 5 mm (not for US - M4 securing screws) Mounting elements for attachable measured value display Interface for contacting measured value display The same dimensions apply to the version with spring terminals. -
Page 11: Mounting
TMT82 Mounting 4.1.2 Mounting location • Head transmitter: • In the terminal head, flat face, as per DIN EN 50446, direct mounting on insert with cable entry (middle hole 7 mm) • In the field housing, separated from the process •... - Page 12 Mounting iTEMP TMT82 4.2.1 Mounting the head transmitter Item A Item B . 7 2 i n ) Item C . 7 2 i n ) A0014269-EN 5 Head transmitter mounting (three versions) Procedure for mounting in a terminal head, pos. A: Open the terminal head cover (8) on the terminal head.
- Page 13 TMT82 Mounting . 5 1 i n ) 6.5 mm . 8 3 i n ) (0.25 in) . 7 2 i n ) A0024604 6 Dimensions of angle bracket for wall mount (complete wall mounting set available as accessory) Procedure for mounting in a field housing, pos.
- Page 14 Mounting iTEMP TMT82 Mounting typical of North America A0008520 7 Head transmitter mounting Thermometer design with thermocouples or RTD sensors and head transmitter: Fit the thermowell (1) on the process pipe or the container wall. Secure the thermowell according to the instructions before the process pressure is applied.
-
Page 15: Post-Mounting Check
TMT82 Mounting 4.2.2 Mounting the DIN rail transmitter NOTICE Wrong orientation Measurement deviates from the maximum accuracy rating when a thermocouple is connected and the internal reference junction is used. ‣ Mount the device vertically and ensure it is oriented correctly (sensor connection at... -
Page 16: Electrical Connection
Electrical connection iTEMP TMT82 Electrical connection CAUTION ‣ Switch off the power supply before installing or connecting the device. Not conforming with this can lead to the destruction of electronic components. ‣ Do not occupy the display connection. An incorrect connection can destroy the electronics. -
Page 17: Connecting The Sensor Cables
TMT82 Electrical connection Supply voltage 4...20 mA 1/+ 2/- Test Test Sensor input 1 Sensor input 2 RTD, : Ω 4-, 3- and 2-wire RTD, : Ω 3- and 2-wire TMT82 (black) (black) TC, mV TC, mV white ®... - Page 18 Electrical connection iTEMP TMT82 Sensor input 1 RTD or resistance transmitter, 4-wire Thermocouple (TC), voltage transmitter 5.3.1 Connecting to push-in terminals A0039468 11 Push-in terminal connection, using the example of a head transmitter Fig. A, solid wire: Strip wire end.
-
Page 19: Connecting The Transmitter
TMT82 Electrical connection Fig. C, releasing the connection: Press down on the lever opener. Remove the wire from the terminal. Release lever opener. Connecting the transmitter Cable specification • A normal device cable suffices if only the analog signal is used. -
Page 20: Special Connection Instructions
Electrical connection iTEMP TMT82 2- 1+ 2- 1+ A0039698 12 Connecting the signal cables and power supply Head transmitter installed in field housing Head transmitter installed in terminal head DIN rail transmitter mounted on DIN rail Terminals for HART ®... -
Page 21: Post-Connection Check
TMT82 Electrical connection A0014463 13 ® Shielding and grounding the signal cable at one end with HART communication Optional grounding of the field device, isolated from cable shielding Grounding of the cable shield at one end Supply unit ®... -
Page 22: Operating Options
Operating options iTEMP TMT82 Operating options Measured value display and operating elements 6.1.1 Option: Display TID10 with transmitter The display may also be subsequently ordered at any time after purchasing the transmitter, see the ' A ccessories' section in the Operating Instructions for the device. - Page 23 TMT82 Operating options Item no. Function Description ' C onfiguration locked' The ' c onfiguration locked' symbol appears when configuration is locked via the symbol hardware. Status signals Symbols Meaning Error message "Failure detected" An operating error has occurred. The measured value is no longer valid.
- Page 24 Operating options iTEMP TMT82 1: Connection to head transmitter 2: DIP switches (1 - 64, SW/HW, ADDR and SIM = simulation mode) no function for this head transmitter 3: DIP switch (WRITE LOCK = write protection; DISPL. 180° = switch, turn the display monitor 180°)
-
Page 25: Configuration Of Transmitter And Hart ® Protocol
Configuration of transmitter and HART protocol The transmitter and measured value display are configured via the HART ® protocol or CDI (= Endress+Hauser Common Data Interface). The following operating tools are available for this purpose: Operating tools FieldCare, Field Xpert SIMATIC PDM... -
Page 26: Enabling Configuration
Commissioning iTEMP TMT82 Step Display Current measured value or Current status message If the switch-on procedure is not successful, the relevant diagnostics event, depending on the cause, is displayed. A detailed list of diagnostic events and the corresponding troubleshooting instructions can be found in the Operating Instructions. - Page 28 www.addresses.endress.com...
Need help?
Do you have a question about the iTEMP TMT82 and is the answer not in the manual?
Questions and answers