Endress+Hauser iTEMP TMT82 Operating Instructions Manual
Dual-input temperature transmitter
Hide thumbs
Also See for iTEMP TMT82:
- Operating instructions manual (124 pages) ,
- Safety instructions (28 pages) ,
- Brief operating instructions (28 pages)

Subscribe to Our Youtube Channel
Related Manuals for Endress+Hauser iTEMP TMT82


Summary of Contents for Endress+Hauser iTEMP TMT82
-
Page 1: Operating Instructions
Operating Instructions iTEMP ® TMT82 Dual-input temperature transmitter BA01028T/09/EN/14.12 71198558 Valid as of version 01.00 (device version) - Page 2 (® ä 51) Complex measurement tasks require the configuration of additional functions, which the user can select, set and adapt to his/her process conditions by setting the appropriate device parameters. A detailed description of all functions and device parameters. Endress+Hauser...
-
Page 3: Table Of Contents
Accessories ......30 10.1 Optional accessories ..... 31 Endress+Hauser... -
Page 4: Important Document Information
The Brief Operating Instructions contain all the essential information from incoming acceptance to initial commissioning. The document types listed are available: • On the CD supplied with the device • In the Download Area of the Endress+Hauser Internet site: www.endress.com ® Download 1.1.3 Safety Instructions (XA) When using in hazardous areas, the national safety requirements must be met. - Page 5 Ã 1.2.4 Symbols and notation in graphics Symbol Meaning 1,2,3 ... Item numbers A, B, C, ... Views A-A, B-B, C-C, ... Sections Hazardous area Indicates a hazardous area. A0011187 Safe area (non-hazardous area) Indicates a non-hazardous area. A0011188 Endress+Hauser...
-
Page 6: Basic Safety Instructions
61010, the EMC requirements of IEC/EN 61326 and NAMUR Recommendation NE 21 and NE NOTICE The unit must only be powered by a power supply that operates using an energy-limited ► electric circuit that is compliant with IEC 61010-1, "SELV or Class 2 circuit". Endress+Hauser... -
Page 7: Identification
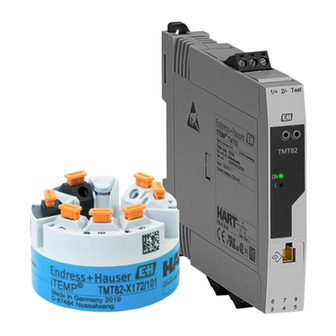
Power supply, current consumption and extended order code Serial number, device revision and firmware version Approvals with symbols 2 lines for the TAG name Approval in hazardous area with number of the relevant Ex documentation (XA...) Order code and manufacturer ID Endress+Hauser... -
Page 8: Scope Of Delivery
HART Communication Protocol Specifications, April 2001, Revision 6.0. 3.3.3 Registered trademarks • HART ® ® Registered trademark of the HART Communication Foundation • iTEMP ® Registered trademark of Endress+Hauser Wetzer GmbH + Co. KG, Nesselwang, D Endress+Hauser... - Page 9 Identification ® iTEMP TMT82 An overview of other approvals and certifications is provided in the "Technical data" section(® ä 50). Endress+Hauser...
-
Page 10: Installation Instructions
(see Ex Safety Instructions). Installation instructions A Phillips head screwdriver is required to mount the head transmitter. NOTICE Do not overtighten the mounting screws as this could damage the head transmitter. Maximum torque = 1 Nm (¾ pound-feet). ► Endress+Hauser... - Page 11 5. Then tighten the head transmitter (5) along with the insert (3) in the terminal head. 6. After wiring, close the terminal head cover again (8) tightly.(® ä 15) Item B Mounting in a field housing Field housing cover Mounting screws with springs Endress+Hauser...
- Page 12 3. Screw the head transmitter (2) onto the DIN rail clip (4). Mounting typical of North America A0008520 Head transmitter mounting å 4 Protection tube Insert Adapter, coupling Terminal head Head transmitter Mounting screws Thermometer design with thermocouples or RTD sensors and head transmitter: Endress+Hauser...
- Page 13 3. Fit the display module onto the mounted and wired head transmitter. The fastening pins must click securely into place on the head transmitter. After mounting, securely tighten the terminal head cover. The display can only be used with the appropriate terminal heads - cover with viewing window (e.g. TA30 from Endress+Hauser). Endress+Hauser...
-
Page 14: Post-Installation Check
After installing the device, always run the following final checks: Device condition and specifications Notes Is the device undamaged (visual inspection)? Do the ambient conditions match the device specification (e.g. ambient temperature, measuring See 'Technical data' range, etc.)? section(® ä 40) Endress+Hauser... -
Page 15: Wiring
Sensor input 2 Sensor input 1 and supply voltage RTD, : Ω 3- and 2-wire RTD, : Ω 4-, 3- and 2-wire TC, mV TC, mV white white white Display connection/ service interface A0007285-EN Wiring the head transmitter å 7 Endress+Hauser... -
Page 16: Connecting The Sensor Cables
3- transmitter, 4- transmitter wire wire wire RTD or resistance    transmitter, 2-wire Sensor input 2 RTD or resistance    transmitter, 3-wire RTD or resistance transmitter, 4-wire Thermocouple (TC),     voltage transmitter Endress+Hauser... -
Page 17: Connecting The Power Supply And Signal Cables
• A normal device cable suffices if only the analog signal is used. • A shielded cable is recommended for HART ® communication. Observe grounding concept of the plant. Please also observe the general procedure on (® ä 15). Endress+Hauser... -
Page 18: Shielding And Grounding
In systems without potential equalization, therefore, cable shielding of fieldbus systems should only be grounded on one side, for example at the supply unit or at safety barriers. Endress+Hauser... -
Page 19: Post-Connection Check
Are the power supply and signal cables correctly (® ä 15) connected? Are all the screw terminals well tightened and have the connections of the spring terminals been checked? Are all the cable entries installed, tightened and sealed? Are all housing covers installed and firmly tightened? Endress+Hauser... -
Page 20: Operating Options
Temperature transmitter as head transmitter or DIN rail device, onsite operation via DIP switches on the rear of the optional display possible only for head transmitter For the head transmitter, display and operating elements are available locally only if the head transmitter was ordered with a display unit! Endress+Hauser... -
Page 21: Structure And Function Of The Operating Menu
HART output Assign PV Diagnostics Actual diagnostics Diagnostics list Actual diagnostics count Event logbook Previous diagnostics Device information Device tag Sensor value Sensor value Sensor 1 min v. Min/max values Simulation Simulation current output Device reset Device reset A0014757-EN Endress+Hauser... - Page 22 Contains all parameters for configuring the measurement. • "Output" submenu Contains all parameters for configuring the analog current output. • "Communication" submenu Contains all parameters for configuring the digital communication interface. • "Diagnostics" submenu Contains all parameters for detecting and analyzing errors. Endress+Hauser...
-
Page 23: Measured Value Display And Operating Elements
The device is being operated outside its technical specifications (e.g. during warm-up or cleaning processes). "Maintenance required" Maintenance is required. The measured value is still valid. The display alternates between the measured value and the status message. DIN rail transmitter Endress+Hauser... - Page 24 Write protection prevents any write access to the parameters. The write protection remains active even when the display is removed. To deactivate the write protection, the device must be restarted with the display attached and the DIP switch deactivated (WRITE LOCK = OFF). Endress+Hauser...
-
Page 25: Access To The Operating Menu Via The Operating Tool
6.4.1 FieldCare Function scope FDT/DTM-based plant asset management tool from Endress+Hauser. It can configure all smart field units in a system and help you manage them. By using the status information, it is also a ® simple but effective way of checking their status and condition. Access takes place via the HART protocol or CDI (= Endress+Hauser Common Data Interface). - Page 26 HART ® protocol. Source for device description files See data (® ä 28). 6.4.4 Field Communicator 375/475 Function scope Industrial handheld terminal from Emerson Process Management for remote configuration and measured value display via the HART ® protocol. Endress+Hauser...
- Page 27 Operating options ® iTEMP TMT82 Source for device description files See data (® ä 28). Endress+Hauser...
-
Page 28: Integrating The Transmitter Via Hart
Operating tools Operating tool Sources for obtaining device descriptions (DD) ® Download Area FieldCare • www.endress.com • CD–ROM (contact Endress+Hauser) • DVD (contact Endress+Hauser) ® Download Area AMS Device Manager www.endress.com (Emerson Process Management) ® Download Area SIMATIC PDM www.endress.com... -
Page 29: Device Variables And Measured Values
Sensor 1 with switchover to sensor 2 if a limit value is exceeded Average of sensor 1 and sensor 2 with backup The device variables can be queried from a HART ® master using HART ® command 9 or 33. Endress+Hauser... -
Page 30: Commissioning
Accessories Different accessories are available for the device. These may be ordered separately from your supplier. Contact your service organization for detailed information on the relevant order code. When ordering accessories, please quote the serial number of the device! Endress+Hauser... -
Page 31: Optional Accessories
FieldCare via the RS232C interface. For details, see Technical Information TI237F/00 Commubox FXA291 Connects Endress+Hauser field devices with a CDI interface (= Endress+Hauser Common Data Interface) and the USB port of a computer or laptop. For details, see Technical Information TI405C/07 WirelessHART adapter Is used for the wireless connection of field devices. -
Page 32: System Components And Data Manager
Loop-powered field indicator for 4 to 20 mA circuit, RIA14 in flameproof metal enclosure For details, see Technical Information TI143R/09 and TI144R/09 RIA15 Process display, digital loop-powered display for 4 to 20 mA circuit, panel mounting For details, see Technical Information TI01043K/09 Endress+Hauser... -
Page 33: Diagnostics And Troubleshooting
(® ä 10). • If possible, test the display module with No display visible other suitable head transmitters e.g. Endress+Hauser head transmitter. The display module is defective. Replace the module. The electronics of the head transmitter Replace the head transmitter. - Page 34 Check the sensor. Sensor is connected incorrectly. Connect the connecting cables correctly Failure current (≤ 3.6 mA or (terminal diagram). ≥ 21 mA) Incorrect programming. Incorrect sensor type set in the Sensor type device function. Set the correct sensor type. Endress+Hauser...
-
Page 35: Diagnostics Events
Diagnostic behavior Alarm Measurement is interrupted. The signal outputs assume the defined alarm condition. A diagnostic message is generated (status signal F). Warning The device continues to measure. A diagnostic message is generated (status signals M, C or S). Endress+Hauser... - Page 36 Sensor drift 1. Check sensors. Warning 2. Check process temperatures. F, S Working area 1. Check ambient temperature. Alarm 2. Check external reference measuring point. Sensor value too 1. Check process temperatures. Alarm 2. Inspect sensor. 3. Check sensor type. Endress+Hauser...
- Page 37 1. Check configuration of sensor parameters. Alarm 2. Check configuration of special sensor linearizion. 3. Check configuration of transmitter settings. 4. Contact service. Data processing Please wait until data processing is complete. Warning Simulation input Measured value simulation Deactivate simulation. Warning Simulation current output Endress+Hauser...
-
Page 38: Spare Parts
+Hauser, as an ISO-certified company, is required to follow certain procedures when handling returned products that are in contact with medium. To ensure swift, safe and professional device returns, please read the return procedures and conditions on the Endress+Hauser website at www.services.endress.com/return-material 11.5 Disposal The device contains electronic components and must therefore be disposed of as electronic waste. -
Page 39: Software History And Overview Of Compatibility
Change to functions and operation. Compatible. The Operating Instructions change. Fixes and internal changes. No changes to the Operating Instructions. Date Firmware Version Modifications Documentation 01/11 1.00.zz Original firmware BA01028T/09/en/13.10 10/12 1.00.zz No changes to functions and operation. BA01028T/09/en/14.12 Endress+Hauser... -
Page 40: Technical Data
–200 to +900 °C (–328 to +1 652 °F) 0 to +750 °C (+32 to +1 382 °F) 50 K Type U (Cu-CuNi) –200 to +600 °C (–328 to +1 112 °F) –185 to +400 °C (–301 to +752 °F) Endress+Hauser... - Page 41 Failure, e.g. sensor breakage, sensor short-circuit ≤ 3.6 mA ("low") or ≥ 21 mA ("high"), can be selected The "high" alarm setting can be set between 21.5 mA and 23 mA, thus providing the flexibility needed to meet the requirements of various control systems. Endress+Hauser...
-
Page 42: Power Supply
• 3.6 to 23 mA • Minimum current consumption 3.5 mA, multidrop mode 4 mA • Current limit ≤ 23 mA Residual ripple Permanent residual ripple U ≤ 3 V at U ≥ 13.5 V, f = 1 kHz max. Endress+Hauser... - Page 43 Thermocouples type: B, C, D, E, J, K, L, N, R, S, T, U Sensor transmitter matching Sensor adjustment RTD sensors are one of the most linear temperature measuring elements. Nevertheless, the output must be linearized. To significantly improve temperature measurement accuracy, the device allows the use of two methods: Endress+Hauser...
- Page 44 Input10 to 2 000 W Typ. 0.001 % of the measured value, min. 10 mW Input–20 to 100 mV Typ. 0.001 % of the measured value, min. 0.2 µV Output4 to 20 mA Typ. 0.0015 % of the span Endress+Hauser...
- Page 45 Up to 4000 m (4374.5 yards) above mean sea level as per IEC 61010-1, CAN/CSA C22.2 No. 61010-1 Climate class As per IEC 60654-1, Class C Humidity • Condensation permitted as per IEC 60 068-2-33 • Max. rel. humidity: 95% as per IEC 60068-2-30 Endress+Hauser...
- Page 46 10 V Measuring category Measuring category II as per IEC 61010-1. The measuring category is provided for measuring on power circuits that are directly connected electrically with the low-voltage network. Degree of contamination Pollution degree 2 as per IEC 61010-1. Endress+Hauser...
- Page 47 Fasteners for attachable measured value display Interface for contacting the measured value display A0007672 Version with spring terminals. The dimensions are identical to the version with screw terminals, apart from the å 16 housing height. DIN rail transmitter 17.5 (0.69) 114.9 (4.52) A0017808 Endress+Hauser...
- Page 48 • Material: aluminum; polyester powder coated • Cable entry glands: ½"NPT, M20x1.5 • Head color: blue RAL 5012 • Cap color: gray RAL 7035 • Weight: 640 g (22.6 oz) (1.1) 78 (3.01) A0009832 Endress+Hauser...
- Page 49 • Housing: polycarbonate (PC), complies with UL94, V-2 UL recognized • Terminals: – Screw terminals: nickel-plated brass and gold-plated contact – Spring terminals (head transmitter): tin-plated brass, contact spring 1.4310, 301 (AISI) • Potting (head transmitter): WEVO PU 403 FP / FL Field housing: see specifications Endress+Hauser...
- Page 50 Communication Protocol Specifications, April 2001, Revision 6.0. 12.8 Documentation ATEX supplementary documentation: ATEX II 1G Ex ia IIC: XA00102T/09/a3 ATEX II2G Ex d IIC: XA01007T/09/a3 (transmitter in field housing) ATEX II2(1)G Ex ia IIC: XA01012T/09/a3 (transmitter in field housing) Endress+Hauser...
-
Page 51: Operating Menu And Parameter
Upper range value (® ä 64) Setup ® Advanced setup ® Device tag (® ä 66) Enter access code (® ä 65) Access status tooling (® ä 65) Device temperature Alarm (® ä 66) Locking status (® ä 66) Endress+Hauser... - Page 52 (® ä 75) Device name (® ä 75) Order code (® ä 75) Configuration counter (® ä 76) Diagnostics ® Measured values ® Sensor 1 value (® ä 76) Sensor 2 value (® ä 76) Device temperature (® ä 76) Endress+Hauser...
- Page 53 (® ä 61) Connection type n (® ä 61) 2-wire compensation n (® ä 62) Reference junction n (® ä 62) RJ preset value (® ä 62) Sensor offset n (® ä 67) Sensor n lower limit (® ä 81) Endress+Hauser...
- Page 54 (® ä 71) Current trimming 20 mA (® ä 71) Expert ® Communication ® HART configuration ® Device tag (® ä 87) HART short tag (® ä 87) HART address (® ä 87) No. of preambels (® ä 88) Endress+Hauser...
- Page 55 Previous diagnostics n (® ä 74) Previous diag n channel (® ä 74) Expert ® Diagnostics ® Device information ® Device tag (® ä 66) Serial number (® ä 75) Firmware version (® ä 75) Devic name (® ä 75) Endress+Hauser...
- Page 56 (® ä 78) Reset device temp. min/max (® ä 78) values Expert ® Diagnostics ® Simulation ® Simulation current output (® ä 78) Value current output (® ä 79) Expert ® Diagnostics ® Device reset ® Device reset (® ä 79) Endress+Hauser...
-
Page 57: Display/Operation" Menu
Use this function to select how the measured value is shown on the local display. The display format Measured value or Measured value with bar graph can be configured. Options: • Value only • Value + Bargraph Factory settings Value only Endress+Hauser... - Page 58 • Device temperature Factory settings Process value Decimal places 1 Display/operation ® Decimal places 1 Navigation Expert ® System ® Display ® Decimal places 1 Prerequisite A measured value is specified in the Value 1 display parameter (® ä 58). Endress+Hauser...
- Page 59 Use this function to select the number of decimal places displayed for the display value. This setting does not affect the accuracy of the device for measuring or calculating the value. If Automatic is selected, the maximum possible number of decimal places is always shown on the display. Endress+Hauser...
- Page 60 If Automatic is selected, the maximum possible number of decimal places is always shown on the display. Options: • x • x.x • x.xx • x.xxx • x.xxxx • Automatic Factory settings Automatic Endress+Hauser...
-
Page 61: Setup" Menu
Sensor type 1: Pt100 IEC751 Sensor type 2: No sensor Connection type n Setup ® Connection type n Navigation Expert ® Sensor ® Sensor n ® Connection type n Prerequisite An RTD sensor must be specified as the sensor type. Endress+Hauser... - Page 62 • Fixed value: a fixed preset value is used. • Sensor 2 value: the measured value of sensor 2 is used. It is not possible to select the Sensor 2 value option for the Reference junction 2 parameter. Factory settings Internal measurement RJ preset value n Endress+Hauser...
- Page 63 The set point that can be set depends on the sensor type used in the Sensor type (® ä 61) parameter and the measured variable assigned in the Assign current output (PV) parameter. User input Depends on the sensor type and the setting for "Assign current output (PV)." Factory settings Endress+Hauser...
- Page 64 2. For drift/difference monitoring, select Out band for drift detection and In band for difference monitoring. ß 3. Set the alarm category for drift/difference monitoring to Out of specification (S), Maintenance required (M) or Failure (F) as required. ß 4. Set the set point for drift/difference monitoring to the desired value. ß 5. End Endress+Hauser...
- Page 65 Use this function to show access authorization to the parameters. Additional information If additional write protection is active, this restricts the current access authorization even further. The write protection status can be viewed via the Locking status parameter. Options: • Operator • Service Factory settings Operator Endress+Hauser...
- Page 66 Expert ® Locking status Description Use this function to view the device locking status. The DIP switch for hardware locking is fitted on the display module. When write protection is activated, write access to the parameters is disabled. (® ä 24) Endress+Hauser...
- Page 67 • If the Out band (drift) option is selected, a status signal is displayed if the absolute value for the differential value exceeds the drift/difference set point. • If the In band option is selected, a status signal is displayed if the absolute value for the differential value drops below the drift/difference set point. Endress+Hauser...
- Page 68 Sensor switch set point Setup ® Advanced setup ® Sensor ® Sensor switch set point Navigation Expert ® Sensor ® Diagnostic settings ® Sensor switch set point Description Use this function to set the threshold value for sensor switching (® ä 63). Endress+Hauser...
- Page 69 7. Enter the current values determined as adjustment values in the Current trimming 4 mA / 20 mA parameters. ß 8. End Output current Setup ® Advanced setup ® Current output® Output current Navigation Expert ® Output ® Output current Description Use this function to view the calculated output current in mA. Endress+Hauser...
- Page 70 Use this function to select the signal on alarm level of the current output in the event of an error. Additional information If Max. is selected, the signal on alarm level is specified using the Failure current parameter. Options: • Min. • Max. Factory settings Max. Endress+Hauser...
- Page 71 Expert ® Output ® Current trimming 20 mA Description Use this function to set the correction value for the current output at the end of the measuring range at 20 mA (® ä 69). User input 19.850 to 20.15 mA Factory settings 20.000 mA Endress+Hauser...
-
Page 72: Diagnostics" Menu
Additional information Example for display format: F261-Electronic modules Operating time Diagnostics ® Operating time Navigation Expert ® Diagnostics ® Operating time Description Use this function to display the length of time the device has been in operation up to now. Endress+Hauser... - Page 73 Expert ® Diagnostics ® Diagnostics list ® Actual diag channel Description Use this function to display the sensor input to which the diagnostics message refers. Display • Sensor 1 • Sensor 2 • - - - - - - Endress+Hauser...
- Page 74 Expert ® Diagnostics ® Diagnostics list ® Previous diag channel Description Use this function to display the possible sensor input to which the diagnostics message refers. Display • Sensor 1 • Sensor 2 • - - - - - - Endress+Hauser...
- Page 75 Use this function to display the serial number of the device. It can also be found on the nameplate. Uses of the serial number • To identify the device quickly, e.g. when contacting Endress+Hauser. • To obtain specific information on the device using the Device Viewer: www.endress.com/deviceviewer Display Max.
- Page 76 Use this function to display the current measured value at the sensor input. Device temperature Diagnostics ® Measured values ® Device temperature Navigation Expert ® Diagnostics ® Measured values ® Device temperature Description Use this function to display the current electronics temperature. Endress+Hauser...
- Page 77 Reset the maximum indicators for the minimum and maximum temperatures measured at the sensor inputs. Options: • No • Yes Factory setting Device temperature max. Diagnostics ® Measured values ® Min/max values ® Device temperature max. Navigation Expert ® Diagnostics ® Measured values ® Min/max values ® Device temperature max. Endress+Hauser...
- Page 78 Use this function to switch simulation of the current output on and off. The display alternates between the measured value and a diagnostics message of the "function check" category (C) while simulation is in progress. Measured value display « C491 (simulation current output) Display Options: • Off • On Factory settings Endress+Hauser...
- Page 79 All the parameters are reset to the order configuration.The order configuration can differ from the factory setting if customer-specific parameter values were defined when the device was ordered. • Restart device The device is restarted but the device configuration remains unchanged. Factory settings Not active Endress+Hauser...
-
Page 80: Expert" Menu
Use this function to set the delay time during which a diagnostics signal is suppressed before it is output. User input 0 to 5 s Factory settings Mains filter Expert ® System ® Mains filter Navigation Description Use this function to select the mains filter for A/D conversion. Options: • 50Hz • 60Hz Factory setting 50Hz Endress+Hauser... - Page 81 Sensor trimming is used to adapt the actual sensor signal to the linearization of the selected sensor type stored in the transmitter. Compared to sensor transmitter matching, sensor trimming only takes place at the start and end value and does not achieve the same level of accuracy. Endress+Hauser...
-
Page 82: Sensor Trimming
Expert ® Sensor ® Sensor n ® Sensor trimming ® Sensor trimming lower value Prerequisite The User trim settings option is enabled in the Sensor trimming parameter (® ä 81). Description Lower point for linear characteristic calibration (this affects offset and slope). Endress+Hauser... - Page 83 4. Select the sensor type (linearization type) "RTD platinum (Callendar/Van Dusen)". ß 5. Select type of connection e.g. 3-wire. ß 6. Set the lower and upper sensor limits. ß 7. Enter the four coefficients A, B, C and R0. ß Endress+Hauser...
- Page 84 The RTD platinum (Callendar/Van Dusen) option is enabled in the Sensor type parameter. Description Use this function to set the R0 value for linearization with the Callendar/Van Dusen polynomial. User input 40.000 to 1 050.000 Factory settings 100.000 Ohm Endress+Hauser...
- Page 85 Use this function to set the coefficients for sensor linearization of copper/nickel resistance thermometers. Factory settings Polynom coeff. A = 5.49630e-003 Polynom coeff. B = 6.75560e-006 "Diagnostic settings" submenu Calibration counter start Expert ® Sensor ® Diagnostic settings ® Calibration counter start Navigation Endress+Hauser...
- Page 86 The countdown of the calibration counter is only running if the device is switched on. Example: The calibration counter is set to 365 days on January 1st, 2011. If the device will be switched off for 100 days, the calibration counter alarm is displayed on April 10th, 2012. Endress+Hauser...
- Page 87 User input Up to 8 alphanumeric characters (letters, numbers and special characters) Factory settings SHORTTAG HART address Navigation Expert ® Communication ® HART configuration ® HART address Description Use this function to define the HART address of the device. Endress+Hauser...
- Page 88 Expert ® Communication ® HART configuration ® Burst command Navigation Prerequisite This parameter can only be selected if the Burst mode option is enabled. Description Use this function to select the command whose response is sent to the HART master in the burst mode. Endress+Hauser...
- Page 89 Average: 0.5 x (SV1+SV2) with backup (measured value of sensor 1 or sensor 2 in the event of a sensor error in the other sensor) Factory settings • Burst variable slot 0: sensor 1 • Burst variable slot 1: device temperature • Burst variable slot 2: sensor 1 • Burst variable slot 3: sensor 1 Endress+Hauser...
- Page 90 Communication Foundation. It is needed to assign the appropriate device description file (DD) to the device. HART revision Navigation Expert ® Communication ® HART info ® HART revision Description Use this function to display the HART revision of the device. Endress+Hauser...
- Page 91 Use this function to display the software revision of the device. HART date code Navigation Expert ® Communication ® HART info ® HART date code Description Use this function to define date information for individual use. User input Date in the format year-month-day (YYYY-MM-DD) Factory settings 2010-01-01 Endress+Hauser...
- Page 92 Navigation Expert ® Communication ® HART output ® Assign SV Description Use this function to assign a measured variable to the secondary HART value (SV). Options: See Assign current output (PV) parameter, (® ä 92) Factory settings Device temperature Endress+Hauser...
- Page 93 Use this function to assign a measured variable to the quaternary (fourth) HART value (QV). Options: See Assign current output (PV) parameter, (® ä 92) Factory settings Sensor 1 Expert ® Communication ® HART output ® QV Navigation Description Use this function to display the quaternary (fourth) HART value. Endress+Hauser...
- Page 94 2-digit hexadecimal number Manufacturer ID Expert ® Diagnostics ® Device information ® Manufacturer ID Navigation Description Use this function to view the manufacturer ID with which the device is registered with the HART Communication Foundation. Display 2-digit hexadecimal number Endress+Hauser...
- Page 95 = Stands for the number of sensor inputs (1 and 2) Expert ® Diagnostics ® Measured values ® Sensor n raw value Navigation Description Use this function to display the non-linearized mV/Ohm value at the specific sensor input. Endress+Hauser...
-
Page 96: Index
Mains filter (parameter) ......80 Device temperature alarm (parameter) ... 66, 81 Endress+Hauser... - Page 97 Sensor trimming lower value (parameter) ... . 82 Sensor trimming min span ..... . 83 Endress+Hauser...
- Page 100 www.endress.com/worldwide BA01028T/09/EN/14.12 71198558 EH-COSIMA ProMoDo...
Need help?
Do you have a question about the iTEMP TMT82 and is the answer not in the manual?
Questions and answers