Advertisement
Quick Links
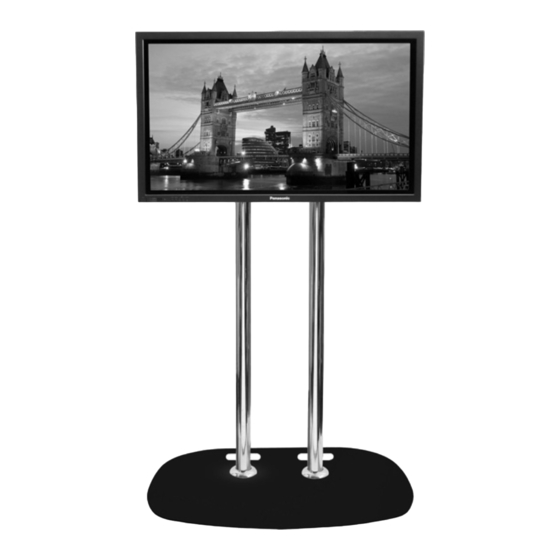
BT4002
LARGE FLAT SCREEN FLOOR STAND
INSTALLATION GUIDE & PARTS LIST
This Pack Contains 1 Stand
PLEASE KEEP THIS FOR FUTURE REFERENCE
Installation Safety Notes.....................................................................................................................2
Parts List.............................................................................................................................................4
Installation Instructions.......................................................................................................................6
Optional Accessories.............................................................................................................................13
Typical Installations................................................................................................................................14
Product Dimensions..........................................................................................................................15
B-Tech Contact Details.....................................................................................................................16
INSTALLATION TOOLS REQUIRED
B-TECH AUDIO VIDEO MOUNTS
FEATURES
● Designed for flat screens up to
● Can be used free standing or bolted to the floor
● Supplied with optional rubber feet
● Mounts screen in landscape or portrait style
● Must be used with interface kit
CONTENTS
Crosshead
screwdriver
www.btechavmounts.com
60" (153cm) / 70kg (154lbs)
(BT7507 / BT8600 / BT8500 / BT8501 / BT8576)
Hex Keys
(Supplied)
Advertisement

Related Manuals for B-Tech BT4002


Summary of Contents for B-Tech BT4002
-
Page 1: Table Of Contents
● Must be used with interface kit (BT7507 / BT8600 / BT8500 / BT8501 / BT8576) CONTENTS Installation Safety Notes........................2 Parts List.............................4 Installation Instructions........................6 Optional Accessories..........................13 Typical Installations..........................14 Product Dimensions..........................15 B-Tech Contact Details........................16 INSTALLATION TOOLS REQUIRED Hex Keys Crosshead (Supplied) screwdriver B-TECH AUDIO VIDEO MOUNTS www.btechavmounts.com... -
Page 2: Installation Safety Notes
Do not attempt to install this product until all instructions and warnings have been read and properly understood. Please keep these instructions for future reference. B-Tech International Limited, its distributors and dealers are not liable or responsible for damage or injury caused by improper installation, improper use or failure to observe these safety instructions. - Page 3 Niniejszy produkt musi być zamontowany na odpowiedniej powierzchni, a podczas użytkowania nie wolno przekraczać podanego maksymalnego obciążenia. A B-Tech International Ltd. recomenda que a instalação deste produto seja efectuada por um instalador de AV profissional ou outra pessoa devidamente habilitada. A B-Tech International Ltd. e os seus distribuidores e concessionários não são responsáveis por danos ou lesões causados por uma instalação incorrecta.
-
Page 4: Parts List
BT4002 PARTS LIST Ø60mm poles (BT4005, BT4011, BT4015 and BT4020) are sold separately Suitable for loads up to 70kg (154lbs) - Page 5 PART NAME FLOOR BASE MOUNTING PLATE Ø60mm COLLAR COLLAR COVER POLE END CAP M10 x 20mm GRUB SCREW M8 x 12mm SCREW M8 SPRING WASHER M5 x 12mm PIN HEX SECURITY SCREW M6 METAL WASHER PLASTIC HOLE CAP POLE TRIM RING RUBBER FOOT M16 x 50mm HEX SCREW 4mm PIN HEX KEY (FOR PART 9)
-
Page 6: Installation Instructions
INSTALLATION INSTRUCTIONS Attach the rubber feet to the floor base. Optional: Slide trim rings onto the bottom of the poles. Ø60mm poles (BT4005, BT4011, BT4015 and BT4020) are sold separately... - Page 7 Fix the poles to the floor base. Ø60mm poles (BT4005, BT4011, BT4015 and BT4020) are sold separately 60mm POLE...
- Page 8 Fix the collars to the mounting plate.
- Page 9 Fix collars and mounting plate to the poles. i. Slide the collars and mounting plate onto the poles 60mm POLE ii. F ix at desired height by tightening parts 6.
- Page 10 Fix an interface to the back of flat screen, then hook the flat screen onto the stand (in landscape or portrait). i. Hook on flat screen Possible Interface Kits : BT7507 / BT8600 / BT8500 / BT8501 / BT8576 FLAT SCREEN...
- Page 11 ii. Secure in place using parts 9 and 10.
- Page 12 Attach the collar covers (parts 4), pole end caps (parts 5) and plastic hole caps (parts 11) to stand.
-
Page 13: Optional Accessories
OPTIONAL ACCESSORIES B-Tech AV Component Shelves BT7162 BT7163 BT7163 BT7161 BT7163 BT4002... -
Page 14: Typical Installations
TYPICAL INSTALLATIONS BT8500 BT8501 60mm POLE 60mm POLE BT4002 BT4002 BT8500 60mm POLE BT8500 BT4002... -
Page 15: Product Dimensions
2.4" 610mm 24" 890mm 35" FLOOR BASE 890mm 35" 600mm 23.6" 276mm 10.9" 110mm 4.3" 720mm 28.3" THESE INSTRUCTIONS ARE INTENDED AS A GUIDE ONLY AND B-TECH ACCEPTS NO LIABILITY FOR THE ACCURACY OF THE INFORMATION CONTAINED IN THIS DOCUMENT. -
Page 16: B-Tech Contact Details
©2010 Bennett Technologies Limited. All rights reserved. B-Tech Audio Video Mounts is a division of Bennett Technologies Limited. B-Tech and Better By Design are registered trademarks of Bennett Technologies Limited. All other brands and product names are trademarks of their respective owners.
Need help?
Do you have a question about the BT4002 and is the answer not in the manual?
Questions and answers