Advertisement
TONNEAU COVER FITTING INSTRUCTION
BASIC TOOLS REQUIRED
Drill, 4mm Drill Bits, Rivet Gun, Marking Pencil/ Pen
CONTENTS
-
1 x Tonneau Cover
-
2 x Support Bars
-
1 x Fitting Instruction
1. INSTALLATION PROCEDURE
NOTE
Read entire instructions prior to start.
STEP 1
Fit the front of the Tonneau to the front of the Ute tub placing the LTD clips (Fitted on the
Tonneau Cover) on to the LTD posts already fitted on the body.
(Behind rear windscreen).
STEP 2
Fit your tonneau cover support bar/s into position (Refer to the instructions below)
STEP 3
Drape cover over support bars.
STEP 4
Fit Bunji Loops to Body Hooks, starting at the rear then fitting the side's bunjis.
STEP 5
Your Tonneau Cover is now fitted.
2. MULTI-FIT SUPPORT BAR
The Aussie Tonneau Multi - Fit Support Bar is designed to fit almost all Utes on the Market, from Suburu Brumbys
to Cab Chassis aluminium trays.
2.1 BASIC TOOL REQUIRED
-
Drill, 4mm drill bit
2.2 MULTI-FIT SUPPORT BAR CONTENTS
-
1 x hollow bar centrepiece
-
2 x solid bar end piece
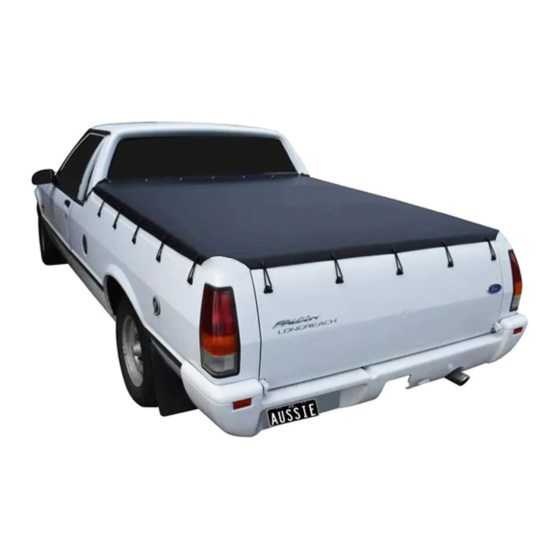
FORD FALCON
XD XE XF XG XH SINGLE CAB
1979 – 1999
PART NO: ATB01002
-
2 x grub screws
- 4 x Bar Brackets
- 8 x Rivets
Advertisement
Table of Contents

Related Manuals for AUSSIE TONNEAU ATB01002


Summary of Contents for AUSSIE TONNEAU ATB01002
- Page 1 Your Tonneau Cover is now fitted. 2. MULTI-FIT SUPPORT BAR The Aussie Tonneau Multi - Fit Support Bar is designed to fit almost all Utes on the Market, from Suburu Brumbys to Cab Chassis aluminium trays. 2.1 BASIC TOOL REQUIRED Drill, 4mm drill bit 2.2 MULTI-FIT SUPPORT BAR CONTENTS...
- Page 2 2.3 FITTING MULTI-FIT BAR 1. Insert solid bar pieces into either end of hollow tube. Adjust bar so it fits between bar bracket holders with the holes facing to the ground (so the grub screws don’t rub against the tonneau), as shown above and then with a white pencil make a mark through the small holes of the hollow bar onto the solid ends.
Need help?
Do you have a question about the ATB01002 and is the answer not in the manual?
Questions and answers