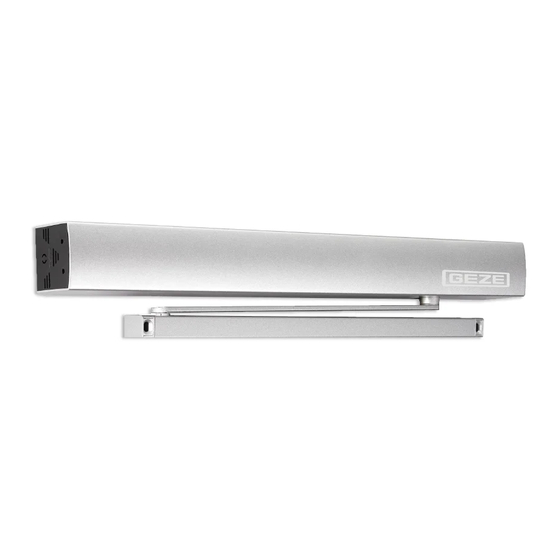
GEZE ECturn Wiring Diagram
Hide thumbs
Also See for ECturn:
- Wiring diagram (36 pages) ,
- Mounting instructions (24 pages) ,
- Original operating instructions (20 pages)
Table of Contents
Advertisement
Advertisement
Table of Contents

Subscribe to Our Youtube Channel
Related Manuals for GEZE ECturn


Summary of Contents for GEZE ECturn
- Page 1 ECturn EN Wiring diagram ECturn Inside 196505-00...
-
Page 2: Table Of Contents
Disposal of the door system ..................................6 Abbreviations ................................6 Electrical data ................................7 Terminals..................................8 ECturn terminals ........................................8 ECturn Inside terminals ....................................9 Safety sensor close and open ........................... 10 Safety sensor GC 338 ....................................10 Safety sensor GC 342 ....................................12 Safety sensor GC 334 .....................................13 Safety sensor GC 335 .....................................14 Mechanical contact ...............................16... - Page 3 Keypad programme switch ..................................26 14.4 Display programme switch ..................................27 Mains connection ..............................27 15.1 Mains connection ECturn ................................... 27 15.2 Mains connection for ECturn Inside................................ 28 Motor ..................................29 Rechargeable battery ............................30 Control unit ................................31 18.1 ECturn control unit ......................................31 18.2 ECturn Inside control unit ...................................
-
Page 4: Symbols And Illustrations
Valid for devices from à Hardware: à ECturn, DCU700, Rev C0 à ECturn Inside, DCU703, Rev A0 à Software: DCU7, V 1.5 Product liability In accordance with the liability of the manufacturer for his products as defined in the German “Product Liability Act”, the information contained in this brochure (product information and proper use, misuse, product performance, product maintenance, obligations to provide information and instructions) is to be observed. -
Page 5: Notes
To ensure personal safety, it is important to follow these safety instructions. Keep these instructions. à Only specialists who are authorised by GEZE are permitted to carry out installation, commissioning and maintenance. à Unauthorised modifications to the system release GEZE from liability for any resulting damages. -
Page 6: Disposal Of The Door System
Following use, you may return any batteries or rechargeable batteries received from us by post. The address is: GEZE GmbH, Incoming Goods, Reinhold-Vöster-Str. 21-29, 71229 Leonberg/Germany. Abbreviations... -
Page 7: Electrical Data
ECturn/ECturn Inside Electrical data Electrical data ECturn ECturn Inside Mains voltage 110 V to 230 V ±10% 110 V to 230 V ±10% Frequency 50 Hz to 60 Hz 50 Hz to 60 Hz Protection rating Capacity rating 75 W... -
Page 8: Terminals
4 3 4 1 4 2 2 ECturn ECturn Inside 4. 1 ECturn terminals For the designations see chapter 18 – RS485 2 4 Vex t LED1 LED2 LED3 LED4 BUZZER BA- LE E D LED5 (RD) – ECturn control unit - DCU700... -
Page 9: Ecturn Inside Terminals
ECturn/ECturn Inside Terminals ECturn Inside terminals For the designations see chapter 18 BUZZER BA-LED DCU703 DCU704 RS485 PROG RS485 WRB-5 DCU703 ECturn Inside control unit with operating unit - DCU703 with DCU704... -
Page 10: Safety Sensor Close And Open
Safety sensor close and open ECturn/ECturn Inside Safety sensor close and open Install the sensor for monitoring closing on the door leaf, opposite hinge side. The door reverses if the SIS is activated during closing. Install the sensor for monitoring opening on the door leaf, hinge side. - Page 11 ECturn/ECturn Inside Safety sensor close and open 5. 1 .2 Monitoring opening Set the parameters: (safety closing) to for “no SIS”. à (safety opening) to for “SIO”. à à (testing) to for “testing with 24V”. 1 Opposite hinge side 100mA...
-
Page 12: Safety Sensor Gc 342
Mount safety sensors to the door leaf as specified in the GC 342 installation instructions. GC 342 settings à See installation instructions GC 342 à GEZE recommends using the optional remote control to change the sensor parameters. 5.2. 1 Monitoring closing and opening... -
Page 13: Safety Sensor Gc 334
ECturn/ECturn Inside Safety sensor close and open 5.2.3 Monitoring closing Set the parameters: (safety closing) to for “SIS” or to for “SIS à and K”. à (safety opening) to for “no SIO”. 60 mA (testing) to for “testing with GND”. -
Page 14: Safety Sensor Gc 335
Safety sensor close and open ECturn/ECturn Inside 5.3.2 Monitoring opening Set the parameters: GC 334 Module (safety closing) to for “no SIS”. à (safety opening) to for “SIO”. à 13 SIO 60mA à (testing) to for “testing with GND”. Configure GC 334 modules:... - Page 15 ECturn/ECturn Inside Safety sensor close and open 5.4. 1 Monitoring closing and opening Set the parameters: à (safety closing) to for “SIS” or to for “SIS and K”. (safety opening) to for “SIO”. à (testing) to for “testing with 24V”.
-
Page 16: Mechanical Contact
Mechanical contact ECturn/ECturn Inside 5.4.2 Monitoring opening Set the parameters: GC335 (safety closing) to for “no SIS”. Slaves à (safety opening) to for “SIO”. à à (testing) to for “testing with 24V”. 60mA 24VSENS Test GC335 Master Door transmission cable 5.4.3... -
Page 17: Contact Sensor
ECturn/ECturn Inside Contact sensor Contact sensor à The K input is only active in the AU mode of operation. à The contact sensor function can also be activated via the WRB-5 wireless module, channel 1 (see chapter 8.1.1, “Radio channel FK1”). -
Page 18: Radio Control
The status LED will light up briefly as confirmation. The radio transmitter has been taught successfully and teach- in is finished. If further radio transmitters are to be taught to channel 1, the steps must be repeated. For further instructions see the GEZE Automatic Wireless Programme installation and service instructions. 8. 1 .2 Radio channel FK2 The function of the radio channel FK2 is identical to that of activation input KB. -
Page 19: Push And Go
ECturn/ECturn Inside Push And Go Push And Go WARNING Danger of injury due to crushing and shearing! During an activated Push And Go function door handles can form potential danger points. à The Push And Go function allows activation of the drive without contact sensors being used. -
Page 20: Configurable Input
PE is a configurable input. The function can be set via the service menu (see chapter 21, “Parameter menu”). ECturn: The signal is connected to input PE1 - terminal 51. ECturn Inside: The signal is connected to input PE2 - terminal 52. 11. 1 Sabotage à... -
Page 21: Stop
ECturn/ECturn Inside Configurable input 11.4 Stop à The configurable PE input can be used as the stop input. ECturn ECturn Inside à When the stop switch is activated, the contact is closed (24 V applied to the PE input). 51 PE1 à... -
Page 22: Contact Sensor K/Do Mode Of Operation
Programmable output ECturn/ECturn Inside 11.8 Contact sensor K/DO mode of operation The function depends on the duration of the signal at the PE input. à If the signal is active for less than 5 s, the function is the same as that of the contact sensor input K. -
Page 23: Further Functions
ECturn/ECturn Inside WC control 12.3. 1 24 V DC electric strike supplied on drive side Attach free swing diode 1N4007 (mat. no. 115293) to the electric strike. PA1B PA1A 24VTOE Free swing diode 12.3.2 AC electric strike supplied on site... - Page 24 The control unit recognises the operating function “WC control” on the basis of the parameter set for the configurable input (PE1 for ECturn, PE2 for ECturn Inside). If the WC is not occupied, the door is in AU mode of operation and is in the closing position. The OCCUPIED signs are off.
-
Page 25: Mode Of Operation
The following options are available to switch to the mode of operation OFF, NA, AU or DO: à Push button mode of operation (integrated in the end cap in the case of ECturn) à Mechanical programme switch MPS (only with ECturn Inside) à... -
Page 26: Keypad Programme Switch
Before connecting the TPS switch the drive operating voltage off. Otherwise the TPS will not be detected by the control unit. à The TPS cannot be used together with the MPS with ECturn Inside. à OFF, NA, AU, DO modes of operation à... -
Page 27: Display Programme Switch
Before connecting the DPS switch the drive operating voltage off. Otherwise the DPS will not be detected by the control unit. à The DPS cannot be used together with the MPS with ECturn Inside. à Modes of operation: OFF, NA, AU, DO... -
Page 28: Mains Connection For Ecturn Inside
Earth-pin power socket (provided on site) ECturn drive unit Mains switch 15. 1 .2 Mains connection for door leaf installation Door transmission cable ECturn, mat. no. 135307 GN/YE GN/YE Mains fuse provided on site Main switch provided on site (optional) -
Page 29: Motor
Mains fuse provided on site Main switch (optional) Power supply Drip loop Ferrite sleeve ECturn Inside drive Motor à Motor gear unit for ECturn, mat. no. 131471 à Motor gear unit for ECturn Inside, mat. no. 149501 MOTOR MOTOR MOT_A MOT_B... -
Page 30: Rechargeable Battery
Rechargeable battery à Rechargeable battery ECturn, mat. no. 131473 à Rechargeable battery ECturn Inside, mat. no. 149496 à The rechargeable battery is not in the drive when the unit is delivered. à The rechargeable battery can be discharged in the delivery state. Therefore the drive has to be operated using the on-site power supply for at least 24 hours after connection of the rechargeable battery in order for the rechargeable battery to charge. -
Page 31: Control Unit
Service buttons for setting parameters for the control unit Mode of operation key 18. 1 ECturn control unit à ECturn control unit (DCU 702 connection board, DCU700 control unit and power supply), mat. no. 131472 à WRB-5 radio reception board, mat. no. 135170 –... -
Page 32: Ecturn Inside Control Unit
“1-leaf single-action door with guide rail, low-energy mode (factory setting) à to for “1-leaf single-action door with link arm, low-energy mode” (ECturn only). If parameters are set for low-energy mode, à the setting options of the hold-open times is limited to greater than or equal to 5 s, à... -
Page 33: Automatic Mode
à For installation with guide rail, the force on the main closing edge is smaller than 67 N independently of the leaf width. à For installation with link arm (ECturn), set the maximum opening torque ( ) and the maximum closing torque ) depending on the leaf width as follows: à... -
Page 34: Commissioning And Service
Commissioning and service ECturn/ECturn Inside Commissioning and service Commissioning and service can be effected either via the display programme switch or the buttons S1 and S2, see chapter 21, “Parameter menu”. 20. 1 Display programme switch The DPS can be used for commissioning and servicing (mat. no. 151524);... -
Page 35: Commissioning The Drive
○ ○ ○ ● With ECturn Inside: Remove DPS. Move the door leaf by hand to the desired open position. Do not enter into the detection area of the safety sensor ’open’, because otherwise the blanking of any wall present in the open position is taught incorrectly. -
Page 36: Commissioning The Drive With Gc 338
○ ○ ● à A confirmation signal will sound. Display service LEDs: With ECturn Inside: Remove DPS. Move the door leaf by hand to the desired open position. Move the door leaf by hand completely to the closing position. With ECturn Inside: Move the door leaf as far out of the closing position as necessary to make buttons S1 and S2 or the DPS connection easily accessible again. - Page 37 ECturn/ECturn Inside Commissioning and service Exit the service menu: à With S1, S2: Simultaneously press buttons S1 and S2 longer than 2 s. à With DPS: Press the hidden service button and button at the same time. After learning, the AU mode of operation is set, the mode of operation LED lights up green, interrupted by 2 flash pulses (1 Hz).
-
Page 38: Parameter Menu
Switch function close after hold-open time NA mode of operation Stop Bolt message normally open contact Bolt message normally closed contact Contact sensor K Mechanical programme switch MPS (ECturn Inside only) Contact sensor K / DO mode of operation WC control ● ○... - Page 39 ○ 1-leaf single-action door with guide rail, Drive type low-energy mode 1-leaf single-action door with link arm, low-energy mode (ECturn only) 1-leaf single-action door with guide rail, automatic mode 1-leaf single-action door with link arm, automatic mode (ECturn only) ** ●...
-
Page 40: Value Table For Service Leds And Display Programme Switch
Parameter menu ECturn/ECturn Inside DPS Service LEDs Parameter Encoding Explanation ** ● ● ● ● Error list see error list Query of the last 10 errors *** ○ ○ ● ● Start production test Start production test (no setting possibility) *** ○... -
Page 41: Error Messages
ECturn/ECturn Inside Error messages Error messages Service LEDs Error Cause Behaviour of the drive group 5 4 3 2 1 ○ ○ ○ ○ ○ ○ ○ ○ ○ ○ – Operating Drive is switched off. voltage ○ ○ ○... - Page 42 - - - - - Position is After supply voltage is returned Initialisation with reduced speed. unknown Mode of operation LED flashes yellow only with ECturn Inside: * ● ● ● ○ Pro- Broken MPS cable Last operating status is retained.
- Page 43 ECturn/ECturn Inside Error messages...
- Page 44 E-Mail: leonberg.de@geze.com Baltic States – Iberia Scandinavia – Norway Lithuania / Latvia / Estonia GEZE Iberia S.R.L. GEZE Scandinavia AB avd. Norge GEZE GmbH E-Mail: norge.se@geze.com E-Mail: baltic-states@geze.com E-Mail: info.es@geze.com Niederlassung Süd-Ost www.geze.no www.geze.es Tel. +49 (0) 7152 203 6440 E-Mail: muenchen.de@geze.com...
Need help?
Do you have a question about the ECturn and is the answer not in the manual?
Questions and answers