Table of Contents
Advertisement
Quick Links
Advertisement
Table of Contents

Subscribe to Our Youtube Channel
Related Manuals for Pulse-Eight neo 4*4 Video Matrix


Summary of Contents for Pulse-Eight neo 4*4 Video Matrix
- Page 1 neo:4 Professional Video Mat- Product User Guide...
- Page 2 Table of Content "Introduction" on the next page "Product Description" on page 4 "Safety Precaution" on page 5 "Panel" on page 6 "Cabling" on page 8 "Setup" on page 10 "Web Interface Setup" on page 16 "Monitoring Portal" on page 32 "EDID Management" on page 36 "Concept Wiring Guideline" on page 42 "Driver Integration" on page 43 "Troubleshooting" on page 55 "Specification" on page 57 "Additional" on page 59 "Warranty" on page 60...
-
Page 3: Key Features
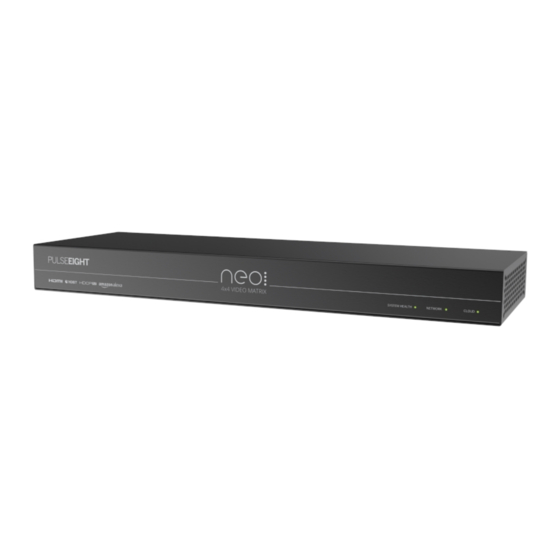
Introduction PULSE-EIGHT NEO:4 PROFESSIONAL VIDEO MATRIX P8-HDBT-L-FFMS44-22-KIT Our flagship 4x4 HDBaseT matrix with 4 HDMI inputs, 4 HDBaseT outputs and 2 mirrored HDMI outputs. Extends 4K up to 40 meters and 1080p to 70 meters over a single Cat5e/6/7 cable. Kit includes all you need for installation includ- ing 4 neo:Lite HDBaseT Class B PoH receivers. KEY FEATURES: Ultra HD 4K Video Transmission (up to 340Mhz), 1080p, 3D Supports 4K up to 40 metres Supports 1080p up to 70 metres 4 x HDMI Inputs 4 x HDBaseT Class B (Lite) Outputs Amazon Alexa Voice Control libCEC for HDMI-CEC Bi-Directional Control Bi-Directional IR Control Set Top Box IP Control Responsive Web Interface Automatic EDID Management Three Year Standard Warranty Third Party Control System Support... -
Page 4: Product Description
4 x neo:Lite Receivers Country Specific Power Cord Power Supply 1 x Infrared Blaster Cable Packs Installation Guide Note: The items listed above comes in a kit. Our customers might receive a different inventory depending on their pur- chase so please check with the installer or Pulse-Eight representative. -
Page 5: Safety Precaution
SAFETY PRECAUTION Please read instructions before attempting to install or operate this equipment. Please keep the following in mind as you unpack and install this equipment: Always follow basic safety precautions to reduce the risk of fire, electrical shock, and injury. To prevent fire or shock hazard, do not expose the unit to rain, moisture or install this product near water. Never spill liquid of any kind on or into this product. Where possible, install the matrix towards the top of the rack to avoid the unit overheating. Only use the supplied IEC cable. Never push any objects into this product through any openings or empty slots in the unit as you may damage parts inside. Do not allow anything to rest on the power cabling and avoid putting weight of any kind on it. To protect the unit from overheating do not block any vents or openings in the unit housing that provides vent- ilation. Allow sufficient space for air to circulate around the unit. Ventilation It’s important when installing a Pulse-Eight video or audio matrix to keep the products ventilated. Video and audio matrices will generate heat. A well-ventilated area helps to disperse the heat. If placed in a poorly vent- ilated area, your equipment may heat up and cause minor irreparable damage to the circuitries. Allowing systems to run for prolonged periods under high temperatures will break down circuitry and chipset. This also applies if the device is left in the path of direct sunlight or near any heat source. Dust tends to accumulate, and this will disrupt the fan and electronics system. Dust particles contain various com- positions such as water, oil and other minerals or chemicals. Having them in your electronic device can sometimes cause a signal error or degradation to various chips and circuitries. Because we cannot accurately predict how or when they can affect your device, we highly recommend that you keep Pulse-Eight products not only in a well-ventilated area but also as clean as possible. In very rare cases, certain insects or reptiles can make nests near or inside the electronic casing. Whilst we design our products to maximise the protection of the internal circuitry please be aware that insects and reptiles are drawn to these types of habitats. . I n the unlikely event this does happen, this will lead to poor ventilation inside the unit, and it will be unable to disperse heat. Finally, whenever possible, do not stack audio and video matrices together. Leave enough space in between each unit in order to provide good airflow. - Page 6 Panel A. System Health LED Indicates whether matrix is turned on and healthy (green), or if there is an issue present (red). B. Network LED Indicates the matrix is connected to the internet through its network link (green) or if there is an issue (red). C. Cloud LED Indicates the matrix is able to connect to the Pulse-Eight Remote Monitoring Portal (green) or if there is an issue (red). D. Power Connector Power connector. Use supplied power cord to connect the power. E. Serial Port D-Sub 9 pin RS-232 port for Third Party Control System. Connect to the matrix via serial cable. F. Ethernet Connect to network - required for connection to Web Interface, Third Party Control and Cloud Remote Monitoring Portal. G. IR Inputs Connect as required. The IR Inputs are to be used to return IR back to the matrix using an P8-IR- Optocable. H. IR Outputs Connect as required. The IR Outputs are to be used to connect input devices using the supplied IR Emitters. See full installation guide to identify IR buds. I. Control IR Input General IR input designed for legacy control systems or where direct IR input is required (we recommend the use of our IP driver instead of this port, where applicable). J. Global IR Used for a control system to be able to see all IR signals from all zones. We recommend using a P8- IR-Optocable for connectivity from this port to your control system. K. HDMI Inputs Connect the appropriate high speed HDMI cable to each input. These cables should then be con- nected to the Source device. (Blu-Ray player etc.) L. HDBaseT Outputs Connect the appropriate Cat5e or higher grade cable to each output. These cables should then be connected to one of the supplied neo:Lite Receivers at each Sink device. (i.e. TV.). M. HDMI Mirror Outputs Connect the appropriate high speed HDMI cable to each output. These cables should then be directly connected to each Sink device. (TV/AVR etc.) The output will mirror the adjacent HDBaseT out- put. N. ...
- Page 7 using an P8-IR-Optocable. O. Reset Factory reset - please use only when instructed by our customer service team. IR BUDS The IR Emitter is to be mounted over the source's IR window. The IR Receiver bud should be mounted underneath the sink (TV) with the smallest end forwards and the sticky pad affixed upwards. Our video matrices use the standard 3.5mm stereo jack, with a 5V tip, Signal Ring and GND sleeve. IR Receiver IR Emitter...
-
Page 8: Shielded Cables
Cabling WHAT IS THE BEST TYPE OF CABLE TO USE? Pulse-Eight products use HDBaseT standard that utilises regular Cat cables. Typically, the minimum cable use on a neo system is Cat5e but you could increase the range and bandwidth by using higher tier cables such as Cat6, Cat6A & Cat7 which have stricter shielding requirement and therefore reduces the data loss between data pairs. We highly discourage patch cabling as this might degrade the signal. Whenever possible, use a long, single high-qual- ity cable for each HDBaseT port as this allows the system to function at its best peak efficiency. We do not recommend the use of pre-made leads unless you are certain of the correct specs (i.e., solid core 568B), the use of lower quality cables will lead to signal degradation and quality of the transmission. Please note Copper Clad Aluminium (CCA) cables are not supported. Due to the inherent properties of a CCA, this will cause an HDBaseT performance issue. SHIELDED CABLES If you prefer shielded FTP cables, please ensure compatible shielded features are used such as grounding & ter- mination. A badly terminated cable can cause interference instead of eliminating it. CABLING BEST PRACTICE Our recommended and best practice policy is to use a straight cable directly from the Pulse-Eight matrix to the receiver. This will ensure the best quality of signal and achieve maximum distance. You can find further information on "HDBaseT Best Practices" on the HDBaseT Alliance website. WALL PLATES & PATCH PANELS If the patch panels are terminated correctly, there is minimal loss of distance. The use of wall plates and patch panels, however, has the potential to cause increased resistance on the cable if not done correctly, introducing pinch points for signal transmission, and could reduce advertised transmission lengths. Instead of using RJ45 wall plates, you can use brush plates to maintain the neat finish. -
Page 9: Connection Termination
CONNECTION TERMINATION Whenever possible, use full plastic encasement. We do not recommend metal ones to avoid grounding leaks to Pulse- Eight products. Terminate the cabling using RJ45 connectors to the 568B wiring standard. (See diagram) IMPORTANT: Please note that local building regulations may apply to the installation of cabling in prop- erties. It is important to check building regulations to guarantee that you are in accordance with the laws of your territory. IR PIN ASSIGNMENTS We highly recommend you purchase a Pulse-Eight Mono-Stereo Optocable if you wish to convert this into a 3.5 mm ste- reo jack. However, if you choose to rewire the IR bud this will void your warranty on the IR accessory. A. B. IR Signal C. Ground... -
Page 10: Installing In A Rack
Setup INSTALLING IN A RACK 1. Attach the rack ears to the front sides of the matrix using the provided screws. 2. Install into rack and connect cabling according to mode of operation – as described below. WARNING: To prevent damage, it is important to ensure adequate ventilation space on the sides of the matrix, espe- cially on the ventilation openings on the side of the product enclosure. CONNECTING THE VIDEO INPUTS 3. Connect HDMI cables from your video sources (e.g. Blu-Ray player) to the HDMI inputs of the matrix. Note: It is recommended, for ease of setup, to connect devices from Input 1 to Input 4, although this is not necessary. 4. Connect the supplied IR Emitter (Identifiable by matt surface) over the source device's IR window and attach to the 'IR Out' port. Note: Ensure that the IR Emitter is connected to the same zone as the source device's HDMI input (i.e HDMI input 3 and IR 3). - Page 11 6. Complete the connection by attaching the other end of the Cat cable to a supplied neo Receiver's 'HDBaseT In' port. The receiver should be situated at the output end (i.e. TV). 7. Attached a supplied IR receiver (shiny surface) into the Receiver's IR RX port and attach the bud to the underside of the sink device with the smallest end forward, as per the diagram. ...
- Page 12 8. Finish the connection using a the appropriate high speed HDMI cable from the output device and connect to the Receiver's 'HDMI Out' port. CONNECTING THE MIRROR HDMI VIDEO OUTPUTS 9. For HDMI Output ports 1 and 2, connect sink devices directly via high speed HDMI cables. The output of these ports mirror the output of the adjacent HDBaseT ports. Note: Can also be used in conjunction with a HDMI Extender Set (sold separately) for reaching further distances. CONNECTING THE MIRROR IR PORTS 10. If you wish to use the mirror HDMI outputs, these IR ports can be used for sending return IR back to the matrix using an P8-IR-Optocable.
-
Page 13: Connecting To Network
CONNECTING TO NETWORK 11. Connect a standard Ethernet cable (Category 5e/6/7) from the matrix's 'Ethernet' port to your router or network switch. Crossover cables are not supported. Note: Network connection is required for supporting full control/remote monitoring features and firmware updates. TURNING ON THE MATRIX 12. Insert the supplied power cord into the matrix. 13. Plug into the AC mains. 14. As it powers ON, the front panel LEDs (System Health, Network, Cloud) will illuminate momentarily before it begins its initialization sequence. Note: The initialization process takes between 20 seconds and up to 2 minutes. However, it is possible that a firmware update may be available the first time the unit is powered ON - in this instance the matrix may take longer to initialize. - Page 14 CONNECTING TO ADMIN WEB INTERFACE 17. Using a computer connected to same router/network, access and login to the Web Interface by visiting www.go- tomymatrix.com in your web browser. 18. Activate administrative rights by clicking on the C loud Connection tab on the left hand nav, then click on the ' [Admin]' link at the foot of the page.
-
Page 15: Led Status
19. Whilst on the C loud Connection page, insert your Installer ID into the box and save changes - this will enable the matrix to be linked to your monitoring account. If you have not set up an installer ID please contact your Pulse-Eight rep- resentative. 20. Within this interface are many setup options - please refer to the full installation guide for further details. LED STATUS 21. Check the LEDs on the HDBaseT ports of the Receiver and Transmitter to ensure correct installation and con- nection: The Yellow LED will illuminate when connected to a video link. The Green LED will illuminate when the device is connected to the power supply. -
Page 16: Web Interface Setup
Web Interface Setup WEB UI The front page of the web interface features a user-friendly drag and drop display showing all available inputs and out- puts. The following steps instruct how to customise this. - Page 17 CONNECTING TO ADMIN WEB UI Using a computer connected to same router/network, access and login to the Web Interface by visiting www.go- tomymatrix.com in your web browser. Activate administrative rights by clicking on the C loud Connection tab on the left hand nav, then click on the '[Admin]' link at the foot of the page.
- Page 18 LINKING A MATRIX TO YOUR INSTALLER ACCOUNT On the Cloud Connection page, insert your Installer ID into the box and save changes - this will enable the matrix to be linked to your monitoring account. Note: If you do not know your Installer ID please check your cloud monitoring portal or contact your Pulse-Eight sales representative.
-
Page 19: Input And Output Options
INPUT AND OUTPUT OPTIONS Once you have activated administrative rights, the Video Routing page should have the following icons: When clicked a popup with additional options for the select device will appear. -
Page 20: Input Options
INPUT OPTIONS Name: Change the name of the selected input. This will be displayed on the source list on the display device. Control Method: Change the control method for the supported Set Top Box. They are: CEC (default control) Sky UK TiVo/Virgin Kodi Dish DirecTV Hidden: The toggle Hidden: The toggle switch can be turned on to hide the selected input from the end user's web interface. EDID Profile: Drop down menu to select an alternative EDID profile for the selected device. EDID Details: This will bring up a page detailing the selected EDID information. Video Signal: Will indicate the signal being broadcast by the input. Note: Ensure that after any changes you click save changes button. - Page 21 SET TOP BOX IP CONTROL When a compatible Set Top Box is connected to an input, an additional option will appear: IP Control: This option will allow you to programme Set Top Box IP control. Simply select the type of device from the dropdown list and insert that device's IP address into the adjacent box. Note: This option only appears if the Input's name includes the Set Top Box's name (i.e Sky/Virgin/TiVo/Kodi/Dish). The matrix also need to reboot for the changes to take effect and for the control to work.
-
Page 22: Output Options
OUTPUT OPTIONS Name: Change the name of the selected output. Video From: A dropdown list showing the source the output is currently displaying. Mirror: Select an output from the list to mirror the display. EDID Details: This will bring up a page detailing the selected EDID information. Hidden: The toggle switch can be turned on to hide the selected output from the end user's web interface. Source Filtering: Toggle switches to choose which inputs can be displayed on the selected output display. Remote Module Details: This will display a popup detailing the output's remote end details. Link Status: Indicates if the link is active. Link Quality: Indicated the quality of the link. Click the icon to view Link Quality Test Tool. Cable Length: Indicates the length of the CAT cable inserted into the output. This is an estimate base on cable's per- formance and may not be accurate. Video Signal: Will indicate the signal of connection. Linked Device: A dropdown list of devices that can be linked to the output (i.e. ProAmp). Connected Device: This option will display when an additional device is linked to the output. Note: Ensure that after any changes you click save changes button. - Page 23 SYSTEM HEALTH TAB Under the System Health tab information about the hardware's performance is displayed. The colour coded boxes will indicate if performing correctly along with the reading of the internal temperature sensor that will indicate if the system is overheating. Under the System Health tab you will also find Advanced Diagnostics that will perform detailed tests on specific areas of your installation to identify potential faults.
- Page 24 IR NOISE TEST The IR Noise Test will check to see if any IR data is being received over a sustained period of time for each output, fail- ing this test would indicate that the IR receiver is picking up noise. Example of failure message: The IR receiver connected to this port is occasionally picking up stray IR messages, this may occasionally interrupt IR communication to the connected source device and/or control system, if you repeat this test and it remains in this state, you may find it is tolerable, but we recommend relocating the IR emitter anyway.
- Page 25 HDBASET LINK QUALITY TEST The HDBaseT Link Quality Test will check to see the HDBaseT link is stable over a sustained period of time. There are two drop down menus, the first is the output you are testing the second is the type of test you are doing. The Mean Square Error test is the ratio (in dB) of the signal power of the 'Good' signal to that of the 'Bad' signal and is analogue. This is analogue and is directly affected by kinks, termination & other cable issues. Each Channel has a col- our that represents the same colour in the twisted pair in the Cat cable. All four of these Channels should be within 3dB's of each other, for example, -21dB. -20dB. -21dB & -19dB. Otherwise, the cable quality will be marked as "Poor". All four of these Channels should also be below the -15dB line. Otherwise, the cable quality will be marked as "Poor". If a Channel is spiking to 0 or towards -40dB or the other above criteria are broken but then they recover to normal this can still indicate an issue and we will remember this and mark the cable as "Poor". This can explain if your cables meet the above criteria but are still marked as "Poor" due to this spiking only happening after a few hours for a few seconds for example. The Channel Errors test is a measurement of the number of errors on the channel, for example, packet loss and bit errors. This is digital and is directly affected by the same issues mentioned in the "Mean Square Error" test. As you can see in the Key each Channel has a colour that represents the same colour in the twisted pair in the Cat cable. All four of these Channels should be within 3 of each other, for example, 35. 36. 35. 34. Otherwise, the cable quality will be marked as "Poor". All four of these Channels should also be below the 40-line. Otherwise, the cable quality will be marked as "Poor". If a Channel is spiking to 0 or towards 60 or the other above criteria are broken but then they recover to normal this can still indicate an issue and we will remember this and mark the cable as "Poor". This can explain if your cables meet the above criteria but are still marked as "Poor" due to this spiking only happening after a few hours for a few seconds for example. Another way to check the link quality remotely is by logging into your installer account at monitoring.pulse-eight.com...
- Page 26 CLOUD CONNECTION TAB Under the C loud Connection tab you will basic monitoring information: System Status: This colour coded status will notify you if the system is healthy or if there is an issue. Last Monitoring Pulse Sent: This will detail when the matrix last 'phoned home'. Installer ID: Enter your Installer ID to link to the Pulse-Eight Monitoring Portal. Note: If you do not know your Installer ID please check your cloud monitoring portal or contact your Pulse-Eight sales representative. Connection Status: This will detail if the matrix is connected to the Pulse-Eight Monitoring Portal. Alexa: This matrix can be controlled by Alexa voice control, set this up by clicking on the 'Setup Voice Services' but- ton. See next section for further details. ALEXA VOICE CONTROL SETUP Install the 'neo' Alexa skill from Amazon on the Alexa app. On the C loud Connection tab, click the 'Setup Voice Services' button, this will take you to my.pulse-eight.com with instructions on setup. Click on the 'Login via Amazon' button and proceed to login to your Amazon account. A page will appear listing your dis- covered devices - these are the systems available for Alexa control. Click 'Connect' next to the appropriate system Tell Alexa to 'Discover Devices' - your system should now be connected.
-
Page 27: Network Settings Tab
NETWORK SETTINGS TAB Under the N etwork Settings tab you will find details about the system's connection to the internet and the rest of your control systems: Network Connectivity: This colour coded status will notify you if the system is connected to a network or if there is an issue. Mode: Dropdown menu to either set a static IP and DHCP. Note: Ensure that after any changes you click save changes button. - Page 28 CEC CONTROL SETTINGS Under the R outing Control tab you will find settings for CEC control: HDMI-CEC Support: Toggle switch to turn CEC control on or off. Auto Pause: Toggle switch to enable (where possible) the function to pause the content when no sink device is watch- ing a source device and resume playback when you switch back. Remote Control Combo Keys: Toggle switch to turn on this function - If there are missing keys on the TV remote f.ex (Guide) then this allows for using combo keys IR ACTIVITY TEST Under the R outing Control tab you will find a test for IR activity. This test lists each IR input and the box will illuminate when an IR signal is received.
-
Page 29: Front Panel Settings
IR CONTROL SETTINGS Under the R outing Control tab you will find settings for IR control. IR Routing by default listens to commands from the supplied remote control, you can use alternative manufacturer profiles for integrating into existing systems or back- wards compatibility. Each output port can be configured to use a different IR profile, if "Default" is set, this is the profile used. FRONT PANEL SETTINGS Under the Front Panel tab you will find options for the front panel of the matrix such as turning off the status LEDs. Note: The status LEDs are in the bottom right of the front panel, these LEDs will always appear during powerup and turn off after 30 seconds if set to Off. -
Page 30: Hardware Details
HARDWARE DETAILS Under the Hardware Details tab you will find manufacturing information about your product - you may be asked for this information if you request help or support. Please Note: The design and features of the Web Interface is ever evolving and may be subject to changes at any time without warning. ... -
Page 31: Discovery Tool
ACCESSING THE MATRIX WITHOUT AN INTERNET CONNECTION While the neo video matrix works best with an active internet connection it is possible to still configure and operate the system without one. However to configure the system from its defaults a local network connection is required. Normal operation of the CEC and IR control systems does not require any network connection, but IP based API control or Web based controlled does require a persistent network connection. DISCOVERY TOOL You can download a discovery tool from your monitoring portal at http://monitoring.pulse-eight.com/ this program will run on Windows 7 or newer only, when run it will scan your network and detect the IP address of your matrix. If you have multiple neo systems on the same network, the discovery tool will only display the last found. If you do have more than one system, it is advised that you disconnect other systems first. The discovery tool will display the IP address of the matrix, you can then access the matrix by typing that IP address into your web browsers address bar. Note: It is recommended in this mode that you configure the networking to use a static IP address, this allows for you to bookmark the page easily and return to the web interface easily without needing to run the discovery tool again. - Page 32 Monitoring Portal ACCESS THE MONITORING PORTAL To access the monitoring portal please visit monitoring.pulse-eight.com, click 'Login' in the top left corner and sign in with your registered details. Once logged in, the dashboard will display your details including your Installer ID. If you don't have an installer ID please contact your Pulse-Eight representative to get an account created. MY INSTALLS Under the My Installs tab you can add projects and assign your installed systems in order to easily access and monitor certain installations. To create an install, click the 'Add New' button and insert the details on the following screen.
- Page 33 Once created, you will then be able to assign systems to the install by clicking the 'Add' button in the 'Products' sec- tion. This will then bring up a page with a dropdown menu to select a system.
- Page 34 MY PRODUCTS Under the My Products tab, all your assigned systems will be listed. Note: If the system you are looking for is not listed, please make sure you have added your Installer ID into the web interface of the system. When you click on a system a system overview page will appear with details of the unit such as: Serial Number Model Number Status System Temperature Firmware Version ...
- Page 35 On the right hand side, a navigation bar features more options: Port Details allows you to individually monitor all inputs and outputs. Health displays information about the system's health plus a visual history of the system's temperature over the pre- vious month. Updates displays current software version and details any updates available for the system. There is also a toggle switch to turn on 'Hotfix Updates' whereby updates are delivered automatically to the system. Installation Report displays all crucial information about the installation on one page. We recommend you print this page once installation is complete to ensure the install is correct. DOCUMENTATION & DRIVERS Under the Documentation and Drivers tab you will find links to third party control drivers, manuals and troubleshooting guides alongside API information.
-
Page 36: Edid Management
EDID Management For your home entertainment to work with each other, Extended Display Identification Data or EDID is required by the source (e.g. media box, game console & etc) to identify what is the capability of the output screen. The neo video matrix contains EDID presets to ease the setup configuration. Here are some of the settings you can find on your EDID profile (provided your video matrix firmware is updated to the latest version). - Page 37 ACCESSING WEB UI Before examining the scenario of all the possible setup, please look over the Web Interface Setup section to access Video Routing (Admin) section. If you do not have the password to access the Admin please check with your installer or your support representative. 1. Access Video Routing (in the Admin portion) 2. Click on the Input option...
- Page 38 3. Select the EDID profile 4. Make sure to click Save Changes to use that particular EDID profile TYPES OF EDID PROFILE Dynamic (Lowest Common Denominator) It will set the EDID to only support the resolutions supported by all the displays connected to the outputs Clone Display X Copies the same EDID as TV attached to the output X HDR/UltraHD (4K)/1080p/720p It sets the EDID to support 720p/1080p/4K/HDR as the maximum, preferred resolution supported as well as the audio support ...
- Page 39 SCENARIO Here are some scenarios that should illustrate how EDID management would work in a setup Dynamic Settings In this scenario, HDMI Input 1 will limit the resolution of the source to 1080p in accordance with the settings selected. This means all displays will receive a 1080p video signal.
- Page 40 UltraHD (4K) In this scenario, HDMI Input 1 will set the resolution to a maximum of 4K. This means all displays will receive a 4K video signal. Note that the last display which has the maximum resolution of 1080p and will display an error.
- Page 41 Dynamic or UltraHD (4K) with a 4K Downscaler In this scenario, HDMI Input 1 will set the resolution to a maximum of 4K. This means all displays will receive a 4K video signal. Note that the last display is using a 4K Downscaler (SKU: HDMI2-4KDS) therefore still receiving a video signal.
- Page 42 Concept Wiring Guideline...
- Page 43 Driver Integration Our products are designed to communicate with a variety of control systems. Most of the control systems have their software which require a driver to run our products. The first step is to download the necessary driver: 1. Go to monitoring.pulse-eight.com and login with your Installer ID. If you do not have an Installer ID, please get in touch with your sales representative or installer directly. 2. One logged in, hover over the "Documentation & Drivers" tap at the top, then navigate to the desired control system. 3. Select the desired product driver and download.
-
Page 44: Quick Navigation
QUICK NAVIGATION Here's a jump link to the home control system: Control4 Creston Home CONTROL4 Note: This is an example for the neo:4 Pro driver. Use the appropriate driver to control the intended hardware. 1. Add the drivers by clicking on 'Driver' at the top, and then 'Add or Update Driver'. - Page 45 2. Click the Search tab on the right-hand side and search for the driver by the name, drag the driver from the Search window into the correct Room location. 3. Click the Action tab in the matrix driver.
- Page 46 4. Then click the Discover button, then click back to the Properties tab. 5. (Orange) If Discovery was successful then the IP of the matrix should appear here. If not follow the steps in the new help window to complete IP address configuration (Green) You can set your installer ID here, instead of navigating back to the matrixes web interface to do this. Before you complete your installation, you must set your Installer Id. This value is used to register this system to your mon- itoring account so you can monitor and support the system remotely. On the properties tab enter your 4-digit Installer Id and click set. Setting this value will also trigger a Monitoring Pulse to be sent so it should appear in your account immediately. (Blue) By default the matrix driver has enabled two-way feedback, to maintain state information with attached nav- igators (such as SR260) if you don’t require this feature, you can disable it here.
- Page 47 6. Click on the Connections tab (bottom left) in Composer, select the matrix driver from the list on the Control/AV tab. 7. Setting the connections is no different that any other driver, however ensure that the Inputs and Outputs match the physical wiring as per the matrix. 8. Setup is now complete. You may need to restart the director for all changes to be applied correctly. However, this is not commonly required.
- Page 48 Action: There are currently three buttons available in ComposerPro for this driver: Reboot System: Restarts the system immediately, doing so will interrupt video routing briefly Discover System: Used to automatically discover the Device IP Address of the system where possible Send Monitoring Pulse: Trigger an immediate monitoring pulse to be sent, returning current system health data to monitoring.pulse-eight.com CRESTON HOME Note: This is an example for the neo:8a driver. Use the appropriate driver to control the intended hardware. Before the Matrix can be configured as a device within Crestron Home, it must be "side loaded" into Crestron Home. To side-load the Driver you will need to copy the driver package file to your Crestron Home processor, we advise you use Crestron Toolbox for this process. Please place the Pulse-Eight Creston Home Driver into the following folder: Intern- alFlash\user\ThirdPartyDrivers\Import Once the driver has been side-loaded it will appear in the Import file as shown below:...
- Page 49 To attach the driver to your project please follow the steps below. 1. Select Pair Devices.
- Page 50 2. In the Pair Devices section of the Crestron Home configuration please select Drivers, and then the device type. ...
- Page 51 3. For the Pulse-Eight Neo Matrix please select "AV Switcher" when choosing the appropriate device type.
- Page 52 4. Once you have selected the device type, Crestron Home will locate the Driver you loaded into Crestron Toolbox earlier and input it into the processor for you. Please click on 'TCP Client' and you will then be prompted to rename the matrix and input its IP address.
- Page 53 5. To locate the IP address for your neo matrix please open a new browser on a device that is connected to the same network as your matrix and Creston Home. On that browser navigate to gotomymatrix.com this will bring up your neo matrix product. The IP address will be present in the search bar. Please input this in the IP Address / Host Name box. The port will be Port 80.
- Page 54 6. Your neo matrix is now linked to Creston Home. Your final step will be configuring your inputs and outputs on Crestron Home.
-
Page 55: Troubleshooting
Troubleshooting The troubleshooting section can be used on all Pulse-Eight Video Matrix & Extender products. Should you encounter installation difficulties or issues with device communication, the following checklist of common issues and causes should help resolve your issues. If you still continue to experience issues, please contact your place of purchase. NO OR POOR PICTURE QUALITY: Connected and powered? Double check all HDMI, CAT and power cables are firmly connected into the correct ports an all devices are correctly powered. Connected and powered? Double check all HDMI, Ethernet and power cables are firmly connected into the cor- rect ports and all devices are correctly powered. Cable length? Are you approaching the maximum distance of the cable (70m) if so, adjust the picture quality or try using an additional extender kit to go further distance. Cables bundled together may cause cross talk and fur- ther degrade signal quality. Signal strength? The use of cable joins, stranded patch panels, wall outlands and stranded patch leads as inter- connects between them can significantly reduce signal strength. Use solid core straight through connections wherever possible. If you reduce the resolution of the source do you get a picture? If so, this suggests a conflicting resolution between source and display or a bandwidth capacity issue with your cable. Check all inputs and outputs share the same resolution capabilities. Picture 'snow' / HD 'noise' signifies a failure to fully establish a signal and can often be caused by poorly ter- minated RJ45 connectors or excess cable lengths. Ensure your cable is correctly wired to 568B standards. Pink or off-colour picture? This could be caused by an invalid EDID or the source device failing to read the EDID from the matrix. Try re-booting matrix and all source devices to force the re-reading of the EDID. Cable quality and condition - HDMI cable/connectors can easily be damaged and the quality of material can vary, Always use good quality leads and cables and try swapping cables that are known to be working into the solution to see if this improves your image. IR CONTROL: Are the IR emitters and receivers correctly positioned to allow infrared signals to be transmitted and received? Emitters should be fixed firmly over infrared sensors of sources. Receivers should be attached to displays ensur- ing a clear line of sight to the remote control used to operate. Each IR port has an LED, when correctly installed the LED will flash red when IR is transmitting and flashes green when IR is being received ... - Page 56 EDID HANDSHAKE: 1. There may be times you will need to perform an EDID Handshake on your Matrix. This is often after a new piece of equipment has been introduced to your setup or any changes have occurred. 2. To do an EDID Handshake 3. Turn off the Matrix and all Sources 4. Turn on all TV's, make sure these are not set to standby 5. Wait 45 seconds 6. Power on Matrix and wait for x3 Green Lights on the front panel 7. Wait a further 45 seconds 8. Turn on all sources FRONT PANEL LED VALUES: SYSTEM HEALTH LED: Solid red - Powering on or fault found Solid green - System healthy CLOUD LED: Solid red - Not connected to the cloud Solid green - Connected to our cloud NETWORK LED: Solid red - No network cable connected Flashing yellow - Discovering IP address Solid yellow - Have IP but cannot ping router Flashing green - Cannot reach internet Solid green - Network healthy HDBASET LED STATUS Please refer to the LED status on the HDBaseT port (on either the receiver or video matrix). Most of them should have two LEDs: The Yellow LED will illuminate when connected to a video link. The Green LED will illuminate when the device is connected to the power supply...
-
Page 57: Specification
Specification SKU: P8-HDBT-L-FFMS44-22-KIT HDMI Inputs: HDBaseT Outputs: 4 x HDBaseT Class B (lite) HDMI Outputs: 2 (Mirror) Max HDBaseT Cable Distance 4K: 40 metres Max HDBaseT Cable Distance 1080p: 70 metres HDBaseT Recommended Cable: Cat5e or greater Colour Supported: 4K: 8bit, 1080p: 12bit TMDS Clock Speed: 340Mhz Max Bandwidth: 10.2Gbps Encryption: HDCP 1.4 and HDCP 2.2 Up to 1080/24p - Frame packing/sequential (Blu-ray), 3D Supported: Interlaced stereoscopic (satellite/cable broadcasts) 720p, 1080i, 1080p (+3D), 4k (30Hz) 4:4:4, 4k Supported Video Resolutions: (50/60Hz) 4:2:0 PCM 2.0, LPCM 2.0, LPCM 5.1, LPCM 6.1, LPCM 7.1, Dolby Digital 2.0, Dolby Digital 5.1, Dolby Digital EX 6.1, Dolby Digital Plus 7.1, Dolby TrueHD 5.1, Dolby TrueHD 7.1, Dolby Atmos 5.1.2, Dolby Atmos 5.1.4, Supported Audio Formats: Dolby Atmos 7.1.2, Dolby Atmos 7.1.4, Dolby Atmos 9.1.2, DTS 5.1, DTS-HD Master 5.1, DTS-HD Master 7.1, DTS 96/24 5.1, DTS-ES Discrete 6.1, DTS-ES Matrix 6.1 PoH (Power over HDBaseT): 4 x PoH Receivers included* Infrared: Bi-Directional CEC Control: Full... - Page 58 Power Supply: 48V @ 2.5Amps Power Consumption: 120W ESD Protection: 8kV (Air-gap discharge) ±4 kV (Contact discharge) IEC 61000-4-4 (EFT) 40A (5/50ns) IEC 61000-4-5 Surge Protection: (Lightning) 25A (8/20μs) Material: Smooth Textured Powder Coated Steel Product Dimensions: 43 x 14 x 4.3 cm (Matrix) Product Weight: 2.05 kg (Matrix) Operating Temp Range: 0 to +35°C (32 to +95°F) Operating Humidity Range: 5 to 90% RH (no condensation) Manufactured In: Great Britain by Pulse-Eight Certification: UKCA, CE, FCC, RoHS *Certain Video Matrix package might not come with PoH Receivers, so please check with sales/installer agents for more information.
-
Page 59: Frequently Asked Questions (Faq)
Additional FREQUENTLY ASKED QUESTIONS (FAQ) Please visit Pulse-Eight Support page for a more updated FAQs. -
Page 60: Warranty
Warranty The following policies only covers products purchased directly from Pulse-Eight. Unless otherwise instructed please do not open any of our products. Doing so will invalidate your warranty. As part of the troubleshooting procedure you may be instructed to open the device, but you can only proceed with this once con- sent has been given. To open a support ticket please visit www.pulse-eight.com/support. - Page 61 WARRANTY PROCEDURE FOR UK DEALERS WHO PURCHASED DIRECT FROM PULSE-EIGHT Warranty Length: 3 years Please Note: The 3 year warranty for Audio/Video matrix and Amplified products starts from the date of installation. The installation date is verified by the products ability to begin contacting our servers alternatively should a product not be online the date of sale to the end client. Should a product be required to appear online for testing and or pre-installation programming the warranty start date can be reset before installation into the final project address within 30 days of initial activation, please contact our cus- tomer service departments to reset this warranty. All accessory component warranties start from the date of purchase. This is including, but not limited to: Extender Sets, HDMI Splitters, Converters, Downmixers and Adapters. Pulse-Eight Current Product - Within first year of warranty 1. Contact support via phone or opening a support ticket. Pulse-Eight will try to help troubleshoot and resolve the issue remotely. 2. If unable to resolve the fault remotely and the unit needs replacing an advanced replacement* will be sent. There will also simultaneously be a collection scheduled for the faulty unit 5 working days later. If the collection does not occur the distributor will be charged for the next collection to be scheduled. Failure to retrieve the faulty item will result in the dis- tributor being invoiced for the advanced replacement* that was sent. If no fault is found with the faulty item the dis- tributor will be invoiced for the courier charges. Pulse-Eight Current Product - In second or third year of warranty 1. Contact support via phone or opening a support ticket. Pulse-Eight will try to help troubleshoot and resolve the issue remotely. 2. If unable to resolve the fault remotely Pulse-Eight will schedule a collection for the faulty item on a date confirmed with the distributor. The faulty item will be returned to Pulse-Eight and repaired. Once repaired this will be dispatched back to the distributor. If no fault is found the distributor will be invoiced for the courier charges. If having the item sent back will cause an inconvenience to the end user a loan unit for the duration of the repair can be arranged at the dis- cretion of Pulse-Eight (subject to availability). Pulse-Eight Discontinued Product - Within first year of warranty 1. Contact support via phone or opening a support ticket. Pulse-Eight will try to help troubleshoot and resolve the issue remotely. 2. If unable to resolve the fault remotely and the unit needs replacing an advanced replacement* will be sent (subject to product availability). There will also simultaneously be a collection scheduled for the faulty unit 5 working days later. If the collection does not occur the distributor will be charged for the next collection to be scheduled. Failure to retrieve the faulty item will result in the distributor being invoiced for the advanced replacement* that was sent. If no fault is found with the faulty item the distributor will be invoiced for the courier charges. Pulse-Eight Discontinued Product - In second or third year of warranty 1. Contact support via phone or opening a support ticket. Pulse-Eight will try to help troubleshoot and resolve the issue remotely. 2. If unable to resolve the fault remotely Pulse-Eight will schedule a collection for the faulty item on a date confirmed with the distributor. The faulty item will be returned to Pulse-Eight and repaired. Once repaired this will be dispatched ...
- Page 62 Pulse-Eight Current or Discontinued Product – Out of Warranty 1. Contact support via phone or opening a support ticket. Pulse-Eight will try to help troubleshoot and resolve the issue remotely. 2. If unable to resolve the fault remotely Pulse-Eight can arrange for the unit to be repaired, cost of the repair will be charged to the Distributor.
- Page 63 WARRANTY PROCEDURE FOR UK DISTRIBUTORS WHO PURCHASED DIRECTLY FROM PULSE-EIGHT Warranty Length: 3 years & 3 months Pulse-Eight Current Product - Within first year of warranty 1. Contact support via phone, opening a support ticket or emailing support@pulse-eight.com. Pulse-Eight will try to help troubleshoot and resolve the issue remotely. 2. If unable to resolve the fault remotely Pulse-Eight will schedule a collection for the faulty item on a date confirmed with the distributor. The faulty item will be returned to Pulse-Eight and repaired. Once repaired this will be dispatched back to the distributor. If no fault is found the distributor will be invoiced for the courier charges. If having the item sent back will cause an inconvenience to the end user a loan unit for the duration of the repair can be arranged at the dis- cretion of Pulse-Eight (subject to availability) Pulse-Eight Current Product - In second or third year of warranty 1. Contact support via phone, opening a support ticket or emailing support@pulse-eight.com. Pulse-Eight will try to help troubleshoot and resolve the issue remotely. 2. If unable to resolve the fault remotely Pulse-Eight will schedule a collection for the faulty item on a date confirmed with the distributor. The faulty item will be returned to Pulse-Eight and repaired. Once repaired this will be dispatched back to the distributor. If no fault is found the distributor will be invoiced for the courier charges. If having the item sent back will cause an inconvenience to the end user a loan unit for the duration of the repair can be arranged at the dis- cretion of Pulse-Eight (subject to availability) Pulse-Eight Discontinued Product - Within first year of warranty 1. Contact support via phone, opening a support ticket or emailing support@pulse-eight.com. Pulse-Eight will try to help troubleshoot and resolve the issue remotely. 2. If unable to resolve the fault remotely Pulse-Eight will schedule a collection for the faulty item on a date confirmed with the distributor. The faulty item will be returned to Pulse-Eight and repaired. Once repaired this will be dispatched back to the distributor. If no fault is found the distributor will be invoiced for the courier charges. If having the item sent back will cause an inconvenience to the end user a loan unit for the duration of the repair can be arranged at the dis- cretion of Pulse-Eight (subject to availability) Pulse-Eight Discontinued Product - In second or third year of warranty 1. Contact support via phone, opening a support ticket or emailing support@pulse-eight.com. Pulse-Eight will try to help troubleshoot and resolve the issue remotely. 2. If unable to resolve the fault remotely Pulse-Eight will schedule a collection for the faulty item on a date confirmed with the distributor. The faulty item will be returned to Pulse-Eight and repaired. Once repaired this will be dispatched back to the distributor. If no fault is found the distributor will be invoiced for the courier charges. If having the item sent back will cause an inconvenience to the end user a loan unit for the duration of the repair can be arranged at the dis- cretion of Pulse-Eight (subject to availability) Pulse-Eight Current or Discontinued Product – Out of Warranty 1. Contact support via phone, opening a support ticket or emailing support@pulse-eight.com. Pulse-Eight will try to help troubleshoot and resolve the issue remotely.
- Page 64 2. If unable to resolve the fault remotely Pulse-Eight can arrange for the unit to be repaired, cost of the repair will be charged to the Distributor.
- Page 65 WARRANTY PROCEDURE FOR DEALERS WHO PURCHASED DIRECT FROM PULSE-EIGHT AMERICA (FORMALLY ZEKTOR) Warranty Length: 3 years Pulse-Eight Current Product - Within first year of warranty 1. Contact support via phone or opening a support ticket. Pulse-Eight will try to help troubleshoot and resolve the issue remotely. 2. If unable to resolve the fault remotely and the unit needs replacing an advanced replacement* will be sent. There will also simultaneously be a collection scheduled for the faulty unit 5 working days later. If the collection does not occur the dealer will be charged for the next collection to be scheduled. Failure to retrieve the faulty item will result in the dealer being invoiced for the advanced replacement* that was sent. If no fault is found with the faulty item the dealer will be invoiced for the courier charges. Pulse-Eight Current Product - In second or third year of warranty 1. Contact support via phone or opening a support ticket. Pulse-Eight will try to help troubleshoot and resolve the issue remotely. 2. If unable to resolve the fault remotely Pulse-Eight will schedule a collection for the faulty item on a date confirmed with the dealer. The faulty item will be returned to Pulse-Eight in the UK and repaired. The repair could take up to 14 days from date of collection. Once repaired the unit(s) will be dispatched back to the dealer. If no fault is found the dealer will be invoiced for the courier charges. If having the item sent back will cause an inconvenience to the end user a loan unit for the duration of the repair can be arranged (subject to availability). The cost of renting a loan unit starts at $50 per week (+ shipping). Pulse-Eight Discontinued Product - Within first year of warranty Contact support via phone or opening a support ticket. Pulse-Eight will try to help troubleshoot and resolve the issue remotely. If unable to resolve the fault remotely and the unit needs replacing an advanced replacement* will be sent (subject to product availability). There will also simultaneously be a collection scheduled for the faulty unit 5 working days later. If the collection does not occur the dealer will be charged for the next collection to be scheduled. Failure to retrieve the faulty item will result in the dealer being invoiced for the advanced replacement* that was sent. If no fault is found with the faulty item the dealer will be invoiced for the courier charges. Pulse-Eight Discontinued Product - In second or third year of warranty 1. Contact support via phone or opening a support ticket. Pulse-Eight will try to help troubleshoot and resolve the issue remotely. 2. If unable to resolve the fault remotely, Pulse-Eight will schedule a collection for the faulty item on a date confirmed with the dealer. The faulty item will be returned to Pulse-Eight in the UK and repaired. The repair could take up to 14 days from date of collection. Once repaired this will be dispatched back to the dealer. If no fault is found the dealer will be invoiced for the courier charges. If having the item sent back will cause an inconvenience to the end user a loan unit for the duration of the repair can be arranged at the discretion of Pulse-Eight (subject to availability). Pulse-Eight Current or Discontinued Product – Out of Warranty 1. Contact support via phone or opening a support ticket. Pulse-Eight will try to help troubleshoot and resolve the issue remotely.
- Page 66 2. If unable to resolve the fault remotely Pulse-Eight can arrange for the unit to be repaired. The cost of the repair will be charged to the Dealer. The dealer is responsible for shipping the item back to the UK for repair and arranging collection of the unit once the repair is complete. There will be a $100 inspection fee for Pulse-Eight to assess the faulty unit. Should the dealer wish to proceed with the repair the $100 inspection fee will be absorbed into the repair cost. If the Dealer chooses to purchase a new Pulse-Eight product instead of proceeding with the repair the $100 inspection fee will be dismissed. WARRANTY PROCEDURE FOR INTERNATIONAL (BOTH DEALERS & DISTRIBUTORS) WHO PURCHASED DIRECTLY FROM PULSE-EIGHT Warranty Length: 3 years & 3 months Pulse-Eight Current or Discontinued Product - Within warranty 1. Contact support via phone, opening a support ticket or emailing support@pulse-eight.com. Pulse-Eight will try to help troubleshoot and resolve the issue remotely. 2. If we are unable to resolve the issue remotely, we will do what we can to rectify the issue and we will raise an RMA authorising it’s return. (Often this will be assessed on a case by case basis dependant on product and location of the product.) Pulse-Eight Current or Discontinued Product - Out of warranty 1. Contact support via phone, opening a support ticket or emailing support@pulse-eight.com. Pulse-Eight will try to help troubleshoot and resolve the issue remotely. 2. If unable to resolve the fault remotely we will raise an RMA authorising it’s return to Pulse Eight, enabling us to exam- ine and quote for repair and return. *An advanced replacement will be sent where possible subject to stock availability. If an advanced replacement is not immediately available Pulse-Eight will go over what options are available to resolve the issue as quickly as possible. This could include options such as a repair, a loan unit (subject to availability), or a replacement with a different product (subject to availability)
Need help?
Do you have a question about the neo 4*4 Video Matrix and is the answer not in the manual?
Questions and answers