Table of Contents
Advertisement
Quick Links
Advertisement
Table of Contents

Related Manuals for Jumpking TRAMPOLINE CANOPY


Summary of Contents for Jumpking TRAMPOLINE CANOPY
- Page 1 User Guide TRAMPOLINE CANOPY Got a Problem building your Trampoline tent? Call us on 1-877-927-8777 and we can help WARNING: Read these assembly instructions carefully before attempting to assemble or use this product. Keep this user guide in a safe place for future reference.
- Page 2 ‡ Before assembling your tent please ensure you have assembled your Trampoline correctly and read all warnings in the manual. WARNING The owner and supervisors of the trampoline canopy are responsible to make sure all the users are aware of practices specified in this manual. Trained Spotter supervision is recommended.
- Page 3 Store away in a dry place, ensuring trampoline canopy is completely dry before pack- ing away. Do not allow pets or animals on the trampoline or inside the trampoline canopy. Claws may damage the netting and fabric. Prolonged exposure to the sun, especially ultraviolet rays, will shorten the life of the tent fabric.
- Page 4 Close the velcro pocket at the edge of canopy. Repeat this for the 3 remaining poles. Slot one of the Blue FRP poles through the sleeve on bottom of the Trampoline canopy. Slot Step 3 the another Blue FRP poles through sleeve on bottom of the trampoline canopy.
- Page 5 Step 4 Clip the skirt sleeve based on your Trampoline Enclosure poles quantity 4 or 5 or 6 pcs. Skirt sleeve for 4 pcs Skirt sleeve for 5 pcs Skirt sleeve for 6 pcs Enclosure poles Enclosure poles Enclosure poles Step 5 Slide canopy over top of trampoline safety net so canopy is on the outside (see diagram).
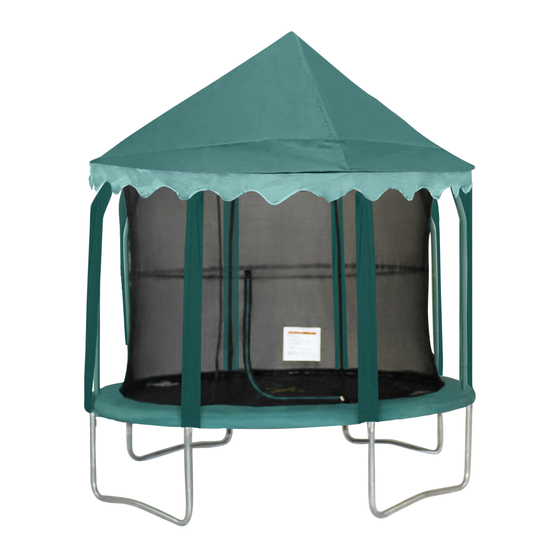
- Page 6 Cross the strap with plastic hook over the toprail frame to hook onto the V-ring. Top rail Spring Strap with plastic hook on bottom of canopy. The Trampoline Canopy is now full assembled. Make sure all parts are securely attached.
Need help?
Do you have a question about the TRAMPOLINE CANOPY and is the answer not in the manual?
Questions and answers